Table of Contents
Advertisement
Quick Links
Advertisement
Table of Contents

Related Manuals for NEFF C17MS32G0B


Summary of Contents for NEFF C17MS32G0B
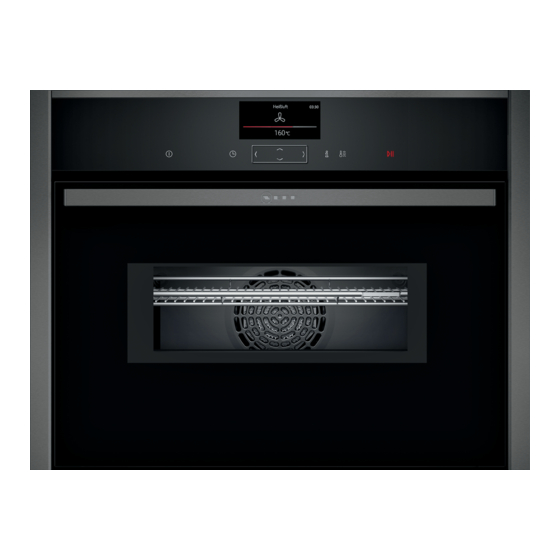
- Page 1 Oven [en] User manual and installation instructions C17MS32G0B...
-
Page 2: Table Of Contents
en Safety ¡ Keep the instruction manual and the Table of contents product information safe for future refer- ence or for the next owner. ¡ Do not connect the appliance if it has been USER MANUAL damaged in transit. Safety .............. 2 1.2 Intended use Preventing material damage ....... -
Page 3: Safety
Safety en Hot steam may escape when you open the 1.4 Safe use appliance door. Steam may not be visible, de- Always place accessories in the cooking com- pending on the temperature. partment the right way round. ▶ Open the appliance door carefully. → "Accessories", Page 11 ▶... - Page 4 en Safety ▶ Never operate an appliance with a cracked ▶ Do not leave food unattended while it is or fractured surface. heating in containers made of plastic, pa- ▶ Never pull on the power cord to unplug the per or other combustible materials. appliance.
- Page 5 Safety en etrates this cavity, it could cause the cook- The accessible parts of the appliance become ware to crack. hot during operation. ▶ Only use microwave-safe cookware. ▶ Never touch these hot parts. Cookware and containers made from metal or ▶...
-
Page 6: Preventing Material Damage
en Preventing material damage 2 Preventing material damage Sitting or placing objects on the appliance door may 2.1 General damage it. ATTENTION! Do not place or hang objects on the appliance door. ▶ Objects on the cooking compartment floor at over Do not place cookware or accessories on the appli- ▶... -
Page 7: Environmental Protection And Saving En- Ergy
Environmental protection and saving energy en 3 Environmental protection and saving energy 3.1 Disposing of packaging The packaging materials are environmentally compat- ible and can be recycled. Sort the individual components by type and dispose ▶ of them separately. 3.2 Saving energy If you follow these instructions, your appliance will use less power. -
Page 8: Familiarising Yourself With Your Appliance
en Familiarising yourself with your appliance 4 Familiarising yourself with your appliance 4.1 Control panel You can use the control panel to configure all functions of your appliance and to obtain information about the operat- ing status. Display Buttons Control element 4.2 Buttons The buttons are touch-sensitive areas. - Page 9 Familiarising yourself with your appliance en Button Name Right Navigate to the right on the display Navigate upwards on the display Down Navigate downwards on the display 4.4 Main menu The main menu provides an overview of your appliance's functions. Press the button to open the main menu.
- Page 10 en Familiarising yourself with your appliance Symbol Type of heating Temperature Slow cooking 70 - 120 °C For gentle, slow cooking of seared, tender pieces of meat in cookware without a lid. The heat is emitted evenly from above and below at a low tem- perature.
-
Page 11: Accessories
Accessories en Lighting ATTENTION! One or more oven lights illuminate the cooking com- Do not cover the ventilation slot above the appliance door. The appliance overheats. partment. Ensure that the ventilation slots are unobstructed. When you open the appliance door, the light in the ▶... - Page 12 You will find a comprehensive range of products for your appliance in our brochures and online: www.neff-international.com Accessories vary from one appliance to another. When purchasing accessories, always quote the exact product number (E no.) of your appliance.
- Page 13 Time-setting options en a The heat-up indicator bar visualises the rising tem- 7.7 Pausing operation perature. Press . When the food is ready, press to switch the appli- Press again to resume operation. ance off. 7.8 Cancelling operation 7.5 Changing the temperature Note: Some functions, e.g. cleaning functions, cannot You can also change the temperature once you have be cancelled.
- Page 14 en Microwave time (duration) and specify when you want your food to 8.3 Cooking time be ready. You can only use the delayed start function Once the set cooking time has elapsed, the appliance in conjunction with a heating function. switches off automatically. You can only use the cook- Setting the Ready at time for delayed starts ing time in conjunction with a heating function.
-
Page 15: Microwave
Microwave en ATTENTION! Cookware and ac- Information cessories Operating the appliance without food in the cooking compartment may lead to overloading. Serving dishes You do not need to transfer Do not switch on the microwave unless there is food ▶ your food. inside. - Page 16 en Microwave Configure the settings for the "microwave" using Remove any food remnants from the cooking com- or . partment. to navigate to the next row. Dry the cooking compartment with a sponge. Press to switch the appliance on. a A microwave power setting and a cooking time ap- Press ...
-
Page 17: Microwave Programmes
Microwave programmes en Note: If you open the appliance door during operation, Use or to change the cooking time. the operation stops. When you close the appliance a The setting is applied. door, you must press to continue the operation. If Changing the microwave combination you have changed the basic setting for this, make sure If you change the combination of the type of heating that the microwave does not resume operation without... -
Page 18: Childproof Lock
en Baking and roasting assistant 11 Baking and roasting assistant The baking and roasting assistant helps you to use Press to switch the appliance on. your appliance to cook various dishes by suggesting Press . the optimal settings. Use the or button to select the "Baking and roast- The baking and roasting assistant helps you to make ing assistant" ... -
Page 19: Rapid Heating
Rapid heating en the automatic childproof lock. Once the appliance has Press to switch the appliance on. finished cooking, it automatically disables the control Press . panel. Use the or button to select "MyProfile" . Use the button to navigate to the next row. Note: When you activate the automatic childproof lock, Use the or button to select "Automatic childproof the appliance will immediately disable the control... -
Page 20: Sabbath Mode
en Sabbath mode 14 Sabbath mode You can set a cooking time of up to 74 hours using to navigate to the next row. Sabbath mode. You can use top/bottom heating to Use or to select the temperature. keep food warm between 85 °C and 140 °C during to navigate to the next row. - Page 21 Home Connect en To discard your settings, use the button to se- Use the or button to select "Favourites". ‒ lect "Discard". Use the button to select "Set favourites". Use the or button to select the required heating function. 15.3 Changing your favourites Use the button to navigate to the next row.
- Page 22 en Home Connect Basic setting Possible settings Explanation Network Connect to network If you disconnect the appliance from the network, all network Disconnect from network information will be deleted. This setting is useful if you have new login details for the router. Connect to app This setting initiates the connection between the Home Con- nect app and the appliance.
- Page 23 Cleaning and servicing en A detailed RED Declaration of Conformity can be found 16.7 Declaration of Conformity online at www.neff-international.com among the addi- Constructa Neff Vertriebs-GmbH hereby declares that tional documents on the product page for your appli- the appliance with Home Connect functionality meets ance.
- Page 24 en Cleaning and servicing Area Suitable cleaning agents Information Door cover ¡ Made of stainless Do not use glass cleaner or a glass scraper. steel: Do not use stainless steel care products. Stainless steel cleaner Tip: Remove the door cover for thorough cleaning. ¡...
-
Page 25: Cleaning Functions
Cleaning functions en Do not use oven cleaner or abrasive cleaning aids. ▶ Use the cleaning function. ▶ If oven cleaner accidentally comes into contact with → "EcoClean cleaning function", Page 25 the self-cleaning surfaces, dab it off immediately us- ing water and a sponge cloth. Do not rub. 18 ... - Page 26 en Rails Wiping the appliance clean following the ATTENTION! Distilled water in the cooking compartment leads to cleaning function corrosion. Allow the appliance to cool down. Do not use distilled water. ▶ Wipe the cooking compartment with a damp cloth. Mix 0.4 litres water with a drop of washing-up liquid Note: Marks may appear on the self-cleaning sur- and pour into the centre of the cooking compart- faces.
-
Page 27: Appliance Door
Appliance door en Hook the rear retainers with the hook into the top 19.2 Fitting the retainers hole and push them into the bottom hole . The retainers may fall out when you detach the rails. Note: The retainers at the front differ from those at the rear. 19.3 Attaching the rails Notes ¡... - Page 28 en Appliance door 20.2 Removing the door panes 20.3 Fitting the door panes WARNING ‒ Risk of injury! WARNING ‒ Risk of injury! Scratched glass in the appliance door may develop The hinges on the appliance door move when the door into a crack. is opened and closed, which could trap your fingers. Do not use any harsh or abrasive cleaners or sharp Keep your hands away from the hinges.
-
Page 29: Troubleshooting
Troubleshooting en 21 Troubleshooting You can rectify minor faults on your appliance yourself. Read the troubleshooting information before contacting after- sales service. This will avoid unnecessary costs. WARNING ‒ Risk of injury! WARNING ‒ Risk of electric shock! Improper repairs are dangerous. Incorrect repairs are dangerous. Repairs to the appliance should only be carried out Repairs to the appliance should only be carried out ▶... - Page 30 Next time, set lower or higher values. ▶ Tip: A lot of information about the food preparation and corresponding setting values can be found on our website www.neff-international.com. 22 Disposal Find out here how to dispose of old appliances cor- This appliance is labelled in accord- rectly.
-
Page 31: How It Works
How it works en 23.1 Product number (E-Nr.) and production number (FD) You can find the product number (E-Nr.) and the pro- duction number (FD) on the appliance's rating plate. Make a note of your appliance's details and the Cus- You will see the rating plate with these numbers if you tomer Service telephone number to find them again open the appliance door. - Page 32 en How it works Roasting in cookware ¡ Follow the manufacturer's instructions on the pack- aging. If you cover the cookware when you cook your food, ¡ If the packaging specifies a higher value than the this will keep the cooking compartment cleaner. maximum power of the appliance, use the next low- est a higher value the next lowest wattage setting on General information about roasting in cookware...
- Page 33 How it works en Place the receptacle onto the wire rack and slide Use the recommended settings when configuring the rack into the cooking compartment. the appliance settings. Use the recommended settings when configuring Stir two or three times during the cooking time. the appliance settings.
- Page 34 en How it works Food Accessory/cook- Shelf pos- Heating Temperature in Microwave Cooking ware ition function °C power setting time in → Page 9 in W mins Bread or white bread Loaf tin, 1 x 900 g 190 - 210 20 - 30 or 2 x 450 g Bread or white bread Loaf tin, 1 x 900 g...
- Page 35 How it works en Food Accessory/cook- Shelf pos- Heating Temperature in Microwave Cooking ware ition function °C power setting time in → Page 9 in W mins Chicken portion, 4 Uncovered cook- 190–210 20–30 pieces, 250 g each ware Trout, whole, 300 g each Wire rack 15 - 20 Lasagne, 500 g Ovenproof dish on...
- Page 36 en How it works Recommended settings for slow cooking Food Accessory/cook- Shelf pos- Searing Heating function Temperature Cooking ware ition time in → Page 9 in °C time in mins mins Duck breast, medium Uncovered cook- 6 - 8 45 - 60 rare, 300 g each ware Fillet of pork, whole Uncovered cook-...
- Page 37 How it works en perature without the usual steam bubbles rising to the Warming up food using the microwave mode surface. Even if the container only vibrates a little, the You can use the microwave mode to warm up food or hot liquid may suddenly boil over and spatter.
- Page 38 en How it works 24.8 Test dishes The information in this section is provided for test institutes to facilitate testing of the appliance in accordance with EN 60350-1:2013 or IEC 60350-1:2011 and EN 60705:2012 or IEC 60705:2010. Baking ¡ The setting values apply to food that is placed into a ¡...
-
Page 39: General Installation Instructions
Installation instructions en Recommended settings for microwave cooking Food Accessories/cook- Shelf posi- Heating Microwave power Cooking time ware tion function setting in W in mins → Page 9 Egg wash Uncovered cookware 1 1. 360 1. 20 2. 180 2. 20–25 Sponge Uncovered cookware 1 ... - Page 40 en Installation instructions 25.2 Appliance dimensions You will find the dimensions of the appliance here ¡ Wear protective gloves so that you do not cut yourself. Parts that are accessible dur- ing installation may have sharp edges. ¡ Dimensions of the figures in mm. 25.3 Installation below a worktop WARNING ‒ Danger: Magnetism! Observe the installation dimensions and the installation...
- Page 41 Installation instructions en 25.4 Installation underneath a hob If the appliance is installed under a hob, the following minimum dimensions must be adhered to (including substructure, if applicable). The minimum worktop thickness a is based on the required minimum clearance . Hob type a raised in mm a flush in mm...
- Page 42 en Installation instructions An all-pole isolating switch must be integrated into the 25.6 Corner installation permanent electrical installation according to the install- Observe the installation dimensions and the installation ation regulations. instructions when installing in a corner. Identify the phase and neutral conductors in the socket.
- Page 43 Installation instructions en Screw the appliance into place. Refit the panels and screw them in place, first at the top and then at the bottom. If required, the gap between the appliance door and the side panels can be adjusted using the screws at the top left and right.
- Page 44 Valid within Great Britain: Imported to Great Britain by BSH Home Appliances Ltd. Grand Union House Old Wolverton Road Wolverton, Milton Keynes MK12 5PT United Kingdom *9001621161* 9001621161 Constructa-Neff Vertriebs-GmbH Carl-Wery-Straße 34 010507 81739 München GERMANY...