Table of Contents
Advertisement
Quick Links
Advertisement
Table of Contents

Related Manuals for Night Owl FS-8320


Summary of Contents for Night Owl FS-8320
-
Page 2: Table Of Contents
TABLE OF CONTENTS FCC RADIATION NORM:..............................2 PACKAGE CONTENTS: ..............................3 SYSTEM REQUIREMENTS: ............................3 SAFETY INSTRUCTION: ..............................4 CHAPTER 1: DVR FEATURES............................5 CHAPTER 2: LAYOUT..............................6 2.1 F ) ................6 RONT ANEL LEASE REFER TO ACTUAL PRODUCT FOR DETAIL 2.2 R ) .................. - Page 3 User’s Manual 5.2.8.6 PTZ Setup ................................22 5.2.9 Network Setup – Intranet (Internal Access) ....................23 5.2.10 Network Setup – Global Access (Connected Directly to Modem)............... 24 5.2.11 Network Setup – Global Access (Connected through a Router or Firewall)..........26 5.2.12 Mobile Phone Access ..........................30 5.3 V ..........................
-
Page 4: Fcc Radiation Norm
User’s Manual FCC RADIATION NORM: This equipment has been tested and found to comply with limits for Class B digital device pursuant to Part 15 of Federal Communications Commission (FCC) rules. FCC Compliance Statement These limits are designed to provide reasonable protection against frequency interference in residential installation. -
Page 5: Package Contents
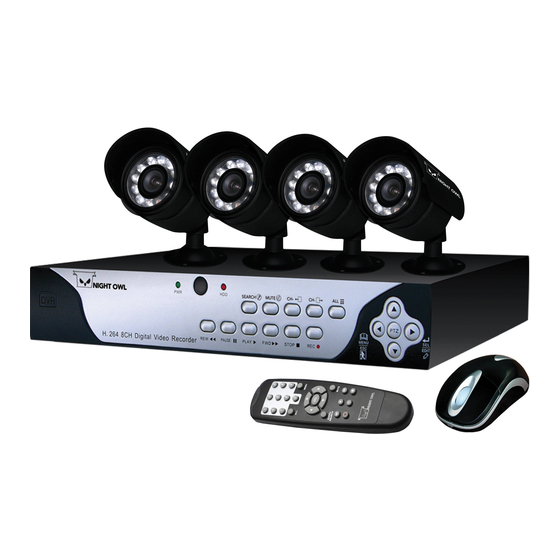
User’s Manual PACKAGE CONTENTS: Your new Security Camera and DVR Kit will ship with the following items. SYSTEM REQUIREMENTS: Please be sure the computer that you install the included software with complies with the following specifications: IBM PCs or 100% Compatibles ®... -
Page 6: Safety Instruction
User’s Manual SAFETY INSTRUCTION: 1. Use proper power source. Do not use this product with a power source that applies more than specified voltage (100-240V AC). 2. Never insert any metal into the DVR or any openings. Putting metal into the DVR case can cause danger of electric shock. 3. -
Page 7: Chapter 1: Dvr Features
User’s Manual CHAPTER 1: DVR FEATURES Other Features! • H.264 compression • Real time recording on 8 channels • USB Backup to flash drive • Security Certified Hard Drive pre-installed • Easy control with USB mouse ® ® ® • Instant viewing using Windows Mobile™, Symbian S60 Version 3 and iPhone... -
Page 8: Chapter 2: Layout
User’s Manual CHAPTER 2: LAYOUT 2.1 Front Panel (Please refer to actual product for detail) Buttons / Item Marks Functions Indicators Power Button Push and hold to turn power On/Off When the indicator lights up or flashes, it means the hard drive is HDD Indicator being used. -
Page 9: Rear Panel (Please See Actual Product For Detail)
User’s Manual 2.2 Rear Panel (Please see actual product for detail) Item Physical ports Connection method Power Port Connect power supply - DC19V 3A Video outputs Connect monitor output ( BNC interface) Video inputs Connect CH1-8 ( BNC interface) Audio input 8 Channel (RCA interface) Audio output Connect signal output (RCA interface) -
Page 10: Remote Control
User’s Manual 2.3 Remote Control The remote control is the secondary input device for navigating the system’s interface. To use the remote control: STANDBY Put DVR into Standby mode Press to active the system to require password LoginLOCK to open menus. This button will simply open Main Menu if password is disabled. -
Page 11: Mouse Operation
User’s Manual 2.4 Mouse Operation You can use a mouse instead of the front panel buttons or remote control to navigate the operation of your DVR The mouse is the primary input device for navigating system menus. To use a mouse with the system: 1. -
Page 12: Chapter 3: Dvr/Camera Installation
User’s Manual CHAPTER 3: DVR/CAMERA INSTALLATION 3.1 Connecting the DVR to a TV or Monitor Using the supplied BNC to RCA connector 1. Connect the BNC to RCA connector to the back of the DVR labeled Video Output, or connect the monitor direct to the port labeled VGA on the back of the DVR (refer to Chapter 2.2, Rear Panel Picture) 2. -
Page 13: Chapter 4: Dvr Start Up
User’s Manual CHAPTER 4: DVR START UP 4.1 System Initialization After connecting the power adapter and turning on the power, the system will boot-up and start initializing. 4.2 Main Interface After initialization, the main interface will load. When there are video inputs, the interface will display live images from the cameras. -
Page 14: Chapter 5: Dvr Menu And Options
User’s Manual CHAPTER 5: DVR MENU AND OPTIONS Mouse Only When using the mouse, use the Sub-Menu to access several system options, including the Main Menu. To open the Sub-Menu: Right-click anywhere onscreen to open Sub-Menu. Select one of the following options: 1. -
Page 15: Main Menu Preview
User’s Manual 5.1 Main Menu Preview SEARCH RECORD Language Date/Time Password BASIC Display Video / Audio MAIN MENU Alarm System Info Motion Detect ADVANCE Mobile Device Setup Maintenance PTZ (Pan Tilt Zoom) Setup Network Setup Exit... -
Page 16: Main Menu
User’s Manual 5.2 Main Menu Right-click the mouse, a pop-up menu will be displayed on the screen. Click “MAIN MENU” button on the pop-up menu to enter into Main Menu. You can also use the Menu button on the front panel to open the Main Menu. When using the front panel buttons, use the navigation buttons to move in the menu, and use the OK button to select the option. -
Page 17: Backup
User’s Manual 5.2.2 Backup Use the File List sub-menu to find recorded video on your system and copy it to a USB flash drive (not included). NOTE: The system is compatible with most major brands of USB flash drives, with capacities from 256 MB to 4 To backup recorded data: 1. -
Page 18: Record Setup
User’s Manual 5.2.5 Record Setup Select Main Menu " RECORD to open the RECORD SETUP menu. The adjustable options are as follow: CHANNEL: Allows you to turn each channel ON/OFF. QUALITY: Choose between “HIGHEST”, “HIGH”, and “NORMAL” resolution. AUDIO: Allows you to Enable/Disable the audio port if you have audio enabled camera installed. -
Page 19: Hard Disk Management
User’s Manual 5.2.6 Hard Disk Management To manage the installed Hard Disk, click “Main Menu” " “HDD” to enter “HDD MANAGEMENT”. The HDD Management screen shows the capacity and available recording time of the installed hard drive and let you configure whether to overwrite old recordings or stop when HDD is full. -
Page 20: Date And Time Setting
User’s Manual 5.2.7.2 Date and Time Setting Click “MAIN MENU” " “BASIC” " “DATE/TIME” to enter the TIME SETUP window to modify system date, time, date/time format and time zone, DST (day saving time). • DATE: Enter the day, month, and year •... -
Page 21: Display Setup
User’s Manual 5.2.7.4 Display Setup Select “MAIN MENU” " “BASIC” " “DISPLAY” to open the DISPLAY SETUP menu. You can set up the name display and position display of each channel, You can also adjust image brightness, saturation, contrast and hue settings of each channel by entering the “COLOR”... -
Page 22: Alarm Setup
User’s Manual 5.2.8.1 Alarm Setup Click “MAIN MENU” " “ADVANCE” " “ALARM” to setup the default system language. I/O STATUS ! Options include NO (Normal-Open), NC (Normal-close) and OFF. Depending the type of external sensor alarm you are using, set this option according to your external sensor alarm. -
Page 23: Motion Detect
User’s Manual 5.2.8.3 Motion Detect Click “MAIN MENU” " “ADVANCE” " “MD” to enter the MOTION DETECT window. STATUS: This option allows you enable motion detection on the channels. SENSITIVITY: This option allows you to set sensitivity level of motion detection from 1 to 4 with 4 being the most sensitive. -
Page 24: System Maintenance
User’s Manual 5.2.8.5 System Maintenance Click “MAIN MENU” " “ADVANCE” " “MAINTAIN” to access the SYSTEM MAINTENANCE page of your DVR. This option allows you reset the DVR to factory default settings, update system software (firmware), and set system auto-maintenance. When enabling the auto-maintain function, you can setup system to restart regularly to clear up some temporary storage memory. -
Page 25: Network Setup - Intranet (Internal Access)
User’s Manual 5.2.9 Network Setup – Intranet (Internal Access) To access the NETWORK SETUP menu, select “MAIN MENU” " “ADVANCE” " “NETWORK” to open the NETWORK SETUP menu. If your DVR is connected to a router of your local network (intranet), then you can setup the NETWORK Setup section of the DVR to view the image your DVR is recording remotely using computers connected within your network. -
Page 26: Network Setup - Global Access (Connected Directly To Modem)
User’s Manual 5.2.10 Network Setup – Global Access (Connected Directly to Modem) To access the NETWORK SETUP menu, select “MAIN MENU” " “ADVANCE” " “NETWORK” to open the NETWORK SETUP menu. If you would like to access your DVR while you are outside of your home, please follow the instructions below to configure the NETWORK Setup page of your DVR Note: Prior to changing the NETWORK Setup of your DVR, it is strongly recommended that you perform the following tasks:... - Page 27 User’s Manual STATIC IP 1. Select STATIC as the network TYPE. 2. Setup PORT and WEB PORT (recommended to leave these at the default values). 3. Enter the IP Address that you have reserved at the beginning of this section into this field to be the unique address of your DVR in your local network.
-
Page 28: Network Setup - Global Access (Connected Through A Router Or Firewall)
User’s Manual 5.2.11 Network Setup – Global Access (Connected through a Router or Firewall) To access the NETWORK SETUP menu, select “MAIN MENU” " “ADVANCE” " “NETWORK” to open the NETWORK SETUP menu. If you would like to access your DVR while you are outside of your home or office network, please follow the instructions below to configure the NETWORK Setup of your DVR Note: Prior to changing the NETWORK Setup of your DVR, it is strongly recommended that you perform the following tasks:... - Page 29 User’s Manual 2. For instructions on the most popular routers go to www.portforward.com. Click on the “Routers List” and select your router from the list of router manufacturers by clicking on the brand and model number. 3. On the next page that opens, click on the “Default Guide” link. This will take you to the port forwarding instructions for your router.
- Page 30 User’s Manual Accessing the DVR through Internet Explorer Browser (IE): Once the network settings on the DVR match the settings of your router, and you have forwarded the ports needed by the DVR (for remote access over the internet), you need to modify your browser controls.
- Page 31 User’s Manual 3. Enabling all Active X Controls On this page scroll down to the ActiveX Controls and Plug Ins, and set all to either PROMPT or ENABLED. To connect to the DVR from a remote computer, you would then open an Internet Explorer browser window and enter the Internet IP of your router that you received by going to www.myipaddress.com.
-
Page 32: Mobile Phone Access
User’s Manual 5.2.12 Mobile Phone Access ® ® The DVR is currently compatible with mobile phones running Windows Mobile, Symbian ® operating systems and iPhones on 3G networks. Before you can access the DVR from a mobile phone, you need to setup the Network Configuration on the DVR. - Page 33 User’s Manual 6. To stop viewing the live video, click the “Disconnect” button or click the “Setting” button to modify the settings. ® When accessing from a mobile phone with Symbian S60 Version 3 operating system, follow these procedures: 1. Install the webcam program that is included on the supplied CD by copying the “QQeye.CAB”...
- Page 34 User’s Manual 7. Once the installation is complete, go to the Applications folder and select the “QQEye” program, and click “Open” to display the settings menu. Open Default Access Point!Input the access point. System default for the access point is GPRS connection.
- Page 35 User’s Manual 6. Click Install. 7. Follow the on screen instructions to complete the installation. ® 8. Once installed click on the application icon in your iPhone home screen to open the application. 9. Select the Settings icon on the bottom right and input your Server IP, Mobile Port number (See Section 5.2.10.4 Mobile) ®...
-
Page 36: Video Search
User’s Manual 5.3 Video Search Click pop-up menu video search to open the “Video Search” menu to search for files and playback recordings. 5.4 PTZ Control Click pop-up menu to show the PTZ option and open the PTZ control interface. You can now click Z+ & Z- keys to zoom In or out, click F+ &... -
Page 37: Chapter 6: Web Application Manager
User’s Manual CHAPTER 6: WEB APPLICATION MANAGER Open Internet Explorer and enter the IP Address or DDNS address of your DVR. A pop-up will ask you to install an ActiveX (plug-in) to your computer. Please confirm the download and install the software. -
Page 38: Main Interface Of Net-Viewer
User’s Manual 6.2 Main Interface of Net-viewer 6.2.1 Menu column Menu column includes “LIVE”, “REPLAY”, “SETUP” and “LOGOUT”. 6.2.1.1 Live After Logging-in to system, system will enter into Live display. 6.2.1.2 Replay This option allows you to playback recordings remotely. 1. -
Page 39: Setup
User’s Manual 6.2.1.3. Setup Click “SETUP” open this sub menu, option in this menu includes “Recording Mode”, “Alarm Mode”, “PTZ Control”, “Network Setting”, “System Setting” and “Host Info” . Record Open sub menu “Recording Mode”, you can select on/off for every channel, and adjust recording parameters (resolution, quality, audio, REC mode and Schedule) remotely via Net-Viewer. -
Page 40: Log Out
User’s Manual PTZ Control Open” PTZ Control” sub menu. Remotely setup methods are the same as configuring on the DVR. Network Open “Network” to enter the “Network” sub menu. Remote setup methods are the same as configuring on the DVR. Setting Open “Setting”... -
Page 41: Ptz Control
User’s Manual 6.2.2 PTZ Control 1. PTZ direction control: Control PTZ moving direction 2. Zoom, Focus and Iris Control: control direction, zoom, focus and iris of PTZ. 3. Presetting bit Control - CUR!display current presetting bit or input a presetting bit you would like to fix at according to the edit box"... -
Page 42: Remote Backup
User’s Manual 6.2.4 Remote Backup You can backup recorded video files from your system to your PC using the Replay menu in the remote surveillance software. To backup files remotely: 1. Click REPLAY at the top of the main screen. 2. - Page 43 User’s Manual 4. Click pop-up menu button on the bottom of multimedia player and click “Play ( )” button, then the backup file will be played accordingly. At the upper right hand corner, the date of when the file was recorded will be displayed. At the lower left hand corner, the 24H recording time is shown.
- Page 44 User’s Manual 6. To enable a specific channel’s audio, select “Setting” " “Audio Channel Setting” " “Normal Video Bar”. Select the channel you want to enable/disable, and check the check box to enable the channel. Please restart the multimedia player after the configuration is changed.
-
Page 45: Chapter 7: Specification S
User’s Manual CHAPTER 7: SPECIFICATION Video System NTSC Video!H.264 / Audio!8kHz*16bit ADPCM Compression Format Video Output 8-CH BNC Input/ 2-CH BNC Output / 1-VGA output Audio I/O 8-CH RCA audio Input / 1-CH RCA audio Output D1!704×576(PAL) 704×480 (NTSC) Display Resolution Single CH PAL!25 fps #NTSC!30 fps Frame rate Recording Resolution... - Page 46 Purchaser’s cost (no CODs) to the address below, with the original proof of purchase receipt. In its sole discretion, Night Owl will either repair or replace the Product at no additional cost to the Purchaser. Any replacement Product (or parts) will be covered by the same warranty as the original Product through the expiration date of the original warranty period.
- Page 47 Prior to mailing, please contact our customer service department to obtain a return authorization number. The Purchaser must provide Night Owl with a copy of his/ her original, dated bill of sale, receipt or invoice, failing which Night Owl is not required to perform any of its obligations under this warranty. To claim on this warranty, proceed with the following steps.
- Page 48 User’s Manual...