Table of Contents
Advertisement
Advertisement
Table of Contents

Related Manuals for Night Owl Poseidon 85


Summary of Contents for Night Owl Poseidon 85
- Page 1 Rev. 110301...
-
Page 2: Table Of Contents
TABLE OF CONTENTS FCC RADIATION NORM:..............................2 PACKAGE CONTENTS: ..............................3 SYSTEM REQUIREMENTS: ............................3 SAFETY INSTRUCTION: ..............................4 CHAPTER 1: DVR FEATURES............................5 CHAPTER 2: LAYOUT..............................6 2.1 F ) ................6 RONT ANEL LEASE REFER TO ACTUAL PRODUCT FOR DETAIL 2.2 R ) .................. - Page 3 User’s Manual 5.2.13 System................................ 38 5.2.13.1 Date/Time ................................38 5.2.13.2 Password ................................38 5.2.13.3 Language ................................39 5.2.13.4 Hard Drive ................................39 5.2.13.5 Video ..................................39 5.2.13.6 System Maintenance............................40 5.2.13.7 Info..................................40 5.3 L ..................................40 5.4 V ................................ 40 PTIONS 5.5 PTZ C ................................
-
Page 4: Fcc Radiation Norm
User’s Manual FCC RADIATION NORM: This equipment has been tested and found to comply with limits for Class B digital device pursuant to Part 15 of Federal Communications Commission (FCC) rules. FCC Compliance Statement These limits are designed to provide reasonable protection against frequency interference in residential installation. -
Page 5: Package Contents
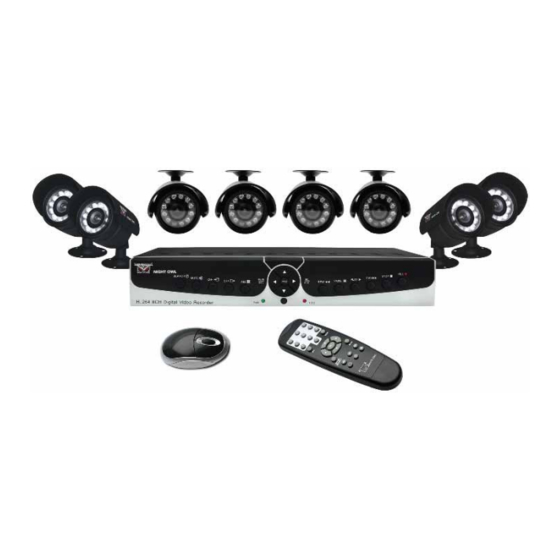
User’s Manual PACKAGE CONTENTS: Your new Security Camera and DVR Kit will ship with the following items. Poseidon-85 Poseidon-45 SYSTEM REQUIREMENTS: Please be sure the computer that you install the included software with complies with the following specifications: IBM PCs or 100% Compatibles ®... -
Page 6: Safety Instruction
User’s Manual SAFETY INSTRUCTION: 1. Use proper power source. Do not use this product with a power source that applies more than specified voltage (100-240V AC). 2. Never insert any metal into the DVR or any openings. Putting metal into the DVR case can cause danger of electric shock. 3. -
Page 7: Chapter 1: Dvr Features
User’s Manual CHAPTER 1: DVR FEATURES Other Features H.264 compression • Real time recording on 8 channels • USB Backup to flash drive • Triplex operation: view, record, playback simultaneously • Security Certified Hard Drive pre-installed • Easy control with USB mouse •... -
Page 8: Chapter 2: Layout
User’s Manual CHAPTER 2: LAYOUT 2.1 Front Panel (Please refer to actual product for detail) Buttons / Item Marks Functions Indicators Search SEARCH Opens the Video Search Screen. Mute Disable Audio MUTE CH- / CH+ Press to scroll between channels Display all cameras in live display or playback mode Enter into main menu or exit menu... -
Page 9: Rear Panel (Please See Actual Product For Detail)
User’s Manual 2.2 Rear Panel (Please see actual product for detail) Item Physical Connection method ports Power Port Connect power supply - DC12V 3A Pan Tilt Zoom Output to PTZ enabled camera Ethernet Port Connect intranet, internet (RJ45 interface) Connect Top USB Port to Mouse, use bottom USB port for USB Ports data backup or system update. -
Page 10: Remote Control
User’s Manual 2.3 Remote Control The remote control is the secondary input device for navigating the system’s interface. To use the remote control: Channel Select 1-8 9 & 0 Digital Key 5-9, 0 Display all Channels – Quad View Menu Enter / Exit Menu ▲... -
Page 11: Mouse Operation
User’s Manual 2.4 Mouse Operation You can use a mouse instead of the front panel buttons or remote control to navigate the operation of your DVR The mouse is the primary input device for navigating system menus. To use a mouse with the system: 1. -
Page 12: Chapter 3: Dvr/Camera Installation
User’s Manual Chapter 3: DVR/Camera installation 3.1 Connecting the DVR to a TV or Monitor Using the supplied BNC to RCA connector 1. Connect the BNC to RCA connector to the back of the DVR labeled Video Output (refer to Chapter 2.2, Rear Panel Picture) 2. -
Page 13: Chapter 4: Dvr Start Up
User’s Manual CHAPTER 4: DVR START UP 4.1 System Initialization After connecting the power adapter and turning on the power, the system will boot-up and start initializing. 4.2 Main Interface After initialization, the main interface will load. When there are video inputs, the interface will display live images from the cameras. -
Page 14: Chapter 5: Dvr Menu And Options
User’s Manual CHAPTER 5: DVR MENU AND OPTIONS Mouse Only When using the mouse, use the Sub-Menu to access several system options, including the Main Menu. To open the Sub-Menu, Right-click anywhere onscreen to open Sub-Menu. MAIN MENU: Opens the main system menu Lock: Password protect access to menu and options View Options: Change between different viewing options PTZ: Opens the PTZ control menu... -
Page 15: Main Menu Preview
User’s Manual 5.1 Main Menu Preview Record Record Motion Functions Alarm Setup Playback Internet / LAN Mobile Network E-mail Setup MAIN MENU Camera Settings Camera Date/Time Password System Hard Drive Language A/V Setup Advanced Maintain Info... -
Page 16: Main Menu
User’s Manual 5.2 Main Menu Right-click the mouse, a pop-up menu will be displayed on the screen. Click “MAIN MENU” button on the pop-up menu to enter into Main Menu. You can also use the Menu button on the front panel to open the Main Menu. When using the front panel buttons, use the FWD and REW button to move in the menu, and use the SEL button to select the icon. -
Page 17: Motion
User’s Manual 5.2.1.2 Motion To configure the Motion Detection function of the DVR, click “MAIN” “Recording Functions” “Motion” to enter the Motion Detect Setup window. Channel: Choose the channel you would like to configure to have specific motion detection function. Motion Detection: Enable or Disable Motion Detection of the selected channel. -
Page 18: Playback
User’s Manual 5.2.2 Playback To play a recorded video, select “Main Menu” “Playback” Functions to open the RECORD SEARCH menu. To search for a file, enter specific date and click “SEARCH”, you will find all the recordings of that day. You can play video Forward at 2x, 4x, 8x and 16x speeds, Slow play at 1/2x, 1/4x, 1/8x, 1/16x or normal play, pause and play frame by frame using the playback control bar, and... - Page 19 User’s Manual drive. NOTE: Backup progress appears in the status window. DO NOT remove the USB flash drive during backup. The system will create a folder on the USB flash drive named RecordFile . The files are saved as If backup is successful, click CLOSE in the confirmation window and then .264 files.
-
Page 20: Network Setup - Intranet (Internal Access)
User’s Manual 5.2.3 Network Setup – Intranet (Internal Access) To access the NETWORK SETUP menu, select Main Menu NETWORK to open the NETWORK SETUP menu. If your DVR is connected to a router of your local network (intranet), then you can setup the NETWORK Setup section of the DVR to view the image your DVR is recording remotely using computers connected within your network. -
Page 21: Network Setup - Global Access (Connected Directly To Modem)
User’s Manual 5.2.4 Network Setup – Global Access (Connected Directly to Modem) To access the NETWORK SETUP menu, select Main Menu NETWORK to open the NETWORK SETUP menu. If you would like to access your DVR while you are outside of your home, please follow the instructions below to configure the NETWORK Setup page of your DVR Important Note: If you are using a DSL modem, the modem must be set to “bridge mode”. - Page 22 User’s Manual STATIC IP 1. Select STATIC as the network TYPE. 2. Leave Media Port at 9000 3. Setup WEB Port (leave at 80 but some ISPs block inbound traffic on port 80 to prevent web servers so if the DVR cannot be remotely accessed choose a different port number) 4.
-
Page 23: Network Setup - Global Access (Connected Through A Router Or Firewall)
User’s Manual 5.2.5 Network Setup – Global Access (Connected through a Router or Firewall) To access the NETWORK SETUP menu, select Main Menu NETWORK to open the NETWORK SETUP menu. If you would like to access your DVR while you are outside of your home or office network, please follow the instructions below to configure the NETWORK Setup of your DVR Important Note: You will not be able to access your DVR if your DVR is connected behind two or more routers. -
Page 24: Port Forwarding
User’s Manual 5.2.6 Port Forwarding To access the DVR from a remote computer over the internet via internet browser (Internet Explorer). 1. Forward Port 80 and Port 9000 in the router attached to the DVR, to the IP address of the DVR. -
Page 25: Viewing Your Nightowl Dvr Over The Internet (Upnp)
User’s Manual 3. On the next page that opens, click on the “Default Guide” link. This will take you to the port forwarding instructions for your router. 4. When you access the DVR from a remote computer, you also need to use a different address in the Internet Explorer browser window. -
Page 26: Accessing The Dvr Through Internet Explorer Browser (Ie)
User’s Manual You can ask your ISP if they can provide you with a static IP address or you can eliminate the need to enter an IP address by using our DDNS server at www.nightowldvr.com. DDNS allows you to enter a normal style internet address into your browser and it will find your camera, even if you have a dynamic IP address. - Page 27 User’s Manual 3. Access Custom Security Level Select the “Security” tab Select “Custom Level…” 4. Enabling all Active X Controls On this page scroll down to the ActiveX Controls and Plug Ins, and set all to either PROMPT or ENABLED. To connect to the DVR from a remote computer, you would then open an Internet Explorer browser window and enter the Internet IP of your router that you received by going to www.myipaddress.com.
-
Page 28: Mobile Setup
User’s Manual 5.2.9 Mobile Setup If you would like to allow your DVR to be accessible by a Mobile device, Click “MAIN MENU” “Network” “Mobile” to open the “MOBILE” menu. USER NAME: is the user name to enter when logging into the DVR. - Page 29 User’s Manual 4. After installation finishes, click the icon named “Asee” to run the program. This will display the program screen. 5. Click the “Setting” button to enter the Setting menu 6. Enter login information. User name: same as the user name setup in DVR under section 5.2.9.
- Page 30 User’s Manual 3. After the phone finishes copying the file, it will ask for permission to install the program. Select “Continue” to start the installation. 4. Click the “Continue” button on the information box displaying the program and current version. 5.
- Page 31 User’s Manual ® When accessing with an iPhone follow these procedures: 1. From you iPhone ® Select “App Store” from your home screen. 2. Select the Search icon. 3. Type: “Asee” in the search field. 4. Download and install the “Asee” Application. 5.
- Page 32 User’s Manual 5. Under the “Add/Remove Applications” pane, click “Start” Button. 6. Click the “Browse…” button and locate the “ASee.alx” file on the included CD. Select the “ASee” file under “Device application selection” and click “Next”. 7. Follow the installation process and click “Finish” at the end to finish the installation.
- Page 33 User’s Manual 2. To run the application, the Blackberry viewer is installed in the “Downloads” directory 3. Open the “Downloads” folder, and then click the “ASee” icon to open the viewing interface. The functions of the various icons are as follow: 1 ---Connect/Disconnect 2 ---Full screen 3 ---Snapshot...
- Page 34 User’s Manual 5. Select the Network Type supported by your phone. 6. Click the “Save” button to save the settings, and system will return to Live display. You can save the connection settings for different DVRs when you give the Settings different names under Settings and click save.
- Page 35 User’s Manual To navigate in live view mode: 1. Click “Next Channels/Group” icon to switch channels, and then choose the channel you want to display. 2. Click the “Full screen” icon to view in full screen display mode, click the “Trackball” on the mobile phone to quit full screen mode.
- Page 36 User’s Manual ® When accessing from a mobile phone with Android phones, follow these procedures: 1. Download the Android software from our website (www.nightowlsp.com/support.htm), decompress and store the downloaded software in an easy to remember location. 2. Copy the downloaded “Asee.pak” to your phone. 3.
- Page 37 User’s Manual 8. Goto “All Programs” and select “ApkInstaller”. 9. Locate the “ASee.apk” on the included CD and copy to your phone 10. Select and install the software to your phone. 11. Goto “All Programs” and select the “ASee” icon.
-
Page 38: E-Mail Setup
User’s Manual 12. The “ASee” main interface will be displayed. The functions of the various icons are as follow: 1 ---Channel Select 2 ---Pan/Tilt Control 3 ---Zoom +/- 4 ---Focus +/- 5 ---Iris +/- 6 ---Play/Pause, Snapshot, Settings, Next Channel Group, and help. -
Page 39: Camera
User’s Manual Set the e-mail account information of your mail server. Please contact your Network Administrator for details and configuration settings. 5.2.12 Camera 5.2.12.1 Camera Setup To set up your cameras, select “Main Menu” Camera Camera Settings to open the CAMERA SETUP menu. -
Page 40: System
User’s Manual 5.2.13 System 5.2.13.1 Date/Time Click “Main Menu” “SYSTEM” “DATE/TIME” to enter the TIME SETTING window to modify system date, time, date/time format and time zone, DST (day saving time). DATE: Enter the day, month, and year •... -
Page 41: Language
User’s Manual 5.2.13.3 Language Click “Main Menu” “System” “Language” to setup the default system language. 5.2.13.4 Hard Drive To manage the installed Hard Disk, click “Main Menu” “System” “Advanced” “Hard Drive” to enter “HDD MANAGEMENT”. The HDD Management screen shows the capacity and available recording time of the installed hard drive and let you configure whether to overwrite old recordings or stop when HDD is full. -
Page 42: System Maintenance
User’s Manual 5.2.13.6 System Maintenance Click “Main Menu” “System” “Advanced” “Maintain” to access the SYSTEM MAINTENANCE page of your DVR. This option allows you reset the DVR to factory default settings, update system software (firmware), and set system auto reboot time. When enabling the auto-reboot function, you can setup system to restart regularly to clear up some temporary storage memory. -
Page 43: Ptz Control
User’s Manual 5.5 PTZ Control 5.5.1 Cruise Setup Open PTZ setting menu if you want to setup cruise function (system default: on), and set up cruise channel, cruise points etc. 1. Channel Select: Select the channel of the installed PTZ camera. -
Page 44: Chapter 6: Net-Viewer Program
User’s Manual CHAPTER 6: NET-VIEWER PROGRAM Open Internet Explorer and enter the IP Address or DDNS address of your DVR. A pop-up will ask you to install an ActiveX (plug-in) to your computer. Please confirm the download and install the software. -
Page 45: Main Interface Of Net-Viewer
User’s Manual 6.2 Main Interface of Net-viewer 6.2.1 Menu column Menu column includes “Live”, “Playback”, “Remote Setting”, “Local Setting” and “Logout”. 6.2.1.1 Live After Logging-in to system, system will enter into Live display. You can enable/disable showing certain cameras, control the volume, or control the movement of PTZ cameras if you have such cameras installed. -
Page 46: Remote Setting
User’s Manual 6.2.1.3. Remote Setting Clicking “Remote Setting” opens this sub menu, option in this menu includes “Record”, “Network”, “Camera”, and “System”. Record Open sub menu “Record” to access the same “Record” settings that you would see on the firmware menus of the DVR. -
Page 47: Play Control
User’s Manual 6.2.2 Play Control 1. On / Off Live display : Clicking this button opens and closes Live display. 2. Capture : Capture Screen image and save to PC. 3. Recording : Operate DVR recording remotely 4. Channel display : These icons stand for Single Channel display, Quad Channel display, 3x3 Channel display and 4x4 Channel display, and full... -
Page 48: Multi Player File Format
User’s Manual 6.2.5 Multi Player File format 1. If you would like to play any recorded file using video players that supports .avi format, first, copy or backup file to your PC. 2. Use the AVI Generator software included in the driver CD and install AVI Generator to your computer. - Page 49 Purchaser’s cost (no CODs) to the address below, with the original proof of purchase receipt. In its sole discretion, Night Owl will either repair or replace the Product at no additional cost to the Purchaser. Any replacement Product (or parts) will be covered by the same warranty as the original Product through the expiration date of the original warranty period.
- Page 50 User’s Manual salespeople, retailers, dealers or distributors to the contrary are not authorized by Night Owl, and do not affect this provision of this warranty. Returns under this Warranty In order to obtain service, please make sure that you have registered your product on-line no later than thirty (30) days after purchase at www.NightOwlSP.com...
- Page 51 User’s Manual...
- Page 52 User’s Manual...