Table of Contents
Advertisement
Quick Links
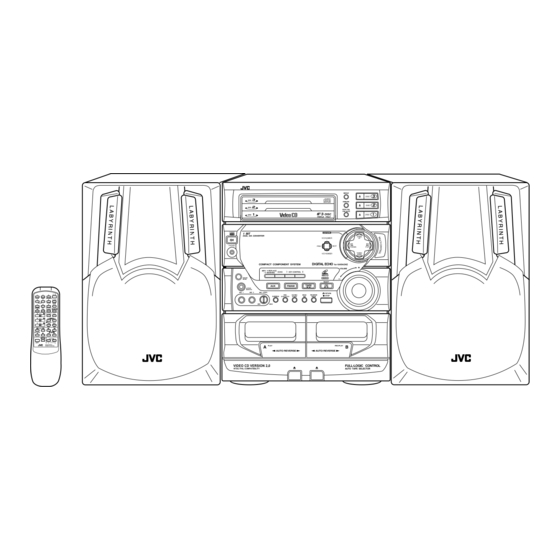
COMPACT COMPONENT SYSTEM
MX-V508T/MX-V588T
Consists of CA-V508T and SP-V608
1
2
3
CLOCK
TIMER
ON SCREEN
4
5
6
SLEEP
– SELECT +
V.INTRO
SOUND
7
8
9
MODE
ECHO
SET
HIGHLIGHT
10
10
FM/AM
FM MODE
DISC
PLAY MODE
8 STILL
7
£
DISC
C D
RETURN
SELECT
DISC
PREV
NEXT
A
B
REC PAUSE
DECK
AUX
– VOLUME +
SHIFT
RM-SEV508TU
REMOTE CONTROL
DISC
DISC
DISC
COMPACT
PlayBack
Control
DIGITAL VIDEO
INSTRUCTIONS
Consists of CA-V588T and SP-V688
REPEAT
RANDOM
NTSC / PAL
/ PAL AUTO
SELECT
COMPACT
DIGITAL AUDIO
GRAPHICS
For Customer Use:
Model No.
Serial No.
COMPACT
DIGITAL AUDIO
Enter below the Model No. and Serial
No. which are located either on the rear,
bottom or side of the cabinet. Retain
this information for future reference.
GVT0006-001A
[ U, UT, US, UB, UF ]
Advertisement
Table of Contents

Related Manuals for JVC MX-V508T


Summary of Contents for JVC MX-V508T
- Page 1 COMPACT COMPONENT SYSTEM MX-V508T/MX-V588T Consists of CA-V508T and SP-V608 CLOCK TIMER ON SCREEN SLEEP – SELECT + V.INTRO SOUND MODE ECHO HIGHLIGHT FM/AM FM MODE DISC PLAY MODE 8 STILL £ DISC RETURN SELECT DISC PREV NEXT REC PAUSE DECK –...
- Page 2 IMPORTANT for the U.K. DO NOT cut off the mains plug from this equipment. If the plug fitted is not suitable for the power points in your home or the cable is too short to reach a power point, then obtain an appropriate safety approved extension lead or consult your dealer.
- Page 3 IMPORTANT FOR LASER PRODUCTS / IMPORTANTE PARA PRODUCTOS LÁSER / IMPOTANTE PARA PRODUTOS LASER / REPRODUCTION OF LABELS / REPRODUCCIÓN DE ETIQUETAS / REPRODUÇÃO DE ETIQUETAS 1 CLASSIFICATION LABEL, PLACED ON REAR ENCLOSURE 1 ETIQUETA DE CLASIFICACIÓN, PEGADA EN LA PARTE POSTERIOR DE LA CAJA 1 ETIQUETA DE CLASSIFICAÇÃO LOCALIZADA NA PARTE POSTERIOR DA CAIXA DO APARELHO.
- Page 4 Instale-o sobre uma superfície plana. Deverá ser mantido espaço suficiente para a ventilação se este for instalado numa posição que tenha uma altura de 10 cm ou mais. 1 cm 15 cm 1 cm 15 cm MX-V508T/ continuación. 15 cm 15 cm 1 cm 1 cm...
-
Page 5: Features
DIGITAL AUDIO GRAPHICS time listening to music. • with the One Touch Operation feature of JVC’s COMPU PLAY, you can turn on the System COMPACT and start the Radio, Cassette Deck or the CD Player with a single touch. 3) The System provides great sound with the following functions : DIGITAL AUDIO •... -
Page 6: Table Of Contents
Table of Contents Features ... 1 How This Manual Is Organized ... 1 IMPORTANT CAUTIONS ... 1 Getting Started ... 3 Accessories ... 3 Set the VOLTAGE SELECTOR Switch ... 3 How to Put Batteries in the Remote Control ... 3 Using the Remote Control ... -
Page 7: Getting Started
Getting Started Accessories Check that you have all of the following items, which are supplied with the System. AC Plug Adaptor (except for Hong Kong and China) (1) Remote Control (1) Batteries (2) AM Loop Antenna (1) FM Wire Antenna (1) Video Cord (1) If any of these items is missing, please contact your dealer immediately. -
Page 8: Connecting The Am Antenna
CAUTION: Make all connections before plugging the Unit into an AC power outlet. Connecting the AM Antenna AM Antenna Wire (not supplied) Note: Even when an outdoor AM Antenna is used, keep the indoor AM Loop Antenne connected. Connecting the FM Antenna Using the Supplied FM Wire Antenna Using a 75Ohm FM Wire Antenna (Not Supplied) If reception is poor, connect the outside antenna. -
Page 9: Connecting The Speakers
CAUTION: Make all connections before plugging the Unit into an AC power outlet. Connecting the Speakers • Please refer to instructions for speakers as well when you connect the speakers. For each speaker, connect one end of the speaker wire to the speaker terminals on the back of the System. Open each of the terminals and insert the speaker wires firmly, then close the terminals. -
Page 10: Video Out Select
COMPU PLAY COMPU PLAY is JVC’s feature that allows you to control the most frequently used functions of the System with a single touch. One Touch Operation starts playing a CD, turns on the radio, plays a tape, etc. with a single press of the play button for that function. -
Page 11: Common Operations
Common Operations Unit (Front Panel) STANDBY indicator PHONES SOUND MODE ACTIVE BASS EX. Remote Control Display CONT. ACTIVE BASS EX. indicator When the System is being used, the display shows other items as well. However, we have only shown the items described in this section. REPEAT DISC RANDOM... -
Page 12: Turning The Power On And Off
Turning the Power On and Off Turning the System On Unit/Remote Control On the Unit 1. Press the ( On the Remote Control 1. Press the ( Turning the System Off Unit/Remote Control On the Unit 1. Press the ( again. -
Page 13: Adjusting The Volume
Adjusting the Volume Unit/Remote Control On the Unit 1. Turn the VOLUME control. On the Remote Control 1. Press the VOLUME + to increase the volume and VOLUME – pressing the will decrease the volume. – VOLUME + Reinforcing the Bass Sound This is used to maintain the richness and fullness of the bass sound regardless of how low the volume is set. -
Page 14: Listening To Auxiliary Equipment
Listening to Auxiliary Equipment By playing the sound from the auxiliary equipment through the System, you can gain control over how the music or program sounds. Once the connected equipment is playing through the System, you can apply the sound effects. Make sure that the external equipment is properly connected to the System (See page 5). -
Page 15: Using The Tuner
Using the Tuner Unit (Front Panel) DISC DISC DISC Remote Control Number keys CLOCK ECHO REC PAUSE SHIFT Display Band display, Frequency display, Preset channel CONT. ALL PRGM When the System is being used, the display shows other items as well. However, we have only shown the items described in this section. -
Page 16: About The Tuner
About the Tuner You can listen to both FM and AM stations. Stations can be tuned in manually, automatically or from preset memory storage. Before listening to the radio, check that both the FM and AM antennas are properly connected (See page 4). Setting the AM Tuner Interval Spacing Some countries space AM stations 9 kHz apart, while others use 10 kHz spacing. -
Page 17: Tuning In A Station
Tuning In a Station There are 3 ways to select a station : Manual Tuning, Auto Tuning, Preset. Unit/Remote Control Manual Tuning: On the Unit 1. Press the FM/AM button. 2. Press the TUNING DOWN or TUNING UP button on the MULTI CONTROL repeatedly. -
Page 18: To Changing The Fm Reception
To Change the FM Reception When an FM stereo broadcast is noisy or hard to receive, changing the following will improve the situation. Remote Control On the Remote Control 1. Press the FM MODE button. Steps 1. The ST indicator goes off and the MONO indicator appears. -
Page 19: Using The Cd Player
Using the CD Player Unit (Front Panel) RANDOM Disc Trays DISC DISC DISC Display Disc indicators Track number, Playing time, step number CONT. RANDOM ALL PRGM CLOCK Repeat indicator Play mode indicator When the System is being used, the display shows other items as well. However, we have only shown the items described in this section. -
Page 20: One Touch Cd Player
One Touch CD Player Unit/Remote Control On the Unit 1. Press the SELECT (6) button. On the Remote Control 1. Press the (3) SELECT button. Notes: • If you press any one of the (0) buttons (for DISC 1-3), the power is automati- cally turned on and the selected disc tray comes out. -
Page 21: Basic Of Using The Cd Player
Basics of Using the CD Player – Continuous Play To Play a Disc Unit/Remote Control 1. Insert a disc into one of the disc trays. On the Unit 1. To Play: Press the SELECT CD (6) or DISC (1-3) buttons of the disc you want to play. -
Page 22: To Select A Disc, Track Or Passage Within A Track
To Select a Disc, Track Or Passage Within a Track Unit/Remote Control On the Unit 1. Press the DISC (1-3) button. 2. Press the (4) P.DOWN (PREV) or (¢) P.UP (NEXT) on the MULTI CONTROL. On the Remote Control 1. Press the DISC (1-3) button. 2. -
Page 23: Programming The Playing Order Of The Tracks
Programming the Playing Order of the Tracks You can change the order in which the discs and tracks play, and select only the discs and tracks you want from among those loaded in the CD Player. • You can program up to 32 steps in any desired order from among the discs in the player. •... -
Page 24: Repeating A Selection Or The Discs
Repeating a Selection or the Discs You can have all the discs, the program or the individual selection currently playing repeat as many times as you like. Unit On the Unit REPEAT 1. Press the REPEAT button. 2. To exit REPEAT MODE, press thge REPEAT button repeatedly until the Repeat mode indicator goes out. -
Page 25: Tray Lock Function
Tray Lock Function In order to keep the discs in the CD Player safely, the disc trays can be locked electronically in a single operation. When the electronic lock is on, the trays cannot be opened even if the (0) button is pressed. This function can only be operated by using the buttons on the Unit itself. -
Page 26: Operation Of Playback Control Function
Operation Of Playback Control Function Playing Video CDs with Playback Control Function This System provides a Playback Control function which utilizes a procedure (menu selection) programmed in a Video CD. The playback operation procedure may differ depending on the disc you use. Video CD with the Playback Control Function is required. The Playback Control function is described below and in the figure on the next page. -
Page 27: What Is The Playback Control Pbc Function
What is the Playback Control PBC function? The Playback Control function, PBC allows you to enjoy menu-driven operation and high resolution still images having a resolution four times greater than video pictures. • Menu-driven playback You can interact with the screen using a menu display to select and play an entry. •... -
Page 28: Graphic Cds
Graphic CDs Playing Graphic CDs 1) Playing back a CD-G Basic CD-playing procedures (described on pages 17-20) can also apply to the CD-G playback. When you start playing a CD-G, “GRAPHICS” appears on the display. To use a CD-G as a Karaoke source, see page 37. 2) Playing back a Video CD without the PBC function Basic CD-playing procedures (described on pages 17-20) can also apply to the playback of Video CDs without the PBC function. -
Page 29: Various Unique Functions
Various Unique Functions Various Functions to Enhance Your Enjoyment The following functions can only be executed with the buttons on the Remote Control. Frame-by-Frame Playback You can advance a still picture frame by frame. Frame-by-Frame Playback is only possible when the moving pictures (of the Video CDs with or without the PBC function) are played back. Remote Control On the Remote Control 1. -
Page 30: Viewing The Video Intro Of A Video Cd
Viewing the Video Intro of a Video CD Using this function, you can check the contents of a Video CD, watching first 5 seconds of each track on the Video CD. Remote Control On the Remote Control 1. Press the DISC (1-3) button for the disc you want to check out. -
Page 31: Using The Cassette Deck
Using the Cassette Deck (Listening to a Tape) Unit (Front Panel) DISC DISC DISC SELECT 0 EJECT (Deck A) Display A.BASS EX CONT. RANDOM TA NEWS INFO ALL PRGM CLOCK : Tape Direction indicator : Deck A, B indicator : Reverse Mode indicator When the System is being used, the display shows other items as well. -
Page 32: One Touch Play
One Touch Play Unit/Remote Control On the Unit 1. Press the (2 2 2 2 2 ) TAPE (3 3 3 3 3 ) button. On the Remote Control 1. Press the (2 2 2 2 2 ) or (3 3 3 3 3 ) button. Regular Play Unit/Remote Control On the Unit... -
Page 33: Music Scan
Music Scan To find the beginning of a music track during play, use the Music Scan function. Music Scan searches for blank portions that usually separate selections, then plays the next selection. Unit/Remote Control To Find the Beginning of the Current Selection 1. -
Page 34: Using The Cassette Deck (Recording)
Using the Cassette Deck (Recording) Unit (Front Panel) DISC DISC DISC SELECT Display A.BASS EX CONT. RANDOM TA NEWS INFO ALL PRGM CLOCK SLEEP MONO REC indicator Recording onto a cassette from any kind of the audio sources is simple. Just insert a cassette in Deck B, have the source ready, make one or two settings, and you’re ready to record. -
Page 35: Standard Recording
Standard Recording This is the basic method for recording. You can record from a tape in Deck A, a CD, the Tuner or Auxiliary source. Insert a tape into Deck B to be recorded. Only Deck B can record. Unit/Remote Control On the Unit 1. -
Page 36: To Reduce The Beat During Recording Am Station
To reduce the beat during recording AM station When recording an AM broadcast, beats may be produces which are not heard when listening to the broadcast. In this case, press the REPEAT button on the CD Player to eliminate the beats. Unit On the Unit 1. -
Page 37: Using The Timer
Using the Timer Unit (Front Panel) (2) TIMER (1) CLOCK (4 –) SELECT (5 +) CLOCK TIMER ON SCREEN – SELECT + V.INTRO (8) SET HIGHLIGHT ECHO FM MODE DISC PLAY MODE DISC RETURN DISC PREV DECK REC PAUSE – VOLUME + SHIFT SHIFT RM-SEV507TU... -
Page 38: Setting The Timer
Setting the Timer Remote Control On the Remote Control 1. Press and hold the SHIFT button until the following procedure is finished. 2. Press the TIMER button. 3. Press the SELECT (+) or (–) to set the On Time. 4. Press the SET button. 5. -
Page 39: Setting The Sleep Timer
Setting the SLEEP Timer The Sleep Timer is used to turn the Unit off after a certain number of minutes when it is playing. This function will let you fall asleep while listening to the music. Thus you will enjoy your sleep without having to worry about the Unit playing until the next morning. The Sleep Timer can only be operated when the Unit is on and a source is playing. -
Page 40: Using The Microphone
Using the Microphone Unit (Front Panel) DISC DISC DISC SOUND MODE MIC 1 MIC 2 MIC LEVEL Display When the System is being used, the display shows other items as well. However, we have only shown the items described in this section. The System includes two microphone terminals, MIC 1 and MIC 2. -
Page 41: Sing Along-Karaoke
Singing Along - Karaoke You can enjoy singing along using conventional audio CDs, CD-Gs, Video CDs or tapes. To sing along with conventional audio discs or tapes Vocal Masking When playing a stereo recorded source such as conventional audio CDs or tapes, you can reduce the lead vocal and replace it with your voice by singing into the microphone. -
Page 42: To Sing Along With Multiplex Karaoke Discs Or Tapes
To sing along with Multiplex Karaoke discs or tapes MPX (Multiplex) / Vocal Replace Sound If the source you are going to play is a multiplex karaoke disc or tape, you can use the following two functions - Multiplex Sound and Vocal Replace. -
Page 43: Apply Echo To Your Voice
Apply Echo to Your Voice Echo can be applied to your voice through the microphone(s). Remote Control On the Unit 1. Press the ECHO button. 2. To Cancel, press the ECHO button again. On the Remote Control 1. Press the ECHO button while pressing the SHIFT button. -
Page 44: Recording Your Singing Along
Recording Your Singing Along Your singing along can be recorded with the effects created by the Karaoke function. Unit On the Unit 1. Turn down the MIC LEVEL control and the VOLUME control. MIC LEVEL 2. Connect the microphone (not supplied) into the MIC 1 or 2 jack on the front panel. -
Page 45: Care And Maintenance
Care And Maintenance Compact Discs Handle your compact discs, cassette tapes, and Cassette Deck carefully, and they will last a long time. • Remove the CD from the case by holding it at the edges while pressing the centre hole lightly. -
Page 46: Troubleshooting
Troubleshooting • If you are having a problem with your System, check this list for a possible solution before calling for service. • If you cannot solve the problem from the hints given here, or the Unit has been physically damaged, call a qualified person, such as your dealer, for service. -
Page 47: Specifications
Specifications MX-V508T / MX-V588T Specifications CD/AMP/DECK TUNER UNIT Specifications CA-V508T/CA-V588T Amplifier Section Output Power (IEC 268-3/DIN) Input Sensitivity/Impedance (1 kHz) MIC 1 MIC 2 Speaker terminals Video out (composite) Cassette Deck Section Frequency Response Type II (CrO Type I (NORMAL) :... - Page 48 Mains (AC) Line Instruction (not applicable for Europe, U.S.A., Canada, Australia, and U.K.) Instrucción sobre la línea de la red (CA) (no aplicable para Europa, EE.UU., Canadá, Australia, ni el Grã-Bretanha) Instrução sobre a tensão da rede eléctrica (CA) (não aplicável para a Europa, os E.U.A., o Canadá, a Austrália e o Reino Unido) IMPORTANT for mains (AC) line BEFORE PLUGGING IN, do check that your mains...