Table of Contents
Advertisement
www.DataSheet4U.com
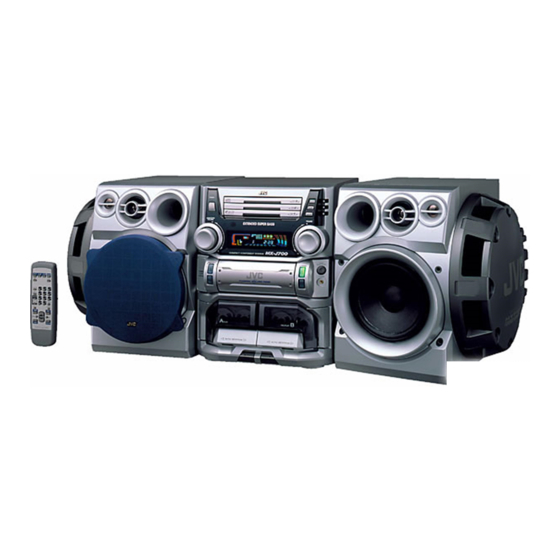
COMPACT COMPONENT SYSTEM
SYSTEME DE COMPOSANTS COMPACT
MX-J700
MX-J506
MX-J500
SP-MXJ700
SOUND
MODE
SLEEP
A/B
TAPE
REC
START/STOP
FM MODE
+
FADE
MUTING
–
RM–SMXJ700J REMOTE CONTROL
SP-MXJ550
SOUND
MODE
SLEEP
TAPE
A/B
REC
START/STOP
ACTIVE
BASS EX.
FM MODE
+
FADE
MUTING
–
RM–SMXJ500J REMOTE CONTROL
www.DataSheet4U.com
Consists of CA-MXJ700 and SP-MXJ700.
—
Composé du CA-MXJ700 et SP-MXJ700.
—
Consists of CA-MXJ506 and SP-MXJ506.
—
Composé du CA-MXJ506 et SP-MXJ506.
—
Consists of CA-MXJ500 and SP-MXJ550.
—
Composé du CA-MXJ500 et SP-MXJ550.
—
CA-MXJ700
SP-MXJ700
CA-MXJ500
SP-MXJ550
INSTRUCTIONS
MANUEL D'INSTRUCTIONS
SP-MXJ506
SOUND
MODE
SLEEP
A/B
TAPE
REC
START/STOP
ACTIVE
BASS EX.
FM MODE
+
FADE
MUTING
–
RM–SMXJ500J REMOTE CONTROL
CA-MXJ506
SP-MXJ506
COMPACT
DIGITAL AUDIO
For Customer Use:
Enter below the Model No. and Serial
No. which are located either on the rear,
bottom or side of the cabinet. Retain this
information for future reference.
Model No.
Serial No.
GVT0029-002A
[C]
Advertisement
Chapters
Table of Contents
Troubleshooting

Related Manuals for JVC MX-J506


Summary of Contents for JVC MX-J506
- Page 1 COMPACT COMPONENT SYSTEM SYSTEME DE COMPOSANTS COMPACT MX-J700 Consists of CA-MXJ700 and SP-MXJ700. — Composé du CA-MXJ700 et SP-MXJ700. — MX-J506 Consists of CA-MXJ506 and SP-MXJ506. — Composé du CA-MXJ506 et SP-MXJ506. — MX-J500 Consists of CA-MXJ500 and SP-MXJ550. —...
- Page 2 www.DataSheet4U.com Warnings, Cautions and Others Mises en garde, précautions et indications diverses CAUTION RISK OF ELECTRIC SHOCK DO NOT OPEN CAUTION: TO REDUCE THE RISK OF ELECTRIC SHOCK, DO NOT REMOVE COVER (OR BACK). NO USER SERVICEABLE PARTS INSIDE. REFER SERVICING TO QUALIFIED SERVICE PERSONNEL. The lightning flash with arrowhead symbol, within an equilateral triangle is intended to alert the user to the presence of uninsulated...
- Page 3 www.DataSheet4U.com Caution –– POWER switch! Disconnect the mains plug to shut the power off completely. The POWER switch in any position does not disconnect the mains line. The power can be remote controlled. Attention –– Commutateur POWER! Déconnecter la fiche de secteur pour couper complètement le courant.
- Page 4 Introduction We would like to thank you for purchasing one of our JVC products. Before operating this unit, read this manual carefully and thoroughly to obtain the best possible performance from your unit, and retain this manual for future reference.
-
Page 5: Table Of Contents
www.DataSheet4U.com Contents Location of the Buttons and Controls ....... 3 Front Panel ..............3 Remote Control ............5 Getting Started ............6 Unpacking ..............6 Putting the Batteries into the Remote Control ... 6 Connecting Antennas ..........6 Connecting Speakers ..........7 Connecting Other Equipment ........ -
Page 6: Location Of The Buttons And Controls
Location of the Buttons and Controls Become familiar with the buttons and controls on your unit. Front Panel Powered Rolling Panel Press PANEL OPEN/ CLOSE to open the panel. To close the panel, press the button again. Front Panel MX-J700 MX-J506/MX-J500 www.DataSheet4U.com – 3 –... - Page 7 1 / ¡ (fast left/fast right) buttons (11, 14, 16) 4 For MX-J700: SUBWOOFER VOLUME control (10) l SEA CONTROL button (11) For MX-J506/MX-J500: ACTIVE BASS EX. (extension) / PROGRAM/RANDOM button (14, 15, 18) LEVEL control (10) z EDIT button (19)
- Page 8 Pressing one of these buttons also turns on the unit. 2 SOUND MODE button (10) 3 TAPE A/B button (16) 4 REC START/STOP button (17, 19) 5 For MX-J700: SUBWOOFER + / – buttons (10) For MX-J506/MX-J500: SOUND SLEEP ACTIVE BASS EX. (extension) + / – buttons (10) MODE 6 1 / 4 (fast left/reverse search) button (14 –...
-
Page 9: Remote Control
www.DataSheet4U.com Getting Started Continued Unpacking Connecting Antennas FM antenna After unpacking, check to be sure that you have all the following items. The number in the parentheses indicates the quantity of the pieces supplied. FM antenna (supplied) • AM loop antenna (1) •... -
Page 10: Connecting Speakers
To left To connect an outdoor AM antenna speaker speaker When reception is poor, connect a single vinyl-covered wire to the AM EXT terminal and extend it horizontally. (The AM FOR MX-J506/MX-J500 loop antenna must remain connected.) Speaker Speaker cord cord... -
Page 11: Connecting Other Equipment
www.DataSheet4U.com Press and hold the clamp of the speaker To connect audio equipment with an optical digital terminal on the rear of the unit. input terminal You can record CD sound onto the connected digital Insert the end of the speaker cord into the equipment. -
Page 12: Common Operations
www.DataSheet4U.com Common Operations Turning On or Off the Power Press 4 or ¢ to adjust the minute, then press SET. To turn on the unit, press POWER so that the STANDBY lamp goes off. The Powered Rolling Panel opens automatically. To check the clock time To turn off the unit (on standby), press Press DISPLAY while playing any source. -
Page 13: Adjusting The Volume
SUBWOOFER – to decrease it. You can adjust the volume level only while the unit is turned For MX-J506/MX-J500 Turn the VOLUME control clockwise to The ACTIVE BASS EX. (extension) LEVEL control increase the volume or counterclockwise provided for this unit can maintain the richness and fullness to decrease it. -
Page 14: Creating Your Own Sound Mode - Manual Mode
www.DataSheet4U.com Surround modes *: Adjust the SEA pattern. D.CLUB: Increases resonance and bass. 1) Press 4 or ¢ to select the HALL: Adds depth and brilliance to the sound. STADIUM: Adds clarity and spreads the sound, like in an frequency range to adjust outdoor stadium. -
Page 15: Listening To Fm And Am Broadcasts
www.DataSheet4U.com Listening to FM and AM Broadcasts Tuning in a Station Press SET. Press FM/AM. The unit automatically turns on and tunes in the previously tuned station (either FM or AM). The Powered Rolling Panel Press PRESET – / + to select a automatically opens. -
Page 16: Playing Back Cds
www.DataSheet4U.com Playing Back CDs Loading CDs Playing Back the Entire Discs — Continuous Play On the unit ONLY: Press 0 for the disc tray (CD1 to 3) You can play CDs continuously. you want to load a CD onto. Load CDs. The unit automatically turns on and the disc tray comes out. -
Page 17: Programming The Playing Order Of The Tracks - Program Play
www.DataSheet4U.com Continued To locate a particular point in a track • Each time you press the button, CD play mode changes During play, press and hold 1 or ¡. as follows: • 1: Fast reverses the disc. Random Play Program Play •... -
Page 18: Playing At Random - Random Play
www.DataSheet4U.com To stop during play, press 7. To check the program contents • Random play also stops when one of the disc trays is Before playing, you can check the program contents by pressing 1 / 4 or ¢ / ¡ on opened. -
Page 19: Playing Back Tapes
www.DataSheet4U.com Playing Back Tapes To play both sides repeatedly — Reverse Mode You can play back type I, type II, and type IV tapes without changing any settings. Reverse Mode works for both decks at the same time. When it is in use, the tape automatically reverses at the end of a side and the unit starts playing the other side of the tape, Playing Back a Tape and repeats the same process. -
Page 20: Recording
www.DataSheet4U.com Recording IMPORTANT: Recording a Tape on Deck B • It should be noted that it may be unlawful to re-record pre-recorded tapes, records, or discs without the Press EJECT 0 for the deck B. consent of the owner of copyright in the sound or video recording, broadcast or cable programme and in any literary, dramatic, musical, or artistic embodied therein. -
Page 21: Dubbing Tapes
www.DataSheet4U.com Continued To record an AM station — Beat Cut CD Direct Recording While recording an AM broadcast, beats may be heard Everything on the CD goes onto the tape in the order it is on (which are never heard when listening to the broadcast the CD, or according to the order you have made for Program without recording it). -
Page 22: Auto Edit Recording
www.DataSheet4U.com Auto Edit Recording Press SET. By using Auto Edit Recording, you can record the CD tracks Tracks to be recorded on the to fit the tape. Auto Edit Recording makes a program by reverse side (SIDE-B) appear. selecting the CD tracks in numerical order. However, to prevent the end of the last track on the front side from being cut off, the last track is selected so as to fit on the remaining tape length. -
Page 23: Using The Timers
www.DataSheet4U.com Using the Timers Continued There are three timers available — Recording Timer, Daily Press CLOCK/TIMER again. Timer, and Sleep Timer. “ON TIME” appears for 2 seconds, then the Before using the timers, you need to set the clock built in the unit enters on-time setting mode. -
Page 24: Using Recording Timer
www.DataSheet4U.com Using Recording Timer When selecting “– CD – –” 1) Press 4 or ¢ to select the disc With Recording Timer, you can make a tape of a radio number, then press SET. broadcast automatically. 2) Press 4 or ¢ to set the track number, then press SET. -
Page 25: Using Sleep Timer
www.DataSheet4U.com Using Sleep Timer Set the on-time you want the unit to turn on. With Sleep Timer, you can fall asleep to music. 1) Press 4 or ¢ to set the hour, then You can set Sleep Timer when the unit is turned on. press SET. -
Page 26: Maintenance
www.DataSheet4U.com Maintenance To get the best performance of the unit, keep your discs, tapes, and mechanism clean. Handling cassette tapes Handling discs • If the tape is loose in its cassette, take • Remove the disc from its case by up the slack by inserting a pencil in holding it at the edge while pressing the one of the reels and rotating. -
Page 27: Specifications
Specifications Design and specifications are subject to change without notice. MX-J700 MX-J506/MX-J500 Amplifier section — CA-MXJ700 Amplifier section — CA-MXJ506/CA-MXJ500 Output Power Output Power 120 W per channel, min. RMS, driven into 6 Ω at 1 kHz with no SUBWOOFERS: 100 W per channel, min. - Page 28 www.DataSheet4U.com COMPACT COMPONENT SYSTEM MX-J700 — Consists of CA-MXJ700 and SP-MXJ700. MX-J500 — Consists of CA-MXJ500 and SP-MXJ550. SP-MXJ700 SP-MXJ700 CA-MXJ700 SOUND MODE SLEEP TAPE START/STOP FM MODE FADE MUTING – RM–SMXJ700J REMOTE CONTROL SP-MXJ550 CA-MXJ500 SP-MXJ550 SOUND MODE SLEEP TAPE START/STOP ACTIVE...
- Page 29 www.DataSheet4U.com Warnings, Cautions and Others CAUTION WARNING: TO REDUCE THE RISK OF FIRE RISK OF ELECTRIC SHOCK OR ELECTRIC SHOCK, DO NOT EXPOSE DO NOT OPEN THIS APPLIANCE TO RAIN OR MOISTURE. CAUTION: TO REDUCE THE RISK OF ELECTRIC SHOCK, DO NOT REMOVE COVER (OR BACK).
- Page 30 www.DataSheet4U.com Instructions for safe use (Statement in accordance with the UL standards) Read Instructions — Read carefully this instructions 11) Outdoor Antenna Grounding — If this appliance is for your safe use before this appliance is installed, provided with means to connect the outdoor antenna wire-connected, and operated.
- Page 31 Introduction We would like to thank you for purchasing one of our JVC products. Before operating this unit, read this manual carefully and thoroughly to obtain the best possible performance from your unit, and retain this manual for future reference.
- Page 32 www.DataSheet4U.com Contents Location of the Buttons and Controls ....... 3 Front Panel ..............3 Remote Control ............5 Getting Started ............6 Unpacking ..............6 Putting the Batteries into the Remote Control ... 6 Connecting Antennas ..........6 Connecting Speakers ..........7 Connecting Other Equipment ........
-
Page 33: Location Of The Buttons And Controls
www.DataSheet4U.com Location of the Buttons and Controls Become familiar with the buttons and controls on your unit. Front Panel Powered Rolling Panel Press PANEL OPEN/ CLOSE to open the panel. To close the panel, press the button again. Front Panel MX-J700 MX-J500 www.DataSheet4U.com... - Page 34 www.DataSheet4U.com Continued Display Window d CD REC START button (18, 19) See pages in the parentheses for details. f TAPE A/B button (16) Front Panel g CLOCK/TIMER button (9, 20 – 22) 1 Disc trays h SET button (9, 12, 20 – 22) j 7 (stop) button (13 –...
-
Page 35: Remote Control
www.DataSheet4U.com Remote Control Remote Control 1 Disc number buttons (CD1, CD2, and CD3) (13) Pressing one of these buttons also turns on the unit. 2 SOUND MODE button (10) 3 TAPE A/B button (16) 4 REC START/STOP button (17, 19) 5 For MX-J700: SUBWOOFER + / –... -
Page 36: Getting Started
www.DataSheet4U.com Getting Started Continued Unpacking Connecting Antennas FM antenna After unpacking, check to be sure that you have all the following items. The number in the parentheses indicates the quantity of the pieces supplied. FM antenna (supplied) • AM loop antenna (1) •... -
Page 37: Connecting Speakers
www.DataSheet4U.com AM antenna Connecting Speakers FOR MX-J700 2, 3 Vinyl-covered wire ANTENNA (not supplied) Blue AM EXT AM LOOP Speaker Speaker cord cord (blue/black) (blue/black) FM 75 COAXIAL Black AM loop antenna (supplied) Black Connect the AM loop antenna to the AM Speaker cord (red/black) LOOP terminals as illustrated. -
Page 38: Connecting Other Equipment
www.DataSheet4U.com To connect audio equipment with an optical digital Press and hold the clamp of the speaker terminal on the rear of the unit. input terminal You can record CD sound onto the connected digital Insert the end of the speaker cord into the equipment. -
Page 39: Common Operations
www.DataSheet4U.com Common Operations Turning On or Off the Power Press 4 or ¢ to adjust the minute, then press SET. To turn on the unit, press POWER so that the STANDBY lamp goes off. The Powered Rolling Panel opens automatically. To check the clock time To turn off the unit (on standby), press Press DISPLAY while playing any source. -
Page 40: Adjusting The Volume
www.DataSheet4U.com Continued Adjusting the Volume When using the remote control, press SUBWOOFER + to increase the subwoofer volume or press SUBWOOFER – to You can adjust the volume level only while the unit is turned decrease it. For MX-J500 Turn the VOLUME control clockwise to The ACTIVE BASS EX. -
Page 41: Creating Your Own Sound Mode - Manual Mode
www.DataSheet4U.com Surround modes *: Adjust the SEA pattern. D.CLUB: Increases resonance and bass. 1) Press 4 or ¢ to select the HALL: Adds depth and brilliance to the sound. STADIUM: Adds clarity and spreads the sound, like in an frequency range to adjust outdoor stadium. -
Page 42: Listening To Fm And Am Broadcasts
www.DataSheet4U.com Listening to FM and AM Broadcasts Tuning in a Station Press SET. Press FM/AM. The unit automatically turns on and tunes in the previously tuned station (either FM or AM). The Powered Rolling Panel Press PRESET – / + to select a automatically opens. -
Page 43: Playing Back Cds
www.DataSheet4U.com Playing Back CDs Loading CDs Playing Back the Entire Discs — Continuous Play On the unit ONLY: Press 0 for the disc tray (CD1 to 3) You can play CDs continuously. you want to load a CD onto. Load CDs. The unit automatically turns on and the disc tray comes out. -
Page 44: Programming The Playing Order Of The Tracks - Program Play
www.DataSheet4U.com Continued To locate a particular point in a track • Each time you press the button, CD play mode changes During play, press and hold 1 or ¡. as follows: • 1: Fast reverses the disc. Program Play Random Play •... -
Page 45: Playing At Random - Random Play
www.DataSheet4U.com To stop during play, press 7. To check the program contents • Random play also stops when one of the disc trays is Before playing, you can check the program contents by pressing 1 / 4 or ¢ / ¡ on opened. -
Page 46: Playing Back Tapes
www.DataSheet4U.com Playing Back Tapes To play both sides repeatedly — Reverse Mode You can play back type I, type II, and type IV tapes without changing any settings. Reverse Mode works for both decks at the same time. When it is in use, the tape automatically reverses at the end of a side and the unit starts playing the other side of the tape, Playing Back a Tape and repeats the same process. -
Page 47: Recording
www.DataSheet4U.com Recording IMPORTANT: Recording a Tape on Deck B • It should be noted that it may be unlawful to re-record pre-recorded tapes, records, or discs without the Press EJECT 0 for the deck B. consent of the owner of copyright in the sound or video recording, broadcast or cable programme and in any literary, dramatic, musical, or artistic embodied therein. -
Page 48: Dubbing Tapes
www.DataSheet4U.com Continued To record an AM station — Beat Cut CD Direct Recording While recording an AM broadcast, beats may be heard Everything on the CD goes onto the tape in the order it is on (which are never heard when listening to the broadcast the CD, or according to the order you have made for Program without recording it). -
Page 49: Auto Edit Recording
www.DataSheet4U.com Auto Edit Recording Press SET. By using Auto Edit Recording, you can record the CD tracks Tracks to be recorded on the to fit the tape. Auto Edit Recording makes a program by reverse side (SIDE-B) appear. selecting the CD tracks in numerical order. However, to prevent the end of the last track on the front side from being cut off, the last track is selected so as to fit on the remaining tape length. -
Page 50: Using The Timers
www.DataSheet4U.com Using the Timers Continued There are three timers available — Recording Timer, Daily Press CLOCK/TIMER again. Timer, and Sleep Timer. “ON TIME” appears for 2 seconds, then the Before using the timers, you need to set the clock built in the unit enters on-time setting mode. -
Page 51: Using Recording Timer
www.DataSheet4U.com Using Recording Timer When selecting “– CD – –” 1) Press 4 or ¢ to select the disc With Recording Timer, you can make a tape of a radio number, then press SET. 2) Press 4 or ¢ to set the track broadcast automatically. -
Page 52: Using Sleep Timer
www.DataSheet4U.com Using Sleep Timer Set the on-time you want the unit to turn on. With Sleep Timer, you can fall asleep to music. 1) Press 4 or ¢ to set the hour, then You can set Sleep Timer when the unit is turned on. press SET. -
Page 53: Maintenance
www.DataSheet4U.com Maintenance To get the best performance of the unit, keep your discs, tapes, and mechanism clean. Handling cassette tapes Handling discs • If the tape is loose in its cassette, take • Remove the disc from its case by up the slack by inserting a pencil in holding it at the edge while pressing the one of the reels and rotating. -
Page 54: Specifications
www.DataSheet4U.com Specifications Design and specifications are subject to change without notice. MX-J700 MX-J500 Amplifier section — CA-MXJ700 Amplifier section — CA-MXJ500 Output Power Output Power 120 W per channel, min. RMS, driven into 6 Ω at 1 kHz with no SUBWOOFERS: 100 W per channel, min. - Page 55 Sophisticated electronic products may require occasional service. Just as quality is a keyword in the engineering and production of the wide array of JVC products, service is the key to maintaining the high level of performance for which JVC is world famous. The JVC service and engineering organization stands behind our products.
- Page 56 WHAT WE WILL DO: If this product is found to be defective, JVC will repair or replace defective parts at no charge to the original owner. Such repair and replacement services shall be rendered by JVC during normal business hours at JVC authorized service centers.
- Page 57 www.DataSheet4U.com VICTOR COMPANY OF JAPAN, LIMITED www.DataSheet4U.com 1299MWMMDWJEM...
- Page 58 www.DataSheet4U.com VICTOR COMPANY OF JAPAN, LIMITED www.DataSheet4U.com 0200MWMMDWJEM EN, FR...
- Page 59 www.DataSheet4U.com COMPACT COMPONENT SYSTEM SISTEMAS DE COMPONENTES COMPACTOS SISTEMA DE COMPONENTE COMPACTO MX-J500 Consists of CA-MXJ500 and SP-MXJ550 Consta del CA-MXJ500 el SP-MXJ550 Consta do CA-MXJ500 e SP-MXJ550 COMPACT SP-MXJ550 CA-MXJ500 CA-MXJ500 SP-MXJ550 DIGITAL AUDIO SP-MXJ550 SP-MXJ550 CA-MXJ500 SOUND VOCAL MODE MASKING ECHO...
- Page 60 www.DataSheet4U.com Warnings, Cautions and Others Avisos, precauciones y otras notas Advertências, precauções e outras notas Caution –– switch! Disconnect the mains plug to shut the power off com- pletely. The switch in any position does not discon- nect the mains line. The power can be remote controlled. Precaución ––...
- Page 61 www.DataSheet4U.com CAUTION To reduce the risk of electrical shocks, fire, etc.: 1. Do not remove screws, covers or cabinet. 2. Do not expose this appliance to rain or moisture. PRECAUCIÓN Para reducir riesgos de choques eléctricos, incendio, etc.: 1. No extraiga los tornillos, los cubiertas ni la caja. 2.
- Page 62 www.DataSheet4U.com Caution: Proper Ventilation To avoid risk of electric shock and fire, and to prevent damage, locate the apparatus as follows: 1 Front: No obstructions and open spacing. 2 Sides/ Top/ Back: No obstructions should be placed in the areas shown by the dimensions below. 3 Bottom: Place on the level surface.
- Page 63 www.DataSheet4U.com IMPORTANT FOR LASER PRODUCTS / IMPORTANTE PARA PRODUCTOS LÁSER / IMPOTANTE PARA PRODUTOS LASER / REPRODUCTION OF LABELS / REPRODUCCIÓN DE ETIQUETAS / REPRODUÇÃO DE ETIQUETAS 1 CLASSIFICATION LABEL, PLACED ON REAR ENCLO- 2 WARNING LABEL, PLACED INSIDE THE UNIT SURE 2 ETIQUETA DE ADVERTENCIA, PEGADA EN EL INTE- 1 ETIQUETA DE CLASIFICACIÓN, PEGADA EN LA PARTE...
- Page 64 Introduction We would like to thank you for purchasing one of our JVC products. Before operating this unit, read this manual carefully and thoroughly to obtain the best possible performance from your unit, and retain this manual for future reference.
- Page 65 www.DataSheet4U.com Contents Location of the Buttons and Controls ....... 3 Front Panel ..............3 Remote Control ............5 Getting Started ............6 Unpacking ..............6 Putting the Batteries into the Remote Control ... 6 Connecting Antennas ..........6 Connecting Speakers ..........7 Connecting Other Equipment ........
-
Page 66: Location Of The Buttons And Controls
www.DataSheet4U.com Location of the Buttons and Controls Become familiar with the buttons and controls on your unit. Front Panel Powered Rolling Panel Press PANEL OPEN/ CLOSE to open the panel. To close the panel, press the button again. Front Panel www.DataSheet4U.com –... - Page 67 www.DataSheet4U.com Continued Display Window g CD REC START button (18, 19) See pages in the parentheses for details. h TAPE A/B button (16) Front Panel j CLOCK/TIMER button (9, 21 – 23) k SET button (9, 12, 21 – 23) 1 Disc trays l 7 (stop) button (13 –...
- Page 68 www.DataSheet4U.com Remote Control Remote Control 1 Disc number buttons (CD1, CD2, and CD3) (13) Pressing one of these buttons also turns on the unit. 2 SOUND MODE button (10) 3 VOCAL MASKING button (20) 4 TAPE A/B button (16) 5 REC START/STOP button (17, 19) 6 ACTIVE BASS EX.
-
Page 69: Getting Started
www.DataSheet4U.com Getting Started Continued Unpacking Connecting Antennas FM antenna After unpacking, check to be sure that you have all the following items. The number in the parentheses indicates the quantity of the pieces supplied. FM antenna (supplied) • AM loop antenna (1) •... -
Page 70: Connecting Speakers
www.DataSheet4U.com AM antenna Connecting Speakers 2, 3 Vinyl-covered wire ANTENNA (not supplied) AM EXT AM LOOP Speaker Speaker cord cord FM 75 COAXIAL Black AM loop antenna (supplied) To left To right Connect the AM loop antenna to the AM speaker speaker LOOP terminals as illustrated. -
Page 71: Connecting Other Equipment
www.DataSheet4U.com Connecting Other Equipment NOW, you can plug in the unit and other connected equipment FINALLY! You can connect both analog and digital equipment. • DO NOT connect any equipment while the power When connecting the AC power cord into a wall outlet, the is on. -
Page 72: Common Operations
www.DataSheet4U.com Common Operations Turning On and Off the Power To check the clock time Press DISPLAY while playing any source. To turn on the unit, press so that the • Each time you press the button, the source STANDBY lamp goes off. indication and the clock time alternate on the display. -
Page 73: Adjusting The Volume
www.DataSheet4U.com Continued Adjusting the Volume Reinforcing the Bass Sound You can adjust the volume level only while the unit is turned The ACTIVE BASS EX. (extension) LEVEL control provided for this unit can maintain the richness and fullness of the bass sound while listening to any source at low Turn the VOLUME control clockwise to volume. -
Page 74: Creating Your Own Sound Mode - Manual Mode
www.DataSheet4U.com Surround modes *: Adjust the SEA pattern. D.CLUB: Increases resonance and bass. 1) Press 4 or ¢ to select the HALL: Adds depth and brilliance to the sound. STADIUM: Adds clarity and spreads the sound, like in an frequency range to adjust outdoor stadium. -
Page 75: Listening To Fm And Am Broadcasts
www.DataSheet4U.com Listening to FM and AM Broadcasts Tuning in a Station On the unit ONLY: Tune in the station you want to preset. Press FM/AM. • See “Tuning in a Station.” The unit automatically turns on and tunes in the previously tuned station (either FM or AM). -
Page 76: Playing Back Cds
www.DataSheet4U.com Playing Back CDs Loading CDs Playing Back the Entire Discs — Continuous Play On the unit ONLY: Press 0 for the disc tray (CD1 to 3) You can play CDs continuously. you want to load a CD onto. Load CDs. The unit automatically turns on and the disc tray comes out. -
Page 77: Programming The Playing Order Of The Tracks - Program Play
www.DataSheet4U.com Continued To locate a particular point in a track • Each time you press the button, CD play mode changes During play, press and hold 1 or ¡. as follows: • 1: Fast reverses the disc. Random Play Program Play •... -
Page 78: Playing At Random - Random Play
www.DataSheet4U.com To stop during play, press 7. To check the program contents • Random play also stops when one of the disc trays is Before playing, you can check the program contents by pressing 1 / 4 or ¢ / ¡ on opened. -
Page 79: Playing Back Tapes
www.DataSheet4U.com Playing Back Tapes To play both sides repeatedly — Reverse Mode You can play back type I, type II, and type IV tapes without changing any settings. Reverse Mode works for both decks at the same time. When it is in use, the tape automatically reverses at the end of a side and the unit starts playing the other side of the tape, Playing Back a Tape and repeats the same process. -
Page 80: Recording
www.DataSheet4U.com Recording IMPORTANT: Recording a Tape on Deck B • It may be unlawful to record or play back copyrighted material without the consent of the copyright owner. Press EJECT 0 for the deck B. • The recording level is automatically set correctly, so it is not affected by the VOLUME control and the ACTIVE BASS EX. -
Page 81: Dubbing Tapes
www.DataSheet4U.com Continued To record an AM station — Beat Cut CD Direct Recording While recording an AM broadcast, beats may be heard Everything on the CD goes onto the tape in the order it is on (which are never heard when listening to the broadcast the CD, or according to the order you have made for Program without recording it). -
Page 82: Auto Edit Recording
www.DataSheet4U.com Auto Edit Recording Press SET. By using Auto Edit Recording, you can record the CD tracks Tracks to be recorded on the to fit the tape. Auto Edit Recording makes a program by reverse side (SIDE-B) appear. selecting the CD tracks in numerical order. However, to prevent the end of the last track on the front side from being cut off, the last track is selected so as to fit on the remaining tape length. -
Page 83: Using The Microphones
www.DataSheet4U.com Using the Microphones You can enjoy singing along (Karaoke) and microphone If howling or squealing (feedback) occurs while using mixing by using two microphones. the microphone(s) • The MIC LEVEL control adjustment is valid for both Take the following actions to prevent these noises. microphones connected the MIC 1 and MIC 2 jacks. -
Page 84: Using The Timers
www.DataSheet4U.com Using the Timers There are three timers available — Recording Timer, Daily Press CLOCK/TIMER again. Timer, and Sleep Timer. “ON TIME” appears for 2 seconds, then the unit Before using the timers, you need to set the clock built in the enters on-time setting mode. -
Page 85: Using Recording Timer
www.DataSheet4U.com Continued Using Recording Timer When selecting “– CD – –” 1) Press 4 or ¢ to select the disc With Recording Timer, you can make a tape of a radio number, then press SET. broadcast automatically. 2) Press 4 or ¢ to set the track number, then press SET. -
Page 86: Using Sleep Timer
www.DataSheet4U.com Using Sleep Timer Set the on-time you want the unit to turn on. With Sleep Timer, you can fall asleep to music. 1) Press 4 or ¢ to set the hour, then You can set Sleep Timer when the unit is turned on. press SET. -
Page 87: Maintenance
www.DataSheet4U.com Maintenance To get the best performance of the unit, keep your discs, tapes, and mechanism clean. Handling discs Handling cassette tapes • Remove the disc from its case by • If the tape is loose in its cassette, take holding it at the edge while pressing the up the slack by inserting a pencil in center hole lightly. -
Page 88: Troubleshooting
www.DataSheet4U.com Troubleshooting If you are having a problem with your unit, check this list for a possible solution before calling for service. If you cannot solve the problem from the hints given here, or the unit has been physically damaged, call a qualified person, such as your dealer, for service. - Page 89 www.DataSheet4U.com Specifications Amplifier section — CA-MXJ500 Output Power (IEC 268-3/DIN) 72 W per channel, min. RMS, both channels driven into 6 Ω at 1 kHz with no more than 0.9% total harmonic distortion. Audio input sensitivity/Impedance (at 1 kHz) AUX: 420 mV/50 kΩ...
- Page 90 www.DataSheet4U.com Mains (AC) Line Instruction (not applicable for Europe, U.S.A., Canada, Australia, and U.K.) Instrucción sobre la línea de la red (CA) (no aplicable para Europa, EE.UU., Canadá, Australia, ni el Grã-Bretanha) Instrução sobre a tensão da rede eléctrica (CA) (não aplicável para a Europa, os E.U.A., o Canadá, a Austrália e o Reino Unido) ANTENNA AM EXT...