Table of Contents
Advertisement
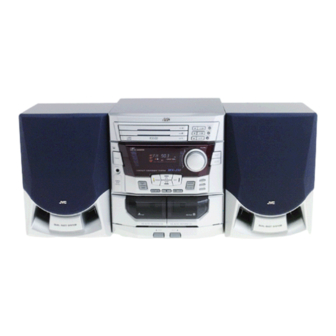
COMPACT COMPONENT SYSTEM
CA-MXJ10
COMPACT
PLAY & EXCHANGER
DIGITAL AUDIO
1 BIT
STANDBY
DUAL D/A CONVERTER
PHONES
TUNING
COMPU
UP
RM-SMXJ10 REMOTE CONTROL
PLAY
CLOCK
TIMER
CONTROL
TUNING
1
2
3
DOWN
–
+
SELECT
SLEEP
4
5
6
P.DOWN
SET
AUX
7
8
9
FM MODE
FM/AM
10
+
10
CD1
CD2
CD3
CD PLAY MODE
C D
/CLEAR
TAPE
A – TAPE – B
REC PAUSE
SHIFT
PLAY
SOUND
ACTIVE
VOLUME
MODE
BASS EX.
AUTO REVERSE
INSTRUCTIONS
REPEAT
RANDOM
CONTINUE
VOLUME
SOUND
MODE
ACTIVE
BASS EX.
CD
FM/AM
AUX
DUBBING
TAPE
DECK A/B
REC
REV. MODE
CD REC START
P.UP
REC/PLAY
AUTO REVERSE
EJECT
EJECT
COMPACT
DIGITAL AUDIO
For Customer Use:
Enter below the Model No. and Serial
No. which are located either on the rear,
bottom or side of the cabinet. Retain this
information for future reference.
Model No.
Serial No.
LVT0301-003A
[ B ]
Advertisement
Table of Contents

Related Manuals for JVC CA-MXJ10


Summary of Contents for JVC CA-MXJ10
- Page 1 COMPACT COMPONENT SYSTEM CA-MXJ10 RM-SMXJ10 REMOTE CONTROL CLOCK TIMER – SELECT SLEEP FM MODE FM/AM CD PLAY MODE /CLEAR TAPE A – TAPE – B REC PAUSE SHIFT SOUND ACTIVE VOLUME MODE BASS EX. REPEAT RANDOM CONTINUE COMPACT PLAY & EXCHANGER...
- Page 2 Disconnect the mains plug to shut the power off completely. The switch in any position does not disconnect the mains line. The power can be remote controlled. 15 cm 1 cm 15 cm CA-D3S CA-MXJ10 switch! Side view 15 cm 15 cm CA-D3S CA-MXJ10...
- Page 3 IMPORTANT FOR LASER PRODUCTS REPRODUCTION OF LABELS 1 CLASSIFICATION LABEL, PLACED ON REAR ENCLOSURE CLASS LASER PRODUCT 1. CLASS 1 LASER PRODUCT 2. DANGER: Invisible laser radiation when open and interlock failed 3. CAUTION: Do not open the top cover. There are no user service- 2 WARNING LABEL, PLACED INSIDE THE UNIT DANGER: Invisible laser radiation when open and...
-
Page 4: How This Manual Is Organized
• With the One Touch Operation feature of JVC’s COMPU PLAY you can turn on the System and start the radio, the Cassette Deck, or the CD Player with a single touch. To get such great sound from such a compact package the System has: Programmed sound mode includes live surround effects D. -
Page 5: Table Of Contents
The Quickest Way to Start a CD Is with the One Touch Operation ... 13 Inserting Discs ... 13 Basics of Using the CD Player — Normal Play ... 14 Playing a Disc ... 14 Selecting a Disc, Track or Passage Within a Track ... -
Page 6: Getting Started
Getting Started Accessories Check that you have all of the following items, which are supplied with the System. If any of these items is missing, contact your dealer immediately. How to Put Batteries in the Remote Control Match the polarity (+ and –) on the batteries with the + and – markings in the battery compartment. CAUTION: Handle batteries properly. -
Page 7: Connecting The Fm Antenna
CAUTION: Make all connections before plugging the Unit into an AC power outlet. Connecting the FM Antenna ANTENNA FM 75 COAXIAL AM LOOP CAUTION: To avoid noise, keep antennas away from metallic parts of the System, connecting cord and the AC power cord. Connecting the AM (MW/LW) Antenna AM Antenna Wire (not supplied) ANTENNA... -
Page 8: Connecting The Speakers
CAUTION: Make all connections before plugging the Unit into an AC power outlet. Connecting the Speakers For each speaker, connect one end of the speaker wire to the speaker terminals on the back of the System. 1. Open each of the terminals and insert the speaker wires firmly, then close the terminals. 2. -
Page 9: Compu Play
COMPU PLAY COMPU PLAY is JVC’s feature that lets you control the most frequently used functions of the System with a single touch. One Touch Operation starts playing a CD, turns on the radio, plays a tape, etc. with a single press of the play button for that function. -
Page 10: Common Operations
Common Operations STANDBY indicator button PHONES RM-SMXJ10E REMOTE CONTROL CLOCK TIMER – SELECT SLEEP FM MODE FM/AM PLAY MODE /CLEAR TAPE REC PAUSE A – TAPE - B SHIFT SOUND ACTIVE VOLUME BASS EX. MODE SOUND MODE Turning the Power On and Off Turning the System On ——————————————————... -
Page 11: Adjusting The Volume
Adjusting the Volume Turn the VOLUME control clockwise to increase the volume or anticlockwise to decrease it. VOLUME Turning the VOLUME control quickly also adjusts the volume level quickly. When using the Remote Control, press the VOLUME + button to increase the volume or press the VOLUME –... -
Page 12: Listening To Auxiliary Equipment
Listening to Auxiliary Equipment By playing the sound from auxiliary equipment through the System, you can gain control over how the music or program sounds. Once the connected equipment is playing through the System, you can apply the sound effects. 1. -
Page 13: Using The Tuner
Using the Tuner FM/AM TUNING UP TUNING DOWN Number keys RM-SMXJ10E REMOTE CONTROL CLOCK TIMER – SELECT SLEEP FM MODE FM/AM FM/AM PLAY MODE FM MODE /CLEAR TAPE REC PAUSE A – TAPE - B SHIFT SOUND ACTIVE VOLUME MODE BASS EX. -
Page 14: Three Ways To Select A Station
Three ways to select a station —————————————— TUNING TUNING DOWN P. DOWN P. UP Presetting Stations You can preset up to 30 FM stations and up to 15 AM stations for the preset numbers. Note: In some cases, test frequencies have been already memorized for the tuner since the factory examined the tuner preset function before shipment. -
Page 15: Using The Cd Player
However, we have only shown the items described in this section. The System’s CD Player has an Automatic Changer with 3 disc trays. You can use Continuous, Random, Program or Repeat Play for the discs in CD1, CD2 and CD3. Repeat Play can repeat all the tracks on all the CD’s, the tracks on one of the CD’s or one track on one CD. -
Page 16: The Quickest Way To Start A Cd Is With The One Touch Operation
• If there are no CDs in CD player, the power is automatically turned on and “NO DISC” appears on the display in Normal Play mode. The CD Player is in stop mode. Press a CD1, CD2 or CD3 button. -
Page 17: Basics Of Using The Cd Player - Normal Play
When using the Remote Control, press the £/8 button or the CD1, CD2 or CD3 buttons. The first track of the selected disc will begin playing. The CD Player automatically stops when the playback finishes the last track of the CD. •... -
Page 18: Continuous Play
Normal Play is resumed. When using the Remote Control, press the PLAY MODE button while the CD Player is stopped to select a different Play mode. The “CONT.” indicator goes out and the next Play mode is selected. -
Page 19: Random Play
Normal Play is resumed. When using the Remote Control, press the PLAY MODE button while the CD Player is stopped to select a different Play mode. The “RANDOM” indicator goes out and the next Play mode is selected. -
Page 20: Repeating A Selection Or The Discs
Tray Lock Function In order to safely keep the discs in the CD Player, the three trays can be electronically locked in a single operation. When the electronic lock is on, the trays cannot be opened even if the 0 button is pressed. -
Page 21: Using The Cassette Deck (Listening To A Tape)
Using the Cassette Deck (Listening to a Tape) RM-SMXJ10E REMOTE CONTROL CLOCK TIMER – SELECT SLEEP FM MODE FM/AM PLAY MODE /CLEAR Cassette Deck TAPE REC PAUSE A – TAPE - B control buttons SHIFT SOUND ACTIVE VOLUME MODE BASS EX. Display CONT. -
Page 22: Fast Left And Fast Right
3. Close the holder gently. 4. Press the TAPE ™ £ button (or 2 or 3 button on the Remote Con- FM/AM TAPE To stop playing, press the 7 button. To remove the tape, stop the tape, and press the 0 EJECT button. DECK A/B To change decks while playing a tape, press the TAPE ™... -
Page 23: Using The Cassette Deck (Recording)
Using the Cassette Deck (Recording) RM-SMXJ10E REMOTE CONTROL CLOCK TIMER – SELECT SLEEP FM MODE FM/AM PLAY MODE /CLEAR TAPE REC PAUSE A – TAPE - B REC PAUSE SHIFT SOUND ACTIVE VOLUME MODE BASS EX. Recording onto a cassette from any of the sound sources is simple. Just place a tape in Deck B, have the source ready, make one or two settings, and you’re ready to record. -
Page 24: Standard Recording
Note: At the start and end of cassette tapes, there is leader tape which cannot be recorded onto. Depend- ing on the recording source, the first part of the recording may be missing because of the leader. When recording CDs or radio broadcasts, to get the beginning of the recording on the tape, first wind on the leader before beginning recording. -
Page 25: Cd Direct Recording
1. Prepare CDs. (See page 13.) If the current playing source is not the CD player, press CD £ /8, then 7 of the CD control before going to the next step. 2. Insert a cassette in Deck B to record on. -
Page 26: Using The Timer
Using the Timer RM-SMXJ10E REMOTE CONTROL CLOCK TIMER CLOCK – SELECT – SELECT + FM MODE /CLEAR TAPE REC PAUSE A – TAPE - B SHIFT SHIFT SOUND VOLUME MODE The timers let you control listening and recording functions automatically. Use the Remote Control to set the clock and timers. -
Page 27: Setting The Timer
Setting the Timer You can set the Timer whether the Unit is on or off. Procedure For Setting the Timer SHIFT 1. Press the SHIFT button. 2. Press the TIMER button. TIMER The Timer indicator on the display lights up and the blinking “TIMER ON” changes to the On Time setting display. -
Page 28: Setting The Sleep Timer
8. Press the SET button. – SELECT 9. Press the SELECT + or – button 10. Press the SET button. Before Turning the Unit Off • • To turn the Timer off, press the SHIFT button and then the TIMER button. The Timer indicator on the display goes out. -
Page 29: Care And Maintenance
Care And Maintenance Compact Discs Handle your compact discs, cassette tapes, and Cassette Deck carefully, and they will last a long time. • Remove the CD from the case by holding it at the edges while pressing the centre hole lightly. •... -
Page 30: Troubleshooting
Troubleshooting • If you are having a problem with your System, check this list for a possible solution before calling for service. • If you cannot solve the problem from the hints given here, or the Unit has been physically damaged, call a qualified person, such as your dealer, for service. -
Page 31: Specifications
Specifications Amplifier Output Power 40 watts per channel, min. RMS, both channels driven into 6 ohms at 1 kHz Input Sensitivity/Impedance (1 kHz) Speaker terminals 6 – 16 ohms Tuner FM Tuner Tuning Range 87.50 – 108.00 MHz AM Tuner Tuning Range CD Automatic Changer CD Capacity 3 discs... - Page 32 VICTOR COMPANY OF JAPAN, LIMITED 0699KSMMDWHIT...