JVC MX-GB5 Instructions Manual
Compact component system
Hide thumbs
Also See for MX-GB5:
- Service manual (85 pages) ,
- Instructions manual (66 pages) ,
- Schematic diagrams (24 pages)
Table of Contents
Advertisement
Quick Links
JVC
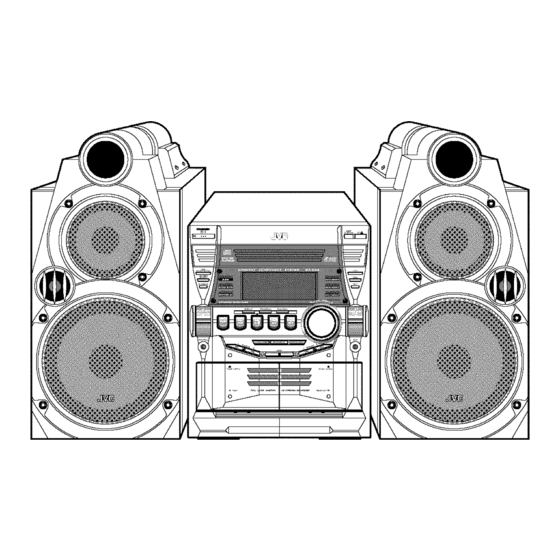
COMPACT COMPONENT SYSTEM
MX-G
B6_onsists
MX-G
BS_onsists
of CA-MXGB6
and SP-MXGB6
of CA-MXGB5
and SP-MXGB5
It
SP°MXGB6
CA-MXGB6
SP-MXGB6
DIGITAL AUDIO
SP-MXG85
CA-MXGB5
SP-MXGB5
DIGITAL
AUDIO
INSTRUCTIONS
For
Customer
Use:
Enter below the Model No. and Serial
No. which are located either on the rear,
bottom or side of the cabinet. Retain this
information for future reference.
Model No.
Serial No.
LVT1188o001C
[4
Advertisement
Table of Contents

Related Manuals for JVC MX-GB5


Summary of Contents for JVC MX-GB5
- Page 1 COMPACT COMPONENT SYSTEM MX-G B6_onsists of CA-MXGB6 and SP-MXGB6 MX-G BS_onsists of CA-MXGB5 and SP-MXGB5 DIGITAL AUDIO SP°MXGB6 CA-MXGB6 SP-MXGB6 DIGITAL AUDIO SP-MXG85 CA-MXGB5 SP-MXGB5 INSTRUCTIONS Customer Use: Enter below the Model No. and Serial No. which are located either on the rear, bottom or side of the cabinet.
- Page 2 Warnings, Cautions and Others Mises en garde, precautions et indications diverses CAUTION To reduce the risk of electrical shocks, fire, etc.: Do not remove screws, covers or cabinet. Do not expose this appliance to rain or moisture. CAUTION: TO REDUCE THE RISK OF ELECTRIC SHOCK.
- Page 3 For Canada/pour le Canada CAUTION: TO PREVENT ELECTRIC SHOCK, MATCH WIDE BLADE OF PLUG TO WIDE SLOT, FULLY INSERT. ATTENTION: POUR EVITER LES CHOCS ELECTRIQUES, INTRODUIRE LA LAME LA PLUS LARGE DE LA FICHE DANS LA BORNE CORRESPONDANTE DE LA PRISE ET POUSSER JUSQUAU FOND.
- Page 4 Introduction We would like to thank you for purchasing one of our JVC products. Before operating this unit, read this manual carefully and thoroughly obtain the best possible performance from your unit, and retain this manual for future reference. AboutThis Manual Power sources •...
-
Page 5: Table Of Contents
Contents Location of the Buttons and Controls ....... Front Panel ..............Remote Control ............Getting Started ............Unpacking ..............Putting the Batteries into the Remote Control ... 6 Connecting Antennas ..........Connecting Speakers ..........Connecting Other Equipment ........Canceling the Display Demonstration ....... -
Page 6: Locationof The Buttonsand Controls
Locationof the Buttonsand Controls Become familiar with the buttons and controls oil your unit. FrontPanel... - Page 7 Continued Display Window ® See pages in the parentheses for details. DISC CHANGE button (13, 15) Disc number buttons (CDI, CD2, trod CD3) (14, 15, 18, FrontPanel 19, 22) [] VII STANDBY/ON button (9, 24, 25) Pressing one ofl these buttons also turns on the unit.
-
Page 8: Remotecontrol
RemoteControl Remote Control [] BEEP ON/OFF button (11) [] SLEEP button (25) BEEP [] Number buttons (12, 16) ON/OFF SLEEP [] TAPE A _ (play) button (9, 20) Pressil_g this bumm also tuttis ol_ the umt. [] VOLUME + button (10) [] FM/AM button (9, 12) this buttot_ also turl*s ot_ the umt. -
Page 9: Gettingstarted
GettingStarted ooot,ouo ...= Unpacking Connecting Antennas FM antenna After unpacking, check to be sure that you have all the following items. The number in the parentheses indicates the quantity of the pieces supplied. FM antenna (supplied) • AM loop antenna •... -
Page 10: Connecting Speakers
AM antenna Connecting Speakers For MX-GB6: DO NOT carry the speaker by holding the tube duct (on the top of the speaker). Vinyl-covered wire (not supplied) FM[75f)] Black Speaker cord Speaker (blue/black) cord (red/black) CMAIN Black AM loop antenna (supplied) Speaker cord Speaker cord (blue/black) -
Page 11: Connecting Other Equipment
Connecting Other Equipment NOW you are ready to plug in the unit and other connected equipment. You can cennect audio equipment--used enly as a playback device. • DO NOT connect any equipment while the power Canceling the DisplayDemonstration is on. •... -
Page 12: Common Operations
Common Operations TurningOnor Oil the Power 3 Press I_lP-Ior _ to adjust the minute, then press To turn on the unit, press _,_/1STANDBY/ON _"_'_/_'=" SET/DISPLAY. so that the standby lamp goes off. rlrl_ rll_ UI-_ rlrll FJhl LIII_1 I__II _1 To turn off the unit (on standby), press doll STANDBY/ON... -
Page 13: Adjustingthe Volume
Continued Adjustingthe Volume Reinforcing the BassSound You c_m adjust the volume level only while the unit is turned This function only affects the playback sound, not your recording. This function only affects the playback sound, not your Press down the SUBWOOFER LEVEL +/- recording. -
Page 14: Selectingthe Soundmodes
Selectingthe SoundModes When using the remote colltrol, press SOUND SOUND MODE MODE to select the sound mode. This function only affects the playback sound, not your • First time you press the button, the current sound recording. mode appears on the display. Each time you press the button while a sound mode appears You ctm select one of the 6 preset sound modes (3 surround... -
Page 15: Listeningto The Radio
Listeningto the Radio On the unit ONLY: Tuningin to a Station--AutoSearch Tune in to the station you want to preset (in this example, of FM 87.50). Tile unit automatically turns on and tunes ill to • See "Tuning in to a Station--Auto Search."... -
Page 16: Playingbackcds
PlayingBackCDs LoadingCDs Tfiis unit has been designed to playback the following CDs: • Audio CD • CD-R (CD-Recordable) Press CD _. _°--" • CD-RW (CD-ReWritable) The unit automatically turns on trod the L_!K. • MP3 disc (MP3 tiles recorded on a CD-R or CD-RW)* carrousel comes out. - Page 17 Continued • Each time you press the button, the indication on the • When the MP3 playback mode is the TRACK mode display changes as follows: (See also page 17.) Current track title scrolls. ALLDISC_ (initial setting) ; ; '_:: :;: 'i *'_1 * See page...
-
Page 18: Basiccd Operations
BasicCD Operations One Disc play When 2 or 3 CDs are loaded on the disc trays, you c_m While playing a CD, you can do the following operations. select one particular disc to be played back. On the unit ONLY: To exchange CDs during playback of another DISO CH_,NOE... - Page 19 Continued To go to another track directly using the number For MP3 disc: buttons When the MP3 playback mode is the TRACK mode For Audio CD: (See also page 17.) Pressing tile number button(s) before or Press I_1_1 or I_1_1before or during ============== during play allows you to start playing playback.
-
Page 20: Changingthe Mp3 Playback Mode
Changingthe MP3 Playback Mode Turning Onor Offthe ResumePlay for MP3 Disc For MP3 disc, this unit ctm store the uumber of the track that When playing an MP3 disc, you ctm choose the playback mode of the MP3 disc as follows: you have stopped playback. -
Page 21: Programming The Playingorder Of The Tracks --Program Play
Continued Programming the PlayingOrder of the Tracks Program other tracks you want. --Program Play • To program tracks from the same disc, repeat step 4. • To program tracks from a different disc, repeat steps 3 You can arrange the order in which the tracks play before and 4. -
Page 22: Playing At Rtmdom--Random Play
Playingat Random--Random Play RepeatingTracksor CDs--Repeat Play The tracks of the selected CD will play at random. You can have all the CDs, the program or the individual track • To use Rtmdom play, you have to cancel Program play. currently playing repeat as mtmy times as you like. -
Page 23: Playingbacktapes
PlayingBackTapes PlayingBacka Tape To stop during play, press l To fast-forward the tape, press I_ (or I_1/1_ on the remote control). The tape running indicator (_) starts 1 Press _ " for the deck you want to use. flashing quickly. To rewind the tape, press _ (or _4/_ on the remote... -
Page 24: Recording
Recording IMPORTANT: Recordinga Tapeon DeckB • It should be noted that it may be unlawful to re-record pre-recorded tapes, records, or discs without On the unit ONLY: consent of the owner of copyright in the sound or video recording, broadcast or cable program and in any 1 Press A for deck B. -
Page 25: Dubbingtapes
DubbingTapes CDSynchronized Recording You can easily record a CD onto a tape. On the unit ONLY: • This function does not work for MP3 discs. When recording an MP3 disc onto a tape, see "Recording a Tape 1 Press TAPE A _, then I1. -
Page 26: Usingthetimers
UsingtheTimers There are three timers available--Daily Timer, Recording 2 Press CLOCK/TIMER again. Timer, trod Sleep Timer. "ON TIME" appears for 2 seconds, then Before using the timers, you need to set the clock built in the the unit enters on-time setting mode. -
Page 27: Usingrecording Timer
Continued UsingRecording Timer 6 Select the preset station number. With Recording Timer, you ctm make a tape of a radio Press I_1_1 or _ to select the broadcast automatically. You can set the timer whether the preset station numbeh then press unit is on or off. -
Page 28: Usingsleeptimer
UsingSleepTimer 4 Set the on-time the unit to turn on. you want With Sleep Timer, you can fall asleep to music. 1) Press I_l_l or _a to set the ,:-- ,, You c_m set Sleep Timer when the unit is turned on. hour, then press SET/DISPLAY. -
Page 29: Maintenance
Maintenance To get the best perform_mce of the unit, keep your discs, tapes, and mech_mism cle_m. Handlingcassettetapes Cleaning the unit • Stains on the unit • If the tape is loose in its cassette, take up the slack by inserting a pencil in one of Should be wiped off with a soft cloth. -
Page 30: Troubleshooting
Troubleshooting If you are having a problem with your unit, check this list for a possible solution before calling for service. If you ctumot solve the problem from the hints given here, or the unit has been physically damaged, call a qualified person, such as your dealer, for service. -
Page 31: Specifications
Specifications subject to change without notice, Amplifiersection--CA-IVlXGB5 Amplifier section--CA-IVlXGB6 Output Power Output Power SUBWOOFERS 170 W per channel, min. RMS, driven into SUBWOOFERS : 160 W per channel, min. RMS, driven into 6 f+ at 63 Hz with no more than 10% total 6 f) at 63 Hz with no nmre... - Page 32 Warranty Period. AIi products and parts • thereof may be brought to a JVC authorized service center on a carryqn basis except for Television sets having a screen size 25 inches and above which are covered on an in-home basis..
- Page 33 QUALITY SERVICE HOW TO LOCATE YOUR JVC SERVICE CENTER TOLL FREE: 1 (800) 537-5722 http:i/www.jvc.com Dear Customer, In order to receive the most satisfaction from your purchase@base read the instruction booklet before operating unitJn event that repairs are necessary, please...
- Page 34 ¢} VICTOR COMPANY OF JAPAN, LIMITED 0104TMMMDWSAM © 2004 VICTOR COMPANY OF JAPAN, LIMITED...