BenQ PU9730 User Manual
Digital projector
Hide thumbs
Also See for PU9730:
- Quick start manual (28 pages) ,
- Installation manual (21 pages) ,
- Installation manual (15 pages)
Table of Contents
Advertisement
Quick Links
Download this manual
See also:
Installation Manual
Advertisement
Table of Contents
Troubleshooting

Related Manuals for BenQ PU9730


Summary of Contents for BenQ PU9730
- Page 1 PU9730 / PW9620 /PX9710 Digital Projector BenQ User Manual...
-
Page 2: Table Of Contents
Table of Contents Important safety instructions ............4 Overview ..................7 Shipping contents ......................7 Projector exterior view ....................8 Front and upper side view........................8 Rear and upper side view ........................8 IO panel ..........................9 Control panel and functions ..................10 Remote control and functions ..................11 Notes on remote controller operation .................... - Page 3 Common problems and solutions ...................... 70 Tips for troubleshooting ........................70 Image problems............................70 Lamp problems ............................71 Remote control problems ........................71 BenQ ecoFACTS ......................72 Copyright ..............................73 Disclaimer ..............................73 Statement regarding hyperlinks and third-party websites ............. 73...
-
Page 4: Important Safety Instructions
Thank you for your purchase of this quality BenQ projector. For the best results, please read this manual through carefully as it is your guide through the control menus and operation. Important safety instructions 1. Please read this user manual before you 4. - Page 5 If the projector does 12. This projector is capable of displaying become wet, disconnect it from the power inverted images for ceiling mount point and call BenQ to have the projector installation. Use only BenQ's Ceiling Mount repaired. Kit for mounting.
- Page 6 13. Never attempt to replace the lamp 15. Do not attempt to disassemble this assembly until the projector has cooled projector. There are dangerous high voltages down and is unplugged from the power inside which may cause death if you should supply.
-
Page 7: Overview
Overview Shipping contents Carefully unpack and verify that you have the items below. Some of the items may not be available depending on your region of purchase. Please check with your place of purchase. Some of the accessories may vary from region to region. The warranty card is only supplied in some specific regions. Please consult your dealer for detailed information. -
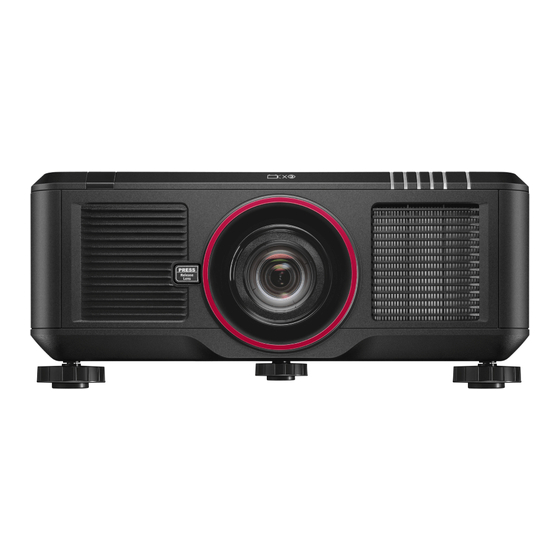
Page 8: Projector Exterior View
Projector exterior view Front and upper side view 1. Front IR sensor 2. Color wheel door 3. Lens release button 4. LED Indication 5. Foot for adjusting projector level 6. AC power switch 7. AC inlet 8. IO panel 9 Control panel 10.Air intake and filter Rear and upper side view 11. -
Page 9: Io Panel
IO panel • HD Connect/Lan For connection to RJ45 Cat5/Cat6 Enthernet cable to input uncompressed high-definition video (HD), control signals. • 3D Sync Out Connection to 3D IR sync signal transmitter. • DVI-D Connection to DVI source. • HDMI Connection to HDMI source. • DisplayPort Connection to device or PC featuring DisplyPort. • Copmuter-1 15-pin VGA port for connection to RGB, component HD source, or PC. -
Page 10: Control Panel And Functions
Control panel and functions • POWER Press to power on/off your projector. • SOURCE Press to select video source including HDMI, DVI, VGA, Component/BNC Composite, DisplayPort or HD Connect. • AUTO Press to execute auto signal sync. • ASPECT Press and hold this button to switch aspect ratio of current image. • MENU Press to hide or display OSD menu. -
Page 11: Remote Control And Functions
Remote control and functions • ON Press to power projector. • OFF Press to power off projector. • FOCUS +/- Press to adjust focus of projection image. • ZOOM +/- Press to zoom in and out on projection image. • TEST PATTERN Press to display test image. -
Page 12: Notes On Remote Controller Operation
Notes on remote controller operation • Some environment factor may hamper the operation of remote controller. If so, point remote controller at the projector and repeat the operation again. • In case the effective range of the remote controller is shortened or stops functioning, please replace the battery with a new one. -
Page 13: Install Remote Controller Battery
Install remote controller battery 1. To open the battery cover, turn the remote control over to view its back, push on the finger grip on the cover and slide it up in the direction of the arrow as illustrated. The cover will slide off. 2. Remove any existing batteries (if necessary) and install two new AA batteries observing the battery polarities as indicated in the base of the battery compartment. -
Page 14: Projection Lens Selection And Installation
Projection lens selection and Installation Note: When installing the lens into the projector, be sure to remove the lens cap from the back of the optional lens before installing the optional lens into the projector. Failure to do so will cause damage to the projector. Installing or removing the optional lens Installing the new lens 1. -
Page 15: Removing The Existing Lens From The Projector
Removing the existing lens from the projector 1. Push the Lens Release button all the way in and rotate the lens counterclockwise, the existing lens will be disengaged. 2. Pull out the existing lens slowly. Note: • Do not shake or place excessive pressure on the projector or the lens components as the projector and lens components contain precision parts. -
Page 16: Choosing A Location
Ceiling Mount Kit from your dealer to Note that a special rear projection screen mount your projector on the ceiling. and the BenQ Projector Ceiling Mount Kit *Set Ceiling Front after you turn the projector on. are required for this installation location. -
Page 17: Projection Distance And Screen Size
79.8 inches (2.03 m) from the wall or screen. The largest the image can be is 500 inches (12.7 m) when the projector is about 1028 inches (26.11 m) from the wall or screen. Lens center Projector bottom Height (B) SCREEN Distance (A) PU9730 Screen Size 5J.JAM37.011 5J.JAM37.021 5J.JAM37.001 5J.JAM37.051 Wide Fix Lens... - Page 18 PW9620 Screen Size 5J.JAM37.011 5J.JAM37.021 5J.JAM37.001 5J.JAM37.051 Wide Fix Lens Wide Zoom Lens STD Lens Semi long Zoom1 Diagonal Width Height(B) Distance(A) Wide Tele Wide Tele Wide Tele (inch) (inch) (inch) (inch) (inch) (inch) (inch) (inch) (inch) (inch) 1.02 0.86 0.54 26.4 0.67...
- Page 19 PX9710 Screen Size 5J.JAM37.011 5J.JAM37.021 5J.JAM37.001 5J.JAM37.051 Wide Fix Lens Wide Zoom Lens STD Lens Semi long Zoom1 Diagonal Width Height(B) Distance(A) Wide Tele Wide Tele Wide Tele (inch) (inch) (inch) (inch) (inch) (inch) (inch) (inch) (inch) (inch) 1.02 0.81 0.61 24.5 0.62...
-
Page 20: Lens Shift Adjustable Range
Lens shift adjustable range The adjustable range for lens shift is tabulated below and subject to the conditions listed. Note The drawings below apply to the standard lens only. Normalprojectionposition Desk-FrontProjection Vertical Shift 0.5V Height of projected image 0.1H 0.1H Width of projected image CeilingMount-FrontProjection Height of projected image... -
Page 21: Making Connections
Making connections Preparations When connecting a signal source to the projector, be sure to: 1. Turn off all equipment before making any connections. 2. Use only the correct type cables for each source with proper type plugs. 3. Ensure that all cable plugs are firmly fitted to the equipment jacks. Note that all cables shown in the following connection diagrams may not be supplied with the projector (See "Shipping contents"... -
Page 22: Connect To Video Equipment
Connect to video equipment You may connect any video equipment to your projector’s input port with a DVI-D, HDMI, DisplayPort or YPBPR cable. Connect to control port Your projector features the following control ports: 3D sync signal transmitter (IR) • HD CONNECT/LAN Your projector supports network control with shared LAN (network control) and HD Connect. -
Page 23: Connect To Screen Trigger
Connect to screen trigger You may connect a projector screen or other 12V trigger device to the projector and turn on trigger output in OSD Control->Trigger. The trigger port supplys the 12 V signal after the projector is powered on. After the projector is powered on it outputs 12V signal be adhere to current aspect ratio and screen control settings for projector screen control. -
Page 24: Connect To External Digital Transmitter
RS-232, LAN signal to projector with single RJ-45 cable. If the optional digital transmitter supports IR remote controller I/O, you may also send IR remote controller signal to PU9730/PW9520/PX9610 projector using the same RJ-45 cable. DVD Player... -
Page 25: Using The Projector
Using the projector Preparations 1. Plug in and turn all of the connected equipment on. 2. If not already in, plug the supplied power cable into the AC inlet on the rear of the projector. 3. Plug the power cable into a wall power outlet and turn the wall switch on. Note: Please use the original accessories (e.g. -
Page 26: Turning The Orojector On Or Off
Turning the orojector on or off Once the projector is correctly located and the power cable and other connections are in place, it is important that the projector is connected and powered on correctly in order to avoid possible dangers such as electric shock and fire. Refer to the following guide to power on the projector. 1. -
Page 27: Selecting An Input Source
Selecting an input source The projector can be connected to multiple equipment at the same time. When the projector is first turned on, it will attempt to reconnect with the input source which was in use when the projector was last shut down. The Input Source can be selected from the projector's control panel or from the remote control. Refer to the following guide to select the desired input source 1. -
Page 28: Using The Menus
Using the menus The projector is equipped with multilingual On-Screen Display (OSD) for making various adjustment and settings, below is the overview of the OSD menu. To use the OSD menu, please set the OSD menu to your familiar language. Main menu DISPLAY Direct Power On... -
Page 29: Adjusting The Projected Image
Adjusting the projected Image Adjusting the image position The projected image position and Size can be adjusted manually from the control panel or the remote control unit. Refer to the following guides to adjust Picture Position manually. 1. Press the LENS SHIFT key on the projector in any direction or LENS SHIFT key on the remote control to bring up the Lens Shift window. -
Page 30: Adjusting The Projection Angle
Adjusting the projection angle There are three adjuster feet on the bottom of the projector, these can be used if necessary to change the projection angle. Screw the feet in or out as appropriate to aim and level the projection angle. -
Page 31: Correcting Picture Distortion
Correcting picture distortion When the image is projected either from the top or from the bottom towards the screen at angle, the image becomes distorted trapezoidally. Keystone function in the ALIGNMENT>Keystone can be used to correct trapezoidal distortion, press ◄/► button to correct trapezoidal distortion till you are satisfied with the shape. -
Page 32: Turning Off The Projector
Turning off the projector If the projector is no longer required, it is important to shut it down correctly to avoid damage or unnecessary wear and tear to the projector. Refer to the following guide to turn the projector Off. • Do not unplug the power cable from the wall outlet or projector when the projector is powered on, it may cause damage to the AC IN connector of the projector and (or) the prong plug of the power cable. -
Page 33: Using On-Screen Display
Using On-Screen Display Using the Menus The projector has an On-Screen Display (OSD) that lets you make image adjustments and change various settings. Navigating the OSD You can use the remote control or the buttons on the top of the projector to navigate and make changes to the OSD. -
Page 34: On-Screen Display (Osd) Menus
On-Screen Display (OSD) menus Use the following illustrations to quickly find a setting or determine the range for a setting. Please note that the on-screen display (OSD) menus vary according to the signal type selected. Main menu Sub-menu DISPLAY Source HDMI DVI-D Computer-1 Computer-2 DisplayPort HD Connect Test Pattern Color Bar/Crosshatch/Burst/Red/Green/Blue/White/ Black/H RampUncorrected Red/Uncorrected Green/ Uncorrected Blue/Uncorrected White/Uncorrected Black/Off Color Space... - Page 35 Main menu Sub-menu PICTURE Trim Red Gain Green Gain Blue Gain Green Blue Cyan Magenta Yellow Saturation Green Blue Cyan Magenta Yellow Gain Green Blue Cyan Magenta Yellow White Balance Green Blue Sharpness Noise Reduction Aspect Ratio 16:10 16:9 1.88:1 2.35 LetterBox Auto...
- Page 36 Main menu Sub-menu LAMP Power Normal Custom Power Level High Altitude Lamp 1 Status Lamp 2 Status ALIGNMENT Projector Installation Front Table Rear Table Front Ceiling Rear Ceiling Up + Front Down + Front Lens Control Zoom Focus Shift V Shift H Lens Memory Load Memory...
- Page 37 Main menu Sub-menu CONTROL RS232 Channel Local HD Connect Startup Logo Trigger 16:10 16:09 1.88 2.35 Letter Box Native Auto Search Dynamic Black 3D Format Auto Side by Side Top/Bottom Frame Sequential DLP Link 3D Swap Normal Reverse 3D 24Hz Display 96Hz 144Hz Language English, Deutsch, Español, Français,...
-
Page 38: Osd Menu - Display
OSD menu - DISPLAY DISPLAY Source • Source This functions is the same as the Hotkey on your remote controller. You can select the desired input source with the remote controller or this function. HDMI This is the terminal to input HDMI signals from PC or media device. DVI-D his is the terminal to input DVI-D signals from PC. - Page 39 RGB-Video: Set color space to RGB with black set to 16, 16, 16 and white to 235, 235, 235 (for 8-bit image) to comply with brilliance value defined in digital component standard. • Input Lock This function locks up one input source to the internal sync signal (Auto, 48Hz, 50Hz, or 60Hz). The Auto option would lock up the sync signal to the current signal source.
-
Page 40: Osd Menu - Picture
OSD menu - PICTURE DISPLAY Dynamic • Picture Mode Press ◄► arrow key to select display mode. Dynamic: Output in the highest brightness for application that requires higher brightness Presentation: Display the best image effect for presentation or static image projection. Cinema: Display in best color effect for film playback. -
Page 41: Noise Reduction
• Color Press ◄► arrow key to adjust color temperature of image. • Sharpness Press ◄► arrow key to adjust values of high frequency details. • Noise Reduction Press ◄► arrow key to adjust noise of projection image. This function helps eliminating image noise caused by interlaced scanning input. -
Page 42: Osd Menu - Lamp
OSD menu - LAMP DISPLAY • Mode Press ◄► arrow key to select single or dual lamp mode. Dual: Enable the dual-lamp projection mode. Lamp 1: Select lamp1 only for projection. The projector switches to lamp 2 if lamp 1 is abnormal in activation. -
Page 43: Osd Menu - Aligment
the internal heat energy out of the projector and ensure its normal operation. However, the projector may turn off automatically if it is used in an environment at excessively high temperature or in an area at a high altitude. In this case, you can enable this function by setting it to ON and have the cooling fan operate at a higher speed to control the internal temperature of the projector. - Page 44 menu, press ◄► arrow key focus the projected image or shift the lens in horizental direction, and ▲▼ to zoom the projection size or shift the lens in vertical direction. • Lens Memory The projector can memorize up to 10 zoom, focus, and lens shift settings. You can give each group of settings a unique name with the virtual keyboard.
- Page 45 • Change lens memory name: Your lens memory has a default name in the format of "Memory_NN" where NN is any number from 00 to 99. You may press Backspace key to erase characters shown in dialog box, press Caps key to toggle switch between upper and lower case, ▲▼◄►...
-
Page 46: Osd Menu - Control
V Zoom: Use ◄► to narrow the vertical size of the projected image. H Shit: Use ◄► to move the narrowed projected image horizontally. This function is only available when the projected image is narrowed. V Shift: Use ◄► to move the narrowed projected image vertically. This function is only available when the projected image is narrowed. - Page 47 DISPLAY Direct Power On Press ▲▼arrow and Enter key to select network and its settings: IP Address: To specify an IP address, press the Enter button to show the IP address input window. Use the ◄► button to select the number in the address to be changed. Use the ▲▼button to increase or decrease the number in the IP address.
- Page 48 • Startup Logo Press ◄► arrow key to enable /disable the startup logo function. • Trigger The projector features one trigger output. If the projector comes with an auto screen device, you can connect it to the trigger to open the screen when the projector powers up. This function may have a 2-3 second lag before powering up.
-
Page 49: Osd Menu - Service
Caution: The projector supports DLP Link and 3D IR sync. After 3D mode is enabled, you can sync the signal of 3D glasses with both built-in DLP Link and external 3D IR transmitter or close the former and rely on the latter for 3D signal sync. - Page 50 • Pixel Clock Display pixel clocking of current input signal. • Signal Format Display signal format of current input signal. • H/V Refresh Rate Display horizontal and vertical refresh rate of current image. • Lamp 1 Time Show use hours of lamp 1. After replacing a new lamp the hour counter resets to zero. • Lamp 2 Time Show use hours of lamp 2.
-
Page 51: Additional Information
Additional information Cleaning the lens Clean the lens whenever you notice dirt or dust on the surface. Before you attempt to clean the lens, turn the projector off, unplug the power cable, and leave it several minutes to cool completely. Use a canister of compressed air to remove dust. (Available from building hardware or photographic suppliers.) If there is stubborn dirt or smudge marks, use a proper photographic lens brush or moisten a cleansoft lens cloth with lens cleaner to gently wipe the lens surface. -
Page 52: Replacing The Lamp
Replacing the lamp The projection lamps should be replaced when they burn out. They should only be replaced with a certified replacement part, contact your local dealer if unsure. • Lamps are positioned differently. Take care not to force the lamps when replacing. • Installation of both lamp modules (Lamp 1 and Lamp 2) is required to operate the projector in dual or single lamp mode. - Page 53 4. Insert a new lamp according to orientation 1. Power off and unplug the projector power cord. Remove the lamp module to of the old one. be replaced after it cools down and the temperature of its lamps and peripheral components falls.
-
Page 54: Installing The Optional Color Wheel
Installing the optional color wheel The projector comes with a bright-type color wheel installed, an additional color-type color wheel is optional. To replace the color wheel (located under the lamp cover adjacent to lamp 1) refer to the following guide. 1. -
Page 55: Replacing The Filter
Replacing the filter Dirtiness and replacement time for filters varies with the environment. Please check the filter regularly to get the best projector performance. Caution: A dirty filter impedes volume of air flowing into the projector which, in turn, leads to system protection enabling or component damage caused by overheating. Please check, remove dust or replace the filter. 1. Open up the left or right front filter cap. 3. Insert a new filter. 2. Remove the used filter. 4. Cap the front cover and it's done. -
Page 56: Specifications
Specifications Model PU9730 PW9620 PX9710 Display Device 0.67”, 1-DLP Chip 0.65”, 1-DLP Chip 0.7”, 1-DLP Chip WUXGA WXGA Resolution HDMI (Compatible with HDCP) DVI-D (Compatible with HDCP) Display Port Input Terminals (Compatible with HDCP) Computer-2 (5BNC) Computer-1 (D-sub 15p) Monitor Out... -
Page 57: Dimension
Dimension... -
Page 58: Timing Chart
Timing chart The following table shows compatible signal types, their resolution and frequency refresh rates. Horizontal: 15kHz, 31kHz to 90 kHz, Vertical: 50 Hz to 85 Hz PC timing Component HDMI/HD Signal Frame Connect Resolution DVI-D DisplayPort Type Rate RGBHV YUV RGBHV YUV 640x480 59.94 640x480... -
Page 59: 3D Supported Timing
Component HDMI/HD Signal Frame Connect Resolution DVI-D DisplayPort Type Rate RGBHV YUV RGBHV YUV 480p 59.94 576p 1080i 1080i 59.94 1080i 720p 720p 59.94 720p EDTV 1080p 23.98 1080p 1080p 1080p 29.97 1080p 1080p 1080p 59.94 1080p 3D supported timing Signal Frame Resolution... - Page 60 Signal Frame Resolution Frame Packing Side by Side Top / Bottom Fram Sequential Type Rate 1080i 59.94 1080i 720p 720p 59.94 720p EDTV 1080p 23.98 1080p 1080p 1080p 59.94 1080p • An image with higher or lower resolution than the projector’s native resolution will be compressed. • Some Sync on Green signals may not be displayed correctly.
-
Page 61: Rs232 Command Control
RS232 command control Function Type Description ASCII Write Power On <CR>*pow=on#<CR> Write Power off <CR>*pow=off#<CR> Power Read Power Status <CR>*pow=?#<CR> Write COMPUTER/YPbPr <CR>*sour=RGB#<CR> Write COMPUTER 2 <CR>*sour=RGB2#<CR> Write DVI-D <CR>*sour=dvid#<CR> Source Write HDMI <CR>*sour=hdmi#<CR> Selection Write DisplayPort <CR>*sour=dp#<CR> Write HD Connect <CR>*sour=hdconnect#<CR>... - Page 62 Write Digital Zoom In <CR>*zoomI#<CR> Write Digital Zoom out <CR>*zoomO#<CR> Picture Setting Write Auto <CR>*auto#<CR> Write Projector Position-Front Table <CR>*pp=FT#<CR> Write Projector Position-Rear Table <CR>*pp=RE#<CR> Write Projector Position-Rear Ceiling <CR>*pp=RC#<CR> Write Projector Position-Front Ceiling <CR>*pp=FC#<CR> Write Projector Position-up Front <CR>*pp=UF#<CR> Write Projector Position-down Front <CR>*pp=DF#<CR>...
- Page 63 Read Model Name <CR>*modelname=?#<CR> Write Blank On <CR>*blank=on#<CR> Write Blank Off <CR>*blank=off#<CR> Read Blank Status <CR>*blank=?#<CR> Write Freeze On <CR>*freeze=on#<CR> Write Freeze Off <CR>*freeze=off#<CR> Read Freeze Status <CR>*freeze=?#<CR> Write Menu On <CR>*menu=on#<CR> Write Menu Off <CR>*menu=off#<CR> Read Menu Status <CR>*menu=?#<CR> Write <CR>*up#<CR>...
-
Page 64: Control The Projector Through A Network
Control the projector through a network Set up the projector for networking DISPLAY Direct Power On Caution: Please set DHCP option to Off and select Apply to activate it. The DHCP service assigns an IP address and settings. The IP address, Subnet and Gateway options will be dimmed and not available for selection. If the LAN does not support DHCP service, please press ▲▼... -
Page 65: Control The Projector Through A Web Browser
Control the projector through a web browser Open a web browser and enter the projector's IP address. Its home page with four options will display: Projector Status: Current projector settings. Alert Mail Setup: Settings for projector abnormality email reminders. In case of any abnormality the projector sends emails to preset users. -
Page 66: Alert Mail Setup
Alert mail setup The projector can send alert messages with Email to predefined users. Make the following settings before enabling this function: SMPT Sever : Set up name of SMTP server for the projector's sending reminder email. Port : Set up transmission port User Name : Set up user name for the projector's sending reminder email through SMTP server. -
Page 67: Crestron Control Page
Crestron control page Click the Crestron option in your projector’s home page to display its control page in a new tab. Power: Press to power on or off your projector. Source List: Switch among list of available projector input signal sources. Press the ▲ (at top of screen) or ▼... - Page 68 Zoom: Zoom in on the projection image. Click "+" key to zoom in and "-" to zoom out. Click the four arrow keys in the window to move the zoomed projection image. Control key window This window simulates keys on the remote controller and control panel. Enter: Confirm the changes and select the OSD option Menu: Press to display the OSD menu.
-
Page 69: Troubleshooting
Troubleshooting Indicator messages Several indicator messages are used by the projector to alert users of problems with setup or system error. The LEDs on top cover of the projector are as below illustration. Power LED indicator LED display Projector status Operation tips Close AC power turned off... -
Page 70: Common Problems And Solutions
Common problems and solutions These guidelines provide tips to deal with problems you may encounter while using the projector. If the problem remains unsolved, contact your dealer for assistance. Often the problem is something as simple as a loose connection. Check the following before proceeding to the problem-specific solutions. • Use some other electrical device to confirm that the electrical outlet is working. • Ensure the projector is turned on. • Ensure all connections are securely attached. -
Page 71: Lamp Problems
Problem: The image is flat with no contrast 1. Adjust the Contrast setting on the Picture menu of the OSD. 2. Adjust the Brightness setting on the Picture menu of the OSD. Problem: The color of the projected image does not match the source image. Adjust the Color temperature and Picture settings. -
Page 72: Benq Ecofacts
BenQ ecoFACTS BenQ has been dedicated to the design and development of greener product as part of its aspiration to realize the ideal of the "Bringing Enjoyment 'N Quality to Life" corporate vision with the ultimate goal to achieve a low-carbon society. Besides meeting international regulatory... -
Page 73: Copyright
Any third party content or service preinstalled in this product is provided "as is". BenQ does not, by expression or by implication, make any warrant to the content or to the services provided by third parties.