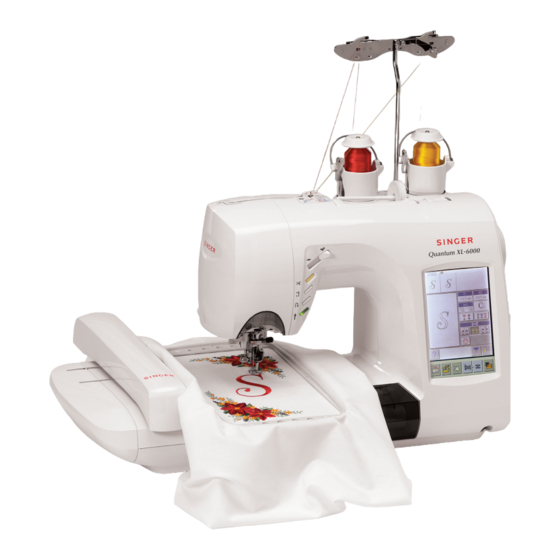
Singer Quantum XL-6000 Workbook
Hide thumbs
Also See for Quantum XL-6000:
- List of parts (51 pages) ,
- Instruction manual (136 pages) ,
- Instruction manual (136 pages)
Table of Contents
Advertisement
Advertisement
Table of Contents

Related Manuals for Singer Quantum XL-6000


Summary of Contents for Singer Quantum XL-6000
- Page 1 QUANTUM XL-6000 ® Workbook 0639_SS_XL6000_WRKBK 6/9/04, 3:47 PM...
-
Page 2: Table Of Contents
Pictograms on the Embroidery Screen..…………………………………… Smart Cards..………………………………………………………………………. Combination Embroidery..…………………………………………………….. Multiple Hoop Embroidery.……………………………………………………. Memory in Embroidery…………………………………………………………. Continuous Hoop Attachment………..……………………………………... 49 Conversion Software……………………………………………………………… **Thank you to Singer USA Education Department and Singer Sourcing for developing this Workbook** ® ® ™ ™ Singer , Quantum... -
Page 3: Sewing Machine Section Of Quantum
Quantum XL-6000 ® SEWING MACHINE SECTION... -
Page 4: Principal Parts Of The Machine
Quantum XL-6000 ® Principal Parts of the Machine - 1 -... -
Page 5: Quantum ® Xl
Quantum ® XL-6000 Operation Keys When this key is pressed “stitching procedure” is shown on LCD Screen Used to save and recall patterns and letter strings Used to change thread tension, stitch length, needle position and zigzag width Used to automatically thread sewing machine Used to automatically wind a bobbin Used to pause to take a break during embroidery sewing. -
Page 6: Pattern Category Screens
Quantum XL-6000 ® Pattern Category Screens The Quantum XL-6000 has a 256 color 3-D appearance LCD screen. All ® commands are input with a light touch on the LCD Screen. Do not press on the screen*. The Utility Patterns are provided on four different screens. Initial Screen First Utility Screen Touch lightly on... -
Page 7: Help Screens
Quantum XL-6000 ® Help Screens The Help Screens give different types of guidance including Machine Usage, Advice, and Sewing Methods. Each “guidance” category gives detailed information and easy-to-understand graphics. Turn the machine on and touch anywhere on the screen. Stitching Procedure (Obtain information on “how to sew” methods) Select STRAIGHT STITCH. -
Page 8: Pictograms And Color-Coded Screens
Quantum XL-6000 ® Pictograms and Color-coded Screens Now is the time to scroll through the vast assortment of Stitch Patterns available on the ® ® Quantum XL-6000. The Stitch Selection Process of the Quantum XL-6000 is a simple touch of the Pictograms which is all it takes to change groupings and select Stitch Patterns. All Stitch Patterns are grouped by general function and are color coded for easy identification. -
Page 9: Operation Pictograms
Quantum XL-6000 ® Operation Pictograms Used to vertically invert - turn over - a pattern Used to mirror image a pattern Used to select straight stitch and to return quickly to “Utility Stitch Pattern” screen (green) Used to activate “Large Decorative Pattern” screen (orange] and leads to Small Decorative Patterns and Alphabets Pattern Elongation - Change visible on screen Pattern Positioning... -
Page 10: Knee Lifter And Screen Brightness
Quantum XL-6000 ® Knee Lift and Screen Brightness Knee Lift The Knee Lift attachment fits into the slot, located at the front of the machine just below the LCD screen. It is used to raise and lower the presser foot, when the presser foot is down. -
Page 11: Automatic Threading
Quantum XL-6000 ® Automatic Threading Automatic Threading in Regular Sewing Machine Mode: Align mark on handwheel with mark on machine. 1. Place the spool of thread and Spool Cap onto the spool pin. Horizontal Spool Pin 2. Use both hands to pull the thread into the primary thread guide. Note: This thread guide is only used with the horizontal spool pin. -
Page 12: Manual Threading
Quantum XL-6000 ® Manual Threading Align mark on handwheel with mark on machine. Remove thread from thread path. Align mark on handwheel with mark on machine. Raise presser foot lifter. Open faceplate cover. Place thread and spool cap onto spool pin. Draw thread toward you with both hands. -
Page 13: Wind-In-Place Bobbin System
Quantum XL-6000 ® ™ Wind-in-Place Bobbin System The Wind-in-Place Bobbin System feature is for ™ regular sewing mode only, as it winds the bobbin from the top spool directly to the bobbin. The Endless Bobbin feature is for Embroidery Sewing. ™... - Page 14 Quantum XL-6000 ® ™ Wind-in-Place Bobbin System Hold the thread taut and pass it under the presser foot. Lower the presser foot and pull the thread into the Thread End Retaining Spring. Thread End Retaining Spring Press the bobbin-winding pictogram on the LCD screen.
-
Page 15: Manual Bobbin Winding
Singer branded bobbins. Generic ® bobbins may be a different size and weight. Additionally, Singer ® does not endorse the use of pre-wound bobbins. Place a spool of thread on the spool pin and place the spool cap securely in place. -
Page 16: Machine Thread Exchanger
XL-6000 ® ™ Auto Thread Exchanger in Regular Sewing Mode The Auto Thread Exchanger is a ™ Singer Exclusive Feature that ® may be used semi-automatically on the Sewing Machine side and fully automatically Embroidery Side of the Quantum ®... - Page 17 Quantum XL-6000 ® ™ Auto Thread Exchanger in Regular Sewing Mode 3. Stage Left Thread through Mast and through Exchanger Thread Guide A… Thread the mast as illustrated This Specific Thread Guide must be used. Failure to use will cause failure when rewinding.
-
Page 18: Tension, Odometer, Needles
3,000,000 stitches. To access Odometer: touch key, then pictogram, then pictogram. Sewing Machine Needles: SINGER has developed a new style needle for use in the Quantum XL-6000 ® ® and other top quality sewing machines. These chromium needles are available in Universal/Round Point Style 2000 and Ball Point Style 2001 in sizes 11/80, 14/90 and 16/100. -
Page 19: Standard Machine Operation
Quantum XL-6000 ® Standard Machine Operations Utility Stitches Turn the machine on and touch anywhere on the “Welcome Screen” to begin. Note: The sewing speed of the Quantum XL-6000 is 850 stitches per minute ® for straight stitch regular sewing. Exercise #1 –... - Page 20 Quantum XL-6000 ® Standard Machine Operations Buttonholes (18 built-in buttonholes) Exercise #1 – Large Buttonhole Select Folder 2, Row 1, Buttonhole 3. Place thread in needle and bobbin. Attach buttonhole foot “E” onto machine. Fold the woven fabric in half, cross-wise, placing interfacing between layers.
- Page 21 Quantum XL-6000 ® Standard Machine Operations Continuous Pattern Sewing Exercise #1 – Pin Stitch Fabric preparation: Apply a heart-shaped piece of fabric onto a 4” x 4” piece of background fabric using fusible web or fabric spray adhesive. Select PIN-STITCH - Continuous Patterns (rose-colored) screen - Folder 1, Row 2, Stitch 1.
-
Page 22: Large And Small Decorative Patterns
Quantum XL-6000 ® Large and Small Decorative Patterns Large Decorative Patterns Exercise #1 – Balance A Pattern Place the Decorative stitch foot (T) on the machine. It is recommended that a test sample of a chosen pattern be sewn using the same fabric, interfacing and thread before sewing on the finished project. - Page 23 Quantum XL-6000 ® Large and Small Decorative Patterns Small Decorative Stitches Select Folder 7 – (Purple screen) Exercise #1 – How To Elongate A Stitch Touch and hold the Trash Can Pictogram, to delete all patterns from the screen. Touch the ABC Pictogram in the lower right of the LCD screen. Select the Crescent Stitch, Folder 7, Row 1, Stitch 1.
-
Page 24: Built-In Lettering
Letters Punctuations Upper case Lower case SINGER. Program the word At this point if everything is to your liking, you may start sewing. To delete the last letter entered, touch the Trash Can. Use “Eyeglass” pictograms to move the vertical orange cursor in the top screen. -
Page 25: Memory In Regular Sewing Machine Mode
Quantum XL-6000 ® Memory MEMORY IN STANDARD SEWING MACHINE There are 20 Memory Folders available within the machine when in the standard sewing mode. Each one of the folders holds up to 120 entries. To save a stitch sequence: 1. Touch the Operation Key. -
Page 26: Embroidery Section Of Quantum
Quantum XL-6000 ® EMBROIDERY SECTION - 23 -... -
Page 27: Categories Of Built-In Embroideries
Quantum XL-6000 ® Categories of Built-in Embroideries 3 Extra-Large Floral Arrangement Designs (Folder 1, 2, & 3) (Green screen) 2 Large Floral Border Designs with Matching Corners [Total 4 Designs] (Folder 10) (Green screen) 6 Long Floral Borders (Folder 11) (Green screen) (Folders 1, 2, &... -
Page 28: Auto Thread Exchanger
Quantum XL-6000 ® ™ Auto Thread Exchanger When the sewing machine is set up in the automatic rewind mode, the Auto Thread Exchanger automatically rewinds the ™ Color 1 upon completion of stitching. Color 2, already set up on the Auto Thread Exchanger , will automatically thread ™... -
Page 29: Endless Bobbin
Quantum XL-6000 ® ™ Endless Bobbin Automatic rewinding of bobbin during embroidery: How the Endless Bobbin Works ™ *When the bobbin has run out of thread while machine is engaged in sewing an embroidery pattern, the machine will reposition the embroidery frame and will start the Endless Automatic Bobbin Winding Sequence. - Page 30 Quantum XL-6000 ® ™ Endless Bobbin Thread the first thread guide. Install the Bobbin Winder Threading guide. Follow the Threading Track around all the turns and thread points [1] though [5]. At numbered positions 1 ~ 3, lightly pull thread to assure it slips into position.
-
Page 31: Pictograms On The Embroidery Screen
Quantum XL-6000 ® Pictograms on the Embroidery Screen Used to activate the Layout Screen, or return to Layout Screen. Used to Combine patterns in a Single or Multiple Hooping. Used to delete an individual pattern or letter. Clears all entered designs or letters when pictogram is touched for 5 seconds or longer. -
Page 32: Smart Cards
Quantum XL-6000 ® SmartMedia Cards ® The Quantum XL-6000 uses SmartMedia Cards to store embroidery designs. A large selection of Cards is available. Open the card cover. Hold the embroidery card with its notched edge to the lower left. Insert the card. Be sure to close the door or the embroidery card will not work. -
Page 33: Combination Embroidery
Quantum XL-6000 ® Combination Embroidery Combination Embroidery is used for arranging design elements to be sewn within a single hooping. The sewing field size of the hoop area in Combination Embroidery is 140mm x 240mm (approximately 5.5 x 9.5 inches). IMPORTANT: The footprint of Machine Set Up: ®... - Page 34 Quantum XL-6000 ® Combination Embroidery The Hoop Pictogram allows the choice of Hoop Size (large, medium or small), Multi-Hoop or Continuous Hoop. Touching this Pictogram automatically selects the default large hoop size. Return to the Edit screen by touching the Pictogram.
- Page 35 Quantum XL-6000 ® Combination Embroidery 12. Return to the Edit screen with the Pictogram. 13. Touch the Pictogram (center pictogram in Edit column). 14. This screen allows the size of the design to increase up to 120%, or decrease to 90%, by touching a specific % Pictogram on screen.
-
Page 36: Editing Lettering
Quantum XL-6000 ® Combination Embroidery Spell out by touching the word ‘Singer’ (one letter at a time) using upper and lower case letters. Touch the Pictogram to Enter. EDITING LETTERING Touch the Letter-sizing Pictogram in the Editing column. Note: Text can be easily increased or decreased in size by increments of 5mm. - Page 37 Pictogram, located to the left of the Smart Card Pictogram. This will put a “break” between the word “Singer” and the next line of text to be entered, in order that they may be edited as 2 separate groups of stitches.
- Page 38 Quantum XL-6000 ® Combination Embroidery 21. Touch the Pictogram to Enter. 22. The word is highlighted, so it may now be edited. Touch the Letter-sizing Pictogram and change the size to 18mm. 23. Touch the ‘minus’ Pictogram (just below the size pictograms) 2 times, to bring the letters closer together.
- Page 39 Quantum XL-6000 ® Combination Embroidery To Edit a design element, place the cursor to the immediate right of the design to be edited, as it appears in the display area of the upper screen. This designated element will now be highlighted within the “hoop” area on screen.
- Page 40 Quantum XL-6000 ® Combination Embroidery • Touch , to return to the previous screen. • Lower the Embroidery foot and resume sewing. PREPARING TO SEW THE COMBINATION DESIGN Place the fabric in the embroidery hoop, and then place the hoop onto the embroidery unit.
- Page 41 Quantum XL-6000 ® Combination Embroidery 12. While color #3 is sewing the last part of the flower, stage the Auto Thread Exchanger with color #4 [red] for the text. 13. Touch then touch 14. Touch Pictogram – touch start button to sew the text from the design layout in red.
- Page 42 Always use Bobbin Fill Thread in your bobbin. Bobbin fill is lighter in weight, providing for less dense stitching on the back side of the embroidery. o Always use Singer Chromium Needles, Style 2000 or 2001 in size 11/80 ®...
-
Page 43: Multiple Hoop Embroidery
Quantum XL-6000 ® Multiple Hoop Embroidery Large design layouts are easily accomplished with the Multiple-Hoop function of the Quantum XL-6000. Design layouts too large to fit within a single hoop ® can be sewn in sections, while maintaining perfect alignment and placement. The joining of the sections is smooth, simple and accurate using the X-Y Axis feature. - Page 44 Quantum XL-6000 ® Multiple Hoop Embroidery Touch the Pictogram to arrange letters vertically. Touch Pictogram to change the orientation of the letters from portrait to landscape in the hoop. Touch Pictogram. Letters appear within a single hoop-sized area. To go to Hoop selection screen, touch (top right Pictogram).
- Page 45 Quantum XL-6000 ® Multiple Hoop Embroidery Use “left” Arrow Pictogram to move border to the left in 23 moves. Use “up” Arrow Key to move border up, until bottom of the border touches the X-axis on screen. To check placement, touch Pictogram.
- Page 46 Quantum XL-6000 ® Multiple Hoop Embroidery 9. Touch Pictogram again. 10. Use “left” Arrow Pictogram to move design to the left, then the “down” Arrow Pictogram to move design down. Borders should line up vertically as one long border. 11. To check placement, touch the Pictogram.
- Page 47 Quantum XL-6000 ® Multiple Hoop Embroidery 10. Touch to return to the Edit screen. 11. Touch to combine with another border. Select Border #3 again. Touch Pictogram (border appears in center of screen). Touch Pictogram. Touch Rotate Pictogram. Touch 100 degrees, then touch 10 degrees a total of 8 times, until the angle of rotation displayed reads 180 degrees.
- Page 48 Quantum XL-6000 ® Multiple Hoop Embroidery DEFINE AN AREA TO BEGIN EMBROIDERING 1. Use the arrow keys to move the “Hoop” on screen, to select the 1 area to be embroidered. 2. Select OK. 3. Place fabric in hoop, so X and Y axis lines drawn on the fabric are set in the hoop in similar placement to the display on screen.
- Page 49 Quantum XL-6000 ® Multiple Hoop Embroidery Specifying Point b on the Y-axis line: 1. Touch on screen at the opposite end of the vertical line, to move the frame. 2. If needle is not directly on the vertical line, use the Position Keys on the sewing machine screen, to move the needle until it is directly over the vertical line drawn on the fabric.
- Page 50 Quantum XL-6000 ® Multiple Hoop Embroidery Specifying Point d on the Y-axis line: 1. Touch on screen at one end of the vertical line, to move the frame. 2. If needle is not directly on the vertical line, use the Position Keys on the sewing machine screen to move the needle until it is directly over the vertical line drawn on the fabric.
-
Page 51: Memory In Embroidery
Quantum XL-6000 ® Memory in Embroidery There are 32 memory folders available within the machine when in embroidery mode. Each one of these folders can hold as much as 180,000 stitches. Each file folder stores all stitch data from a design layout. Since all stitch data is saved, it is not necessary to place memory cards in the machine so that stitch data can be retrieved. -
Page 52: Continuous Hoop Attachment
Quantum XL-6000 ® Continuous Hoop Attachment The Quantum XL-6000 comes with the Continuous Hoop Attachment. You ® can create borders for garments and home decorator projects. Heirloom insertions can be created at a fraction of the cost of purchased Swiss insertions, by embroidering borders on organza or batiste. - Page 53 Quantum XL-6000 ® Continuous Hoop Attachment CREATING ORIGINAL OBRDER DESIGNS FOR THE CONTINUOUS HOOP The optional Professional Sew-Ware 2.00a has a function that provides for ™ creating original borders. The software will automatically insert the “marking” stitches, which indicate the “V”-shaped placement for the needle when moving the fabric to the next area for embroidery.
-
Page 54: Conversion Software
XL-6000 ® through a special serial port cable called a Null Modem Cable, (Singer Part # 270- 10D1-20206 for 6-foot cable, Part # 270-10D1-20210 for 10-foot cable). This special cable is a 9-pin cable with both a male and female end, one for the PC and one for the sewing machine. -
Page 55: Loading A Design
Quantum XL-6000 ® Conversion Software How to Use the Conversion Software: Loading a Design – a. First, click on the Open icon on the horizontal tool bar. b. Select the desired design from the hard drive, floppy disk or CD. o Select the drive specific Drive in which designs have been stored. - Page 56 Quantum XL-6000 ® Conversion Software Saving a Design – a. Save – Will allow saving the file under the current name. b. Save As – Will allow saving the file under a new name. Printing a Design – The print function provides all the necessary controls needed to choose the exact se-up of the final printout.
- Page 57 Quantum XL-6000 ® Conversion Software o Define the Bits per Second parameter (also referred to as the “Baudrate”). This value defines the speed at which the Quantum XL-6000 Conversion ® Software will transmit the design to the sewing machine and the speed at which the machine will accept it.