
Related Manuals for Samsung CLX-9252 9352 Series


Summary of Contents for Samsung CLX-9252 9352 Series
- Page 1 CLX-9252 9352 Series SCX-8230 8240 Series Color Multi-Functional Printer User’s Guide imagine the possibilities Thank you for purchasing a Samsung product.
- Page 2 This user’s guide is provided for informational purposes only. All information included herein is subject to change without notice. Samsung Electronics is not responsible for any direct or indirect damages, arising from or related to use of this user’s guide.
-
Page 3: Table Of Contents
INTRODUCTION Machine overview Front view 1 Front view 2 Rear view Inner view (CLX-9252 9352 Series) Inner view (SCX-8230 8240 Series) View with Standard finisher (optional) View with Booklet finisher 1 (optional) View with Booklet finisher 2 (optional) View with Cabinet stand and High capacity feeder (optional) - Page 4 Changing the settings for each copy Selecting the paper supply tray Reducing or enlarging copies Copying multiple sides Selecting the color mode (CLX-9252 9352 Series only) Deciding the form of copy output Changing the darkness Proof copying Using special copy features...
- Page 5 103 Using a programs setting Saving Programs Using Programs Managing Programs Using previous settings 104 Saving documents 105 Scanning originals and sending to your computer (scan to PC) For a network connected machine 105 Using Samsung Scan and Fax Manager 2 Contents_ 5...
- Page 6 contents Scan Assistant 107 Scanning with TWAIN-enabled software 107 Macintosh scanning Scanning with network 107 Linux scanning Scanning Adding Job Type Settings Using the Image Manager FAXING (OPTIONAL) 110 Preparing to fax 110 Using a fax in your computer Sending a fax (Windows) Checking a sent fax list (Windows) Sending a fax (Macintosh) 112 Understanding the fax screen...
- Page 7 PRINTING 137 System requirements Windows Macintosh Linux UNIX 138 Introducing useful software programs Samsung Anyweb Print 138 Printer driver features PCL printer driver XPS printer driver PostScript printer driver 139 Basic printing Canceling a print job 140 Opening printing preferences...
- Page 8 Box Setting MANAGEMENT TOOLS 182 Easy Capture Manager 182 Samsung AnyWeb Print 182 Easy Eco Driver 182 Using Samsung Easy Printer Manager Understanding Samsung Easy Printer Manager Advanced settings user interface overview 183 Using Samsung Printer Status Samsung Printer Status overview...
- Page 9 contents 186 Using the Linux Unified Driver Configurator Opening the Unified Driver Configurator Printers configuration Scanners configuration Ports configuration TROUBLESHOOTING 188 Redistributing toner 189 Replacing the toner cartridge 191 Cleaning paper dust stick and chargers of imaging units 195 Replacing the imaging unit 199 Replacing the waste toner container 201 Clearing original document jams Original paper jam in front of scanner...
- Page 10 Copying problems Scanning problems Scan and Fax Manager 2 Problem Fax problems (optional) Common PostScript problems Common Windows problems Common Linux problems Common Macintosh problems 250 Specifications 251 Electrical specifications CONTACT SAMSUNG WORLDWIDE GLOSSARY Contents_ 10...
- Page 11 about this user’s guide This user’s guide provides information to provide a basic understanding of the machine as well as detailed explanations on each step during actual usage. Valuable for both novice and professional users, all users can refer to this guide for installing and using the machine.
-
Page 12: Finding More Information
This help guide provides you with help information on the printer driver and instructions for setting up the printing options (see the User’s Guide). Samsung website If you have Internet access, you can get help, support, machine drivers, manuals, and order information from the Samsung website. (www.samsung.com/printer) Downloadable You can download useful softwares from the Samsung website. -
Page 13: Features Of Your New Product
features of your new product Your new machine is equipped with a number of special features that improve the quality of your printed documents. Special Features Print with excellent quality and speed * Zoran IPS Emulation compatible with PostScript 3: •... -
Page 14: Features By Models
Features by models The machine is designed to support all of your document needs from printing and copying to more advanced networking solutions for your business. Some features and optional goods may not be available depending on models or countries. Features by models include: FEATURES SCX-8230 Series... -
Page 15: Front View 1
introduction These are the main components of your machine: This chapter includes: • Machine overview • Control panel overview • Understanding the status LED • Turning the machine on • Connecting a printer cable • Adjusting angle of the control panel •... -
Page 16: Front View 2
Multi-purpose tray Control panel Standard tray right bottom door Center tray Optional dual cassette feeder right bottom door a. Optional device. Front view 2 Scanner glass Power-switch White sheet Power receptacle Multi-purpose tray USB port (2 EA) Multi-purpose tray paper width guide Introduction_ 16... -
Page 17: Rear View
Rear view Optional dual cassette feeder cable USB host port Duplexing automatic document feeder cable Finisher connector Scanner locking screw Network port USB port Introduction_ 17... -
Page 18: Inner View (Clx-9252 9352 Series
Inner view (CLX-9252 9352 Series) Waste toner container Imaging units Toner cartridges Inner cover If you want to see the imaging unit, you need to remove the waste toner container. Hold the left/right locking levers and push outward. Then remove the waste toner container. -
Page 19: Inner View (Scx-8230 8240 Series
Inner view (SCX-8230 8240 Series) Waste toner container Imaging unit Toner cartridge Locking lever If you want to see the imaging unit, you need to remove the waste toner container. Lift the locking lever upward. Then remove the waste toner container. Introduction_ 19... -
Page 20: View With Standard Finisher (Optional
View with Standard finisher (optional) Standard finisher front door Top door Manual stapler Standard finisher Front door handle Manual stapler button Bridge unit Finishing tray Staple Top tray Introduction_ 20... -
Page 21: View With Booklet Finisher 1 (Optional
View with Booklet finisher 1 (optional) Booklet tray Top tray Finishing tray Top door Booklet finisher front door Booklet finisher front door handle Manual stapler Bridge unit Manual stapler button Introduction_ 21... -
Page 22: View With Booklet Finisher 2 (Optional
View with Booklet finisher 2 (optional) Knife wheel Staple Booklet maker handle Booklet Staple (2 EA) Fold wheel Booklet maker Booklet jam removal wheel If you want to open the booklet maker, hold the booklet maker handle and pull it out. Introduction_ 22... -
Page 23: View With Cabinet Stand And High Capacity Feeder (Optional
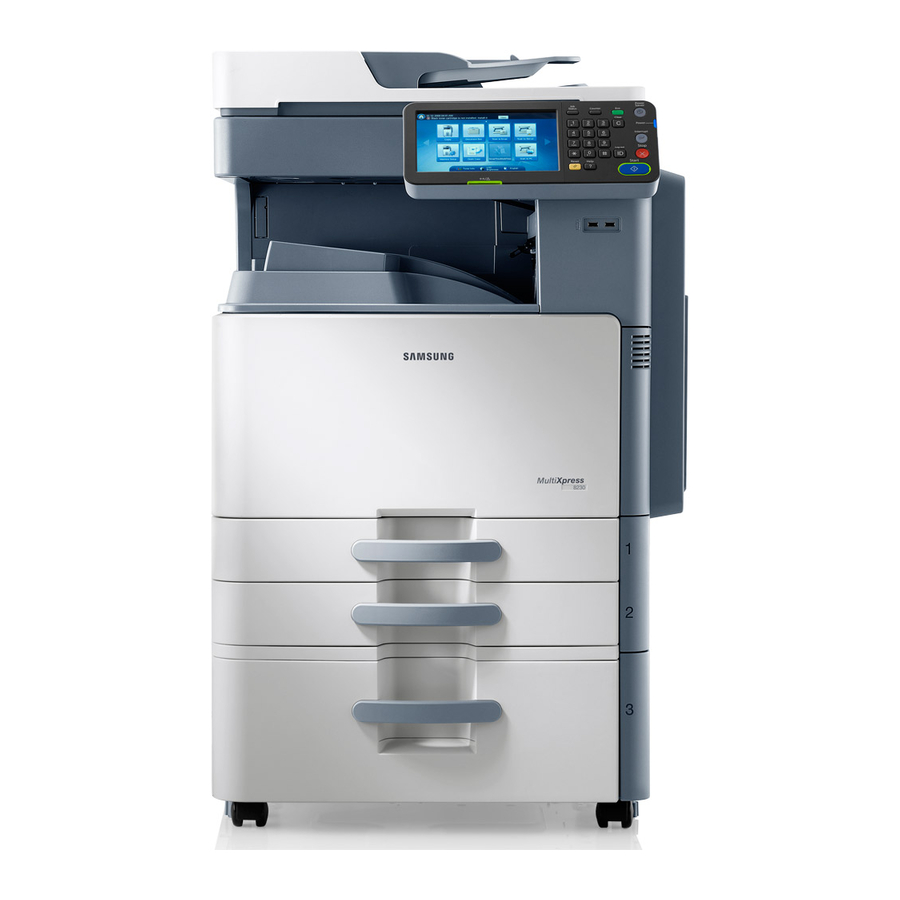
View with Cabinet stand and High capacity feeder (optional) Cabinet Stand High capacity feeder High capacity feeder right bottom door Introduction_ 23... -
Page 24: Control Panel Overview
Control panel overview Shows the current machine status and prompts during an operation. You can set menus easily using the display screen. Display screen Shows the status of your machine (See "Understanding the status LED" on page 25). Status LED Shows the jobs currently running, queued jobs, completed jobs, current error code or secured jobs. -
Page 25: Understanding The Status Led
Understanding the status LED The color of the status LED indicates the machine's current status. Description Status • The machine is off-line. • The machine is in power saver mode. When data is received, or any button is pressed, it switches to on-line automatically. Green The machine is on-line and can be used. -
Page 26: Turning The Machine On
Turning the machine on 3. Turn on the main power switch. Keep in mind that you should use the power cord supplied with the machine. Otherwise, it can cause damage or fire to the machine. 1. Plug the power cord into the power receptacle. •... -
Page 27: Turning The Machine Off
Turning the machine off Connecting a printer cable Using a network cable If you need to turn the machine off, press the Power button for more than three seconds on the right side of the control panel. When the confirmation This machine has a bulit-in network interface card. -
Page 28: Adjusting Angle Of The Control Panel
Adjusting angle of the control panel The display screen could not be seen depending on the angle of the control panel and light. You can adjust the angle of the control panel to the direction which you want. Introduction_ 28... -
Page 29: Introducing The Display Screen And Useful Buttons
(scan to PC)" on page 105). • SmarThru WorkFlow: In order to use this menu, SmarThru WorkFlow should be installed. For more information, contact your local Samsung dealer or the retailer where you purchased your machine. Counter button When you press the Counter button on the control panel, You can see the number of impressions. -
Page 30: Eco Button
Eco button • User: Displays the name of the job owner. • Detail: Displays detailed information of selected job from the list. The eco feature allows you to save print resources and leads you to eco-friendly printing. When you press the Eco button, the machine turns the •... -
Page 31: Secured Job
Active Notice Meaning of status Displays any error messages and codes that have occurred. • Receiving: The machine is receiving data from network or fax line. • Image Processing: The machine is processing the image (decoding, encoding, converting data format). •... -
Page 32: Help Button
Help button Power Saver button Press the Help button when you have no idea how to use some function. When the machine is not in use, save electricity by pressing Power Saver The display screen shows the functional description in User’s guide or ). -
Page 33: Using The Manual Stapler
Using the manual stapler 3. The first page of the printed documents should face the bottom. Insert the documents into the manual stapler so that the upper right part of the documents will be stapled. You can use the manual stapler when the standard finisher or booklet finisher is installed. -
Page 34: Using The Pen And Paper Clip Holder
Using the pen and paper clip holder Viewing the animation for trouble shooting You can keep pens, paper clips and other small office supplies in the Pen When the problems in the machine occur, some error messages are shown and Paper Clip Holder. The Pen and Paper Clip Holder has a magnet inside with animations to help you solve the problems. -
Page 35: On The Scanner Glass
media and tray This chapter provides information on how to load originals and print media into your machine. This chapter includes: • Loading originals • Printing on special media • Selecting print media • Tray setting • Loading paper in the tray Loading originals 2. -
Page 36: In The Duplex Automatic Document Feeder (Dadf
In the duplex automatic document feeder (DADF) 2. Load the originals face up into the DADF. Make sure that the bottom of the original stack matches the paper size marked on the document Preparing originals input tray. • Do not load paper smaller than 140 x 140 mm (5.5 x 5.5 inches) or larger than 297 x 432 mm (11.7 x 17 inches). -
Page 37: Selecting Print Media
2. Squeeze the paper length guide, and pull it to the end of the tray. cause problems or require repairs. Such repairs are not covered by Samsung’s warranty or service agreements. The amount of paper put into the tray may differ according to media type used (see "Print media specifications"... - Page 38 3. Squeeze the paper width guide, and pull it to the end of the tray. 6. Adjust the paper length guide to the desired paper length. Paper width guide 4. Flex and fan the edge of the paper stack to separate the pages before loading papers.
- Page 39 The standard tray and optional dual cassette feeder can automatically • Do not push the paper guide too far causing the media to wrap. detect various-sized paper (See "Media sizes automatically detected" on • If you do not adjust the paper width guide, it may cause paper page 44).
-
Page 40: Optional High Capacity Feeder
Optional high capacity feeder 3. Load paper with the print side facing up. You can increase the paper handling capacity of your machine by installing an optional high capacity feeder. This tray holds up to 2,000 sheets of paper. The high capacity feeder can only hold A4 or letter-sized paper. Using photographic paper or coated paper may cause problems, that require repairs. - Page 41 4. Load the paper in the left side of the tray with the print side facing up. • If the paper in the right side has run out, the guide The left side of the tray can hold up to 1,000 sheets of plain paper. automatically pushes the paper in the left side to right side automatically.
-
Page 42: Multi-Purpose Tray
Multi-purpose tray 3. Load the paper with the side to be printed on facing down. The multi-purpose tray can hold special sizes and types of print material, such as postcards, note cards, and envelopes. It is useful for single page printing on colored paper. - Page 43 5. When you print a document, set the paper type and size for the multi-purpose tray. The multi-purpose tray can automatically detect various-sized paper (see "Media sizes automatically detected" on page 44). For information about setting the paper type and size on the control panel (see "Tray setting"...
-
Page 44: Media Sizes Automatically Detected
Media sizes automatically detected This machine can automatically detect various sized-paper. Refer to the table below. Standard tray/ optional Optional high capacity Multi-purpose tray Duplex printing size dual cassette feeder feeder ● Available Letter SEF ● ● ● Available Letter LEF Ledger ●... -
Page 45: Printing On Special Media
Printing on special media • Extra Heavy Weight 1: 176 to 216 g/m (47 to 57 lb) thick paper. • Extra Heavy Weight 2: 217 to 253 g/m (58 to 67 lb) thick paper. The table below shows the available special media for each tray. •... -
Page 46: Transparency
Labels Load the paper with the side to be printed on facing down. To avoid damaging the machine, use only labels designed for use in laser machines. Acceptable Unacceptable • Envelopes with a peel-off adhesive strip or with more than one flap that folds over to seal must use adhesives compatible with the machine’s fusing temperature about 170°C (338 °F) for 0.1 second. -
Page 47: Card Stock/ Custom-Sized Paper
Card stock/ Custom-sized paper Glossy Load a piece paper into the multi-purpose tray at a time, glossy side facing down. • Recommend media: Glossy paper (Letter) for this machine by HP Brochure Paper (Product: Q6611A) only. • Recommend media: Glossy paper (A4) for this machine by HP Superior Paper 160 glossy (Product: Q6616A) only. -
Page 48: Setting The Paper Type
Setting the paper type Auto continue This option allows you to continue printing when the paper size you have set 1. Press Machine Setup > Tray Settings > Settings > select the tray you is mismatched with the paper in the tray. When this option is activated, the want from the display screen. -
Page 49: Tray Priority Setting
Tray priority setting Setting the tray confirmation message When you do not select the tray for printing, the tray selected as in the Tray When you load paper into a tray, you can set the confirmation message to Priority Setting will be used in order. If the tray does not have the paper on appear automatically. -
Page 50: Basic Tab
(see "Copying multiple sides" on page 55). • Color Mode: Selects a color mode for making copies (see "Selecting the color mode (CLX-9252 9352 Series only)" on page 56). • Output: Sets the machine’s various output options (see "Deciding the form of copy output"... -
Page 51: Advanced Tab
Advanced tab • Overlay: Allows you to use a overlay to apply to copy outputs (see "Overlay" on page 71). You can move to next or previous page using up/down arrows at the bottom • Stamp: Allows you to print with some information (see "Stamp" on left. -
Page 52: Basic Copy
Basic copy 5. Enter the number of copies using the numeric keypad on the control panel, if necessary. This is the normal and usual procedure for copying your originals. 1. Press Copy from the display screen. 6. Press Start from the control panel to begin copying. 2. -
Page 53: Copying Different Sized Originals
• You can delete current and pending jobs using Job Status on the 1. Press Copy from the display screen. control panel. Select the job you want to cancel and press Delete 2. Place the different sized originals face up in the DADF. When you place (see "Job Status button"... -
Page 54: Changing The Settings For Each Copy
Changing the settings for each copy You can also set a paper tray with the More button. On the Basic tab of the Copy screen, you can select copy features before starting to copy. The Basic tab setting is only for the current copy job, which means the selected settings do not apply to the next copy job. -
Page 55: Reducing Or Enlarging Copies
Reducing or enlarging copies Copying multiple sides The duplex feature allows you to copy one sided or two sided originals on Using the Reduce/Enlarge feature allows you print an original image both sides of the paper or divide two-sided originals into multiple one-sided reducing or enlarging it to the paper. -
Page 56: Selecting The Color Mode (Clx-9252 9352 Series Only
Copy originals. You can select the original and output binding type, either Book or Calendar, with the More button. Selecting the color mode (CLX-9252 9352 Series only) The machine provides many powerful effects on images without having expert editing skills. - Page 57 • Output Tray: Select the output tray. Depending on the options you select the result will vary. Refer to the In CLX-9252 9352 Series, the right tray (face-up) is optional below table before using the 2 Staple option. device. In SCX-8230 8240 Series, the Inner Tray (optional Job Separator) is optional device.
- Page 58 Origianl orientation Original orientation Direction of paper Available Staple Result feeding in the tray Direction (DADF/Scanner grass) (display screen) In the DADF Upright Images Long Edge Feed (LEF) Left or Right Left Right Sideways Images On the scanner grass Upright Images Short Edge Feed (SEF) Sideways Images Left or Right...
- Page 59 • Punch: Holes are punched in the printouts for filing purposes. Depending on the options you select the result will vary. Refer to the below tables before using the Punch option. Origianl orientation Original orientation Direction of paper Available punch Result feeding in the tray position...
-
Page 60: Changing The Darkness
Proof copying • The hole punch function is available only when the punch kit is installed in the optional standard or booklet finisher. This mode is useful when you print more than one copy. You can print one • Numbers of punched holes are depending on the punch kit. copy first to check the quality, then print the rest of copies later. -
Page 61: Using Special Copy Features
Using special copy features In the DADF On the scanner glass On the Advanced or Image tab of the Copy screen, you can select specific Minimum size 128 x 128 mm 25 x 25 mm copy features. (5 x 5 inches) (1.0 x 1.0 inches) Selecting the size of originals Maximum size... -
Page 62: Id Card Copying
ID card copying Using the DADF Using the scanner Icon The machine prints one side of the original on the upper half of the paper glass and the other side on the lower half without reducing the size of the original. This feature is helpful for copying a small-sized item, such as a business card. -
Page 63: N-Up Copying
7. Turn the original over and place it on the scanner glass as shown below, the Reduce/Enlarge feature. and then close the DADF. When you place a original on the scanner glass, leave a little space between the edge of the scanner glass and the original. Otherwise, the part of original could not be printed. - Page 64 Origianl orientation Original orientation Direction of paper Available Result feeding in the tray orientation (DADF/Scanner grass) (display screen) In the DADF Upright Images Left-to-Right Left-to-Right or SEF Right-to-Left Right-to-Left On the scanner grass In the DADF Sideways Images LEF or SEF On the scanner grass Copying_ 64...
- Page 65 Origianl orientation Original orientation Direction of paper Available Result feeding in the tray orientation (DADF/Scanner grass) (display screen) In the DADF Sideways Images LEF or SEF Top-to-Down Top-to-Down Down-to-Top Down-to-Top On the scanner grass In the DADF Upright Images LEF or SEF On the scanner grass a.
-
Page 66: Image Repeat
• All other page order options of N-up are the same except for the 1. Press Copy from the display screen. 2Up. You can press Right-to-Down, Left-to-Down, Down-to-Left, 2. Place the originals face up in the DADF or place a single original face and Down-to-Right. - Page 67 1. Press Copy from the display screen. 2. Place the originals face up in the DADF or place a single original face down on the scanner glass and close the DADF (see "Loading originals" on page 35). 3. Adjust the settings for each copy such as Paper Supply, Reduce/Enlarge, Duplex and more in the Basic tab (see "Changing the settings for each copy"...
-
Page 68: Booklet Copying
Booklet copying The machine automatically prints on one or both sides of the paper, which are then folded to produce a booklet with all the pages in the correct sequence. The machine will also reduce and correctly adjust the position of each image to fit on the selected paper. -
Page 69: Book Copying
Fold: Select this setting to fold printouts only. 5. Press the appropriate option. • Off: Disables this feature. • Left Page: Prints only the left page of the book. Divide Into Sets: If you copy a document containing many pages, select Divide Into Sets. You can divide the output booklet into multiple batches.The maximum number of sheets in a batch is 15 sheets. -
Page 70: Cover Copying
Cover copying Transparency copying The machine automatically adds covers to your copied set using stock taken This feature prevents copies to print onto transparencies from sticking from a different tray. Covers must be the same size and orientation as the together as a cause by heat that is produced during copying. -
Page 71: Watermark
Watermark • Custom: Allows you to enter a text message using the pop-up keyboard. The watermark option allows you to print text over an existing document. 6. Set the Watermark settings. For example, you use it when you want to have large gray letters reading “DRAFT”... -
Page 72: Stamp
Stamp to all copies. Contact your administrator. Prints the date and time, page number, or user ID on printouts. • Off: Disables this feature. When you use this option, Booklet and Poster in in the Advanced • On: This feature can be used. tab is inactivated. -
Page 73: Poster Copying
Poster copying Selecting duplex scan speed Your original will be divided into 9 portions. You can paste the printed pages This option allows you to speed up the copy scanning. In this case, you can together to make one poster-sized document. save the working hours. -
Page 74: Setting Job Completion Notification
Setting job completion notification Build job When a copy job is completed, this machine can send the completion This feature allows you to copy various originals at once consisting of notification using an email. This feature is helpful for a large copy job. You multiple batches and/or different sizes. -
Page 75: Erasing Edges
Changing the sharpness 3. Adjust the settings for each copy such as Paper Supply, Reduce/Enlarge, Duplex and more in the Basic tab (see "Changing the Set this parameter to emphasize the edges to make text more readable. settings for each copy" on page 54). This parameter can also be used to adjust the original image. -
Page 76: Changing The Contrast
Changing the contrast Copying in a mirror image Set this parameter to adjust the contrast between Low and High. This feature allows you to copy in a mirror image. 1. Press Copy from the display screen. 2. Place the originals face up in the DADF or place a single original face down on the scanner glass and close the DADF (see "Loading originals"... -
Page 77: Adjusting Background
Adjusting background Erasing backside Images This feature is helpful when copying originals containing color in the When the original is thin and backside images are shown through, you can background, such as in newspapers or catalogs. use this feature to remove the backside images. 1. -
Page 78: Copying In A Negative Image
Copying in a negative image Set this feature to copy the original with the light- and dark-colored areas or the colors of the image inversed. 1. Place the originals face up in the DADF or place a single original face down on the scanner glass and close the DADF (see "Loading originals"... -
Page 79: Using A Programs Setting
Using a programs setting Using Programs 1. Press Copy from the display screen. This option allows you to save the current settings for future use. You can 2. Place the originals face up in the DADF or place a single original face also use the previous settings from the last jobs. -
Page 80: Using Previous Settings
If important data is stored in the Document Box, we recommend For example, if you want to use the settings from the last job, press you to backup the data regulary. Samsung disclaims all Previous 1. responsibility for damage or loss of data caused by misuse or failure of the machine. -
Page 81: Using The Quick Copy Menu
Using the Quick Copy menu 3. Adjust the settings for each copy such as Reduce/Enlarge, Duplex/N-Up, Output, Paper Supply, etc. The Quick Copy menu allows you to quickly set copy options without You can set the default Quick Copy options from Machine Setup having to move to a lower level menu or another tab. -
Page 82: Understanding The Scan Methods
You can scan the originals with your machine via the network. • Easy Printer Manager(EPM): EPM is a Windows-based application that combines Samsung device settings into one location. • Easy Document Creator(EDC): This program is accompanying software for your machine. You can use this program to scan images or documents. -
Page 83: Scanning Originals And Sending Through Email (Scan To Email
Scanning originals and sending through email (see "Using a programs setting" on page 103). (scan to email) • Save Document: Saves document in your machine's HDD (see "Saving documents" on page 104). You can scan originals and send the scanned image to several destinations •... -
Page 84: Output Tab
Image tab Output tab You can move to next or previous page using the up/down arrows located at the bottom left. • Quality: Adjusts the display quality of the scanned output (see "Quality" on page 101). • Scan Preset: Automatically changes some scan options, such as •... -
Page 85: Sending A Scanned Image To Several Destinations As An Email Attachment
Sending a scanned image to several destinations as Entering email addresses an email attachment Once you have stored the frequently used addresses into the address book (see "Setting up an address book" on page 128), you can enter email 1. Place the originals face up in the DADF or place a single original face addresses singly or you can enter email addresses directly using the pop-up down on the scanner glass and close the DADF (see "Loading originals"... -
Page 86: Resending The Latest Email Address
Entering email addresses by the pop-up keyboard Printing an email confirmation report The following procedure is an example of entering "abcdefg@abc.com". You can set the machine to print a report whether an email transmission is successfully completed or not. 1. Press Scan to Email from the display screen. If a report contains characters or fonts that the machine do not 2. -
Page 87: Scanning Originals And Sending Via Smb/Webdav/Ftp (Scan To
Scanning originals and sending via SMB/WEBDAV/FTP (scan to server) • : This button allows you to move to USB, Copy, Fax, Document Box, etc. Press this button and select the menu you want You can scan an image and send it to a total of three destinations via the to move to. - Page 88 Image tab Output tab You can move to next or previous pages using the up/down arrows located at the bottom left. • Quality: Adjusts the display quality of the scanned output (see "Quality" on page 101). • Scan Preset: Automatically changes some scan options, such as •...
-
Page 89: Scanning And Sending To Smb/Webdav/Ftp Server
Scanning and sending to SMB/WEBDAV/FTP server Entering server addresses Once you have stored the frequently used addresses into the address book You can select up to four destinations using SMB, WEBDAV, or FTP (see "Setting up an address book" on page 128), you can enter server servers. - Page 90 Entering server addresses manually SMB server. • If the FTP server you entered is not registered with any 1. Press Scan to Server from the display screen. domain, leave it blank. 2. Press server address input area or +Add. Then the Direct input 10.
-
Page 91: Resending The Latest Server Address
Resending the latest server address An example of security configuration for anonymous user on SMB server. To resend the server address you sent latest: To send data to an SMB server, the security configuration on the SMB 1. Place the originals face up in the DADF or place a single original face server should be set to use the Anonymous option. - Page 92 7. Click Sharing and Security..10. Add ANONYMOUS LOGON on Group or user names:, as shown below. 8. Click Security, and add ANONYMOUS LOGON on Group or user names:, as shown below. 11. Click Apply and then OK on Permissions for Shared. 12.
-
Page 93: Scanning Originals And Sending To A Usb Memory Device (Scan To
Scanning originals and sending to a USB Advanced tab memory device (scan to USB) You can scan a document and save the scanned image onto a USB memory device. When you scan a document, the machine uses the default settings, such as the resolution. You can also customize your own scan settings (see "Changing the scan feature settings"... -
Page 94: Scanning To A Usb Memory Device
Scanning to a USB memory device • Scan to Edge: Scans originals from edge-to-edge (see "Scan to Edge" on page 101). • The machine cannot detect the unformatted USB memory device. • Back: Returns to the Basic tab. Format, and then reinsert the USB memory device into the USB memory port on your machine. -
Page 95: Attaching Stored Documents
Attaching stored documents Previewing image to be scanned When you send a stored document to email or server by Scan to Email or Before sending a image, you can see the scanned image using the Preview Scan to Server, this option allows you to attach a document stored in the feature. -
Page 96: Changing The Scan Feature Settings
Changing the scan feature settings Feature Resolution (dpi) File Format This section explains how to adjust the document settings for each scan job, Scan to Email 100, 200, 300, 400, JPEG, PDF, TIFF, XPS such as resolution, duplex, original size, type, color mode, darkness, and more. -
Page 97: Selecting The Orientation Of Originals
3. Press OK from the display screen. • Sideways Images: Select this setting for an original document loaded into the DADF with the top of the original document toward Selecting the orientation of originals the left side of the machine or an original document placed on the scanner glass with the top of the original document toward the right 1. -
Page 98: Book Scanning
Book scanning • Both Pages (From Right): Scans both facing pages from the right page. Use this feature to scan a book. If the book is too thick, lift the DADF until its hinges are engaged by the stopper and then close the DADF. If the book or magazine is thicker than 30 mm (1.18 inches), start copying with the DADF open. -
Page 99: Selecting The Type Of Originals
2. Press the appropriate option. To recieve the job completion notification, you need to set up network parameters and email settings using the control panel or SyncThru™ • Text: Use for originals containing mostly text. Web Service. For details about how to set up the network parameters •... -
Page 100: Changing Darkness
Changing Darkness Changing Contrast You can select the degree of darkness of the scanned output. If your This parameter can be used to make the original either crisper or smoother. original document is light or faded, press the right arrow to make the output 1. -
Page 101: Erasing Backside Images
Erasing backside Images Quality This feature prevents scanning the other side’s image shown through the You can use this option to produce a high quality document. The higher original paper quality you select, the larger file size you get. 1. Press the Output tab > Quality from the display screen. When you use this feature, Adjust Background in the Image tab are inactivated. -
Page 102: File Format
File Format File Name You can select the file format before you proceed with the scanning job. You can make the name of the file attached to be sent. If you do not make a file name before you send it by email, the machine automatically creates a 1. -
Page 103: Folder Creation
Folder Creation Using Programs You can set to create a new folder automatically for storing the scanned 1. Press Scan to Email, Scan to Server or Scan to USB from the display image to the USB memory device. screen. 1. Press the Output tab > Folder Creation from the display screen. 2. -
Page 104: Saving Documents
Document Box chapter (see "Document box" on page 167). • If important data is stored in the Document Box, we recommend you to backup the data regulary. Samsung disclaims all responsibility for damage or loss of data caused by misuse or failure of the machine. -
Page 105: Scanning Originals And Sending To Your Computer (Scan To Pc
If you have installed the printer driver from the software CD, Samsung Scan and Fax Manager 2 program should have been installed. Start Samsung You can scan an image on the machine via the Samsung Scan and Fax Scan and Fax Manager 2 to find this program’s information and the installed Manager 2 program that is installed on your network-connected computer. -
Page 106: Scan Assistant
Delete. To set a favorite as startup, select the favorite you want to set as startup, then click the Set as default button. 1. From the Start menu, click Programs or All Programs > Samsung Printers > Scan and Fax Manager 2 > Scan and Fax Manager 2. -
Page 107: Scanning With Twain-Enabled Software
Additional settings: Allows special processing of scanned images. • If scanning does not operate in Image Capture, update Mac OS to These transformations include stitching several partial image scans the latest version. Image Capture operates properly in Mac OS X into a single image, processing of scanned books and watermark 10.4.7 or higher. -
Page 108: Adding Job Type Settings
To delete a Job Type setting Preview Pane. 1. Select the setting you want to delete from the Job Type drop-down list. 2. Click Delete. The setting is deleted from the list Using the Image Manager The Image Manager application provides you with menu commands and tools to edit your scanned image. - Page 109 Tools Name Function Save Saves the image. Undo Cancels your last action. Redo Restores the action you canceled. Scroll Allows you to scroll through the image. Crop Crops the selected image area. Zoom Out Zooms the image out. Zoom In Zooms the image in.
-
Page 110: Using A Fax In Your Computer
ISDN, VolP), you can improve the connection quality by using the Micro-filter. The Micro-filter eliminates unnecessary noise signals To send a fax from your computer, the Samsung Network PC Fax program and improves connection quality or Internet quality. Since the DSL must be installed. -
Page 111: Checking A Sent Fax List (Windows
You can see the status of the fax job. You can also delete, hold, resume, and pause the fax job. 3. Select Samsung CLX-9252 9352 Series fax from the drop-down list in Printer. 4. Choose the number of copies and pages. -
Page 112: Understanding The Fax Screen
Understanding the fax screen number" on page 115). • Pause: Inserts a pause into a fax number. To use the fax feature, press Fax on the display screen. • On Hook: When you press this button, you can hear a dial tone. Then enter a fax number. -
Page 113: Image Tab
Image tab Sending a fax This part explains how to send a fax and the special methods of transmission. When you place the originals, you can use either the DADF or the scanner glass. If the originals are placed on both the DADF and the scanner glass, the machine will read the originals on the DADF first, because it has higher priority in scanning. -
Page 114: Sending A Fax Using Speed Dial Numbers
Sending a fax manually using an extension 7. Press Start on the control panel. The machine starts to scan and send a fax to destinations. telephone • You can send a fax directly from your computer (see "Using a fax This method is sending a fax using an extension telephone. -
Page 115: Redialing The Last Number
Redialing the last number Delaying a fax transmission You can set your machine to send a fax at a later time when you will not be 1. Place the originals face up in the DADF or place a single original face present. -
Page 116: Sending A Priority Fax
Sending a priority fax Receiving a fax This function is used when a high priority fax needs to be sent ahead of This part explains how to receive a fax, and the special receiving methods reserved operations. The original is scanned into memory and immediately available. -
Page 117: Receiving Automatically In Answering Machine/Fax Mode
Receiving automatically in Answering Machine/Fax Receiving in secure receiving mode mode You may need to prevent your received faxes from being accessed by unauthorized people. You can turn on secure receiving mode to restrict To use this mode, you must attach an answering machine to the EXT socket printing of received faxes when the machine is unattended. -
Page 118: Selecting A Received Fax Output Tray
Selecting a received fax output tray This option allows you to specify the tray where the fax will be printed. 1. Press Machine Setup > Application Setting > Fax Settings > Received Fax Printing > Output Tray from the display screen. 2. -
Page 119: Adjusting The Document Settings
Adjusting the document settings Faxing on both sides of originals This function is especially intended for two-sided originals. You can select Before sending a fax, you can adjust the document settings, such as whether the machine sends the fax on one side or both sides of the paper. resolution, darkness, color, duplex and so on. -
Page 120: Changing The Resolution
Selecting the orientation of originals • Sideways Images: Select this setting for an original document loaded into the DADF with the top of the original document toward When faxing double-sided documents, specify the document orientation. the left side of the machine, or an original document placed on the Otherwise the faxes may not be printed in the correct page order or correct scan glass with the top of the original document toward the right side front and back page arrangement. -
Page 121: Selecting The Color Mode
Selecting the type of originals Changing the darkness You can set the original document type to enhance the quality of a You can select the degree of darkness of the original document. document being scanned. 1. Press the Image tab > Darkness from the display screen. 1. -
Page 122: Erasing Backside Images
Erasing backside images This feature prevents faxing the original’s image being shown through on the backside. 1. Press the Image tab > Erase Backside Image from the display screen. 2. Press the appropriate option. • Off: Disables this feature. • Auto: Optimizes the backside. -
Page 123: Forwarding A Fax To Another Destination
Forwarding a fax to another destination 3. Set the appropriate options. • Forward Type: Select a fax type using the left/right arrows. You can set your machine to forward a sent or received fax to other • Line 1 or Line 2: When both fax kit and fax multiline kit are installed destinations via fax, email, SMB, FTP, etc. -
Page 124: Printing A Fax Report
Printing a fax report 5. Enter the junk fax number using the numeric keypad on the control panel and press OK. You can set the machine to print a report whether a fax transmission and • If you set On in Caller ID, you can select a junk fax number reception is successfully completed or not. -
Page 125: Saving Programs
Using a programs setting Using Programs 1. Place the originals face up in the DADF or place a single original face This option allows you to save the current settings for future use. You can down on the scanner glass and close the DADF (see "Loading originals" also use the previous settings from the previous jobs. -
Page 126: Managing Programs
Managing Programs Previous1. 1. Press Fax from the display screen. 2. Press Programs > List. 3. Press the appropriate option. 6. Press OK. 7. Press Yes when the confirmation window appears. The machine is now set to fax according to the setting you selected. 8. -
Page 127: Saving Documents
Document Box chapter (see "Document box" on page 167). • If important data is stored in the Document Box, we recommend you to backup the data regulary. Samsung disclaims all responsibility for damage or loss of data caused by misuse or failure of the machine. -
Page 128: Storing Individual Address (Smb, Ftp, Webdav
setting up an address book This guide gives you guidelines for the address book. This chapter includes: • Setting up an address book using the control panel • Setting up an address book using SyncThru™ Web Service Setting up an address book using the control 5. -
Page 129: Editing Individual Address
Editing Individual address • In case of WebDav, User Domain does not appear. • If the SMB server you entered is not registered any domain, 1. Press Machine Setup > Application Setting > Address Book from the leave it blank or enter the computer name of the SMB server. display screen. -
Page 130: Editing Group Address
Editing Group address Searching Address Book for an entry You can search the addresses that are currently stored in the address book. 1. Press Machine Setup > Application Setting > Address Book from the display screen. 1. Press Machine Setup > Application Setting > Address Book from the 2. -
Page 131: Deleting An Entry In An Address Book
Deleting an entry in an Address Book You can delete the selected address which currently stored in address book. 1. Press Machine Setup > Application Setting > Address Book from the display screen. 2. Press the address you want to delete. Press Delete. 3. -
Page 132: Setting Up An Address Book Using Syncthru™ Web Service
Setting up an address book using SyncThru™ • In case of SMB or FTP, if you want the server to permit Web Service access for unauthorized person. Press the Anonymous box. This box is unchecked by default. If you checked the Anonymous box, go to step 18. - Page 133 21. Enter the file name in File Name, which is to be stored in the server. (Example, http://123.123.123.123) 22. You can check if it works well according to the entered server 3. Press Enter or click Go to access the SyncThru™ Web Service information, click Test.
- Page 134 You can export an address book file to your computer for backup of the should have the file extension ‘csv’. Also you can import addresses from file or to another machines Samsung produced. a LDAP server. Before importing the addresses to your machine, the 1.
- Page 135 Grouping addresses in Groups Address Book Editing Group addresses in Groups Address Book 1. Turn your networked computer on and open the web browser. 1. Turn your networked computer on and open the web browser. 2. Enter your machine’s IP address as the URL in a browser. 2.
- Page 136 Checking Group Addresses You can see group addresses information. You can also add or delete individual addresses in the Group Details window. 1. Turn your networked computer on and open the web browser. 2. Enter your machine’s IP address as the URL in a browser. (Example, http://123.123.123.123) 3.
-
Page 137: Windows
printing This chapter explains common printing tasks. This chapter includes: • System requirements • Using direct printing utility • Introducing useful software programs • Changing the default print settings • Printer driver features • Setting your machine as a default machine •... -
Page 138: Unix
Multiple pages per sheet ● of Windows Internet Explorer more easily, than when you use the ordinary program. Click Start > All programs > Samsung Printers > Samsung Booklet printing ● AnyWeb Print > Download the latest version to link the website where Fit to page printing ●... -
Page 139: Postscript Printer Driver
(●: Supported, Blank: Not supported) Reader®, Adobe Illustrator®, Adobe Photoshop®, etc. • If you are using Windows Internet Explorer, the Samsung AnyWeb Print too will save your time for screen-captured Basic printing images or printing the image. Click Start > All programs >... -
Page 140: Opening Printing Preferences
Release button. The rest of copies will be printed. Smart Panel program is opened. The Smart Panel program displays the current status of the machine (see "Using Samsung Job Name: This option is used when you need to find a stored file Printer Status"... -
Page 141: Basic Tab
user name that you use to log on Windows. • Portrait: This option prints across the width of the page, letter style. Enter Password: If the Property of the document box you selected • Landscape: This option prints across the length of the page, spreadsheet style. -
Page 142: Paper Tab
Paper tab Use MP Tray when printing on special materials, such as envelopes and transparencies. Use the Paper tab options to set the basic paper handling specifications. • Type: This option allows you to set the type of paper to be loaded in Click the Paper tab to display the options shown below. -
Page 143: Graphics Tab
Graphics tab Quality Use the Graphic tab options to adjust the print quality for your specific The higher the setting, the sharper the clarity of printed characters and printing needs. graphics. The higher setting may also increase the printing time of a document. -
Page 144: Postscript Options
Graphic Controller Fine Edge This option allows users to emphasize edges of texts and fine lines for improving readability and align each color channel registration in color printing mode. Advanced Raster Compression: This option determines the compression level of images for transferring data from computer to a printer. If you set this option to Maximum, the printing speed will be high, but the printing quality will be low. -
Page 145: Finishing Tab
Finishing tab optional standard finisher or booklet finisher is installed. Staple: Select the number of staples between 1 Staple and 2 Use the Finishing tab to set various finishing options. Staple. Click the Finishing tab to display the options shown below. Position: Select the position of staples among Left, Right and Top. -
Page 146: Advanced Tab
Advanced tab If this option is checked, some print options such as Multiple Pages Per Side, Watermark, Booklet Printing, Poster Use the Advanced tab to set various printing options. Printing and Scaling Options may not work correctly when Click the Advanced tab to display the options shown below. printing from the application that can create the PostScript code for printing. -
Page 147: Samsung Tab
Samsung tab printing. When you select Eco Printing, you can see the eco image Use the Samsung tab to display the copyright and the version number of )on some options. Also, Some options are not available to use in the the driver. -
Page 148: Using A Favorite Setting
F1 on your keyboard. 2. Enter a name for the item in the Presets input box. If you want to search information via a keyword, click the Samsung tab in the Printing Preferences window, and enter a keyword in the input line of the Help option. -
Page 149: Setting Device Options
The available punch kit may differ from country to country. from the computer to the printer before the printer stops trying to Contact your local Samsung dealer or the retailer where you print the document. If you specify 0, the printer will continue purchased your machine. - Page 150 fonts as bitmap (Type 3) fonts. A font larger than the maximum permissions in the control panel or SyncThru™ Web setting will be downloaded as an outline (Type 1) font. Service. For the detailed information about them, refer to the Administrator’s Guide. This option lets you fine-tune the Automatic setting or override the Download as Bit Image setting for the Advanced Font/Text Options (see "Advanced"...
-
Page 151: Using Special Print Features
Using special print features 4. Select the Poster Overlap value. Specify Poster Overlap in millimeters or inches by selecting the radio button on the upper right of Basic tab to make it easier to paste the sheets together. Special print features include: •... -
Page 152: Printing On Both Sides Of The Paper
Change the size by percentage of your document mark). You can change the size of a document to appear larger or smaller on the 6. Click OK or Print until you exit the Print window. printed page by typing in a percentage you want. 1. -
Page 153: Using Overlay
Using an existing watermark Deleting a watermark 1. To change the print settings from your software application, access 1. To change the print settings from your software application, access Printing Preferences (see "Opening printing preferences" on Printing Preferences (see "Opening printing preferences" on page 140). -
Page 154: Banner Printing
Banner Printing 5. In the Save As window, type a name up to eight characters in the File name box. Select the destination path, if necessary (The default Machine Setup is C:\Formover). 6. Click Save. The name appears on the Overlay List. 1. -
Page 155: Using Direct Printing Utility
From the Direct Printing Utility window If Printing Preferences item has ► mark, you can select other 1. From the Start menu select Programs or All Programs > Samsung printer drivers connected with selected printer. Printers > Direct Printing Utility > Direct Printing Utility. -
Page 156: Setting Your Machine As A Default Machine
Setting your machine as a default machine 1. Click the Windows Start menu. 2. For Windows 2000, select Settings > Printers. • For Windows XP/2003, select Printers and Faxes. • For Windows 2008/Vista, select Control Panel > Hardware and Sound > Printers. •... -
Page 157: Macintosh Printing
Macintosh printing Changing printer settings You can use advanced printing features provided by your machine. This section explains how to print using a Macintosh. You need to set the Open an application and select Print from the File menu. The machine print environment before printing (see Installation guide). -
Page 158: Job Accounting
Graphics Job Accounting The Graphics tab provides options for selecting Quality. Select This option allows you to print with the given permission. Graphics from the drop-down list. • User permission: If you check this option, only users with user • Quality: This option allows you to select the printing resolution. - Page 159 Document Box (see "Document box" on page 167). User ID: This option is used when you need to find a stored file using the control panel. The user name automatically User ID: This option is used when you need to find a stored appears as the user name that you use to log in Mac OS X.
-
Page 160: Printing Multiple Pages On One Sheet Of Paper
Printer Features Printing multiple pages on one sheet of paper You can print more than one page on a single sheet of paper. This feature provides a cost-effective way to print draft pages. 1. Open an application, and select Print from the File menu. 2. -
Page 161: Linux Printing
Linux printing source, and destination. 5. Click Apply to apply the changes and close the Properties window. Printing from applications 6. Click OK in the LPR GUI window to start printing. 7. The Printing window appears, allowing you to monitor the status of your There are a lot of Linux applications that allow you to print using Common print job. -
Page 162: Unix Printing
Changing the printer settings class. 4. Click OK to apply the changes and close the Printer Properties The UNIX Printer Driver Print Job Manager in which the user can select window. various print options in printer Properties. The following hot keys may also be used: “H” for Help, “O” for OK and “A” UNIX Printing for Apply and “C”... - Page 163 Margins tab • Use Margins: Set the margins for the document. By default, margins are not enabled. The user can change the margin settings by changing the values in the respective fields. Set by default, these values depend on the page size selected. •...
-
Page 164: Using A Usb Memory Device
using a usb memory device This chapter explains how to use a USB memory device with your machine. This chapter includes: • Understanding the USB screen • Printing from a USB memory device • About USB memory device • Managing usb memory Understanding the USB screen About USB memory device To use the USB feature, press USB on the display screen. -
Page 165: Printing From A Usb Memory Device
Printing from a USB memory device Insert a USB memory device into the USB memory port on your machine. Do not insert the USB memory device to other ports except the ports You can directly print files stored on a USB memory device. You can print which is as shown below the image. -
Page 166: Managing Usb Memory
Managing usb memory when the machine requires the secure password. If you do not know the password, the print job will be cancelled. 4. Press USB Print. You can delete image files stored on a USB memory device one-by-one or all at once by reformatting the device. -
Page 167: Document Box
Web Service" on page 178). If important data is stored in the Document Box, we recommend you to backup the data regulary. Samsung disclaims all responsibility for damage or loss of data caused by misuse or failure of the machine. -
Page 168: Box Setting
Box setting Edit Box You can change the settings of a created box. To use Document Box, you need to create a new box first in the Machine Only the Auto Document Delete setting can be edited in the Setup > Application Setting > Box Setting. You can also edit or delete the Common box. -
Page 169: Delete Box
Delete Box Saving documents You can delete a created box. This machine allows you to store the scanned data on HDD using the Save The Common box cannot be deleted even by administrator. Document feature in Copy, Scan to Email, Scan to Server, Scan to USB or Fax mode. -
Page 170: Understanding Details Of The Document Box Screen
• If an original is placed on the scanner glass, the machine page 171). shows the window asking if you want to place another page. • +Add: Stores a new scanned data (see "Adding scanned data" on Load another original and press Yes. When you finish, press page 172). -
Page 171: Using Document Box Features
Using document box features Previewing the stored data You can preview the stored data using Preview. This feature has many This machine allows you to print the stored data on HDD. You can also send handy functions for preview. the stored data to specific destinations using Fax, Email, Server, Box or 1. -
Page 172: Adding Scanned Data
Adding scanned data Enter the file name you want. Then press OK. 6. Press OK to scan and store the scanned data. You can store a new scanned data direcly from the selected box. • To cancel the current scan job, press Stop on the control 1. -
Page 173: Viewing Detail Information
Viewing detail information Editing stored data You can see the detailed information of the selected out of stored data. You You can change the name of the selected stored data can also change the name and file property of the selected stored data 1. -
Page 174: Sending Stored Data
Sending stored data 4. When the cursor is blinking in the input line, enter the fax number using the numeric keypad on the control panel, or use Address You can send the stored data to specific destination using Fax, Email, Book from the display screen, if you have stored frequently used fax Server, Box, or USB. - Page 175 While the machine is sending an email, you cannot use the machine to copy or to send a fax. 1. Press Document Box > Select the box you want to enter > Select from the display screen. Server When you send stored data to server, you can only send data which the JOB_TYPE is Box, Fax or Scan.
- Page 176 USB Capacity. When you send stored data to server, you can only send data which the JOB_TYPE is Box, Fax or Scan. This feature is available only when the USB memory device is connected to the machine. 1. Press Document Box > Select the box you want to enter > Select from the display screen.
-
Page 177: Printing Stored Data
Printing stored data Printing information of stored data You can print the selected stored data. You can print information of the selected document box. 1. Press Document Box > Select the box you want to enter > Select from 1. Press Document Box > Select the box you want to enter > Select from the display screen. -
Page 178: Combining Stored Data
If important data is stored in the Box, we recommend you to backup 1. Press Document Box > Select the box you want to enter > Select from the data regulary. Samsung disclaims all responsibility for damage or the display screen. -
Page 179: Edit Box
5. Enter the ID and password. Select a domain as you log in the If you do not use the SyncThru™ Web Service for five minutes, machine. you will be automatically logged out. 6. Click Login. 7. Click Box. If you do not use the SyncThru™ Web Service for five minutes, 8. - Page 180 3. Press Enter or click Go to access the SyncThru™ Web Service • : You can search for a document that is shows. currently stored in the box. If necessary, you can change the language in the upper right • : You can select a job type in the job type list.
- Page 181 Downloading a document to your computer 7. Click Box. 8. Select the box which has the document you want to print. Then click You can download a stored document to your networked computer. Browse Files. 1. Turn your networked computer on and open the web browser. 9.
-
Page 182: Samsung Anyweb Print
To open the program: Samsung AnyWeb Print For Windows, Select Start > Programs or All Programs > Samsung Printers > Available for Windows and Mac OS X users only. Samsung Easy Printer Manager > Samsung Easy Printer Manager. For MAC,... -
Page 183: Advanced Settings User Interface Overview
(see "Advanced settings user interface overview" on page 183). The Samsung Printer Status is a program that monitors and informs you of the machine status. Quick links Displays Quick links to machine specific functions. -
Page 184: Using Samsung Easy Document Creator
Close the window. Using Samsung Easy Document Creator Samsung Easy Document Creator is an application to help users scan, compile, and save documents in multiple formats, including .epub format. These documents can be shared via social networking sites or fax. Whether Click the information button to see the you’re a student needing to organize research from the library or a... -
Page 185: Using Features
Send Fax Provides the ability to directly fax a document Scan Directly from Easy Document Creator if the Samsung 1. Place a single document face down on the document glass, or load Network PC Fax driver is installed (see the documents face up into the document feeder. -
Page 186: Plug-Ins
Opening the Unified Driver Configurator 1. Double-click the Unified Driver Configurator on the desktop. Switches to Printers configuration. You can also click the Startup Menu icon and select Samsung Unified Driver > Unified Driver Configurator. Shows all of the installed machine. -
Page 187: Scanners Configuration
I/O port. The Unified Linux Driver package provides an appropriate port sharing mechanism that is used by Samsung printer and scanner drivers. The drivers talk to their devices via so-called machine ports. The current status of any machine port can be viewed via the Ports configuration. -
Page 188: Troubleshooting
troubleshooting This chapter gives helpful information for what to do if you encounter an error. This chapter includes: • Redistributing toner • Clearing original document jams • Replacing the toner cartridge • Tips for avoiding paper jams • Cleaning paper dust stick and chargers of imaging units •... -
Page 189: Replacing The Toner Cartridge
Replacing the toner cartridge 4. Hold the toner cartridge and align it with the corresponding slot inside the machine. Insert it back into its slot until it locks in place. The machine uses four colors and has a different toner cartridge for each one: yellow(Y), magenta(M), cyan(C), and black(K). - Page 190 2. Pull the corresponding toner cartridge out from the machine. Model Part name Average yield SCX-8230 Average continuous black MLT-K607S Series cartridge yield: 20,000 standard pages Average continuous black MLT-K606S cartridge yield: 35,000 (Korea/USA only) standard pages SCX-8240 Average continuous black MLT-K607S Series cartridge yield: 20,000...
-
Page 191: Cleaning Paper Dust Stick And Chargers Of Imaging Units
7. Close the front door. Ensure that the door is securely closed. 2. Hold the left/right locking levers and push outward at the same time. Then remove the waste toner container. (CLX-9252 9352 Series) If the front door is not completely closed, the machine will not operate. - Page 192 Lift the locking lever upward. Then remove the waste toner container. 4. Pull the paper dust stick out. (SCX-8230 8240 Series) 5. Remove the paper dust. 3. Hold and push down the lever, and open the inner cover. Troubleshooting_ 192...
- Page 193 6. Insert the paper dust stick back. 8. Pull the corresponding charger cleaner completely as shown below. Do not strongly pull the charger cleaner to prevent it from separating from the machine. It can cause damage to the machine. 7. Close the inner cover. 9.
- Page 194 10. Insert the waste toner container until it locks in place. 11. Close the front door. Ensure that the door is securely closed. If the message still appears, do the steps 8 and 9 again. Troubleshooting_ 194...
-
Page 195: Replacing The Imaging Unit
1. Open the front door. 3. Hold and push down the lever, and open the inner cover. 2. Hold the left/right locking levers and push outward at the same time. Then remove the waste toner container. (CLX-9252 9352 Series) Troubleshooting_ 195... - Page 196 4. Pull the corresponding imaging unit out from the machine. 7. Remove the tape on the handle. 8. Pull the rubber stopper out of the developer. 5. Remove the new imaging unit from its package. 9. Remove the tape wrapped around the developer. Do not use sharp objects, such as a knife or scissors, to open the imaging unit package.
- Page 197 11. Pull out the OPC protecting pad. 13. Close the inner cover. If toner gets on your clothing, wipe it off with a dry cloth and wash clothing in cold water. Hot water sets toner into fabric. • Be careful not to scratch the surface of the imaging unit. •...
- Page 198 15. Locate the LSU window cleaning hole and insert the LSU window 18. Close the front door. Ensure that the door is securely closed. cleaning stick. Slowly push and pull the LSU window cleaning stick 4 or 5 times to clean the LSU window. 16.
-
Page 199: Replacing The Waste Toner Container
Replacing the waste toner container 2. Squeeze the left/right locking levers and push outward. Then remove the waste toner container. (CLX-9252 9352 Series) When the life of the waste toner container expires totally, the display screen shows the error message of replacing waste toner container. - Page 200 4. Insert the new waste toner container until it locks in place. 5. Close the front door. Ensure that the door is securely closed. If the front door is not completely closed, the machine will not operate. Troubleshooting_ 200...
-
Page 201: Clearing Original Document Jams
Clearing original document jams 3. Gently remove the jammed paper from the DADF. When an original jams while passing through the duplex automatic document feeder(DADF), a warning message appears on the display screen. To avoid tearing the document, remove the jammed document slowly and gently. -
Page 202: Original Paper Jam Inside Of Scanner
Original paper jam inside of scanner 4. Open the DADF. Click this link to open an animation about clearing a jam. 1. Remove any remaining pages from the DADF. 2. Open the DADF cover. 5. Open the DADF jam cover. 3. -
Page 203: Original Paper Jam While Reversing Paper In Scanner
Original paper jam while reversing paper in scanner 6. Grasp the misfeed paper, and remove the paper from the feed area by carefully pulling it using both hands. Click this link to open an animation about clearing a jam. 1. Remove any remaining pages from the DADF. 2. -
Page 204: Original Paper Jam In Front Of Scanner Duplex Path
Original paper jam in front of scanner duplex path 4. Pull the jammed paper gently out of the DADF. Click this link to open an animation about clearing a jam. 1. Remove any remaining pages from the DADF. 2. Open the DADF cover. 5. - Page 205 4. Pull the jammed paper gently out of the DADF. 6. Open the DADF jam cover. 7. Grasp the misfeed paper, and remove the paper from the feed area by carefully pulling it using both hands. Close the duplex jam cover and the DADF cover. Load the removed pages back into the DADF.
-
Page 206: Original Paper Jam In Exit Area Of Scanner
Original paper jam in exit area of scanner 4. Gently remove the jammed paper from the DADF. Click this link to open an animation about clearing a jam. 1. Remove any remaining pages from the DADF. 2. Open the DADF cover. If the jammed paper is not easily removed, go to the next step. -
Page 207: Original Paper Jam In Duplex Exit Area Of Scanner
Original paper jam in duplex exit area of scanner 6. Turn the misfeed clearing wheel in the direction of the arrow to remove the jammed paper. Click this link to open an animation about clearing a jam. 1. Remove any remaining pages from the DADF. 2. - Page 208 4. Gently remove the jammed paper from the DADF. 6. Turn the misfeed-clearing wheel in the direction of the arrow to remove the jammed paper. If you do not see paper in this area, go to the next step. 7. Pull the jammed paper gently out of the DADF. 5.
- Page 209 If you do not still see the jammed original or not easily removed it, go to 10. Close the exit tray cover, the DADF input tray and the DADF cover. Load the next step. the removed originals back into the DADF. 8.
-
Page 210: Tips For Avoiding Paper Jams
Tips for avoiding paper jams Clearing paper jams By selecting the correct media types, most paper jams can be avoided. When a paper jam occurs, a warning message appears on the display When a paper jam occurs, refer to the next guidelines. screen. - Page 211 2. Remove the jammed paper by gently pulling it straight out. 4. Remove the jammed paper from the machine. Close the right door. 5. Insert tray 1 back into the machine until it locks into place. Printing automatically resumes. If you do not see paper in this area, go to the next step. 3.
-
Page 212: Paper Jam In Tray
Paper jam in tray 2 3. Pull out tray 2. Click this link to open an animation about clearing a jam. 1. Open the right bottom door. 4. Remove the jammed paper from the machine. 2. Remove the jammed paper by gently pulling it straight out. 5. -
Page 213: Paper Jam In Tray
Paper jam in tray 3 3. Pull out tray 3. Click this link to open an animation about clearing a jam. 1. Open the right bottom door of the dual cassette feeder. 4. Remove the jammed paper from the machine. 2. -
Page 214: Paper Jam In Tray
Paper jam in tray 4 3. Pull out tray 4. Click this link to open an animation about clearing a jam. 1. Open the right bottom door of the dual cassette feeder. 4. Remove the jammed paper from the machine. 2. -
Page 215: Paper Jam In Optional High Capacity Feeder
Paper jam in optional high capacity feeder 3. Pull out high capacity feeder tray. Click this link to open an animation about clearing a jam. 1. Open the optional high capacity feeder right bottom door. 4. Remove the jammed paper from the machine. 2. -
Page 216: Paper Jam In The Multi-Purpose Tray
Paper jam in the multi-purpose tray Paper jam inside the machine (Jam feed 1) Click this link to open an animation about clearing a jam. Click this link to open an animation about clearing a jam. 1. If the paper is not feeding properly, pull the paper out of the machine. The fuser area is hot. -
Page 217: Paper Jam Inside The Machine (Jam Feed 3
Paper jam inside the machine (Jam feed 3) 3. Close the right door. Click this link to open an animation about clearing a jam. Paper jam inside the machine (Jam feed 2) 1. Open the right bottom door of the dual cassette feeder. Click this link to open an animation about clearing a jam. -
Page 218: Paper Jam Inside The Machine (Jam Registration
Paper jam inside the machine (Jam feed 4) Paper jam inside the machine (Jam Registration) Click this link to open an animation about clearing a jam. Click this link to open an animation about clearing a jam. 1. Open the right bottom door of the dual cassette feeder. The fuser area is hot. -
Page 219: Paper Jam Inside Of The Machine (Jam At Fuser Out
Paper jam inside of the machine (Jam at Fuser out) Paper jam at the top of duplex path (Jam Duplex Return) Click this link to open an animation about clearing a jam. Click this link to open an animation about clearing a jam. The fuser area is hot. -
Page 220: Paper Jam At The Top Of Duplex Path (Jam Duplex 1
Paper jam at the top of duplex path (Jam Duplex 1) Paper jam at the inside of duplex path (Jam Duplex Click this link to open an animation about clearing a jam. Click this link to open an animation about clearing a jam. The fuser area is hot. -
Page 221: Paper Jam Bottom Of Duplex Path (Jam Duplex Regi
Paper jam bottom of duplex path (Jam Duplex Regi.) Paper jam in exit area (Jam Exit Face down) Click this link to open an animation about clearing a jam. Click this link to open an animation about clearing a jam. 1. -
Page 222: Paper Jam In Exit Area (Jam Exit Face Up
Paper jam in exit area (Jam Exit Face Up) The bin full sensor is located in front of the entrance of bridge unit. Click this link to open an animation about clearing a jam. 1. Gently pull the paper out of the output tray. 2. -
Page 223: Paper Jam Inside Of Finisher During Ejecting To Top Bin
Paper jam inside of finisher during ejecting to top Paper jam at finisher’s exit during ejection to the top Click this link to open an animation about clearing a jam. Click this link to open an animation about clearing a jam. 1. -
Page 224: Paper Jam Inside Of Finisher During Ejecting To Main Bin
Paper jam inside of finisher during ejecting to main Paper jam at finisher’s exit during ejecting to main Click this link to open an animation about clearing a jam. Click this link to open an animation about clearing a jam. 1. - Page 225 3. Lift up the top tray. 5. Put the top tray back in the original position. 4. Remove the jammed paper by gently pulling it straight out. 6. Open and close the finisher front door. Printing automatically resumes. Troubleshooting_ 225...
-
Page 226: Paper Jam Inside Of Finisher Bridge
Paper jam inside of finisher bridge 3. Open and close the finisher front door. Printing automatically resumes. Click this link to open an animation about clearing a jam. 1. Lift up and hold the bridge cover. Paper jam at entrance of finisher Click this link to open an animation about clearing a jam. - Page 227 2. Remove the jammed paper by gently pulling it out. If this paper jam persists, make sure the bridge covers are inserted correctly. When the bridge covers are not inserted correctly, it could cause paper jams and hole punch positions askew. 3.
-
Page 228: Paper Jam Around Puncher Of Finisher
Paper jam around puncher of finisher Paper jam at entrance of booklet maker (3,250-sheet booklet finisher only) Click this link to open an animation about clearing a jam. Click this link to open an animation about clearing a jam. 1. Open the finisher top door. 1. -
Page 229: Paper Jam Inside Of Booklet Maker (3,250-Sheet Booklet Finisher Only
Paper jam inside of booklet maker (3,250-sheet 3. Remove the jammed paper by gently pulling it out. booklet finisher only) Click this link to open an animation about clearing a jam. 1. Open the finisher front door. 4. Close the finisher front door. If this paper jam persists, make sure the bridge covers are inserted correctly. - Page 230 3. Lift up and hold the booklet entrance guide. 5. Insert the booklet maker. 4. Remove the jammed paper by gently pulling it straight out. 6. Close the finisher front door. Troubleshooting_ 230...
-
Page 231: Paper Jam Before Booklet Folding (3,250-Sheet Booklet Finisher Only
Paper jam before booklet folding (3,250-sheet 3. Turn the knife wheel several times in the direction of the arrow. booklet finisher only) Click this link to open an animation about clearing a jam. 1. Open the finisher front door. 4. Open the booklet maker cover. 2. - Page 232 5. Remove the jammed paper by gently pulling it straight out. 7. Remove the jammed paper by gently pulling it straight out. 8. Insert the booklet maker. 6. Turn the fold wheel in the direction of the arrow until you can remove the jammed paper.
-
Page 233: Paper Jam After Booklet Folding (3,250-Sheet Booklet Finisher Only
Paper jam after booklet folding (3,250-sheet booklet 3. Turn the knife wheel several times in the direction of the arrow. finisher only) Click this link to open an animation about clearing a jam. 1. Open the finisher front door. 4. Turn the fold wheel in the direction of the arrow until you can remove the jammed paper. -
Page 234: Understanding Display Messages
Understanding display messages 5. Remove the jammed paper by gently pulling it straight out. Messages appear on the display screen to indicate the machine’s status or errors. Some error messages are shown with graphics to help you troubleshoot problem. Refer to the tables below to understand the messages and their meaning, and correct the problem, if necessary. - Page 235 The life of the imaging Replace the imaging unit [color/black] toner The toner cartridge Install a with new [color] unit expires totally. with a Samsung-genuine cartridge Failure you have installed is Samsung-genuine toner imaging unit. imaging unit (see [error number]: not for your machine.
- Page 236 Fusing unit is not The fuser unit you Install a with new transfer belt unit expires unit with a compatible. Check have installed is not Samsung-genuine fuser belt unit. totally. Samsung-genuine user's guide. for your machine. unit, designed for your transfer belt unit.
- Page 237 Message Meaning Suggested solutions Message Meaning Suggested solutions HDD System There is a problem in Turn the machine off and Output tray(face The output tray (face Remove papers from the Failure [error the hard disk. back on again. If the up) is full.
- Page 238 Message Meaning Suggested solutions Message Meaning Suggested solutions Paper Jam at the Paper has jammed Clear the jam (see "Paper Paper Jam inside Paper has jammed Clear the jam (see "Paper return of duplex during duplex printing. jam at the top of duplex of machine inside of the machine.
- Page 239 Replace with new The indicated imaging Replace the imaging unit close. [color/black] unit has almost with a Samsung-genuine imaging unit. reached its estimated imaging unit (see Staple cartridge is The staple cartridge is Install the staple imaging unit life. The "Replacing the imaging...
-
Page 240: Solving Other Problems
The life of the waste Replace the waste toner container is full. toner container container with a Display screen problem Replace it. expires soon. Samsung-genuine waste toner container (see Condition Suggested solutions "Replacing the waste toner container" on The display screen •... -
Page 241: Paper Feeding Problems
Paper feeding problems Printing problems Condition Suggested solutions Condition Possible cause Suggested solutions Paper jams during Clear the paper jam (see "Clearing paper jams" The machine The machine is not Check the power cord printing. on page 210). does not print. receiving power. - Page 242 Condition Possible cause Suggested solutions Condition Possible cause Suggested solutions (Continued) The The document size Get more hard disk space Pages print, but The toner cartridge Redistribute the toner, if machine does not is so big that the and print the document they are blank.
-
Page 243: Printing Quality Problems
Condition Possible cause Suggested solutions Condition Suggested Solutions Your machine The oil used to After printing about 100 Toner specks • The paper may not meet specifications; for has an odd smell protect the fuser is color pages, there will be no example, the paper may be too moist or rough during initial use. - Page 244 Condition Suggested Solutions Condition Suggested Solutions Color or Black If the amount of background shading becomes Misformed • If characters are improperly formed and background unacceptable: characters producing hollow images, the paper stock may be too slick. Try different paper (see "Print •...
-
Page 245: Copying Problems
Condition Suggested Solutions Condition Suggested Solutions Solid Color or • The imaging unit may not be installed properly. An unknown image Your machine is probably being used at an Black pages Remove the imaging unit and reinsert it. repetitively appears altitude of 1,000 m (3,281 ft) or above. -
Page 246: Scanning Problems
Scanning problems Scan and Fax Manager 2 Problem Conditon Suggested solutions Condition suggested solution The scanner does not • Make sure that you place the original to be Scan and Fax Check your system requirements. Scan and Fax work. scanned face down on the scanner glass, or Manager 2 does not Manager 2 works in Windows operating system face up in the DADF. -
Page 247: Common Postscript Problems
Common Windows problems condition suggested solutions Condition Suggested solutions The machine dials a The other fax machine may be turned off, out of number, but the paper, or cannot answer incoming calls. Speak “File in Use” Exit all software applications. Remove all connection with the with the other machine operator and ask her/him message appears... -
Page 248: Common Linux Problems
Common Linux problems condition Suggested solutions I cannot scan via Check if Gimp Front-end has Xsane: Device condition Suggested solutions Gimp Front-end. dialog on the Acquire menu. If not, you should The machine does • Check if the printer driver is installed in your install Xsane plug-in for Gimp on the your not print. -
Page 249: Common Macintosh Problems
condition Suggested solutions The machine does • Ensure a document is loaded into the not scan. machine, ensure your machine is connected to the computer. • If there is an I/O error while scanning. Refer to the Linux User’s Guide that came with your computer for further information on Linux error messages. -
Page 250: Specifications
Hardware specifications • Environmental specifications • Electrical specifications • Print media specifications The specification values here are based on preliminary data. See www.samsung.com/printer for current information. Hardware specifications Item CLX-9252 9352 Series SCX-8230 8240 Series Dimension Height 1,153 mm (45.4 inches) 924 mm (36.4 inches) -
Page 251: Electrical Specifications
Power requirements are based on the country/region where the device is sold. Do not convert operating voltages. Doing so might damage the device and void the product warranty. Item CLX-9252 9352 Series SCX-8230 8240 Series 110 volt models AC 110 - 127 V... -
Page 252: Print Media Specifications
Print media specifications print media weight/Capacity Type Size Dimensions tray1,2,3,4 / High capcity multipurpose tray feeder Plain paper Letter 216 x 279 mm (8.5 x 11 inches) 71 to 90 g/m (19 to 24 lb bond) 71 to 90 g/m (19 to 24 lb bond) •... - Page 253 print media weight/Capacity Type Size Dimensions tray1,2,3,4 / High capcity multipurpose tray feeder Extra Heavy Refer to the Plain Refer to the Plain paper section 176 to 216 g/m (47 to 57 lb bond) 176 to 216 g/m (47 to 57 lb bond) weight 1 paper section •...
- Page 254 print media weight/Capacity Type Size Dimensions tray1,2,3,4 / High capcity multipurpose tray feeder Tray 1,2,3,4 minimum size (custom) 139.7 x 210 mm (5.5 x 8.27 inches) 60 to 216 g/m (16 to 57 lb bond) Tray 1,2,3,4 maximum size (custom) 305 x 457 mm (12 x 18 inches) Multipurpose tray minimum size 98 x 148 mm (3.87 x 5.82 inches)
-
Page 255: Contact Samsung Worldwide
If you have any comments or questions regarding Samsung products, contact the Samsung customer care center. COUNTRY/REGION CUSTOMER CARE CENTER WEB SITE ALBANIA 42 27 5755 ARGENTINE 0800-333-3733 www.samsung.com ARMENIA 0-800-05-555 AUSTRALIA 1300 362 603 www.samsung.com AUSTRIA 0810-SAMSUNG (7267864, €... - Page 256 COUNTRY/REGION CUSTOMER CARE CENTER WEB SITE GREECE IT and Mobile : 80111-SAMSUNG (80111 7267864) from land line, local charge/ www.samsung.com from mobile, 210 6897691 Cameras, Camcorders, Televisions and Household Appliances From mobile and fixed 2106293100 GUATEMALA 1-800-299-0013 www.samsung.com HONDURAS 800-27919267 www.samsung.com...
- Page 257 PORTUGAL 80820-SAMSUNG (726-7864) www.samsung.com PUERTO RICO 1-800-682-3180 www.samsung.com RUMANIA 08010 SAMSUNG (08010 726 7864) only from landline, local network www.samsung.com Romtelecom - local tariff / 021 206 01 10 for landline and mobile, normal tariff. RUSSIA 8-800-555-55-55 www.samsung.com SAUDI ARABIA 9200-21230 www.samsung.com...
-
Page 258: Control Panel
glossary The following glossary helps you get familiar with the product by understanding the terminologies commonly used with printing as well Charge Coupled Device (CCD) is a hardware which enables the scan as mentioned in this user’s guide. job. CCD Locking mechanism is also used to hold the CCD module to prevent any damage when you move the machine. -
Page 259: Fuser Unit
DLNA Ethernet The Digital Living Network Alliance (DLNA) is a standard that allows Ethernet is a frame-based computer networking technology for local devices on a home network to share information with each other across area networks (LANs). It defines wiring and signaling for the physical the network. -
Page 260: Mac Address
IEEE 1284 ITU-T No. 1 chart The 1284 parallel port standard was developed by the Institute of Standardized test chart published by ITU-T for document facsimile Electrical and Electronics Engineers (IEEE). The term "1284-B" refers to transmissions. a specific connector type on the end of the parallel cable that attaches to the peripheral (for example, a printer). -
Page 261: Printer Driver
Printer Driver Modified Read (MR) is a compression method recommended by ITU-T A program used to send commands and transfer data from the computer T.4. MR encodes the first scanned line using MH. The next line is to the printer. compared to the first, the differences determined, and then the differences are encoded and transmitted. -
Page 262: Toner Cartridge
SSID Service Set Identifier (SSID) is a name of a wireless local area network Universal Serial Bus (USB) is a standard that was developed by the (WLAN). All wireless devices in a WLAN use the same SSID in order to USB Implementers Forum, Inc., to connect computers and peripherals. - Page 263 index understanding the copy screen 50 scanning 100 watermark 71 erasing backside address book scanning 101 SyncThru Web Service 132 error message adjusting background default settings copying 77 extension telephone setting a fax header 113 faxing 121 tray setting 47 answering machine/fax deleting AnyWeb Print...
- Page 264 front view 1 poster, print front view 2 PostScript driver Macintosh features 139 common Macintosh problems 249 troubleshooting 247 printing 157 scanning 107, 137 print media glossary managing USB memory card stock 47 envelope 45 group mirror image glossy 47, 37 email address for scanning 85 copying 76 labels 46, 47...
- Page 265 120 printing 143 scanning 96 to USB memory device 93, 94 toner cartridge Samsung Printer Status redistributing toner 188, 189 scan preset touch screen scan sending problem solving 240 delay sending 97 tray scan to email...