Table of Contents
Advertisement
Quick Links
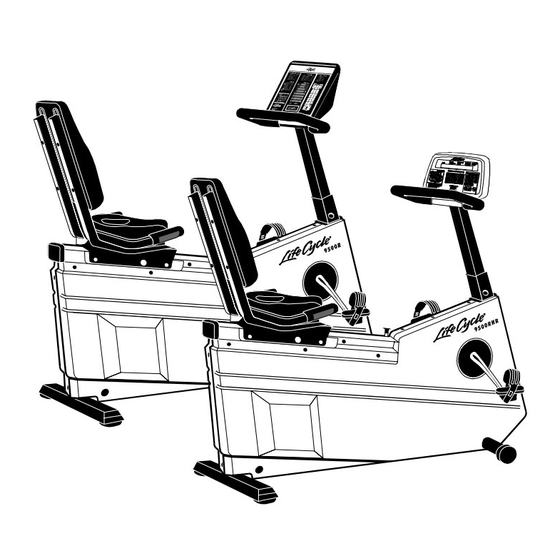
Lifecycle 9500RHR Series Bikes
This service manual is applicable to Model 9500RHR (heart rate function) chain- and belt-drive recumbent exercise
bikes. Information is appropriate to all models unless otherwise noted.
Note: Information represents typical configuration and may differ slightly from actual equipment.
Customer Support Services
SERVICE MANUAL
Advertisement
Table of Contents

Related Manuals for Life Fitness Lifecycle 9500RHR Series


Summary of Contents for Life Fitness Lifecycle 9500RHR Series
- Page 1 Lifecycle 9500RHR Series Bikes This service manual is applicable to Model 9500RHR (heart rate function) chain- and belt-drive recumbent exercise bikes. Information is appropriate to all models unless otherwise noted. Note: Information represents typical configuration and may differ slightly from actual equipment.
- Page 2 Via telephone - Monday through Friday from 8:00 AM to 6:00 PM ( CST). Via post - At address cited. To speed Life Fitness Customer Support Services response to your needs, please provide the following information. 1. Model number 2. Serial number 3.
- Page 3 Lifecycle 9500RHR Series Exercise Bikes THEORY OF OPERATION The Lifecycles recumbent bikes are stationary exercise bicycles that provide a scientific method of improving body fitness and endurance through its unique “12 or 24 MINUTE RIDE TO VIGOROUS HEALTH.” Computerized state-of-the-art electronics have been engineered to satisfy a range of personalized fitness needs of the beginner to the needs of the most advanced fitness enthusiast.
-
Page 4: Table Of Contents
Lifecycle 9500RHR Series Exercise Bikes TABLE OF CONTENTS INTRODUCTION How to use this Service Manual Theory of Operation TABLE OF CONTENTS SECTION I TROUBLESHOOTING GUIDES PAGE NO POWER................................2 DISPLAY CONSOLE INITIALIZES THEN FAILS ....................3 ERRATIC DISPLAY CONSOLE L.E.D.S ........................ 4 DISPLAY CONSOLE L.E.D.S REMAIN ILLUMINATED.................. - Page 5 FAX FORM..................................5 MISCELLANEOUS NOTES ..............................6 ©1998 Brunswick Corporation. All rights reserved. Life Fitness is a registered trademark of Brunswick Corporation. Zone Trainer and Heart Rate Zone Training are trademarks of Brunswick Corporation. Any use of these trademarks, without the express written consent of Brunswick Corporation, is forbidden.
-
Page 6: Section I
Lifecycle 9500RHR Series Exercise Bikes SECTION I TROUBLESHOOTING GUIDES... -
Page 7: No Power
Lifecycle 9500RHR Series Exercise Bikes TROUBLESHOOTING GUIDE Symptom: No Power Symptom Probable Cause Corrective Action Display Console LEDs do Pedaling too slowly Pedal faster than 45 RPM then press the START button. not illuminate Keypad not responding Massage keypad with fingertips. -
Page 8: Display Console Initializes Then Fails
Lifecycle 9500RHR Series Exercise Bikes TROUBLESHOOTING GUIDE Symptom: Display Console Initializes Then Fails Symptom Probable Cause Corrective Action Loose wire connections Disconnect then secure connections. Display Console initializes then fails Worn or damaged wire Inspect wire harnesses. Replace worn or harnesses damaged harness. -
Page 9: Erratic Display Console L.e.d.s
Lifecycle 9500RHR Series Exercise Bikes TROUBLESHOOTING GUIDE Symptom: Erratic Display Console LEDs Symptom Probable Cause Corrective Action Pedaling too slowly Pedal faster than 45 RPM. Display Console LEDs are not constant Insufficient battery voltage Test the battery voltage. It should be: 5.8 to 6.3 VDC. -
Page 10: Display Console L.e.d.s Remain Illuminated
Lifecycle 9500RHR Series Exercise Bikes TROUBLESHOOTING GUIDE Symptom: Display Console LEDs Remain Illuminated Symptom Probable Cause Corrective Action Loose wire connections Disconnect then reconnect the connections. Display Console LEDs do not extinguish in timely manner at the end of a... -
Page 11: Prompt Persists And Information Entry Not Allowed
Lifecycle 9500RHR Series Exercise Bikes TROUBLESHOOTING GUIDE Symptom: Prompt Persists and Information Entry Not Allowed Symptom Probable Cause Corrective Action Prompt persistently flashes Pedaling too slowly Pedal faster than 45 RPM. and entry of additional information is not allowed. Attempting to enter improper... -
Page 12: Prompt Extinguishes When Start Key Is Released And Information Entry Not Allowed
Lifecycle 9500RHR Series Exercise Bikes TROUBLESHOOTING GUIDE Symptom: Prompt Extinguishes When Start Key Is Released and Information Entry Not Allowed Symptom Probable Cause Corrective Action Malfunctioning Display Console Test with substitute Display Console. Replace Prompt extinguishes when malfunctioning Display Console. -
Page 13: Display Console Keys Do Not Function
Lifecycle 9500RHR Series Exercise Bikes TROUBLESHOOTING GUIDE Symptom: Display Console Keys Do Not Function Symptom Probable Cause Corrective Action Attempting to enter program Refer to Operation Manual for program Display Console keys not available. availability. (except START key) do not function and Aerobic Trainer does not respond. -
Page 14: Immediate, Excessive Resistance Load At Start Of Program
Lifecycle 9500RHR Series Exercise Bikes TROUBLESHOOTING GUIDE Symptom: Immediate, Excessive Resistance Load at Start of Program Symptom Probable Cause Corrective Action Pedaling too slowly Pedal faster than 45 RPM. Upon start of program, excessive resistance load is immediate; no normal, incremental increase from “no load.”... -
Page 15: Excessive Resistance Load During Program
Lifecycle 9500RHR Series Exercise Bikes TROUBLESHOOTING GUIDE Symptom: Excessive Resistance Load During Program Symptom Probable Cause Corrective Action During program, excessive Pedaling too slowly Pedal faster than 45 RPM. resistance loading occurs. Loose wire connections Disconnect then, reconnect connections. Worn or damaged wire Inspect wire harnesses. -
Page 16: Resistance Varies During Manual Program
Lifecycle 9500RHR Series Exercise Bikes TROUBLESHOOTING GUIDE Symptom: Resistance Varies During Manual Program NOTE: In RANDOM and HILL programs, resistance variation may be normal. Test for resistance variation in MANUAL program. Symptom Probable Cause Corrective Action During MANUAL program, Pedaling too slowly Pedal faster than 45 RPM. -
Page 17: Resistance Constant During Random Or Hill Programs
Lifecycle 9500RHR Series Exercise Bikes TROUBLESHOOTING GUIDE Symptom: Resistance Constant During Random or Hill Programs NOTE: In RANDOM and HILL programs, resistance variation may be normal. Test for resistance variation in MANUAL program. Symptom Probable Cause Corrective Action Loose wire connections Disconnect then, reconnect connections. -
Page 18: Difficult Or No Pedaling Movement
Lifecycle 9500RHR Series Exercise Bikes TROUBLESHOOTING GUIDE Symptom: Difficult or NO Pedaling Movement Symptom Probable Cause Corrective Action Malfunctioning Free-wheel Inspect Gear for free backward and forward Pedaling is difficult, feels Gear rotation. Replace malfunctioning Gear. restricted or, is not... -
Page 19: Pedaling Too Easy
Lifecycle 9500RHR Series Exercise Bikes TROUBLESHOOTING GUIDE Symptom: Pedaling Too Easy NOTE: Trainer utilizes “constant work” principle - pedal faster/less resistance, pedal slower/greater resistance. Symptom Probable Cause Corrective Action Pedaling too slowly Pedal faster than 45 RPM. During exercise program,... -
Page 20: Battery Over-Heating
Lifecycle 9500RHR Series Exercise Bikes TROUBLESHOOTING GUIDE Symptom: Battery Over-Heating Symptom Probable Cause Corrective Action Battery Wires incorrectly Inspect connections: red wire to positive (+) Battery over-heating during connected lead; black wire to negative (-) lead. exercise program. Worn Battery Wires Inspect Wires. -
Page 21: Not Stable
Lifecycle 9500RHR Series Exercise Bikes TROUBLESHOOTING GUIDE Symptom: Not Stable Symptom Probable Cause Corrective Action Aerobic Trainer not stable Stabilizer Foot Pads not Adjust Foot Pads. adjusted correctly upon floor. Floor surface not level Position Aerobic Trainer upon level surface. - Page 22 Lifecycle 9500RHR Series Exercise Bikes TROUBLESHOOTING GUIDE Symptom: Emitting Loud Noise NOTE: Trainer machinery may resonate louder upon hard surfaces than upon carpeted or matted surfaces. Symptom Probable Cause Corrective Action Non-carpeted, hard surface Place Aerobic Trainer upon softer surfaced...
-
Page 23: Seat Wobble
Lifecycle 9500RHR Series Exercise Bikes TROUBLESHOOTING GUIDE Symptom: Seat Wobbles Symptom Probable Cause Corrective Action Seat rollers out of adjustment Inspect seat rollers. Adjust or replace worn Seat wobbles or has or excessively worn rollers as necessary. excessive side-to-side movement... -
Page 24: Alternator Voltage Test
Lifecycle 9500RHR Series Exercise Bikes TROUBLESHOOTING GUIDE Alternator Voltage Test Symptom Probable Cause Corrective Action (Various. See Malfunctioning Alternator Inspect Alternator voltage. Troubleshooting Guides) 1. Attach DC voltmeter to Alternator. Voltmeter positive (+) probe to Alternator red lead. Voltmeter negative (-) lead to Alternator black lead. -
Page 25: No Heart Rate Or Display Reads No Heart Rate
Lifecycle 9500RHR Series Exercise Bikes TROUBLESHOOTING GUIDE Symptom: No Heart Rate or Display Reads No Heart Rate Symptom Probable Cause Corrective Action No heart rate or, display No heart rate reading Executive Diagnostic Mode to verify performance of heart rate function. -
Page 26: Handlebar/Lifepulse Grips Loose
Lifecycle 9500RHR Series Exercise Bikes TROUBLESHOOTING GUIDE Symptom: Handlebar/Lifepulse Grips Loose Symptom Probable Cause Corrective Action Excessive wear or damage to Replace the handlebar assembly. Handlebar grips loosening grip Cleaning solution that contains Replace the Lifepulse Sensor Kit. Lifepulse sensor molding an acid or ammonia base. - Page 27 Lifecycle 9500RHR Series Exercise Bikes NOTES:...
- Page 28 Lifecycle 9500RHR Exercise Bike SECTION II DIAGNOSTIC MODES...
- Page 29 Lifecycle 9500RHR Exercise Bike HOW TO ENTER DIAGNOSTIC MODE Diagnostics can be entered while holding the the ‘5’ key and pressing the ‘Start’ key while pedaling the bike over 45 RPM’s. The ‘Enter’ key will prompt you forward, while the ‘Clear/Pause’ key you prompt you backward in diagnostic modes.
-
Page 30: Speaker Test Diagnostics State 2 - Individual Led Test
Lifecycle 9500RHR Exercise Bike DIAGNOSTIC MODES DIAGNOSTICS STATE 1 - ALL LEDS and KEYPAD TEST ALL LED TEST KEYPAD TEST SPEAKER TEST DIAGNOSTICS STATE 2 - INDIVIDUAL LED TEST INDIVIDUAL LED TEST DIAGNOSTICS STATE 3 - VERSION #: RPM, HR, and LOAD TESTS PROGRAM VERSION NUMBER PEDAL RPM HEART RATE... -
Page 31: Diagnostics State 1 - All Leds And Keypad Test
Lifecycle 9500RHR Exercise Bike DIAGNOSTIC MODES DIAGNOSTICS STATE 1 - ALL LEDS and KEYPAD TEST Diagnostics is entered by holding the ‘5’ key and depressing the ‘Start’ key while pedaling 45 RPM or faster. On entry to this state, all of the LED’s will turn on. Pressing keys will result in a beep sound and, for all but the START/ENTER’... -
Page 32: Diagnostics State 4 - Lifepulse And Network Status Tests
Lifecycle 9500RHR Exercise Bike DIAGNOSTIC MODES DIAGNOSTICS STATE 4 - LIFEPULSE and NETWORK STATUS TESTS The PROGRAM VERSION NUMBER of the HEART RATE DSP board ‘05 software (ex. P1.80) will be displayed in the ELAPSED TIME window. The PROGRAM VERSION NUMBER of the HEART RATE DSP board DSP software (ex. P3.90) will be displayed in the SPEED window. -
Page 33: Diagnostics State 8 - English/Metric Units
Lifecycle 9500RHR Exercise Bike DIAGNOSTIC MODES Pressing the ‘CLEAR/PAUSE’ key will return to DIAGNOSTICS STATE 6. Pressing the ‘START/ENTER’ key will advance to DIAGNOSTICS STATE 8. DIAGNOSTICS STATE 8 - ENGLISH/METRIC UNITS Within this state, ENGLISH or METRIC units can be selected. The ‘DOWN ARROW’... -
Page 34: Diagnostics State 13 - Total Hours And Statistics
Lifecycle 9500RHR Exercise Bike DIAGNOSTIC MODES DIAGNOSTICS STATE 12 - POWER SUPPLY CONFIGURATION Within this state, the power supply selection can be made. Press the ‘UP/DOWN’ arrow keys to toggle Between 6-VOLT BATTERY, EXTERNAL SUPPLY and 9-VOLT BATTERY (CVA) selections. This value is stored in EEROM and is kept when the unit is not in use. - Page 35 Lifecycle 9500RHR Exercise Bike DIAGNOSTIC TESTS In ALL DIAGNOSTICS STATES, the user must keep pedaling the bike. If the pedal RPM drops too low, the bike will shut down, requiring at least 45 RPM or greater and a START switch closure to operate again.
-
Page 36: Diagnostics State 1
Lifecycle 9500RHR Exercise Bike DIAGNOSTIC TESTS DIAGNOSTICS STATE 1 This test indicates that all keys on the Display are responding properly. Pressing keys in this state verifies and displays a value in each 7-segment display. Press PROGRAM SELECT key to display 'A' Press ‘... - Page 37 Lifecycle 9500RHR Exercise Bike DIAGNOSTIC TESTS DIAGNOSTICS STATE 3 This test indicates the state of the Software Version and EEROM configurations. Upon entry the system will beep and begin displaying the current pedal rpm in the 3 digits of the RPM 7 - segment displays.
- Page 38 Lifecycle 9500RHR Exercise Bike DIAGNOSTIC TESTS DIAGNOSTICS STATE 4 This test displays the current PROGRAM VERSIONS. Upon entry, the system will beep and then display the PROGRAM VERSION / REVISION NUMBERS of the HEART Rate, ‘05, the HEART RATE DSP, and the NETWORK ‘05. MULTI-FUNCTION DISPLAY ELAPSED TIME WINDOW DATA ENTRY WINDOW...
- Page 39 Lifecycle 9500RHR Exercise Bike DIAGNOSTIC TESTS DIAGNOSTICS STATE 7 This test indicates if the Telemetry feature is Enabled/Disabled. Upon entry the system will beep and display a heart in the PROGRAM PROFILE LED Matrix if the TELEMETRY HEART RATE feature is enabled. The condition of the TELEMETRY HEART RATE system will be displayed in the ELAPSED TIME window and the user Heart Rate (if transmitter is in use) will be displayed in the DATA ENTRY window.
- Page 40 Lifecycle 9500RHR Exercise Bike DIAGNOSTIC TESTS DIAGNOSTICS STATE 9 This test indicates of the Lifecycle is a Recumbent or Upright unit. MULTI-FUNCTION DISPLAY ELAPSED TIME WINDOW DATA ENTRY WINDOW When the default is set for a Recumbent unit, it will read ‘REC’ in the DATA ENTRY WINDOW. When the default is set for an Upright unit it will read ‘...
- Page 41 Lifecycle 9500RHR Exercise Bike NOTES...
-
Page 42: How To
SECTION III How To... SERVICE AND REPAIR GUIDES... -
Page 43: The Alternator
Lifecycle 9500RHR Series Exercise Bikes How To...REMOVE AND REPLACE THE ALTERNATOR Tools Required: 3/4, 5/16, 1/2, and 1/4 inch wrenches. STEP 1 Remove the HOUSING. Refer to “How To...” in this section. STEP 2 Remove the two POSITIVE RED WIRES from their POSTS on the ALTERNATOR. -
Page 44: Alternator Belt
Lifecycle 9500RHR Series Exercise Bikes ALTERNATOR BELT (BELT) Tools Required: Two 3/4 inch wrenches, 1/2 inch wrench, long-nose pliers, two Standard screwdrivers, E-ring tool, center punch, light hammer, belt-tension gauge. STEP 1 Remove the HOUSING. Refer to “How To...” in this section. - Page 45 Lifecycle 9500RHR Series Exercise Bikes How To...REMOVE AND REPLACE THE DRIVE BELT Tools Required: Two Standard screwdrivers, long-nose pliers, or E-ring tool STEP 1 Remove the shroud. Refer to “How To..” in this section. STEP 2 Loosen the hex bolt on the bracket assembly and slacken the belt.
-
Page 46: Chain
Lifecycle 9500RHR Series Exercise Bikes How To... REMOVE AND REPLACE THE CHAIN TOOLS REQUIRED: Needle-nose pliers, Standard screwdriver Step 1 Remove the HOUSING. (See ”How To...”) Step 2 With a standard screwdriver, pry apart the MASTER LINK RETAINER CLIP. Then, with a needle nose pliers, remove the MASTER LINK RETAINING CLIP, the MASTER LINK and the MASTER LINK PLATE from the worn CHAIN. -
Page 47: Crank Arm And Bearings
Lifecycle 9500RHR Series Exercise Bikes How To...REMOVE AND REPLACE THE CRANK ARM AND BEARINGS Tools Required: Special crank arm wrench required (available from Life Fitness), torque wrench 30 FT. LBS. with 32mm open end, punch, Standard screwdriver, hex key set , and clean rag WARNING! IF THE INFORMATION IN THESE INSTRUCTIONS ARE NOT FOLLOWED EXACTLY, THE EXERCISE BIKE MAY BE DAMAGED, VOIDING YOUR WARRANTY. - Page 48 Lifecycle 9500RHR Series Exercise Bikes How To...REMOVE AND REPLACE THE CRANK ARM AND BEARINGS (Cont) STEP 10 Slide the right CRANK BEARING NUT ASSEMBLY over the CRANK ARM. Using the 32mm crank arm wrench, install the BEARING CRANK NUT ASSEMBLY until it seats against the SPROCKET. Tighten to 20-30 FT. LBS.
- Page 49 Lifecycle 9500RHR Series Exercise Bikes How To...REMOVE AND REPLACE THE EXTRUSION/SEAT ASSEMBLY Tools Required: 1/2 inch wrench, Standard screwdriver, 5/32 inch Hex key wrench STEP 1 Remove the HOUSING. Refer to See How To...in this section. STEP 2 Using a 1/2 inch wrench, remove the four MOUNTING BOLTS that secure the EXTRUSION to the FRAME.
- Page 50 Lifecycle 9500RHR Series Exercise Bikes How To...REMOVE AND REPLACE THE FREE-WHEEL GEAR (Chain) Tools Required: E-ring tool, light hammer, needle-nose pliers, two Standard screwdrivers, 1/2 wrench, two 3/4 inch wrenches, center punch STEP 1 Torque Remove HOUSING. Refer to See How To... in this 12-15 in-lbs section.
-
Page 51: Main Wire Harness
Lifecycle 9500RHR Series Exercise Bikes How To...REMOVE AND REPLACE THE MAIN WIRE HARNESS Tools Required: 1/4 , 5/16, and 3/8 inch wrenches, scissors, standard screwdriver STEP 1 Remove the HANDLEBAR ASSEMBLY. Refer to See How To..in this section. STEP 2 Remove the HOUSING. -
Page 52: Seat Roller Bearings
Lifecycle 9500RHR Series Exercise Bikes How To...ADJUST SEAT ROLLER BEARINGS Tools Required: 7/8 inch wrench and Standard screwdriver STEP 1 With a straight-blade screwdriver, remove the two SCREWS from the EXTRUSION CAP. Remove the EXTRUSION CAP and set aside to... -
Page 53: Battery
Lifecycle 9500RHR Series Exercise Bikes How To...REMOVE AND REPLACE THE BATTERY Tools Required: Standard screwdriver STEP 1 Tilt the bike, resting it on its side to allow access to the underside. STEP 2 Use a straight-blade screwdriver, remove the four MOUNTING SCREWS from the BATTERY ASSEMBLY. -
Page 54: Display Console
Lifecycle 9500RHR Series Exercise Bikes How To...REMOVE AND REPLACE THE DISPLAY CONSOLE Tools Required: Phillips screwdriver STEP 1 Using a Phillips screwdriver, remove the four DISPLAY SCREWS (A) from the BACK PLATE of the HANDLEBAR ASSEMBLY. STEP 2 Disconnect the 16-PIN and 14-PIN CONNECTORS from the back of the DISPLAY CONSOLE, taking note of their positions. -
Page 55: Alternator Control Board
Lifecycle 9500RHR Series Exercise Bikes How To...REMOVE AND REPLACE THE ALTERNATOR CONTROL BOARD Tools Required: Standard screwdriver STEP 1 Remove the HOUSING. Refer to See How To...in this section. STEP 2 Note the WIRE HARNESS position then, disconnect the WIRE HARNESS from locations P1 and P2 from the ALTERNATOR CONTROL BOARD. -
Page 56: Foot Strap
Lifecycle 9500RHR Series Exercise Bikes How To...REMOVE AND REPLACE THE FOOT STRAP Tools Required: None NOTE: THE STRAP HAS BEEN INITIALED “L” FOR LEFT AND “R” FOR RIGHT TO SHOW PEDAL LOCATION. STEP 1 Grasp the outside of the worn STRAP and pull AWAY and DOWN from the knob on the PEDAL. -
Page 57: Front Wheels
Lifecycle 9500RHR Series Exercise Bikes How To...REMOVE AND REPLACE THE FRONT WHEEL Tools Required: Phillips screwdriver STEP 1 Using a Phillips screwdriver, remove the two screws and washers from the wheel. Screw STEP 2 Torque Guide the new wheel onto the axle and secure with the two 20-25 IN LBS Phillips screws and washers. -
Page 58: Handlebar Assembly
Lifecycle 9500RHR Series Exercise Bikes How To...REMOVE AND REPLACE THE HANDLEBAR ASSEMBLY Tools Required: 1/2 inch and Phillips screwdriver STEP 1 Remove the DISPLAY CONSOLE. Refer to See How To...in this section. NOTE: TUCK BOTH CONNECTORS INTO THE HANDLEBAR ASSEMBLY TO PREVENT IT FROM CATCHING AS THE HANDLEBAR IS REMOVED. -
Page 59: Digital Heart Rate Sensors
Lifecycle 9500RHR Series Exercise Bikes How To...REMOVE AND REPLACE THE DIGITAL HEART RATE SENSORS Tools Required: Phillips screwdriver, standard screwdriver, 5/64” hex key wrench NOTE: The kit you have received will come equipped with either 5/64” hex key button head screws or Phillips head pan screws. -
Page 60: Digital Heart Rate Sensors
Lifecycle 9500RHR Series Exercise Bikes How To...REMOVE AND REPLACE THE DIGITAL HEART RATE SENSORS (Continued) Installing the new Lifepulse digital heart rate sensors: Kit Number Product GK20-00002-0001 Life Fitness 9100HR and 9500HR Treadmills ( small radius ) Life Fitness 9500HR Cross-Trainer Total Body... -
Page 61: Heart Rate Pc Board
Lifecycle 9500RHR Series Exercise Bikes How To...REMOVE AND REPLACE THE DIGITAL HEART RATE PC BOARD Tools Required: Phillips screwdriver, pliers STEP 1 Remove the four SCREWS securing the DISPLAY CONSOLE to the DISPLAY CONSOLE BRACKET. STEP 2 Unplug the PIN CONNECTORS from the back of the DISPLAY CONSOLE. - Page 62 Lifecycle 9500RHR Series Exercise Bikes How To...REMOVE AND REPLACE THE SEAT/LIFEPULSE GRIP ASSEMBLY Tools required: Socket/Rachet set, Standard screwdriver, Hex key set & T10 Torx key Step 1 Remove the user-right side SHROUD. (see How to...) Step 2 With a standard screwdriver, carefully remove the two SCREWS securing the EXTRUSION END CAP to the SEAT GUIDE EXTRUSION.
-
Page 63: Housing
Lifecycle 9500RHR Series Exercise Bikes How To...REMOVE AND REPLACE HOUSING Tools Required: 5/8 inch open-end wrench, Phillips screwdriver, standard screwdriver STEP 1 Raise the COLLAR from the HOUSING and tape it to the HANDLEBAR post. STEP 2 To remove the LEFT PEDAL, small hole-side of HOUSING, place a 5/8 inch open-end wrench on the PEDAL BOLT and turn the wrench clockwise. -
Page 64: Pedals
Lifecycle 9500RHR Series Exercise Bikes How To...REMOVE AND REPLACE THE PEDALS Tools Required: 5/8 inch open end wrench STEP 1 To remove the LEFT PEDAL, place a 5/8 inch open end wrench on the PEDAL BOLT and turn the wrench clockwise. -
Page 65: Seat Back Pad
Lifecycle 9500RHR Series Exercise Bikes How To...REMOVE AND REPLACE THE SEAT BACK PAD Tools Required: 5/32 inch hex key wrench STEP 1 With a 5/32 inch hex key wrench, remove four SCREWS from the SEAT PAD and remove the PAD. -
Page 66: Stabilizer Bar
Lifecycle 9500RHR Series Exercise Bikes How To...REMOVE AND REPLACE THE STABILIZER BAR Tools Required: 1/2 inch wrench, short length of 2x4 board or a small box of same size to support bike STEP 1 Raise the rear of the bike and support it with a piece of 2x4 board under the rear of the bike and in front of the STABILIZER BAR. -
Page 67: Wiring Block Diagrams
Life Cycle 9500RHR Series Exercise Bikes SECTION IV WIRING BLOCK DIAGRAMS PARTS IDENTIFICATION... - Page 68 Life Cycle 9500RHR Series Exercise Bikes WIRING BLOCK DIAGRAM...
- Page 69 Life Cycle 9500RHR Series Exercise Bikes WIRING BLOCK DIAGRAM...
- Page 70 Life Cycle 9500RHR Series Exercise Bikes SECTION IV WIRING BLOCK DIAGRAMS PARTS IDENTIFICATION...
- Page 71 Life Cycle 9500RHR Series Exercise Bikes WIRING BLOCK DIAGRAM...
- Page 72 Life Cycle 9500RHR Series Exercise Bikes WIRING BLOCK DIAGRAM...
- Page 73 Life Cycle 9500RHR Series Exercise Bikes PARTS IDENTIFICATION Overlay Bezel AK19-00060-0001 Eng/Eng AK19-00060-0002 Eng/Met Console Assembly AK19-00060-0003 Ger/Met SK19-00039-0001(R) Eng/Eng AK19-00060-0006 Jap/Met SK19-00039-0002(R) Eng/Met AK19-00060-0004 Spn/Met Console Logo Decal SK19-00039-0003(R) Ger/Met AK19-00060-0005 Swe/Met OK18-01178-0005 SK19-00039-0006(R) Jap/Met AK19-00060-0008 Itl/Met SK19-00039-0004(R) Spn/Met AK19-00060-0009 Dut/Met SK19-00039-0005(R) Swe/Met SK19-00039-0008(R) Itl/Met...
- Page 74 Clamps(2) Clamps(2) Tabbed Lockwasher OK18-01104-0002 OK18-01104-0001 Master Link Assembly OK18-01280-0000 GK18-00004-0002 Crankarm Bearing Set Crankarm Locknut GK18-00004-0024 OK18-01059-0002 Bearing Nut(LT) AK18-00116-0000 Main Cable Assembly Seat Assembly w/o Back AK19-00065-0000 SK19-00075-0000 Bearing Nut(RT) AK18-00116-0000 Roller Guards(2) Alternator Control Assy OK19-01186-0001 SK19-00063-0000(R) Extruded Tube Assembly SK19-00088-0002 Sprocket 60-Tooth...
- Page 75 Life Cycle 9500RHR Series Exercise Bikes PARTS IDENTIFICATION LC-9500R GK19-00001- EXERCISE BIKE XXXX SN #101-141, 450000-465515 Crankarm Dust Cover OK19-01134-0000 Wheel Inserts(2) Leg Covers(2) OK18-01057-0000 OK18-01006-0001 Alternator, Mando 0017-00009-0841 Wheel Insert Screws(2) OK17-00101-0932 Leg Cover Washers(2) OK18-01023-0100 Wheel Insert Washers(2) OK17-01029-0000 Wheels &...
- Page 76 Life Cycle 9500RHR Series Exercise Bikes PARTS IDENTIFICATION LC-9500RHR (RE) GK19-00005- EXERCISE BIKE XXXX SN # 483000 - 490681 Overlay Bezel AK18-00166-0001 Eng/Eng AK18-00166-0002 Eng/Met Console Assembly AK18-00166-0003 Ger/Met SK19-00084-0001(R) Eng/Eng AK18-00166-0006 Jap/Met SK19-00084-0002(R) Eng/Met AK18-00166-0007 Frn/Met Console Logo Decal SK19-00084-0003(R) Ger/Met AK18-00166-0004 Spn/Met OK18-01178-0005...
- Page 77 Clamps(2) Clamps(2) Tabbed Lockwasher OK18-01104-0002 OK18-01104-0001 Master Link Assembly OK18-01280-0000 GK18-00004-0002 Crankarm Bearing Set Crankarm Locknut GK18-00004-0024 OK18-01059-0002 Bearing Nut(LT) AK18-00116-0000 Seat Assembly w/o Back Main Cable Assembly SK19-00075-0000 AK19-00065-0000 Heart Rate Electrode Kit Bearing Nut(RT) GK20-00002-0002 AK18-00116-0000 Roller Guards(2) Alternator Control Assy OK19-01186-0001 SK19-00087-0000(R)
- Page 78 Life Cycle 9500RHR Series Exercise Bikes PARTS IDENTIFICATION LC-9500RHR (RE) GK19-00005- EXERCISE BIKE XXXX SN # 483000 - 490681 Crankarm Dust Cover OK19-01134-0000 Wheel Inserts(2) Leg Covers(2) OK18-01057-0000 OK18-01006-0001 Alternator, Mando 0017-00009-0841 Wheel Insert Screws(2) OK17-00101-0932 Leg Cover Washers(2) OK18-01023-0100 Wheel Insert Washers(2) OK17-01029-0000 Leg Cover Screws(2)
- Page 79 Life Cycle 9500RHR Series Exercise Bikes PARTS IDENTIFICATION LC-9500R (RE) GK19-00007- EXERCISE BIKE XXXX SN # 463901-483950 Randomly to 482999 Overlay Bezel AK18-00172-0001 Eng/Eng AK18-00172-0002 Eng/Met Console Assembly AK18-00172-0003 Ger/Met SK19-00094-0001(R) Eng/Eng AK18-00172-0007 Frn/Met SK19-00094-0002(R) Eng/Met AK18-00172-0004 Spn/Met Console Logo Decal SK19-00094-0003(R) Ger/Met AK18-00172-0008 Itl/Met OK18-01178-0005...
- Page 80 Clamps(2) Clamps(2) Tabbed Lockwasher OK18-01104-0002 OK18-01104-0001 Master Link Assembly OK18-01280-0000 GK18-00004-0002 Crankarm Bearing Set Crankarm Locknut GK18-00004-0024 OK18-01059-0002 Bearing Nut(LT) AK18-00116-0000 Main Cable Assembly Seat Assembly w/o Back AK19-00065-0000 SK19-00075-0000 Bearing Nut(RT) AK18-00116-0000 Roller Guards(2) Alternator Control Assy OK19-01186-0001 AK19-00134-0000(R) Extruded Tube Assembly SK19-00088-0002 Sprocket 60-Tooth...
- Page 81 Life Cycle 9500RHR Series Exercise Bikes PARTS IDENTIFICATION LC-9500R (RE) GK19-00007- EXERCISE BIKE XXXX SN # 463901-483950 Randomly to 482999 Crankarm Dust Cover OK19-01134-0000 Wheel Inserts(2) Leg Covers(2) OK18-01057-0000 OK18-01006-0001 Alternator, Mando 0017-00009-0841 Wheel Insert Screws(2) OK17-00101-0932 Leg Cover Washers(2) OK18-01023-0100 Wheel Insert Washers(2) OK17-01029-0000...
- Page 82 Life Cycle 9500RHR Series Exercise Bikes PARTS IDENTIFICATION LC-9500R (RE) GK19-00010- EXERCISE BIKE XXXX Overlay Bezel AK18-00192-0001 Eng/Eng AK18-00192-0002 Eng/Met Console Assembly AK18-00192-0003 Ger/Met AK19-00106-0001(R) Eng/Eng AK18-00192-0007 Frn/Met AK19-00106-0002(R) Eng/Met AK18-00192-0004 Spn/Met Console Logo Decal AK19-00106-0003(R) Ger/Met AK18-00192-0008 Itl/Met OK18-01178-0005 AK19-00106-0007(R) Frn/Met AK18-00192-0009 Dut/Met AK19-00106-0004(R) Spn/Met...
- Page 83 Clamps(2) Clamps(2) Tabbed Lockwasher OK18-01104-0002 OK18-01104-0001 Master Link Assembly OK18-01280-0000 GK18-00004-0002 Crankarm Bearing Set Crankarm Locknut GK18-00004-0024 OK18-01059-0002 Bearing Nut(LT) AK18-00116-0000 Main Cable Assembly Seat Assembly w/o Back AK19-00065-0000 SK19-00075-0000 Bearing Nut(RT) AK18-00116-0000 Roller Guards(2) Alternator Control Assy OK19-01186-0001 AK19-00134-0000(R) Extruded Tube Assembly SK19-00088-0002 Sprocket 60-Tooth...
- Page 84 Life Cycle 9500RHR Series Exercise Bikes PARTS IDENTIFICATION LC-9500R (RE) GK19-00010- EXERCISE BIKE XXXX Crankarm Dust Cover OK19-01134-0000 Wheel Inserts(2) Leg Covers(2) OK18-01057-0000 OK18-01006-0001 Alternator, Mando 0017-00009-0841 Wheel Insert Screws(2) OK17-00101-0932 Leg Cover Washers(2) OK18-01023-0100 Wheel Insert Washers(2) OK17-01029-0000 Wheels & Bearings(2) Leg Cover Screws(2) SK18-00016-0000 0017-00101-0017...
- Page 85 Life Cycle 9500RHR Series Exercise Bikes PARTS IDENTIFICATION LC-9500RHR (RE) GK19-00011- EXERCISE BIKE XXXX Overlay Bezel AK18-00191-0001 Eng/Eng AK18-00191-0002 Eng/Met Console Assembly AK18-00191-0003 Ger/Met SK19-00084-0001(R) Eng/Eng AK18-00191-0006 Jap/Met AK19-00105-0002(R) Eng/Met AK18-00191-0007 Frn/Met Console Logo Decal AK19-00105-0003(R) Ger/Met AK18-00191-0004 Spn/Met OK18-01178-0005 AK19-00105-0006(R) Jap/Met AK18-00191-0008 Itl/Met AK19-00105-0007(R) Frn/Met...
- Page 86 Clamps(2) Clamps(2) Tabbed Lockwasher OK18-01104-0002 OK18-01104-0001 Master Link Assembly OK18-01280-0000 GK18-00004-0002 Crankarm Bearing Set Crankarm Locknut GK18-00004-0024 OK18-01059-0002 Bearing Nut(LT) AK18-00116-0000 Seat Assembly w/o Back Main Cable Assembly SK19-00075-0000 AK19-00065-0000 Heart Rate Electrode Kit Bearing Nut(RT) GK20-00002-0002 AK18-00116-0000 Roller Guards(2) Alternator Control Assy OK19-01186-0001 SK19-00087-0000(R)
- Page 87 Life Cycle 9500RHR Series Exercise Bikes PARTS IDENTIFICATION LC-9500RHR (RE) GK19-00011- EXERCISE BIKE XXXX Crankarm Dust Cover OK19-01134-0000 Wheel Inserts(2) Leg Covers(2) OK18-01057-0000 OK18-01006-0001 Alternator, Mando 0017-00009-0841 Wheel Insert Screws(2) OK17-00101-0932 Leg Cover Washers(2) OK18-01023-0100 Wheel Insert Washers(2) OK17-01029-0000 Wheels & Bearings(2) Leg Cover Screws(2) 0017-00101-0017 SK18-00016-0000...
- Page 88 Life Cycle 9500RHR Series Exercise Bikes PARTS IDENTIFICATION LC-9500RHR GK19-00014- EXERCISE BIKE XXXX Overlay Bezel AK18-00191-0001 Eng/Eng AK18-00191-0002 Eng/Met Console Assembly AK18-00191-0003 Ger/Met SK19-00084-0001(R) Eng/Eng AK18-00191-0006 Jap/Met AK19-00105-0002(R) Eng/Met AK18-00191-0007 Frn/Met Console Logo Decal AK19-00105-0003(R) Ger/Met AK18-00191-0004 Spn/Met OK18-01178-0005 AK19-00105-0006(R) Jap/Met AK18-00191-0008 Itl/Met AK19-00105-0007(R) Frn/Met AK18-00191-0009 Dut/Met...
- Page 89 Clamps(2) Clamps(2) Tabbed Lockwasher OK18-01104-0002 OK18-01104-0001 Master Link Assembly OK18-01280-0000 GK18-00004-0002 Crankarm Bearing Set Crankarm Locknut GK18-00004-0024 OK18-01059-0002 Bearing Nut(LT) AK18-00116-0000 Seat Assembly w/o Back Main Cable Assembly SK19-00075-0000 AK19-00065-0000 Heart Rate Electrode Kit Bearing Nut(RT) GK20-00002-0002 AK18-00116-0000 Roller Guards(2) Alternator Control Assy OK19-01186-0001 SK19-00087-0000(R)
- Page 90 Life Cycle 9500RHR Series Exercise Bikes PARTS IDENTIFICATION LC-9500RHR GK19-00014- EXERCISE BIKE XXXX Crankarm Dust Cover OK19-01134-0000 Wheel Inserts(2) Leg Covers(2) OK18-01057-0000 OK18-01006-0001 Alternator, Mando 0017-00009-0841 Wheel Insert Screws(2) OK17-00101-0932 Leg Cover Washers(2) OK18-01023-0100 Wheel Insert Washers(2) OK17-01029-0000 Wheels & Bearings(2) Leg Cover Screws(2) SK18-00016-0000 0017-00101-0017...
- Page 91 Life Cycle 9500RHR Series Exercise Bikes PARTS IDENTIFICATION LC-9500RHR (BELT) GK19-00016- EXERCISE BIKE XXXX SN: 495553 - 503543 Console Assembly Battery Cover AK19-00116-0001(R) Eng/Met Overlay Bezel OK36-01035-0006 AK19-00116-0003(R) Ger/Met AK19-00115-0001 Eng/Met AK19-00116-0007(R) Frn/Met AK19-00115-0003 Ger/Met AK19-00116-0004(R) Spn/Met Console Case AK19-00115-0007 Frn/Met AK19-00116-0008(R) Itl/Met OK36-01034-0006 AK19-00115-0004 Spn/Met...
- Page 92 Console Cable Assembly Seat Assy w/o Back AK19-00081-0001 SK19-00075-0000 Heart Rate Electrode Kit Idler Arm Bracket GK20-00002-0002 OK46-01056-0001 Extruded Tube Assembly SK19-00083-0002 Roller Guards(2) OK-01186-0001 Crank Arm Pulley Assembly AK46-00015-0001 Alternator Control Assy AK19-00129-0000(R) Flat Flex Cable Assembly Alternator Cable Assy AK19-00082-0001 AK19-00126-000 Crank Arm...
- Page 93 Life Cycle 9500RHR Series Exercise Bikes PARTS IDENTIFICATION LC-9500RHR (BELT) GK19-00016- EXERCISE BIKE XXXX SN: 495553 - 503543 Pedal w/Strap(LT) AK17-00026-0015 Pedal w/Strap(RT) AK17-00026-0014 Shroud w/Decal(RT) AK19-00113-0001 Shroud Decal(RT) OK19-01297-0001 Shroud w/Decal(LT) AK19-00113-0002 Shroud Decal(LT) Handlebar Assembly OK19-01297-0001 SK19-00108-0000 End Cap OK19-01136-0000 Crankarm Dust Cover OK19-01134-000...
- Page 94 Life Cycle 9500RHR Series Exercise Bikes PARTS IDENTIFICATION LC-9500R(CE) GK19-00018- EXERCISE BIKE XXXX Overlay Bezel AK18-00192-0001 Eng/Eng AK18-00192-0002 Eng/Met Console Assembly AK18-00192-0003 Ger/Met AK19-00106-0001(R) Eng/Eng AK18-00192-0007 Frn/Met AK19-00106-0002(R) Eng/Met AK18-00192-0004 Spn/Met Console Logo Decal AK19-00106-0003(R) Ger/Met AK18-00192-0008 Itl/Met OK18-01178-0005 AK19-00106-0007(R) Frn/Met AK18-00192-0009 Dut/Met AK19-00106-0004(R) Spn/Met AK19-00106-0008(R) Itl/Met...
- Page 95 Clamps(2) Clamps(2) Tabbed Lockwasher OK18-01104-0002 OK18-01104-0001 Master Link Assembly OK18-01280-0000 GK18-00004-0002 Crankarm Bearing Set Crankarm Locknut GK18-00004-0024 OK18-01059-0002 Bearing Nut(LT) AK18-00116-0000 Main Cable Assembly Seat Assembly w/o Back AK19-00065-0000 SK19-00075-0000 Bearing Nut(RT) AK18-00116-0000 Roller Guards(2) Alternator Control Assy OK19-01186-0001 AK19-00134-0000(R) Extruded Tube Assembly SK19-00088-0002 Sprocket 60-Tooth...
- Page 96 Life Cycle 9500RHR Series Exercise Bikes PARTS IDENTIFICATION LC-9500R(CE) GK19-00018- EXERCISE BIKE XXXX Crankarm Dust Cover OK19-01134-0000 Wheel Inserts(2) Leg Covers(2) OK18-01057-0000 OK18-01006-0001 Alternator, Mando 0017-00009-0841 Wheel Insert Screws(2) OK17-00101-0932 Leg Cover Washers(2) OK18-01023-0100 Wheel Insert Washers(2) OK17-01029-0000 Leg Cover Screws(2) Wheels &...
- Page 97 Life Cycle 9500RHR Series Exercise Bikes PARTS IDENTIFICATION LC-9500RHR (BELT) GK19-00022- EXERCISE BIKE XXXX SN# 624330 - UP Console Assembly Battery Cover AK19-00141-0001(R) Eng/Met OK36-01035-0006 Overlay Bezel K19-00141-0003(R) Ger/Eur AK19-00115-0001 Eng/Met AK19-00141-0004(R) Jap /Eur AK19-00115-0003 Ger/Met Console Case AK19-00141-0005(R) Frn/Eur AK19-00115-0004 Spn/Met AK19-00141-0006(R) Spn/Eur OK36-01034-0006...
- Page 98 Console Cable Assembly Seat Assy w/o Back AK19-00081-0001 SK19-00075-0000 Heart Rate Electrode Kit Idler Arm Bracket GK20-00002-0002 OK46-01056-0001 Extruded Tube Assembly SK19-00083-0002 Roller Guards(2) OK-01186-0001 Crank Arm Pulley Assembly AK46-00015-0001 Alternator Control Assy AK19-00129-0000(R) Flat Flex Cable Assembly Alternator Cable Assy AK19-00082-0001 AK19-00126-000 Crank Arm...
- Page 99 Life Cycle 9500RHR Series Exercise Bikes PARTS IDENTIFICATION LC-9500RHR (BELT) GK19-00022- EXERCISE BIKE XXXX SN# 624330 - UP Pedal w/Strap(LT) Pedal w/Strap(RT) AK17-00026-0015 AK17-00026-0014 Shroud w/Decal(RT) AK19-00113-0001 Shroud Decal(RT) OK19-01297-0001 Shroud w/Decal(LT) AK19-00113-0002 Shroud Decal(LT) Handlebar Assembly OK19-01297-0001 SK19-00108-0000 End Cap OK19-01136-0000 Crankarm Dust Cover OK19-01134-000...
- Page 100 Lifecycle 9500RHR Series Exercise Bikes Lifecycle 9500RHR Series Exercise Bikes SECTION V MISCELLANEOUS INFORMATION...
-
Page 101: Model Identification And Serial Number Location
Lifecycle 9500RHR Series Exercise Bikes MODEL IDENTIFICATION and SERIAL NUMBER LOCATION Serial Number... -
Page 102: Preventive Maintenance Tips
Lifecycle 9500RHR Series Exercise Bikes PREVENTIVE MAINTENANCE TIPS Preventive Maintenance Schedule DAILY MONTHLY BI-ANNUALLY ANNUALLY Housing: Inside Outside Alternator Control Heatsink Connectors Board Chain / Master Link Drive Belt Crank Bearings Pedals Freewheel Gear Freewheel Pulley Alternator Flywheel Plunger Assembly... -
Page 103: Communicating By Fax
Simply make a copy (or copies) of the FAX sheet and fill in the necessary information. You may FAX us at any time, 24 hours a day, to either of the numbers shown. A Life Fitness service representative will process your order, or respond to your problem, as quickly as possible. - Page 104 Lifecycle 9500RHR Series Exercise Bikes CUSTOMER SUPPORT SERVICES PARTS ORDER SALE ( IF BOTH PLEASE INDICATE ) PRODUCT TROUBLESHOOTING WARRANTY NAME: CUSTOMER NO: DATE: PHONE: FAX: CONTACT NAME: METHOD OF SHIPMENT: 1 DAY 2 DAY GROUND PARTS ORDER FORM ITEM NO.
-
Page 105: Miscellaneous Notes
Lifecycle 9500RHR Series Exercise Bikes MISCELLANEOUS NOTES:...