TANDBERG 880 MXP User Manual
Hide thumbs
Also See for Tandberg 880 MXP:
- Basic use manuallines (44 pages) ,
- User manual (12 pages) ,
- Administrator's manual (375 pages)
Table of Contents
Advertisement
Quick Links
Download this manual
See also:
Administrator's Manual
Advertisement
Table of Contents

Related Manuals for TANDBERG Tandberg 880 MXP


Summary of Contents for TANDBERG Tandberg 880 MXP
- Page 1 Tandberg 880 MXP User Guide Prepared by: MBTelehealth September 2006 Updated: April 2009...
-
Page 2: Table Of Contents
MBTelehealth – Tandberg 880 MXP User Guide TABLE OF CONTENTS OBJECTIVES ........................3 THE TANDBERG 880 MXP....................3 GENERAL SETUP AND USE .....................7 General Setup .........................7 Mute/Microphone......................8 Camera Presets ......................8 PLACING AND RECEIVING A VIDEO CALLS ..............10 Point to Point .........................10 Multi-Point ........................11 VOLUME..........................11... -
Page 3: Objectives
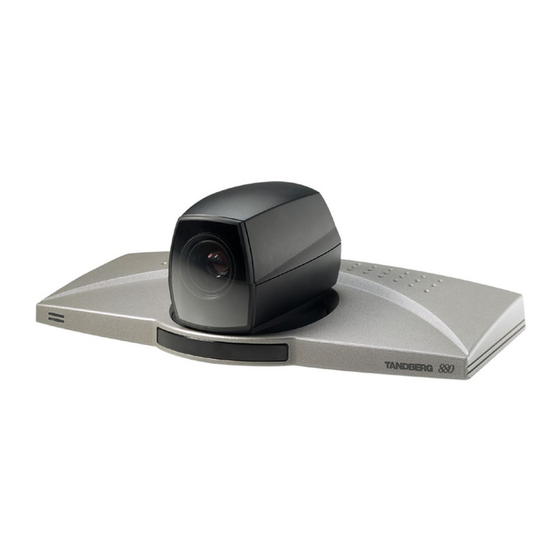
MBTelehealth – Tandberg 880 MXP User Guide OBJECTIVES This user guide will provide you with an overview of the Tandberg 880 MXP and the knowledge to setup and use the videoconferencing equipment. Learning Outcomes: After reviewing this guide, you should be able to: 1. - Page 4 Area Network (LAN). One end is plugged into the back of the codec and the other end (for MBTelehealth purposes), must be plugged into the specified jack in the wall. Once the Ethernet cable is plugged in, you will be able to connect, or be connected to other sites.
- Page 5 MBTelehealth – Tandberg 880 MXP User Guide that loud and soft voices are picked up and transmitted to the far end at approximately the same level. 6. Screen/Monitor - The videoconferencing equipment may utilize single or dual screen/monitor configurations. The screen/monitor displays the far end or the near end image.
- Page 6 MBTelehealth – Tandberg 880 MXP User Guide The Tandberg MXP Remote Contro Video Sources switch between Main Camera, Laptop, Document Camera, DVD / VCR and Aux Mic Off turns your microphone The Presentation key switches to a on and off.
-
Page 7: General Setup And Use
1. Position the equipment in the specified location/room 2. Plug the power cord into the wall. 3. Connect the free end of the Ethernet cable to the MBTelehealth jack 4. Turn on the codec, the screen/monitor and the router. After approximately 15-20 seconds you will see the startup screen. -
Page 8: Mute/Microphone
3.3.1 Standardized Presets MBTelehealth recommends setting the following setting the following camera presets for each video conference event: 1. Sign - The first preset is of a sign with the sites name. This is an off screen camera view that allows users to move about the room without being on camera and identifies the sites that are connected. - Page 9 MBTelehealth – Tandberg 880 MXP User Guide To save a preset from the remote control: 1. Move the camera to the desired position. If storing a video source ensure it is selected and showing on screen. 2. Press a number key on the remote control (from 0-9) until a message appears stating the preset has been stored.
-
Page 10: Placing And Receiving A Video Calls
MBTelehealth – Tandberg 880 MXP User Guide Presets do not require names, however if they will be consistently the same, it is a good idea to name them so other users are aware. 3.3.3 Using Camera Presets To use camera presets: 1. -
Page 11: Multi-Point
For sessions with 3 or more participating sites, you will be automatically dialed in by the MBTelehealth service desk. If you are participating in a multi-site session, have your equipment set up and turned on at least 15 minutes prior to the scheduled start time with the microphone on mute. -
Page 12: Far End Control
MBTelehealth – Tandberg 880 MXP User Guide Remote Control Volume Indicator 2. When the volume is turned off, the volume indicator will appear onscreen. Press the Volume + key to remove the indicator. During a conference, all sites should be muted with the exception of the presenter’s site. -
Page 13: Multi-Point
MBTelehealth – Tandberg 880 MXP User Guide 6.2 Multi-Point During multi-point calls, the Far End button allows you to control how the other sites are displayed on your screen. To split the screen in a multipoint session: 1. Press the Far End button on the remote control then toggle through the layout options using the up arrow. -
Page 14: Laptop/Pc Connection
MBTelehealth – Tandberg 880 MXP User Guide Another method to disconnect a call is to press the Menu key on the remote control. When the End Call Dialogue box is displayed, select the red End Call icon by pressing the OK button on the remote control. -
Page 15: Lcd Projector
MBTelehealth – Tandberg 880 MXP User Guide Connect the VGA end to the matching port on the laptop. VGA Connector Turn the laptop on. Press the Presentation button on the remote control. You should now see you PC displayed on the video conference monitor. If not,... -
Page 16: Far End Presentation Through Lcd
MBTelehealth – Tandberg 880 MXP User Guide If the image does not display press the input button on the LCD to search for the input or use the appropriate function key on your laptop (often F5, F8, or F10) to send out the image. -
Page 17: Near End Presentation With Video Splitter
MBTelehealth – Tandberg 880 MXP User Guide 10.2.1 Diagram Codec S-Video Out S-Video In LCD Projector 10.3 Near End Presentation with Video Splitter This method of connection allows you to display the near end presentation through the video conference equipment and the LCD Projector simultaneously. Connecting through a video splitter is the easiest way to display a high quality image through both the LCD Projector and share it with the far end site. -
Page 18: Near End Presentation W S-Video Out
MBTelehealth – Tandberg 880 MXP User Guide 6. Press the Presentation button again to return to your main camera image 10.3.1 Diagram LCD Projector Codec VGA In DVI In VGA Out Video Splitter VGA Out VGA In VGA Out Laptop 10.4 Near End Presentation w S-Video Out... -
Page 19: Amd Patient Camera Connection
MBTelehealth – Tandberg 880 MXP User Guide 3. Press the Presentation button on the remote control to display the PC image to the far site 4. Press the Presentation button again to return to your main camera image If the image does not display and/or you get a “pc not connected” message on your video conference equipment, use the appropriate function key on your laptop (often F5, F8, or F10) to send out the image. -
Page 20: Connection
MBTelehealth – Tandberg 880 MXP User Guide Patient Camera 11.1 Connection To connect the patient camera to the Tandberg 880 MXP: Plug the DC/VBS cable to the back of the patient camera. Make sure the cable is secure. 1 Power Indicator... -
Page 21: Operation
MBTelehealth – Tandberg 880 MXP User Guide Plug the other end of the S-Video cable into the Y/C Input at the back of the patient camera. Plug the power adapter cord into an outlet. Move the Power Switch to ON, move the Light Switch to ON and verify that the green power indicator light is ON. -
Page 22: N_Sight Patient Camera
Parts of the n_sight Patient Camera Still Image Capture Viewfinder LED Display Zoom in/out Onboard Light Light on/off S-Video Port Power button Stylus External Power Connector 12.1 Connection To connect the patient camera to the Tandberg 880 MXP: Page 22 of 31... - Page 23 MBTelehealth – Tandberg 880 MXP User Guide Connect one end of the S-Video cable to the AUX Input at the back of the codec. Aux Input Open the plastic cover on the left hand side of the camera. Plug the remaining end of the S-Video cable into the s-video port located under...
-
Page 24: Operation
MBTelehealth – Tandberg 880 MXP User Guide 12.2 Operation To operate the patient camera: Connect the patient camera to your video conference equipment following the instructions listed above. Ensure the power is turned on by looking for the green power indicator light on the top of the camera. -
Page 25: Document Camera
Base Lamp Control Panel 13.1 Connection To connect the document camera to the Tandberg 880 MXP: Connect one end of the S-Video cable to the AUX Input at the back of the codec. S – Video Connector Rear View of Codec... -
Page 26: Operation
MBTelehealth – Tandberg 880 MXP User Guide Press the AUX button on the Tandberg remote control to display the Document Camera image to the far site. Press the Main Cam button to return to the previous view. 13.2 Operation To operate the document camera: Turn the document camera on by pressing the power switch located on the right-hand side of the equipment. -
Page 27: Glossary Of Key Terms
MBTelehealth – Tandberg 880 MXP User Guide If you are using the document camera to examine three-dimensional objects, make sure that the object is pressed firmly against the screen so that the camera can maintain its focus. Also, ensure that the object is centered. -
Page 28: Acknowledgements
MBTelehealth – Tandberg 880 MXP User Guide 15.0 ACKNOWLEDGEMENTS AMD Telemedicine www.amdtelemedicine.com LibreStream www.librestream.com Tandberg www.tandberg.net 16.0 TROUBLESHOOTING 16.1 Audio Issues Issue Possible Cause(s) Resolution Far-end site unable to hear Your microphone is muted Un-mute your microphone (check for icon in top right... -
Page 29: Additional Training Information
MBTelehealth – Tandberg 880 MXP User Guide If you are experiencing any problems with the videoconferencing equipment or have any questions, please contact the service desk for assistance: Winnipeg or outside of Manitoba Phone: (204) 975-7714 Outside of Winnipeg (within Manitoba only) Phone: 1-866-667-9891 (toll free) 17.0 ADDITIONAL TRAINING INFORMATION... -
Page 30: Appendix A: Tandberg 880 Mxp Cheat Sheet
MBTelehealth – Tandberg 880 MXP User Guide APPENDIX A: TANDBERG 880 MXP CHEAT SHEET Double Click Word Icon to Open Printable Version 880 MXP Cheat Sheet Page 30 of 31... -
Page 31: Appendix B: Videoconferencing Etiquette
MBTelehealth – Tandberg 880 MXP User Guide APPENDIX B: VIDEOCONFERENCING ETIQUETTE The following tips on videoconferencing etiquette will help prepare you for a successful session: Assume that people can see and hear you as the Camera and Microphone are always “Live”.