Table of Contents
Advertisement
Advertisement
Chapters
Table of Contents

Related Manuals for Husqvarna Quilt Designer II


Summary of Contents for Husqvarna Quilt Designer II
- Page 1 User’s Guide K E E P I N G T H E W O R L D S E W I N G...
-
Page 2: Important Safety Instructions
This houshold sewing machine is designed to comply with IEC/EN 60335-2-28 and UL1594 IMPORTANT SAFETY INSTRUCTIONS When using an electrical appliance, basic safety precautions should always be followed, including the following: Read all instructions before using this household Sewing machine. DANGER - To reduce the risk of electric shock: •... -
Page 3: Table Of Contents
Program Stitches and Letters SET Menu Sew your Program ADJUST Menu HELP Menu Page 57-66 Care of your Quilt Designer II 67 Pop-up Menus Care of your Quilt Designer II 68 Begin Sewing Care of the Machine Finish Sewing Trouble Shooting... -
Page 4: Learn Your Quilt Designer Ii
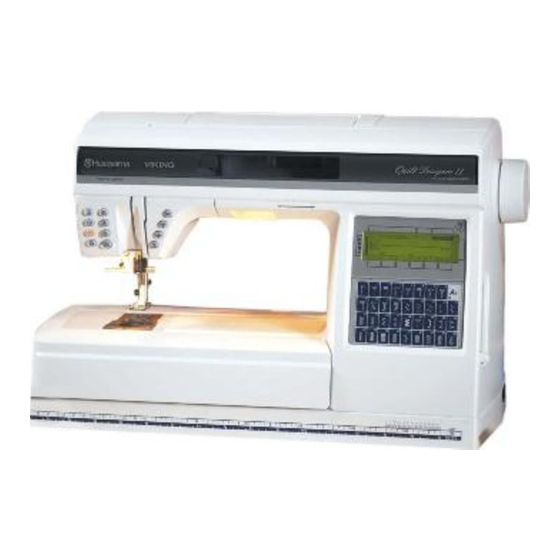
Learn your Quilt Designer II Learn your Quilt Designer II Overview - Front Side Door/Lid 23. Needle clamp screw Thread take-up lever 24. Sensor foot down button Thread tension 25. Sensor foot pivot button Pre-tension disc 26. Sensor foot up/extra lift button Stitch Re-Start button 27. -
Page 5: Rear Side
Learn your Quilt Designer II Some fabrics have a lot of excess dye which can cause discoloration on other fabric but also on your sewing machine. This discoloring may be very diffi cult or impossible to remove. Fleece and denim fabric in especially red and blue often contain a lot of excess dye. -
Page 6: Connect To The Power Supply
Learn your Quilt Designer II Connect to the Power Supply Among the accessories you fi nd the main cord. On the underside of the machine you will fi nd information about the power supply (V) and the frequency (Hz). Before plugging in, check to ensure that the foot control is of “type FR4”... -
Page 7: Accessory Tray / Sewing Surface
Learn your Quilt Designer II Accessory Tray / Sewing Surface In the Accessory Tray there are special places for presser feet, bobbins and needles plus space for other accessories. Store the accessories in the tray so they are easily accessible. -
Page 8: Spool Pins
Learn your Quilt Designer II Spool Pins Auxiliary spool pin Your Quilt Designer II has two spool pins, a main spool pin and an auxiliary spool pin. The spool pins are suitable for all types of thread. Place the thread spool on the spool pin so that the thread reels coun ter-clock wise. -
Page 9: Threading The Upper Thread
Learn your Quilt Designer II Threading the Upper Thread When threading the upper thread, make sure that the presser foot is raised and the needle is in the up position. The threading differs de pend ing on which spool pin position you choose. -
Page 10: Needle Threader
Learn your Quilt Designer II Needle Threader The needle must be in the up position to use the needle threader. We also recommend lowering the presser foot. 1. Pull the needle threader all the way down, behind the needle. 2. Bring it forward until the metal fl anges cover the needle. -
Page 11: Bobbin Winding
Learn your Quilt Designer II Bobbin Winding 1. Place an empty bob bin on the bobbin spindle at the front of the machine (the mark facing up). Bring the bobbin spindle down. A Pop-up menu on the Touch Screen reminds you that bob bin winding is engaged. -
Page 12: Function Buttons
Pop-up goes out. You Quilt Designer II is fi rm ly hold ing your work, can change the speed setting while sewing ready to sew. See page 13. -
Page 13: Sensor Foot Pressure
Thanks to the Sensor Foot Pres sure, the presser foot actually senses the thick ness of fabric or stitching (or em broi dery). Therefore Quilt Designer II always sews smooth ly and even ly. Touch... -
Page 14: Presser Feet
Learn your Quilt Designer II Presser Feet Among the accessories there are a number of pres ser feet for different purposes. Presser Foot A Fitted on the machine upon delivery. This foot is used mainly for straight stitching and zigzag stitch ing with a stitch length longer than 1.0. -
Page 15: Changing The Presser Foot
Learn your Quilt Designer II Presser foot S This foot is used for side-motion stitches. Sensor Buttonhole Foot When connected to the machine it measures but ton hole length and sews the buttonhole size that has been entered into the machine. The mid dle mark gives a 9/16'' (15 mm) buttoning edge. -
Page 16: Needles
Learn your Quilt Designer II Needles The sewing machine needle plays an important role in successful sewing. To ensure you will get a quality needle, we recommend needles of sys tem 130/705H. The needle case included with Quilt Designer II contains nee dles of the most used siz es for sew ing in woven and stretch fabrics. -
Page 17: Interchangeable D-Cards
There are several Stitch d-Cards available. Each Stitch d-Card features up to 35 dif fer ent stitch es. Four Stitch d-Cards are included with Quilt Designer II; Utility Stitches, A , Fash ion Stitches, N Quilt and Appliqué... -
Page 18: Touch Screen
Learn your Quilt Designer II Touch Screen Quilt Designer II features a large Touch Screen at the front right of the machine. The Touch Screen is very easy to use. Just touch it with your fi nger tip to se lect a function or a stitch. -
Page 19: Sewing Advisor
Select from eight different sewing techniques. The se lect ed sew ing technique but ton turns black to in di cate your choice. Your Quilt Designer II se lects the best stitch, thread ten sion, stitch length, stitch width, sewing speed, presser foot pres sure and recommends the press er foot for your project. -
Page 20: Set Menu
The set tings re main until Quilt Designer II is turned off or until you re-set. Some of the set tings remain even if Quilt Designer II is turned off (for example twin needle, Sensor Q foot). - Page 21 Learn your Quilt Designer II SET 2 Twin Needle Safety When you sew with a twin needle, en ter the width be tween the needles. Touch step by step until the correct number is dis played in the icon. For standard single nee dle, touch .
- Page 22 The Touch Screen is calibrated at the Husqvarna Viking factory, but the settings may be affected when the machine is shipped and transported. You only need to calibrate the Touch Screen if there is a pre ci si on problem when touching the tabs on the screen.
-
Page 23: Adjust Menu
Learn your Quilt Designer II ADJUST Menu Touch to override default settings and to make manual adjustments in stitch length and/ or stitch width. Elongation or mir ror imaging of stitch es side to side and end to end are also done in... -
Page 24: Pop-Up Menus
Q Foot func tion is activated in when the machine is turned on. No d-Card Inserted Quilt Designer II alerts you if you try to select a stitch from the d-Card area on the Touch Screen and no d-Card is inserted. Invalid d-Card... -
Page 25: Begin Sewing
Learn your Quilt Designer II Begin Sewing There are two ways to select stitches with Quilt Designer II, ei ther use the Sewing Advisor or select a stitch from one of the Stitch d-Cards. The Sewing Advisor • Touch the Sewing Advisor tab on the Touch Screen. -
Page 26: Thread Tension
Learn your Quilt Designer II Thread Tension The Sewing Advisor will automatically set the thread ten sion for the selected fabric and sewing technique. To set the tension for special fabrics and/ or techniques, see page 20. To understand the correct thread tension, sew a few sample zigzag stitches at different settings. -
Page 27: Utility Garment Sewing
Utility Garment Sewing... -
Page 28: Fabric Selection
Utility Garment Sewing Sewing Advisor Your Quilt Designer II sewing machine features the exclusive Husqvarna Viking Sewing Advisor. When beginning a sewing project, touch the Sewing Advisor tab. A fabric menu appears on the Touch Screen. Touch your fabric type and weight. -
Page 29: Thread
Single clear synthetic thread. Used for quilting and oth er decorative sewing. As you read the following instructions, sew the step by step exercises to learn your Husqvarna Viking Quilt Designer II sewing machine to the fullest. Use the Function Buttons •... -
Page 30: Seam
Utility Garment Sewing Seam A seam sews two pieces of fabric together with a seam allowance that will usually be pressed open. In most cases edges of the seam al low ance are fi nished with an overcast stitch before sewing the seam. Seams in stretch fabric must stretch with the fabric. -
Page 31: Overcast
Utility Garment Sewing Overcast Overcast fabric edges to prevent fraying and to help them lay fl at. It is easiest to overcast before the garment is sewn together. Presser foot J is rec om mend ed for light and medium weight fab ric to pre vent puckering along the edge. -
Page 32: Seam And Overcast
This saves time. There are a number of different Seam/Over cast stitches on your Quilt Designer II. Your Sewing Advisor will select the best one for your fab ric and make all adjustments automatically. -
Page 33: Baste
Utility Garment Sewing Baste Basting is temporary stitching for fi tting garments, gathering (see page 38) and marking. The Sewing Advisor automatically sets a long stitch length and reduces the tension so the threads are easy to remove or to pull for gathering. -
Page 34: Blind Hem
Utility Garment Sewing Blind Hem The blind hem creates an invisible hem on garments. There are two types of blind hem, one is recommended for medium to heavy woven fab rics, the other for stretch. The blind hem is not suggested for light weight fabric, but your Sew ing Advisor will select the best stitch possible. - Page 35 Utility Garment Sewing The Hem technique on your Sewing Advisor will select the visible or topstitch hem that is best for your fabric weight and type. For woven fabric, leather and vinyl, a straight stitch is selected. For stretch fabrics, elastic stitches are se lect ed.
-
Page 36: Buttonhole
Utility Garment Sewing Buttonhole The Sewing Advisor will select the best but ton hole and stitch settings for your fabric. Fabric should be interfaced and/or stabilized where but ton holes are to be sewn. Mark the buttonhole placement on your fabric with your Pictogram pen™. -
Page 37: Button
44. buttonholes sewn with presser foot C Button Sew buttons, snaps, hook and eyes quickly with your Quilt Designer II. Fabric: Woven medium Touch: Woven medium fabric and Button technique in the Sewing Advisor. Use: Size 80 needle and the clearance plate to create a thread shank as rec om mend ed. -
Page 38: Gathering
Stretch Stitch (A 05) from the Stitch d-Card A Your Quilt Designer II will au to mat i cal ly make the stan dard set tings. The Touch Screen will show you all information you need to get the best result. -
Page 39: Twenty-Fi Ve Needle Positions
Utility Garment Sewing Twenty-fi ve Needle Positions Your Quilt Designer II has twenty-fi ve different needle positions for the most accurate seaming and topstitching ever. When sewing straight stitch or reinforced straight stitch, the needle positions can be adjusted in steps. Take advantage of the dif fe rent needle positions to edge stitch and top- stitch. -
Page 40: Center Zipper
Utility Garment Sewing Center Zipper Fabric: Woven medium Use: Size 80 needle. Touch: Woven medium fabric and Seam technique. Sew the two fabrics together along the 5/8'' (15 mm) seam line up to the notch at the zip per pla ce ment. Touch: Baste on the Sewing Advisor and baste the zipper area of the seam together. -
Page 41: Reinforced Straight Stitch
Utility Garment Sewing Reinforced Straight Stitch The reinforced straight stitch is stronger than ordinary straight stitch, due to the fact that the stitch is tri ple and elastic. The reinforced straight stitch can be used for for all heavy fab rics, for crotch seams that are subject to con sid er a ble strain and for topstitching in heavy fab rics. -
Page 42: Multiple Zigzag Stitches
Utility Garment Sewing Multiple ZigZag Stitches The multiple zigzag stitches on Stitch d-Card A look like a zigzag stitch with straight stitch es in the “zig” and the “zag” of the stitch. Stitch A 13, three- step zigzag, is up to 1/4'' (6 mm) wide and suitable for light and me di um fab rics. -
Page 43: Mending And Darning
Utility Garment Sewing Mending and Darning Stitches A 32-33 Darning a small hole or a tear before it becomes larger can save a garment. Choose the fi nest thread in the closest color match possible. Fabric: Woven medium Touch: Woven medium on the Sewing Advisor. Poke a small hole to darn. -
Page 44: Buttonholes
By using the Sensor But ton hole Foot that mea-sures as it sews, every but ton hole will be the same size (see pages 36-37). The buttonholes on your Quilt Designer II are shown to the right. 34 Bartack Buttonhole for most fabric weights. - Page 45 (more dense). will make the stitches further apart (less dense). The set ting will be re tai ned until Quilt Designer II is turned off. Note: Only the right side stitch column will be adjusted.
-
Page 46: Stitch Table - Utility Stitches
Utility Garment Sewing Stitch Table - Utility Stitches 1-3 Straight Stitch For all kinds of sewing in woven fabrics, 25 different needle positions. 4-6 Stretch Stitch For seams in tricot and stretch fabrics. 7-9 Reinforced Straight Stitch For seams which are subject to considerable 22 Reinforced Zigzag strain. -
Page 47: Quilting
Quilting... -
Page 48: Quilt And Appliqué Stitch D-Card E 1
The English aristocracy pieced scraps of ele gant fabrics with beau ti ful hand embroidery for Cra zy Quilt ing. Today you can quilt with your Quilt Designer II to cre ate beau ti ful quilts and quilt ed gar ments in a fraction of the time. -
Page 49: Decorative Stitch Tie Quilting
Quilting with Quilt Designer II Hand-look Quilting Use stitch E 02 to imitate a hand-look quilting stitch. When sewing the hand-look quilting stitch, the result depends on what fabric, bat ting and thread you are using. The thread tension is set au to mat i cal ly for... -
Page 50: Piecing Quilts
Free motion quilting and stippling is a popular technique to stitch (quilt) layers of fabric and bat ting together. Set your Quilt Designer II for free motion sewing: Set Menu 4, touch V 01. Lower the feed teeth. Snap on the R presser foot. Put in a size 90 quilt ing needle. -
Page 51: Log Cabin Quilt
Sewing thread matching backing Schmetz Quilting Needles (412 40 20-01) Safety pins for basting the quilt Husqvarna Viking Ruler (412 66 17-01) or (412 66 15-01) Husqvarna Viking Cutting Mat (412 66 13-01) Olfa Ergonomic“ Rotary Cutter (415 16 42-01) 1/4”... - Page 52 Quilting with Quilt Designer II Making the blocks: Select Woven Light on the Sewing Advisor. Snap on presser foot A and insert stitch d-Card E with quilt and appliqué stitches in your Quilt De sign er. Select stitch E 01 for a 1/4” (6 mm) seam al low ance when the fabric edges line up with the edge of the A Foot.
- Page 53 Quilting with Quilt Designer II Inner border: Illustration G, H Piece together on the diagonal, 1 strip for each side of the quilt top for inner border. To piece on the diagonal, place them right sides together on a 90 degree angle and stitch on a diagonal to eliminate bulk at the seams.
- Page 54 Quilting with Quilt Designer II After fi nishing the pattern of the dark logs, rethread with sewing thread matching the lighter logs and continue to in the same way to quilt along the edge of the light logs. Quilt through all layers around the quilt top and around the inner frame.
- Page 55 Quilting with Quilt Designer II Illustration O To sew a mitered seam where the two pieces of binding meet, fold the ends diagonally where they meet and press. Illustration P Pin together along the fold lines and stitch, be ing careful not to catch the quilt in this seam. Trim off excess binding.
- Page 56 Quilting with Quilt Designer II...
-
Page 57: Decorative Sewing
Decorative Sewing... -
Page 58: Decorative Sewing
Decorative Sewing Decorative Sewing Supplied with your Quilt Designer II, there is a Stitch d-Card with decorative fashion stitches. Additional Stitch d-Cards with different types of decorative stitches are optional accessories. With the decorative Stitch d-Cards, you sew a myriad of stitches for creative sewing and embellishment. - Page 59 Decorative Sewing When free motion (free hand) sewing at slow speed (less than 200 rpm) the presser foot moves up and down. The foot is down when the needle is down to hold the fabric in place while the stitch is formed. The foot is raised with the needle so the fabric can be moved without risk ing to bend the needle.
-
Page 60: Appliqué
27), 4 mm 28), and 6 mm (A 29). The top ten sion is re duced automatically. Fabric: Woven medium fabric, Husqvarna Viking Tear-A-Way stabilizer, Cotton scrap for applique. Thread: Sulky Rayon embroidery thread on top and embroidery weight bobbin thread. -
Page 61: Bridging Stitch
Optional: Snap on the optional Edge Join ing pres ser foot, to guide the lace and fabric. Lettering Your Quilt Designer II, includes the Block alphabet Stitch d-Card (O ). Two ad di tion al let ter ing Stitch d-... -
Page 62: Adjust The Decorative Stitches
Decorative Sewing Adjust the Decorative Stitches By using the Quilt Designer II function buttons or the functions in the ADJUST menu, you can vary the stitches to t your speci c project. When sewing decorative stitches, always use Husqvarna Viking Tear- a-way stabilizer. - Page 63 The elon ga tion func tion is only active for satin stitch es. The stitches that come with your Quilt Designer II cannot be elongated. There are sev er al optional Stitch d- The heart pictured above is on optional Stitch d- Cards sold separately that include satin stitches.
-
Page 64: Prog Mode
Decorative Sewing Programming With Quilt Designer II you can program stitches and letters into combinations. Save the programmed combinations in nine permanent memories. A programmed stitch combination that is saved in one of the memories is retained in the memory even when the machine is turned off. -
Page 65: Program Stitches And Letters
Touch function button to add a cut in your sequence to make your Quilt Designer II cut the thread when it has fi nished sewing. -
Page 66: Sew Your Program
Decorative Sewing Change a Stitch or Letter Any stitch or letter can be changed in when the cursor is positioned under the stitch or let ter. Simply touch the correct stitch or letter, to replace the one you would like to change. Add a Stitch or Letter To add a stitch or letter in , move the cursor to... -
Page 67: Care Of Your Quilt Designer Ii
Care of your Quilt Designer II... -
Page 68: Care Of Your Quilt Designer Ii
Care of your Quilt Designer II Care of your Quilt Designer II Quilt Designer II is equipped with two lights, one is placed to the left of the needle (A) and the other up to the right (B). Use light bulb de sig ned as in di cat ed on the front of the machine. -
Page 69: Care Of The Machine
No lubrication (oiling) is needed. Turn off the main switch. Cleaning Wipe the exterior surfaces of your Quilt Designer II with a soft cloth to remove any dust or lint built up. Wipe the Touch Screen with a soft damp cloth. -
Page 70: Trouble Shooting
Care of your Quilt Designer II Trouble Shooting Any Time You Experience a Problem Needle Breaks? • Use care not to pull fabric when sewing. When Sewing: • Enter correct type and weight of fabric in the • Insert new needle as HELP recommends. - Page 71 • Turn machine off and on to reset. Non-Original Parts and Accessories • Change needle, rethread top and bobbin. The Quilt Designer II warranty does not cover any • Use stabilizer. defect or dam age caused by use of non-original ac ces so ries or parts.
- Page 72 Care of your Quilt Designer II...
-
Page 73: Optional Stitch D-Cards Embroidery Theme
Optional Stitch d-Cards / Embroidery Theme... -
Page 74: Optional Stitch D-Cards
Optional Stitch d-Cards / Embroidery Theme Optional Stitch d-Cards Buttonhole Stitches B On Stitch d-Card B , Buttonholes you fi nd buttonholes and eyelets in different styles plus button sewing. There is also a bartack stitch that is used to secure elastic ends, drapery pleats, belt loops and pocket cor ners. - Page 75 Optional Stitch d-Cards / Embroidery Theme Children Stitches, G Stitch d-Card G contains 24 stitches specially de signed for children. Use the stitches to program cute combinations, sew doll faces, or rows of fun stitches. Scallop Stitches, H On Stitch d-Card H , you fi...
- Page 76 Ear ly embroideries were stitched by hand. With the Embroidery Theme, your Husqvarna Viking Quilt De sign er II embroiders your designs effortlessly. The theme in cludes an embroidery unit, em broi dery...
-
Page 77: Index
Index... - Page 78 Hem - Sewing Advisor Sensor Foot Sewing Advisor Interchangeable Stitch d-Cards step by step Jewelry Button, sewing on - Sewing Advisor Knit fabric Care of your Quilt Designer II 67-71 Changing Language Stitch d-Card Leather light bulbs Lettering 61, 64-66...
- Page 79 Save stitches 21, 64 threading Seam - Sewing Advisor safety Seam and Overcast - Sewing Advisor Selecting fabric on Sewing Advisor Unpack Quilt Designer II Selecting sewing technique on Utility Sewing 38-46 Sewing Advisor Sensor Buttonhole Foot 15, 36 Vinyl...
- Page 80 We reserve the right to change the machine equipment and the assortment of accessories without prior notice, or make modifi - cations to the performance or design. Such modifications, however, will always be to the benefit of the user and the product. Please note that on disposal, this product must be safely recycled in accordance with relevant National legislation relating to electrical/electronic products.
- Page 81 Please note that on disposal, this product must be safely recyc- led in accordance with relevant National legislation relating to electrical/electronic products. If in doubt please contact your retailer for guidance...
- Page 82 VSM Group AB • SE-561 84 Huskvarna, Sweden w w w . h us qv ar nav ik ing.c om...