Brother MFC-4820C User Manual
Hide thumbs
Also See for MFC-4820C:
- Service manual (268 pages) ,
- Quick setup manual (28 pages) ,
- User manual (337 pages)
Table of Contents
Advertisement
Quick Links
Download this manual
See also:
Service Manual
Advertisement
Table of Contents

Related Manuals for Brother MFC-4820C


Summary of Contents for Brother MFC-4820C
- Page 1 USER ’S GUIDE MFC-4820C...
-
Page 2: Compilation And Publication Notice
ANALOGUE PSTN LINE FITTED WITH THE APPROPRIATE CONNECTOR. APPROVAL INFORMATION Brother advises that this product may not function correctly in a country other than where it was originally purchased, and does not offer any warranty in the event that this product is used on public telecommunication lines in another country. -
Page 4: Safety Precautions
Safety Precautions To Use the MFC Safely Save these instructions for later reference. WARNING There are high voltage Do not handle the plug with wet electrodes inside the MFC. hands. Doing this might cause Before you clean the MFC or an electrical shock. - Page 5 WARNING ■ Use caution when installing or modifying telephone lines. Never touch telephone wires or terminals that are not insulated unless the telephone line has been disconnected at the wall socket. Never install telephone wiring during a lightning storm. Never install a telephone socket in a wet location.
-
Page 6: Choosing A Location
Choosing a Location Place your MFC on a flat, stable surface that is free of vibration and shocks, such as a desk. Put the MFC near a telephone socket and a standard, grounded power outlet. Choose a location where the temperature remains between 10°... -
Page 7: Quick Reference Guide
Quick Reference Guide Sending Black & White Place the next page on the Faxes scanner glass. Menu/Set Press Automatic Transmission The MFC starts scanning. Sending a fax (Repeat step 4 and 5 for Place the original face down each additional page.) on the scanner glass. - Page 8 Receiving Faxes Search/Speed Dial Place the original face down Select Receive Mode on the scanner glass. Menu/Set Press Search/Speed Dial Press Press to select FAX and use the dial pad to enter ONLY, FAX/TEL, or the first letter of the name MANUAL, and then press you are looking for.
-
Page 9: Table Of Contents
Finding information ............. 1-1 Symbols used in this Guide ........1-1 MFC Part Names and Functions ........ 1-2 MFC-4820C control panel overview ........ 1-6 About fax machines ............1-8 Fax tones and handshake .......... 1-8 ECM (Error Correction Mode)........1-9 Connecting the MFC............ - Page 10 Initial setup ................4-1 Getting started ..............4-1 Setting the Paper Type ..........4-1 Setting the Date and Time .......... 4-2 Setting the Station ID..........4-3 Entering text ............4-4 Inserting spaces ............. 4-4 Making corrections ..........4-5 Repeating letters ............ 4-5 Special characters and symbols ......
- Page 11 Telephone services ............5-14 BT Call Sign (For U.K. Only) ........5-14 To enable the machine to work with BT Call Sign (Only with your external phone) ....... 5-14 Setup Send ................6-1 How to Dial ............... 6-1 Manual Dialing............6-1 Speed Dialing .............
- Page 12 Auto Dial numbers and Dialing options ......7-1 Storing numbers for easy dialing ........7-1 Storing Speed Dial numbers........7-1 Changing Speed Dial numbers........7-2 Setting up Groups for Broadcasting......7-3 Dialing options ..............7-5 Access codes and credit card numbers...... 7-5 Pause .................
- Page 13 Setting Maximum Time for incoming messages..9-7 ICM Recording Monitor..........9-7 Record FAX/TEL Outgoing Announcement (F/T MESSAGE) ............. 9-8 Printing reports ..............10-1 MFC settings and activity ..........10-1 Customizing the Transmission Verification Report... 10-1 Setting the Fax Activity Report Interval ....10-2 Printing reports ............
- Page 14 ™ Using PhotoCapture Center for scanning originals..12-21 Using the MFC as a printer ..........13-1 Using the Brother MFC-4820C printer driver ....13-1 Features................13-1 Choosing the right type of paper........13-2 How to print your document..........13-2 Simultaneous printing and faxing........13-3 Clearing data from the memory ........
- Page 15 Watermark Style ..........14-17 Device Options ............14-18 Print Date & Time ..........14-19 Quick Print Setup ..........14-20 Support tab ............. 14-21 Brother Solutions Center ........14-21 Web Update ............14-21 Check Setting ............. 14-21 ® How to scan using Windows ...........
- Page 16 You can Import items from other applications ..15-24 You can Export items in other formats....15-25 Exporting an image file ........15-25 ® Using the Brother Control Center for Windows 98SE/Me/2000 Professional ..........16-1 Brother MFL-Pro Control Center........16-1 AutoLoad the Brother Control Center ....... 16-2 How to turn off AutoLoad ..........
- Page 17 Scan to OCR (Word Processing program) ....17-22 Scan to Graphics application (example: Microsoft Paint)......... 17-24 Copy ............... 17-26 Fax setting (PC-Fax using the Brother Fax Driver) ..17-28 FAX settings ............17-29 Custom: User-defined buttons ........17-31 Customizing a user-defined button......17-32 1.
- Page 18 G4 or iMac or iBook with Mac OS 8.6-9.2 or Mac OS X 10.1/10.2.1 or greater......... 21-1 ® Using the Brother printer driver with your Apple ® Macintosh (OS 8.6-9.2)..........21-2 ® Using the Brother Printer Driver with Your Apple ®...
- Page 19 .... 21-7 Setting up your Address Book ........21-9 Adding a new Member ......... 21-9 Adding a new Group........... 21-10 Using the Brother TWAIN scanner driver with your ® Macintosh (For Mac OS 8.6-9.2 and OS X 10.2.1 or greater) ..............
- Page 20 Glossary ................G-1 Specifications ..............S-1 Product description ............S-1 General ................S-1 Print media............... S-2 Copy ................S-2 Photo Capture Center ............. S-2 Fax .................. S-3 Scanner ................S-4 Printer ................S-4 Interface................S-4 Computer Requirements..........S-5 Consumable Items............S-5 Index ..................
-
Page 21: Introduction
Introduction Using this Guide Thank you for buying a Brother multi-function center (MFC). This MFC is simple to use, with LCD screen instructions to guide you through programming it. You can make the most of your MFC by taking a few minutes to read this Guide. -
Page 22: Mfc Part Names And Functions
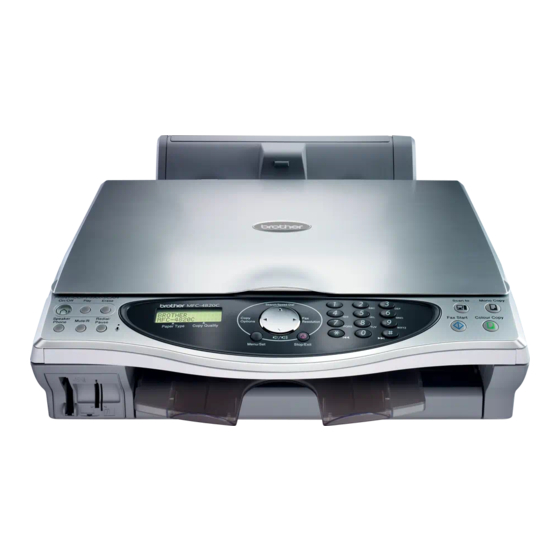
MFC Part Names and Functions ■ Front view 6 Paper Support 5 Paper Tray 4 Paper Guide 7 Document Cover ™ 3 PhotoCapture Media Slot 8 Scanner Cover 2 Output Paper Support 9 Scanner Cover Release Lever 1 Output Paper Support Extension 10 Control Panel No. - Page 23 ■ Rear View 11 Telephone Line Jack 12 USB Interface Connector No. Name Description Telephone Line Jack Connect the telephone line cord into this jack/socket. USB Interface Connect the USB Cable here. Connector INTRODUCTION 1 - 3...
- Page 24 ■ Internal View (Document Cover Open) 15 Document Cover 14 Document Guidelines 16 White Film 13 Scanner Glass No. Name Description Scanner Glass Put the original to be scanned here. Document Guidelines Use to center the original on the scanner glass.
- Page 25 ■ Internal View (Scanner Cover Open) 18 Scanner Cover 17 Machine Window 19 Tube 20 Ink Cartridge Cover No. Name Description Machine Window Use to remove small paper jammed inside the MFC without pulling the tube. Scanner Cover Open to install ink cartridges or remove jammed paper.
-
Page 26: Mfc-4820C Control Panel Overview
MFC-4820C control panel overview TAD Keys Navigation Key: On/Off Copy Options Activates the TAD (Telephone Answering Copy Options Device) and blinks if you have received any You can quickly and easily select temporary voice messages. settings for copying. Photo Capture Play ™... - Page 27 Menu/Set Dial Pad Lets you access the Menu to program and Use these keys to dial telephone and fax store your settings in the MFC. numbers and as a keyboard for entering information into the MFC. The # key lets you temporarily switch the Press to scroll forward or backward to a menu dialing mode during a telephone call from selection.
-
Page 28: About Fax Machines
About fax machines If you’ve never used an MFC before, it might seem a little mysterious. But you’ll soon recognize the unusual fax tones on your phone line, and be able to send and receive faxes easily. Fax tones and handshake When someone is sending a fax, the MFC sends fax calling tones (CNG tones). -
Page 29: Ecm (Error Correction Mode)
The fax ‘handshake’ is the time in which the sending machine’s CNG tones and the receiving machines “chirps” overlap. This must be for at least 2 to 4 seconds, so the machines can understand how each is sending and receiving the fax. The handshake cannot begin until the call is answered, and the CNG tones only last for about 60 seconds after the number is dialed. -
Page 30: Connecting The Mfc
Connecting the MFC Connecting an External Telephone Although your MFC does not have a handset, you can connect a separate telephone (or telephone answering device) on the same line. Connect a separate telephone to the machine, as shown below. Extension Telephone External Telephone... -
Page 31: Connecting An External Telephone Answering Device (Tad)
Connecting an External Telephone Answering Device (TAD) Sequence You may choose to connect an answering device. However, when you have an external TAD on the same telephone line as the MFC, the TAD answers all calls and the MFC “listens” for fax calling (CNG) tones. - Page 32 Do not connect a TAD elsewhere on the same phone line. (Example for the U.K.) 1 - 12 INTRODUCTION...
-
Page 33: Connections
Connections You may connect an external TAD to your machine, as shown below. (Example for the U.K.) Set your external TAD to two rings or less. Record the outgoing message (next page). Set the TAD to answer calls. INTRODUCTION 1 - 13... -
Page 34: Recording Outgoing Message (Ogm) On An External Tad
Recording Outgoing Message (OGM) on an External TAD Timing is important in recording this message. The message sets up the ways to handle both manual and automatic fax reception. Record 5 seconds of silence at the beginning of your message. (This allows your MFC time to listen for the fax CNG tones of automatic transmissions before they stop.) Limit your speaking to 20 seconds. - Page 35 The inadvisable configuration is shown in figure 1 below, and the recommended master/slave configuration is shown in figure 2. This new connection configuration can be arranged by your contacting BT, Kingston upon Hull Telecommunications, your PABX maintainer or a qualified telephone installation company as appropriate.
-
Page 36: Multi-Line Connections (Pbx)
Multi-Line Connections (PBX) Most offices use a central telephone system. While it is often relatively simple to connect the machine to a key system or a PBX (Private Branch Exchange), we suggest that you contact the company that installed your telephone system and ask them to connect the MFC for you. -
Page 37: Paper
Paper About paper The print quality of your document can be affected by the kind of paper you use in the MFC. To ensure the best print quality for the settings you’ve chosen, always set the Paper Type to match the type of paper you load. You can use plain paper, inkjet paper (coated paper), glossy paper, transparencies and envelopes. -
Page 38: Recommended Paper
Recommended paper The output quality depends on the paper type and paper brand. Visit us at http://solutions.brother.com and check the latest recommendations for paper that can be used with the MFC-4820C. Paper capacity of the Paper Tray Paper Type Paper Size... -
Page 39: Paper Specifications For The Paper Tray
Paper specifications for the Paper Tray Cut Sheet Paper Plain Paper / Inkjet Paper: 64 to 120 g/m Weight Glossy Paper: Up to 150 g/m Post card: Up to 170 g/m Index card: Up to 120 g/m Thickness Plain Paper / Inkjet Paper: 0.08 to 0.15 mm Glossy Paper: Up to 0.18 mm Envelopes: Up to 0.52 mm Post card: Up to 0.23 mm... - Page 40 Do not use paper or envelopes: ■ that are damaged, curled, wrinkled, or irregularly shaped 2 mm or 2 mm or longer longer 2 mm or longer ■ that are extremely shiny or highly textured ■ that were previously printed by a printer ■...
-
Page 41: Printable Area
Printable area The printable area depends on the settings in the application you are using. The figures below show the unprintable areas on cut sheet paper and envelopes. Cut Sheet Paper Envelopes ■ unprintable area 1Top 2Bottom 3Left 4Right Paper Paper Size Cut Sheet 3 mm... -
Page 42: How To Load Paper And Envelopes
How to load paper and envelopes To load paper or other media Fan the stack of paper well to avoid paper jams and mis-feeds. Unfold the paper support, and press and slide the paper guide to fit the paper width. Paper Support Paper Guide 2 - 6 PAPER... -
Page 43: To Load Glossy Paper
Gently insert the paper. Make sure the print side is towards you and the paper is below the maximum paper mark. Maximum Paper Mark Print Side Paper To load glossy paper Fan the stack of glossy paper well. Put a sheet of plain paper in the paper tray first, and then put the stack of glossy paper on top of it. -
Page 44: To Load Envelopes
To load envelopes Before loading, press the corners and sides of the envelopes to make them as flat as possible. If the envelopes are ‘double-feeding’, put one envelope in the paper tray at a time. Press and slide the paper guide to fit the width of the envelopes. Insert them into the paper tray with the address side toward you and pointed in the direction below. -
Page 45: On-Screen Programming
On-Screen Programming User-friendly programming Your MFC is designed to be easy to use with LCD on-screen programming using the navigation key. User-friendly programming helps you take full advantage of all the menu selections your MFC has to offer. Since your programming is done on the LCD, we have created step-by-step on-screen instructions to help you program your MFC. -
Page 46: Navigation Key
Navigation key * Access the menu * Go to the next menu level * Accept an option * Scroll through the current menu level * Go back to the previous menu level * Go forward to the next menu level * Exit the menu Menu/Set You can access the menu mode by pressing... - Page 47 Press to scroll to your next menu selection. Menu/Set Press When you finish setting an option, the LCD shows ACCEPTED. to scroll backward if you passed your choices or want to save keystrokes. The current setting is always the option without a “?”. ON-SCREEN PROGRAMMING 3 - 3...
- Page 48 Press the Menu numbers. (ex. Press 1, 1 for) Paper Type — — select select accept exit Main Menu Submenu Menu Options Descriptions Page Selections 1 . GENERAL 1 . PAPER TYPE — Sets the type of PLAIN paper in the paper SETUP INKJET tray.
- Page 49 Press the Menu numbers. (ex. Press 1, 1 for) Paper Type — — select select accept exit Main Menu Submenu Menu Options Descriptions Page Selections 1 . GENERAL 5 . PBX — Turn on this function if the machine is SETUP connected to PABX (Continued)
- Page 50 Press the Menu numbers. (ex. Press 1, 1 for) Paper Type — — select select accept exit Main Menu Submenu Menu Options Descriptions Page Selections 2 . FAX/TEL 1 . SETUP 1 . RECEIVE You can choose the FAX ONLY receive mode that best RECEIVE MODE...
- Page 51 Press the Menu numbers. (ex. Press 1, 1 for) Paper Type — — select select accept exit Main Menu Submenu Menu Options Descriptions Page Selections 2 . FAX/TEL 1 . SETUP 6 . AUTO Reduces the size of the incoming faxes. (Continued) RECEIVE REDUCTION...
- Page 52 Press the Menu numbers. (ex. Press 1, 1 for) Paper Type — — select select accept exit Main Menu Submenu Menu Options Descriptions Page Selections 2 . FAX/TEL 2 . SETUP SEND 6 . POLLED TX Sets up your MFC 6-18 STANDARD with a document to...
- Page 53 Press the Menu numbers. (ex. Press 1, 1 for) Paper Type — — select select accept exit Main Menu Submenu Menu Options Descriptions Page Selections 2 . FAX/TEL 5 . REMOTE FAX 1 . FAX Sets the MFC to forward fax (Continued) FORWARD messages.
- Page 54 Press the Menu numbers. (ex. Press 1, 1 for) Paper Type — — select select accept exit Main Menu Submenu Menu Options Descriptions Page Selections 2 . FAX/TEL 7 . SETUP TAD 3 . ICM Allows you to turn the speaker volume for (Continued) (Continued)
- Page 55 Press the Menu numbers. (ex. Press 1, 1 for) Paper Type — — select select accept exit Main Menu Submenu Menu Options Descriptions Page Selections 3 . COPY 4 . COLOUR 1 . RED R: - Adjusts the amount 11-14 of Red in copies.
- Page 56 Press the Menu numbers. (ex. Press 1, 1 for) Paper Type — — select select accept exit Main Menu Submenu Menu Options Descriptions Page Selections 4 . PHOTOCAPTURE 4 . CONTRAST — Adjusts the contrast. 12-18 (Continued) 5 . COLOUR Adjusts the hue of the 12-18 1.WHITE...
- Page 57 Press the Menu numbers. (ex. Press 1, 1 for) Paper Type — — select select accept exit Main Menu Submenu Menu Options Descriptions Page Selections 5 . MAINTENANCE 1 . TEST PRINT — — You can print a test 23-11 sample page to check the print quality and adjust the...
-
Page 58: Initial Setup
Initial setup Getting started Setting the Paper Type To get the best print quality, set the MFC for the type of paper you are using. Menu/Set Press GENERAL SETUP 1.PAPER TYPE Press to select PLAIN, INK JET, GLOSSY or TRANSPARENCY. Menu/Set Press If you selected GLOSSY, press... -
Page 59: Setting The Date And Time
Setting the Date and Time Your MFC displays the date and time, and if you set up the Station ID it prints on every fax you send. If there is a power failure, you may have to reset the date and time. All other settings will not be affected. Menu/Set Press GENERAL SETUP... -
Page 60: Setting The Station Id
Setting the Station ID You should store your name or company name and fax number to be printed on all fax pages that you send. It is important that you enter the fax and telephone numbers in the internationally standardised format, i.e. in accordance with the following strict sequence: ■... -
Page 61: Entering Text
Use the dial pad to enter your name STATION ID (up to 20 characters). NAME: Menu/Set Press (See Entering text on page 4-4.) Stop/Exit Press The LCD will show the date and time. If the Station ID has already been programmed, the LCD will ask you to press to make a change or to exit without changing. -
Page 62: Making Corrections
Making corrections If you entered a letter incorrectly and want to change it, press Stop/Exit move the cursor after the last correct letter. Then press All the letters above and to the right of the cursor will be deleted. Re-enter the correct characters. You can also back up and type over incorrect letters. -
Page 63: Setting The Ring Volume
Setting the Ring Volume Menu/Set Press VOLUME 1.RING Press to select (OFF, LOW, MED, or HIGH). Menu/Set Press Stop/Exit Press —OR— You can adjust the ring volume when your MFC is idle (not being used). You can turn the ring OFF or you can select the ring volume level. -
Page 64: Setting The Speaker Volume
Setting the Speaker Volume You can adjust the speaker volume. Menu/Set Press VOLUME 3.SPEAKER Press to select (OFF, LOW, MED, or HIGH). Menu/Set Press Stop/Exit Press —OR— Speaker Phone You can adjust the speaker volume by pressing to select a speaker volume level. Press to adjust the volume level. -
Page 65: Pabx And Transfer
PABX and TRANSFER The machine is initially set to be connected with PSTN (Public Switched Telephone Network) lines. However, many offices use a central telephone system or Private Automatic Branch Exchange (PABX). Your fax can be connected to most types of PABX. The recall facility on the machine supports timed break recall only (TBR), PBXS normally can work with this for gaining access to an outside line, or for transferring a call to another extension: The feature works... -
Page 66: Setting The Clock Change
Setting the Clock Change You can easily let the machine's clock gain or lose one hour by using this feature. Menu/Set Press GENERAL SETUP 6.CLOCK CHANGE Press to select TO SUMMER TIME (or TO WINTER TIME). Menu/Set Press Press to change to Winter Time or TO SUMMER TIME ? Summer Time. -
Page 67: Setting The Lcd Contrast
Setting the LCD Contrast You can adjust the LCD contrast for a sharper and more vivid display. If you are having difficulty seeing the LCD from your position, we recommend the following contrast settings for improved viewing. Menu/Set Press GENERAL SETUP 7.LCD CONTRAST Press to increase the contrast. -
Page 68: Power Save
Power Save Setting Power Save Mode reduces power consumption by turning off the CPU etc. inside the machine. If Power Save Mode is switched ON, when the machine is idle for approximately 10 minutes, it drops into power save mode automatically. In the Power Save Mode, you cannot use fax detect function or remote activation. -
Page 69: Setup Receive
Setup Receive Basic receiving operations Choosing the Receive Mode There are four different Receive Modes for your MFC. You can choose the mode that best suits your needs. (See TAD (Telephone Answering Device) on page 9-1 to set up the TAD:MSG MGR mode.) How it works When to use it The MFC automatically... -
Page 70: To Select Or Change Your Receive Mode
To select or change your Receive Mode Menu/Set Press SETUP RECEIVE 1.RECEIVE MODE Press to select FAX ONLY, FAX/TEL, or MANUAL. Menu/Set Press Current Receive Mode FAX : FAX ONLY F/T : FAX/TEL MAN : MANUAL TAD : MSG CTR If the TAD Mode is ON, it overrides your Receive Mode setting. -
Page 71: Setting The Ring Delay
Setting the Ring Delay The Ring Delay sets the number of times the MFC rings before it answers in FAX, FAX/TEL and TAD:MSG MGR mode. If you have extension phones or external answering machine on the same line as the MFC or subscribe to the telephone company’s Distinctive Ring service, keep the Ring Delay setting of 4. -
Page 72: Setting Toll Saver
Setting Toll Saver When you set the toll saver feature, the MFC answers after four rings if you don’t have voice or fax messages, and after two rings if you do have voice or fax messages. This way, when you call the MFC for remote retrieval and let it ring three times, you know you have no messages, and can hang up, to avoid a toll charge. -
Page 73: Setting The F/T Ring Time (Fax/Tel Mode Only)
Setting the F/T Ring Time (FAX/TEL mode only) If you set the Receive Mode to FAX/TEL, you’ll need to decide how long the MFC will signal you with its special pseudo/double-ring when you have a voice call. (If it’s a fax call, the MFC prints the fax.) This ringing happens after the initial ringing from the phone company. -
Page 74: Fax Detect
Fax Detect Fax Start When you use this feature, you don’t have to press or the Remote Activation Code when you answer a fax call and hear calling beeps. When you see RECEIVING on the LCD or when you hear “chirps” through the handset of an extension phone connected to another wall socket, just replace the handset. -
Page 75: Printing A Reduced Incoming Fax (Auto Reduction)
Printing a reduced incoming fax (Auto Reduction) If you choose ON, the MFC reduces an incoming fax automatically, so that it fits on to one page of A4 size paper. If the sending document is too long, the MFC may print onto 2 pages. If the sending document is too long, the MFC may not be able to reduce onto one page and may print onto 2 pages. -
Page 76: Advanced Receiving Operations
Advanced receiving operations Operation from extension telephones If you answer a fax call on an extension telephone, or an external telephone, you can make your MFC take the call by using the Remote Activation Code. When you press the Remote Activation Code , the MFC starts to receive a fax. -
Page 77: Using A Cordless External Handset
Using a cordless external handset If your cordless telephone is connected and you typically carry the cordless handset elsewhere, it is easier to answer calls during the Ring Delay. If you let the MFC answer first, you will have to answer using the cordless and then go to the MFC so you can press Speaker Phone to transfer the call to the cordless handset. -
Page 78: Printing A Fax From The Memory
Printing a fax from the memory If you set Fax Storage to ON for Remote Retrieval, you can still print a fax from the memory when you are at your MFC. (See Setting Fax Storage on page 8-1.) Menu/Set Press REMOTE FAX OPT 4.PRINT DOCUMENT Fax Start... -
Page 79: Setup For Polling Receive (Standard)
Setup for Polling Receive (Standard) Menu/Set Press SETUP RECEIVE 7.POLLING RX Press to choose STANDARD, Menu/Set and press Fax Start Enter the fax number you are polling, and press The LCD shows DIALING. Setup for Polling Receive with Secure Code You need to make sure you are using the same secure code as the other party. -
Page 80: Setup Delayed Polling Receive
Setup Delayed Polling Receive You can set your MFC to begin Polling Receive at a later time. Menu/Set Press SETUP RECEIVE 7.POLLING RX Press to select TIMER. Menu/Set Press The screen prompts you to enter the time you want to begin polling. -
Page 81: Sequential Polling
Sequential Polling Your MFC can request documents from several fax units in a single operation. You just specify several destinations in Step 4. Afterward, a Sequential Polling Report will be printed. Menu/Set Press Press to select STANDARD, SECURE or TIMER. Menu/Set Press when the screen displays the setting you... -
Page 82: Telephone Services
Telephone services BT Call Sign (For U.K. Only) This machine feature lets you use the BT Call Sign subscriber service which allows you to have at least two separate telephone numbers on one phone line. Each phone number has its own distinctive ringing pattern, so you know which phone number is ringing. -
Page 83: Setup Send
Setup Send How to Dial There are three ways to dial. Manual Dialing Press all of the digits of the phone or fax number. Speed Dialing Search/Speed Dial Press , and then the two digit Speed Dial number. (See Storing Speed Dial numbers on page 7-1.) two digit number SETUP SEND 6 - 1... -
Page 84: Search
Search You can search for names you have stored in the Speed Dial Search/Speed Dial memory. Press and navigation key to search. (See Storing Speed Dial numbers on page 7-1.) To search numerically To search alphabetically* * To seach alphabetically, you can use the dial pad to enter the first letter of the name you are looking for. -
Page 85: How To Fax
How to Fax Automatic Transmission You can use the scanner glass to fax pages of a book or one page at a time. Originals can be up to A4 or letter. Lift the document cover. Originals are Face Down on the Scanner Glass Document Guideline Using the document guidelines on the left, center the original... -
Page 86: Out Of Memory Message
Place the next page on the scanner SET NEXT PAGE glass. THEN PRESS SET Menu/Set Press The MFC starts scanning. (Repeat Steps 5 and 6 for each Stop/Exit additional page.)Press to cancel. Out of Memory message If you get an OUT OF MEMORY message while scanning the first page Stop/Exit of a fax, press to cancel the scan. -
Page 87: Sending A Fax At The End Of A Conversation
Sending a fax at the end of a conversation At the end of a conversation you can send a fax to the other party before you both hang up. Ask the other party to wait for fax tones (beeps) and then press Start before hanging up. -
Page 88: Basic Sending Operations
Basic sending operations Sending faxes using multiple settings When you send a fax you can choose any combination of these settings: contrast, resolution, overseas mode, delayed fax timer, polling transmission or real time transmission. After each setting is accepted, the LCD will ask if you want to enter more settings: Press to select more settings. -
Page 89: Contrast
Contrast If your original is very light or very dark, you may want to set the contrast. Use LIGHT to make the document darker. Use DARK to make the document lighter. Place the original face down on the SETUP SEND scanner glass. -
Page 90: Fax Resolution
Fax resolution When you have an original on the scanner glass you can use the Fax Resolution key to change the setting temporarily (for this fax Fax Resolution only). Press repeatedly until the LCD shows the setting you want. —OR— You can change the default setting. -
Page 91: Colour Fax Transmission
Colour fax transmission Your MFC can send a colour fax to machines that support this feature. However, colour files cannot be stored in the memory, so Delayed fax and Polling Transmission features are not available. Place the original face down on the scanner glass. Fax Resolution Press to select COLOUR STD or COLOUR... -
Page 92: Dual Access (Not Available For Colour Faxes)
Dual Access (Not available for colour faxes) You can dial a number, and begin scanning the fax into memory— even when the MFC is receiving, sending or printing a fax from memory. The LCD shows the new job number and available memory. -
Page 93: Real Time Transmission
Real Time Transmission When you are sending a fax, the MFC will scan the originals into the memory before sending. Then, as soon as the phone line is free, the MFC will start dialing and sending. If the memory becomes full, the MFC will send the original in real time (even if REAL TIME TX is set to OFF). -
Page 94: Checking Job Status
Checking job status Check which jobs are still waiting in the memory to be sent. (If there are no jobs, the LCD shows NO JOB WAITING.) Menu/Set Press FAX/TEL 6.REMAINING JOBS If you have more than one job waiting, press to scroll through the list. -
Page 95: Advanced Sending Operations
Advanced sending operations Broadcasting (Not available for colour faxes) Broadcasting is when the same fax message is automatically sent to Menu/Set more than one fax number. Using the key, you can include Groups, Speed Dial numbers and up to 50 manually dialed numbers. - Page 96 Place the original face down on the scanner glass. Enter a number using Speed Dial, a Group number, Search or the dial pad. (Example: Group number) Menu/Set Press . You will be asked to press the next number. Enter the next number. (Example: Speed Dial number) Menu/Set Press...
-
Page 97: Overseas Mode
Overseas Mode If you are having difficulty sending a fax overseas due to possible interference on the phone line, we recommend that you turn on the Overseas Mode. After you send a fax using this feature, the feature will turn itself off. Place the original face down on the SETUP SEND scanner glass. -
Page 98: Delayed Fax (Not Available For Colour Faxes)
Delayed Fax (Not available for colour faxes) During the day you can store up to 50 faxes in the memory to be sent within 24 hours. These faxes will be sent at the time of day you enter Menu/Set in Step 3. Press to accept it, or enter another time for the faxes to be sent. -
Page 99: Setting Up Polled Transmission (Not Available For Colour Faxes)
Setting up Polled Transmission (Not available for colour faxes) Polled Transmission is when you set up your MFC to wait with an original so another fax machine can retrieve it. The document will be stored and can be retrieved from any other fax machine until you delete the fax in memory by using the Cancelling a Job function. -
Page 100: Setup For Polled Transmit (Standard)
Setup for Polled Transmit (Standard) Place the original that is going to be SETUP SEND retrieved face down on the scanner 6.POLLED TX glass. Menu/Set Press Menu/Set Press to choose STANDARD, and press Press if you want to choose more settings and the LCD will return to the SETUP SEND menu. -
Page 101: Setup For Polled Transmit With Secure Code
This information is available for retrieval by any other fax machine unless it is deleted from the memory. (See Cancelling a scheduled job on page 6-12.) You can use Secure Polling only with another Brother fax machine. SETUP SEND 6 - 19... -
Page 102: Memory Security
Memory Security This feature allows you to prevent unauthorised access to the machine. When switched ON, Memory Security prohibits most functions. The following functions listed are available while Memory Security is switched ON. ■ Receiving faxes into memory [limited by Memory Capacity]. ■... -
Page 103: Using Memory Security
Using Memory Security You must use a password to switch Memory Security ON and OFF. Setting Up Memory Security for the First Time Menu/Set Press MISCELLANEOUS 1.MEM SECURITY Enter a 4-digit number as a new MEM SECURITY password. NEW PASSWD:XXXX Menu/Set Press MEM SECURITY... -
Page 104: Changing The Memory Security Password
Changing the Memory Security Password Menu/Set Press MISCELLANEOUS 1.MEM SECURITY Press to choose SET PASSWORD. Menu/Set Press MEM SECURITY OLD PASSWD:XXXX The screen prompts you to enter the old password. Enter the current password. Menu/Set Press MEM SECURITY NEW PASSWD:XXXX Enter a 4-digit number as a new password. -
Page 105: Switching Off Memory Security
SECURE MODE. You must then start from Step 1 to switch OFF Memory Security. If you forget the Memory Security password, please contact your Brother dealer for service or the help number given with the warranty documentation. Delayed Batch Transmission... -
Page 106: Auto Dial Numbers And Dialing Options
Auto Dial numbers and Dialing options Storing numbers for easy dialing You can set up your MFC to do two types of easy dialing: Speed Dial and Groups for Broadcasting faxes. If you lose electrical power, the auto dial numbers that are in the memory will not be lost. -
Page 107: Changing Speed Dial Numbers
Changing Speed Dial numbers If you try to store a Speed Dial number where a number is already stored, the LCD will show the name stored there (or number) and will ask you to do one of the following: Press to change the stored #05:XXXXXXXX number. -
Page 108: Setting Up Groups For Broadcasting
Setting up Groups for Broadcasting Groups allow you to send the same fax message to many fax Search/Speed Dial numbers by pressing only a few keys ( , the Fax Start two-digit number, and ). First, you’ll need to store each fax number as a Speed Dial number. - Page 109 Menu/Set Press to accept the Speed Dial numbers for this Group. Use the dial pad and the chart on SETUP GROUPS page 4-3 to enter a name for the NAME: Group. Menu/Set Press (For example, type NEW CLIENTS). Stop/Exit Press You can print a list of all the Speed Dial numbers.
-
Page 110: Dialing Options
Dialing options Access codes and credit card numbers Sometimes you may want to choose from several long distance carriers when you make a call. Rates may vary depending on the time and destination. To take advantage of low rates, you can store the access codes or long-distance carriers and credit card numbers as Speed-Dial numbers. -
Page 111: Pause
Pause Redial/Pause Press to insert a 3.5-second pause between Redial/Pause numbers. If you are dialing overseas, you can press as many times as needed to increase the length of the pause. Fax Redial If you’re sending a fax manually and the line is busy, press Redial/Pause to try again. -
Page 112: Telephone (Voice) Operation
Telephone (Voice) Operation You can use MFC to make voice telephone calls by dialing manually or by using Search or Speed Dial memory. You can use the external telephone’s handset or speakerphone to make and receive calls. When you dial an auto dial number, the LCD shows the name you’ve stored, or if you haven’t stored a name, the fax number you’ve stored. -
Page 113: Search
Search You can search for names you have stored in the Speed Dial Search/Speed Dial memory. Press and navigation key to search, Fax Start and press to dial. (See Storing Speed Dial numbers on page 7-1.) To search numerically To search alphabetically* * To seach alphabetically, you can use dial pad to enter the first letter of the name you are looking for. -
Page 114: Answering Calls With The Speaker Phone
Answering Calls with the Speaker Phone When the MFC rings, instead of lifting the external telephone’s Speaker Phone handset, press . Speak clearly, toward the Speaker Phone microphone . To end the call, press If you have a bad telephone line connection, the other party might hear your voice echoed during the call. -
Page 115: Remote Fax Options
Remote fax options (Not available for colour faxes) Setting Fax Storage If you set Fax Storage to ON, you can use Fax Forwarding to forward fax messages to another location. Use the Remote Retrieval commands to get voice and fax messages from your MFC. (See Remote commands on page 8-5.) The LCD will show when you have a fax stored in memory. -
Page 116: Fax Forwarding
Fax Forwarding You cannot use Fax Forwarding when Fax Storage is set to OFF. Programming a Fax Forwarding number When Fax Forwarding is set to ON, your MFC stores received faxes in the memory. Then it dials the fax number you’ve programmed and forwards the fax message. -
Page 117: Setting Your Remote Access Code
Setting your remote access code The remote access code lets you access the Remote Retrieval features when you are away from your MFC. Before you use the remote access and retrieval features, you have to set up your own code. The default code is inactive code (--- Menu/Set Press REMOTE FAX OPT... -
Page 118: Remote Retrieval
Remote retrieval You can call your MFC from any touch tone telephone or fax machine, then use the Remote Access Code and remote commands to retrieve fax or voice messages. Cut out the Remote Access Card on the last page and keep it in your wallet to help you. Using your remote access code Dial your fax number from a telephone or another fax machine using touch tone. -
Page 119: Remote Commands
Remote commands Follow the commands below to access features when you are away from the MFC. When you call the MFC and enter your Remote Access Code (3 digits followed by ), the system will give two short beeps and you must enter a remote command. Remote commands Operation details Playing Voice Messages... - Page 120 Remote commands Operation details Change the Fax Forwarding settings 1 OFF If you hear one long beep, the change has been accepted. If you hear three short beeps, 2 Fax Forwarding you cannot change it because the conditions 4 Fax Forwarding number have not been met (for example, registering a fax forwarding number).
-
Page 121: Retrieving Fax Messages
Retrieving fax messages Dial your fax number. When your MFC answers, immediately enter your Remote Access Code (3 digits followed by ). If you hear one long beep, you have fax messages. As soon as you hear two short beeps, use the dial pad to press Wait for the long beep, and then use the dial pad to enter the number of the remote fax machine where you want your fax messages sent to followed by... -
Page 122: Tad (Telephone Answering Device)
TAD (Telephone Answering Device) TAD mode TAD mode allows you to store up to 99 incoming voice messages that are a maximum of 3 minutes each in a memory. Voice messages are stored on a “first-come, first-served” basis. You can retrieve voice messages remotely. -
Page 123: Recording Tad Outgoing Message
Recording TAD Outgoing Message Recording the TAD Outgoing Message (TAD MESSAGE) is the first step you need to follow before you can turn on the TAD. Make sure your OGM is less than 20 seconds long. Menu/Set Press SETUP TAD The LCD prompts you to choose an 1.OGM OGM. -
Page 124: Listening To Outgoing Message (Ogm)
Listening to Outgoing Message (OGM) Menu/Set Press SETUP TAD 1.OGM Press to select TAD MESSAGE (or F/T MESSAGE). Menu/Set Press Press to select PLAY OGM. Menu/Set Press Adjust the volume by pressing Volume Stop/Exit Press Erasing Outgoing Message (OGM) Menu/Set Press SETUP TAD 1.OGM... -
Page 125: Activating Tad Mode
Activating TAD mode Press and hold until it lights and the LCD shows: TAD:MSG MGR When light is out, the TAD is OFF. (See Setting up the TAD on page 9-1.) Message indicator light flashes when you have new messages waiting for your review. -
Page 126: Playing Voice Messages
Playing voice messages Follow the steps below to listen to voice messages: Play Press Adjust the Volume by pressing All messages are played in the order they were recorded. The LCD shows the number of the current message, and the total number of messages. -
Page 127: Erasing Messages
Erasing messages You can erase voice messages individually, or all at once. To Erase Voice Messages Individually Play Press The MFC sounds a two-second beep and begins message playback. Each message is preceded by one long beep, and followed by two short beeps. To erase a specific message, press ERASE THIS MSG.? Erase... -
Page 128: Setting Maximum Time For Incoming Messages
Setting Maximum Time for incoming messages Your MFC comes set to receive voice messages up to 30 seconds long. You can change this setting to 60, 120 or 180 seconds. Menu/Set Press SETUP TAD 2.ICM MAX.TIME Press to select the maximum time setting for incoming messages (30, 60, 120 or 180 seconds). -
Page 129: Record Fax/Tel Outgoing Announcement (F/T Message)
Record FAX/TEL Outgoing Announcement (F/T MESSAGE) This is the announcement played by your MFC (not an external TAD) when someone calls and your MFC is set to FAX/TEL receive mode. Although callers hear your announcement, they cannot leave a message. By choosing F/T MESSAGE (not TAD MESSAGE) you can record the announcement using the same steps as for the TAD outgoing message. -
Page 130: Printing Reports
Printing reports MFC settings and activity You need to set up the Transmission Verification Report and Activity Report Interval in the menu table. Menu/Set Press REPORT SETTING —OR— 1.XMIT REPORT Menu/Set Press REPORT SETTING 2.JOURNAL PERIOD Customizing the Transmission Verification Report You can use the Transmission Report as proof that you sent a fax. -
Page 131: Setting The Fax Activity Report Interval
Setting the Fax Activity Report Interval You can set the MFC to print activity reports at specific intervals (every 50 faxes, 6, 12 or 24 hours, 2 or 7 days). If you set the interval to OFF, you can print the report by following the Steps on the next page. The default setting is OFF. -
Page 132: Printing Reports
Printing reports Five reports are available: Prints the Help List so you can see at-a-glance PRINT REPORTS how to quickly program your MFC. 1.HELP Lists names and numbers stored in the Speed PRINT REPORTS Dial memory, in numerical order. 2.QUICK-DIAL Lists information about the last incoming and PRINT REPORTS outgoing faxes. -
Page 133: Making Copies
Making copies Using the MFC as a copier Your MFC allows you to make high-quality photocopies and transparencies. Copies can be in black and white or full colour. Always make sure you have paper in the paper tray before making copies. -
Page 134: Single Or Multiple Copies
Single or multiple copies You can make multiple copies using the scanner glass. Multiple copies will be stacked (all copies of page 1, then all copies of page 2, and so Copy Options on). Use the key to choose more settings. (See Using Copy Options key (Temporary Settings) on page 11-4.) Lift the Document Cover. -
Page 135: Out Of Memory Message
Out of memory message If the memory becomes full before you are OUT OF MEMORY making copies, the LCD will show this PLAIN NORMAL message: Stop/Exit If the OUT OF MEMORY message appears, press cancel. You will need to clear some jobs from the memory before you can continue. -
Page 136: Using Copy Options Key (Temporary Settings)
Using Copy Options key (Temporary Settings) When you want to change the settings only for the next copy, use the Copy Options key. Copy Options Key You can use different combinations. For example, if you want to copy a photograph on glossy paper with best print quality, press Copy Options to select BEST in the Quality setting and GLOSSY in the Paper Type setting. - Page 137 Press Menu Selections Options Factory Page Copy Setting Options select select 11-6 QUALITY FAST/NORMAL/BEST NORMAL 11-7 ENLARGE/REDUCE 25%/50%/78%/94%/ 100% 100%/104%/150%/ 200%/400%/MANUAL 11-8 PAPER TYPE PLAIN/INK JET/ PLAIN GLOSSY (4-COLOUR or 3-COLOUR)/ TRANSPARENCY 11-9 PAPER SIZE A4/10(W)×15(H)CM 11-9 BRIGHTNESS 11-10 PAGE LAYOUT OFF(1 IN 1)/ 2 IN 1/4 IN 1/ (1 IN 1)
-
Page 138: No. Of Copies
No. of Copies Place the original face down on the scanner glass. Copy Options Press ↑ ↓ SELECT & SET select NO. OF COPIES:01. NO. OF COPIES:01 Press the number of copies using the dial pad. Menu/Set Press Mono Copy Colour Copy To start copying now, press —OR—... -
Page 139: Enlarge/Reduce
Enlarge/Reduce You can select the following enlargement or reduction ratios. MANUAL allows you to enter a ratio from 25% to 400%. Press Copy Options 100% 104% to select 150% ENLARGE/REDUCE 200% 400% MANUAL Place the original face down on the scanner glass. Copy Options Press ENLARGE/REDUCE... -
Page 140: Paper Type
Paper Type You can change the paper type only for the next copy. Select the type of media that you are using to get the best print quality. Place the original face down on the scanner glass. Copy Options Press to select PAPER TYPE. -
Page 141: Paper Size
Paper Size You can change the paper size setting only for the next copy. You can copy only on A4 and Post Card (10X15) paper. Place the original face down on the scanner glass. Copy Options Press to select PAPER SIZE. Menu/Set Press Press... -
Page 142: Page Layout
Page Layout You can save paper by copying either two or four pages onto one page, or you can make a poster size copy. Place the original face down on the scanner glass. Copy Options Press to select PAGE LAYOUT. Menu/Set Press Press... - Page 143 4 in 1 Poster You can make a poster size copy of a photograph. For 2 in 1 or 4 in 1 copies, you cannot change the enlargement or reduction ratio or print on glossy paper. For colour 2 in 1 or 4 in 1 copies, you can use A4 size paper. You cannot make more than one copy.
-
Page 144: Changing The Default Copy Settings
Changing the default copy settings You can adjust the copy settings that are shown in the chart. These settings will stay until you change them again. Submenu Menu Selections Options Factory Settings — 1.QUALITY NORMAL NORMAL BEST FAST — 2.BRIGHTNESS —... -
Page 145: Copy Quality
Copy Quality Menu/Set Press Press to select NORMAL, BEST COPY or FAST. 1.QUALITY Menu/Set Press Stop/Exit Press Brightness Menu/Set Press Press to make a lighter copy. COPY —OR— 2.BRIGHTNESS Press to make a darker copy. Menu/Set Press Stop/Exit Press Contrast You can change the contrast to help an image look sharper and more vivid. -
Page 146: Colour Adjustment
Colour Adjustment Menu/Set Press COPY 4.COLOUR ADJUST Press to select RED, GREEN or BLUE. Menu/Set Press Press to increase the colour saturation. —OR— Press to decrease the colour saturation. Menu/Set Press Return to Step 2 to select the next colour. —OR—... -
Page 147: Legal Limitations
Legal limitations Colour reproductions of certain documents are illegal and may result in either criminal or civil liability. This memorandum is intended to be a guide rather than a complete listing of every possible prohibition. In case of doubt, we suggest that you check with counsel as to any particular questionable documents. -
Page 148: Walk-Up Photocapture Center
Walk-Up PhotoCapture ™ Center Introduction Your Brother MFC includes three media drives (slots) to use with ® ® popular digital camera media: CompactFlash , SmartMedia ® Memory Stick ® ® ® CompactFlash SmartMedia Memory Stick ™ The PhotoCapture Center feature lets you print digital photos from your digital camera at high resolution to get photo quality printing. -
Page 149: Basic Flow
Basic flow Insert the media card firmly into the media drive (slot). (See Getting started on page 12-3.) Print the index (Thumbnails) of all the images on your media card by selecting PRINT INDEX. The images will be numbered. (See Printing the Index (Thumbnails) on page 12-6.) To print the images, select PRINT IMAGES. -
Page 150: Getting Started
Getting started ® There are separate slots on your MFC, for a CompactFlash ® ® card, a SmartMedia card and a Memory Stick Use only Smart media cards with a 3.3 voltage. ® The left slot is for a CompactFlash Card, the middle slot is for a ®... - Page 151 Media Card Indicator Lights: ■ LED light is ON, the media card is inserted properly. ■ LED is OFF, the media card is not properly inserted. ■ LED is BLINKING, the media card is being read or written to. Do NOT unplug the power cord or remove the media card from the media drive (slot) while the MFC is reading or writing to the card (LED is blinking).
- Page 152 The MFC can only read one Media card at a time so do not insert more than one card. The settings that you want to use with the card will be kept until you take out the media card from the drive (slot), Stop/Exit print images or press Insert the media card firmly into the media drive (slot).
-
Page 153: Printing The Index (Thumbnails)
Printing the Index (Thumbnails) ™ The PhotoCapture Center assigns numbers for images (such as No.1, No.2, No.3, and so on). It does not recognize any other numbers or file names that your digital camera or PC have used to identify the pictures. You can print a thumbnail page (Index page with 6 or 4 images per line). -
Page 154: Printing Images
Printing images Before you can print an individual image, you have to know the image number. Print the Index first. (See Printing the Index (Thumbnails) on page 12-6.) Make sure you inserted the media card. Copy Options Press . (See page 12-3.) Press to choose ↑... -
Page 155: Changing The Settings For Printing Images
Changing the settings for printing images You can change the settings for the number of Copies, Paper Type, Paper & Print Size, Print Quality, Brightness and Colour Enhancement only for the next printed image. Menu Selections Options (1) Options (2) Factory Page Setting... -
Page 156: Menu Selections
Menu selections Make sure you have entered the image number that you want to be printed. (See page 12-7.) Number of Copies Press to select NO. OF COPIES:01. Menu/Set Press Use the dial pad to enter the number of copies you want. Menu/Set Press Colour Copy... -
Page 157: Paper And Print Size
Paper and Print Size Make sure you have done Steps 1 to 5 on page 12-7. Press to select PAPER&PRINT SIZE. Menu/Set Press Press to select the size of the paper you are using (A4 or 10(W)X15(H)CM). Menu/Set Press If you select A4, press to select the print size. - Page 158 Load the post card with the top edge down and print side is towards you. Print side Check the printed thumbnail image on the index sheet. Index Landscape image Portrait image Some image taken by some cameras have the orientation information.
- Page 159 Press to select LANDSCAPE or PORTRAIT. Menu/Set Press The result of the output (10 (W) x 15 (H) cm) LANDSCAPE PORTRAIT Portrait Image Landscape Image Colour Copy Press to print. —OR— Press for more settings. ™ WALK-UP PHOTOCAPTURE CENTER 12 - 12...
-
Page 160: Print Quality
Print Quality Press to select PRINT QUALITY. Menu/Set Press Press to select NORMAL, FINE or PHOTO. Menu/Set Press Recommended mode for ordinary printouts. Good print quality NORMAL with adequate print speed. Better print quality than normal and faster copy speed than FINE PHOTO. -
Page 161: Colour Enhancement
Colour Enhancement You can turn on the colour enhancement feature to print more vivid images. If you want to customize the White Balance, Sharpness or Menu/Set Colour Density, press . (See Colour Enhancement on page 12-18.) Press to select COLOUR ENHANCE. Menu/Set Press Press... - Page 162 Insert your media card into the C.FLASH ACTIVE proper drive (slot). Press Copy Option key ----- The media active message will be shown for 60 seconds and then the display will return to standby mode (date and time). Even in that case, you can enter the PhotoCapture mode by Copy Options pressing Copy Options...
-
Page 163: Changing The Default Settings
Changing the default settings You can adjust the Print Quality, Print Size, Brightness, Contrast, Colour Enhancement and Scan to Card settings, that are shown in the chart. These settings will remain set until you change them again. Menu/Set Press , followed by the number of the setting you want to change. -
Page 164: Print Quality
Print Quality Menu/Set Press PHOTOCAPTURE 1.PRINT QUALITY Press to select NORMAL, FINE or PHOTO. Menu/Set Press Stop/Exit Press Print Size Menu/Set Press PHOTOCAPTURE 2.PRINT SIZE Press to select 13×9CM, 15×10CM, 18×13CM or 20×25CM. Menu/Set Press Stop/Exit Press Brightness Menu/Set Press PHOTOCAPTURE 3.BRIGHTNESS Press... -
Page 165: Contrast
Contrast You can choose the contrast setting. More Contrast will make an image look sharper and more vivid. Menu/Set Press PHOTOCAPTURE 4.CONTRAST Press to select CONTRAST. Menu/Set Press Press to increase the contrast. —OR— Press to decrease the contrast. Menu/Set Press Stop/Exit Press... - Page 166 Press to adjust the degree of White Balance. Menu/Set Press Repeat Step 4 and Step 5 to adjust the degree of Sharpness and Colour Density. —OR— Stop/Exit Press ■ White Balance This setting adjusts the hue of the white areas of an image. Lighting, Camera settings and other influences will effect the appearance of white.
-
Page 167: Understanding The Error Messages
Understanding the Error Messages Once you are familiar with the types of errors that can occur while ™ you’re using the PhotoCapture Center , you can easily identify and troubleshoot any difficulties. When an error message appears on the LCD, the MFC will beep to get your attention. -
Page 168: Using Photocapture Center
™ Using PhotoCapture Center from your PC You can access the media card that is in the media drive (slot) of the MFC from your PC. ™ See Using PhotoCapture Center from your PC. (See Using the ™ PhotoCapture Center from your PC on page 20-1 and Using the ™... -
Page 169: Using The Mfc As A Printer
The printer drivers are on the CD-ROM we have supplied. Install the drivers first by following the Quick Setup Guide. Also, the latest printer driver can be downloaded from the Brother Solutions Center at: http://solutions.brother.com http://www.brother-uk.com Features This MFC offers many features you’ll find in a high quality ink jet... -
Page 170: Choosing The Right Type Of Paper
From your computer select the Print command. If your computer is also connected to any other printers, select Brother MFC-4820C USB Printer as your printer driver from the Print or Print Settings menu in your software application, and then click on OK to begin printing. -
Page 171: Simultaneous Printing And Faxing
Simultaneous printing and faxing Your machine can print from your computer while sending or receiving a fax in memory, or while scanning a document into the computer. Fax sending will not be stopped during PC printing. However, when the machine is copying or receiving a fax on paper, it pauses the PC printing operation, and then continues printing when copying or fax receiving has finished. -
Page 172: Printer Driver Settings
Quick Print Setup How to access the printer driver settings Select Print from the File menu in your application software. Select Brother MFC-4820C USB Printer as your printer and click Properties. The Brother MFC-4820C USB Printer dialog box will appear. -
Page 173: Basic Tab
Basic tab Select the Media Type and Quality. Select the Paper Size, Page Layout, Border Line (if any), Orientation, number of Copies, the page order and Near Edge Print. Click the Apply button to apply your selected settings. To return to the default settings, click the Default button, then click the Apply button. -
Page 174: Media Type
Media Type To achieve the best print results, the media being printed on should be selected in the driver. The MFC changes the way it prints, depending on the selected media type. Plain Paper Inkjet Paper Glossy Paper (4 colour) Glossy Paper (3 colour) Transparencies The print quality of black ink depends on the type of glossy... -
Page 175: Quality
Quality The quality selection allows you to choose the print resolution you want for your document. Print quality and speed are related. The higher the quality the longer it will take to print the document. The quality selections that are available will vary depending on the media type you select. -
Page 176: Bi-Directional Printing
Bi-Directional Printing When Bi-Directional Printing is selected, the print heads print in both directions and offer faster print speeds. When not selected, the print heads will only print in one direction to provide higher quality printouts. 14 - 5 PRINTER DRIVER SETTINGS... -
Page 177: Paper Size
Paper Size The Paper Size selection provides a large selection of standard paper sizes. If you wish, you can create a custom size ranging from 89 x 127 mm to 216 x 355.6 mm. From the drop-down box, select the Paper Size you are using. -
Page 178: Page Layout
Page Layout The Page Layout selection can reduce the image size of a page allowing multiple pages to be printed on one sheet of paper or enlarging the image size for printing one page on multiple sheets of ® paper. If you are using Windows 98/98SE/Me, the 4 in 1 layout is not available. -
Page 179: Copies
Copies The Copies selection sets the number of copies that will be printed (1 to 999). Collate With the Collate check box selected, one complete copy of your document will be printed and then repeated for the number of copies you selected. -
Page 180: Advanced Tab
Advanced tab 1 2 3 4 To return to the default settings, click the Default button. Change the tab settings by selecting one of the following icons: 1.Colour 2.Scaling 3.Watermark 4.Device Options 14 - 9 PRINTER DRIVER SETTINGS... -
Page 181: Colour
Colour Colour/Greyscale This selection allows a colour document to be printed in black and white using grey scale. Image Type The printer driver will select the most suitable colour matching and half tone method, depending on your image type. Generally, text and business graphics are printed vividly and photographic images are printed softly. -
Page 182: Custom Image Type
Custom Image Type You can select the colour matching method manually. Select the best one for your document. Match Monitor Colour is adjusted to get the closest colour match to the PC monitor. ■ Natural: Suitable for photographic images. The colour is adjusted to print a more natural colour. -
Page 183: Halftone Pattern
Halftone Pattern The MFC can use two methods (Diffusion or Dither) to arrange where to place dots to express halftones. There are some predefined patterns set for this and you can select which one to use for your document. Select the appropriate method. ■... -
Page 184: Colour Enhancement
Colour Enhancement Selecting Colour Enhancement enables the Colour Enhancement feature. This feature analyzes your image to improve quality sharpness, white balance and colour density. This process may take several minutes depending on the size of the image and the specifications of your computer. ■... - Page 185 ■ White Balance This setting adjusts the hue of the white areas of an image. Lighting, camera settings and other influences will effect the appearance of white. The white areas of a picture may be slightly pink, yellow or some other colour. By using this adjustment you can correct this effect and bring the white areas back to pure white.
-
Page 186: Scaling
Scaling You can change the print size of your document with the Scaling feature. ■ Check Off if you want to print the document as it appears on your screen. ■ Check Fit to Paper Size, if your document has an unusual size, or if you have only the standard size paper. -
Page 187: Watermark
Watermark You can place a logo or text into your document as a Watermark. You can select one of the preset Watermarks, or you can use a bitmap file or text file that you have created. Check Use Watermark, and then select the watermark you want to use. -
Page 188: Watermark Style
Watermark Style You can change the Watermark’s size and position on the page by selecting the Watermark, and clicking the Edit button. If you want to add a new Watermark, click the New button, and then select Text or Bitmap in the Watermark Style. ■... -
Page 189: Device Options
Device Options Lets you set the following Printer Functions: PRINTER DRIVER SETTINGS 14 - 18... -
Page 190: Print Date & Time
Print Date & Time When enabled the Print Date and Time feature will print the date and time on your document from your computer’s system clock. Click the Setting button to change the Date and Time format, and the Position and Font. To include a background with the Date and Time, select Opaque. -
Page 191: Quick Print Setup
Quick Print Setup The Quick Print Setup feature allows you to quickly select driver settings. To view settings, simply click your mouse button on the task tray icon. This feature can be set to ON or OFF from the Device Options. -
Page 192: Support Tab
Support tab The Support Tab provides driver version and setting information. In addition there are links to the Brother Solutions Center and the Driver Update Web sites. Click the Support tab to display the following screen: Brother Solutions Center The Brother Solutions Center is a Web site offering information... -
Page 193: How To Scan Using Windows
How to scan using ® Windows The scanning operations and drivers will be different depending on your operating system. ® For Windows 98/98SE/Me and 2000 Professional The MFC uses a TWAIN Compliant driver for scanning documents from your applications. (See Scanning a document ®... -
Page 194: Scanning A Document (For Windows ® 98/98Se/Me And 2000 Professional)
® PaperPort viewer that Brother included with your MFC, but you can also scan images directly into hundreds of other software applications that support TWAIN scanning. These applications ®... -
Page 195: How To Access The Scanner
The Scan pane appears in the left panel. Select TWAIN_32 Brother MFL Pro Scanner from the Scanner drop-down list box. Click the Scan button. The TWAIN_32 Brother MFL Pro Scanner Setup dialog box will appear: ® HOW TO SCAN USING WINDOWS... -
Page 196: Scanning A Document Into The Pc
Scanning a document into the PC You can scan a whole page —OR— scan a portion of the page after pre-scanning the document. Scanning a whole page Place the original face down on the scanner glass. Adjust the following settings, if required, in the Scanner window: ■... -
Page 197: Prescanning To Crop A Portion You Want To Scan
Select the settings for Image Type, Resolution, Scan Type, Brightness, Contrast and Document Size, as needed. In the TWAIN_32 Brother MFL Pro Scanner Setup dialog box, click the PreScan button. The entire original will be scanned into the PC and will appear in the Scanning Area. - Page 198 Select the portion you want to scan by clicking the left mouse button and dragging it. Scanning area If you enlarge the image using button, you can then use the button to restore the image to its former size. Click Start. This time only the selected area of the original will appear in the ®...
-
Page 199: Settings In The Scanner Window
Settings in the Scanner window Scan (Image Type) Select the image type of output from Photo, Web or Text. Resolution and Scan Type will be altered for each default setting. The default settings are: Image Type Resolution Scan Type Photo Select for scanning photo images. -
Page 200: Scan Type
Scan Type Black & White: Set the Scan Type to Black & White for text or line art. Grey Scale: Set the Scan Type to Grey or True Grey for photographic images. Colours: Set either: 256 Colour, which scans up to 256 colours, or 24-bit colour which scans up to 16.8 million colours. -
Page 201: Document Size
Document Size Set the Size to one of the following: ■ Letter (8 1/2 x 11 in.) ■ A4 (210 x 297 mm) ■ A5 (148 x 210 mm) ■ B5 (182 x 257 mm) ■ Executive (7 1/4 x 10 1/2 in.) ■... - Page 202 If you selected Custom as the size, The Custom Document Size dialog box will appear. Type the Name, Width and Height for the document. You can choose ‘mm’ or ‘inch’ as the unit for Width and Height. You can see the actual paper size you selected on the screen. ■...
-
Page 203: Scanning A Document (For Windows ® Xp Only)
MFC. You can scan images directly into the ® PaperPort viewer that Brother included with your MFC or you can scan images directly into any other software application that supports WIA or TWAIN scanning. How to access the scanner Open your software application to scan a document. - Page 204 Click the OK button after you choose your settings. The scanner resolution you can select is up to 1200 x 1200 dpi. To select higher scan resolutions you can use the Brother Scanner Utility. (See Brother Scanner Utility on page 15-15.) To start scanning your document, click the Scan button in the Scan dialog box.
-
Page 205: Prescanning To Crop A Portion You Want To Scan
PreScanning to crop a portion you want to scan The Preview button is used to preview an image for cropping any unwanted portions from the image. When you are satisfied with the preview, click the Scan button from the scanner window to scan the image. - Page 206 If you require advanced settings, click Adjust the quality of the scanned picture (B). You can select Brightness, Contrast, Resolution and Picture Type from the Advanced Properties tab. Click the OK button after you choose your settings. To start scanning your document, click the Scan button in the Scan dialog box.
-
Page 207: Brother Scanner Utility
Brother Scanner Utility The Brother Scanner Utility is used for configuring the scanner driver for resolutions higher than 1200dpi. To run the utility: You can run the utility by selecting the Scanner Utility located in the Start/Programs/Brother/Brother MFL-Pro Suite menu. -
Page 208: Using The Scan Key
When you are ready to use the key, make sure the Brother Control Center application is running on your computer. For details about how to configure the Brother Control Center buttons to launch the application of your choice using the Scan to key, go to the appropriate chapter: ■... -
Page 209: Scan To E-Mail
Scan to E-mail You can either scan a black and white or colour original into your E-mail application as a file attachment. You can change the Scan to key configuration.(See Scan to E-mail on page 16-7 to 16-9.) (For ® Windows XP: See Hardware Section: Changing the Scan to Button Configuration on page 17-6 to 17-14.) -
Page 210: Scan/Ocr
The file type and specific folder are based on the settings you have chosen in the Scan to File screen of the Brother MFL-Pro Control Center. (See ®... -
Page 211: Scan To Card
Scan to Card You can scan black and white and colour originals into a media card. Black and white originals will be stored in TIFF file format (*.TIF). Colour originals may be stored in PDF (*.PDF) or JPEG (*.JPG) file format. -
Page 212: Changing The Default Colour File Format
Press to select the quality you want. Menu/Set Press If you selected COLOUR STD, COLOUR FINE or COLOUR S.FINE, press to select the file format (PDF or JPEG). Menu/Set Press —OR— To start scanning, press to select START SCANNING. Menu/Set Press —OR—... -
Page 213: Ocr
PaperPort ® TextBridge ® ® ScanSoft PaperPort for Brother is a document management ® application. You will use PaperPort to view scanned documents. ® PaperPort has a sophisticated, yet easy-to-use, filing system that will help you organize your graphics and text documents. It allows you to combine or “stack”... -
Page 214: Viewing Items
Viewing items ® ® ScanSoft PaperPort provides several ways to view items: Desktop View displays a thumbnail (a small graphic that represents each item in a Desktop or folder). ® Items in the selected folder appear on the PaperPort Desktop. You ®... -
Page 215: Organizing Your Items In Folders
Organizing your items in folders ® PaperPort has an easy-to-use filing system for organizing your items. The filing system consists of folders and items that you select ® to view in Desktop View. An item can be a PaperPort item or a ®... -
Page 216: Scansoft ® Textbridge ® Ocr Lets You Convert Image Text In To Text You Can Edit
® ® ScanSoft TextBridge OCR lets you convert image text in to text you can edit Software by: ® ® ScanSoft TextBridge OCR is installed automatically with ® PaperPort when you install MFL-Pro Suite on your computer. ® ® ® ScanSoft PaperPort can quickly convert the text on a ScanSoft... -
Page 217: You Can Export Items In Other Formats
® For Windows 98/98SE, and Windows Select Start, Settings, Control Panel, Add/Remove Programs and the Install/Uninstall tab. ® Select Brother Extensions for PaperPort and click the Add/Remove button. ® Select PaperPort 8.0 SE from the list and click the Add/Remove button. -
Page 218: Using The Brother Control Center For Windows 98Se/Me/2000 Professional
2000 Professional, we recommend that you are logged on as an administrator. Brother MFL-Pro Control Center The Brother Control Center is a software utility that pops up on the PC screen whenever you click the Control Center icon in the Task Tray and select Show. -
Page 219: Autoload The Brother Control Center
Show. When the Control Center window appears, left-click the Configuration Control Center button. A dialogue box will appear: Uncheck the ‘AutoLoad’ Pop-Up check box. ® USING THE BROTHER CONTROL CENTER FOR WINDOWS 98/ 98SE/ME/2000 PROFESSIONAL 16 - 2... -
Page 220: Brother Control Center Features
For example, you can change a scan button from MS Word Pad to MS Word by changing the application that is listed for the Word Processor. ® 16 - 3 USING THE BROTHER CONTROL CENTER FOR WINDOWS 98/ 98SE/ME/2000 PROFESSIONAL... -
Page 221: Scan To Key Operations
Scan Image—Lets you to scan an image directly into any graphic viewer/editor application. You can choose the graphics application, such as Microsoft Paint or Corel PhotoPaint. ® USING THE BROTHER CONTROL CENTER FOR WINDOWS 98/ 98SE/ME/2000 PROFESSIONAL 16 - 4... -
Page 222: Scan To File
Text for OCR; Photos; Photos (High Quality); Photos (Quick Scan) or Custom. To change any of the settings for the mode, click Modify Settings. ® 16 - 5 USING THE BROTHER CONTROL CENTER FOR WINDOWS 98/ 98SE/ME/2000 PROFESSIONAL... -
Page 223: Destination Folder
Portable Network Graphics (*.png) FlashPix (*.fpx) To Search your system for the directory and folder you want, click the Browse button. Click OK to save your settings. ® USING THE BROTHER CONTROL CENTER FOR WINDOWS 98/ 98SE/ME/2000 PROFESSIONAL 16 - 6... -
Page 224: Scan To E-Mail
Control Center. To save your settings, click the OK button. —OR— To go back to the factory default settings, click the Restore Defaults button. ® 16 - 7 USING THE BROTHER CONTROL CENTER FOR WINDOWS 98/ 98SE/ME/2000 PROFESSIONAL... -
Page 225: Scanner Settings
E-mail Application—From the pull-down list, select your E-mail application. E-mail Settings—Click the E-Mail Settings button to set up links. The Send To Options window will appear: ® USING THE BROTHER CONTROL CENTER FOR WINDOWS 98/ 98SE/ME/2000 PROFESSIONAL 16 - 8... -
Page 226: Send To Options
File type—Identifies the format in which to convert items; for example, JPEG or TIFF. Combine items into a single file, if possible—Not available for your MFC. ® 16 - 9 USING THE BROTHER CONTROL CENTER FOR WINDOWS 98/ 98SE/ME/2000 PROFESSIONAL... -
Page 227: Scan To Ocr (Word Processor)
To access Scan to OCR Configuration screen In the Task Tray right-click the Control Center icon and select Show to access the Brother Control Center window. Right-click the word processor application button and click on Configuration. Click the Modify Settings button to view the configuration screen of the Control Center. -
Page 228: Scanner Settings
OCR program: File Type—From the pull-down list, select the file type you want to use for your word processor or text documents. ® 16 - 11 USING THE BROTHER CONTROL CENTER FOR WINDOWS 98/ 98SE/ME/2000 PROFESSIONAL... - Page 229 ■ Single column output—Click this check box if you want to remove columns from multi-column documents so that converted text appears in a one-column format. ® USING THE BROTHER CONTROL CENTER FOR WINDOWS 98/ 98SE/ME/2000 PROFESSIONAL 16 - 12...
-
Page 230: Scan Image
Text for OCR; Photos; Photos (High Quality); Photos (Quick Scan) or Custom. To change any of the settings for this mode, click Modify Settings. ® 16 - 13 USING THE BROTHER CONTROL CENTER FOR WINDOWS 98/ 98SE/ME/2000 PROFESSIONAL... -
Page 231: Target Application
Application—From the pull-down list, select the application you want to add to this Pop-Up screen. Click the Custom Link Settings button to set up links for your user-defined application. ® USING THE BROTHER CONTROL CENTER FOR WINDOWS 98/ 98SE/ME/2000 PROFESSIONAL 16 - 14... -
Page 232: Using The Windows -Based Brother Smartui Control Center
® (For Windows Brother SmartUI Control Center The Brother Control Center is a software utility that allows you to quite easily, with very few mouse clicks, access the most frequently used scanning applications. Using the Control Center eliminates the need to manually launch the specific applications and allows you to scan a document directly to a folder on your computer. -
Page 233: Autoload The Brother Control Center
In the Task Tray right-click on the Control Center icon and select Show to have access to the Brother SmartUI Control Center window. AutoLoad the Brother Control Center The Control Center is initially configured to automatically load each ®... -
Page 234: How To Turn Off Auto Load
“AutoLoad Pop-up”. Uncheck the AutoLoad Pop-Up option to prevent the SmartUI from automatically loading every time Windows is started. ® 17 - 3 USING THE WINDOWS -BASED BROTHER SMARTUI CONTROL CENTER... -
Page 235: Brother Control Center Features
Select which section you want by clicking on the appropriate tab. ® USING THE WINDOWS -BASED BROTHER SMARTUI CONTROL CENTER 17 - 4... -
Page 236: Auto Configuration
Select the Configuration tab and from the Application pull down menu select a different application. For example, you can change the E-mail scan button from Outlook Express to Outlook by changing the application that is listed. ® 17 - 5 USING THE WINDOWS -BASED BROTHER SMARTUI CONTROL CENTER... -
Page 237: Hardware Section: Changing The Scan To Button Configuration
Hardware Section window to reconfigure the key on your MFC. Click the Hardware Section tab at the top left of the SmartUI Control Center screen. (See Using the scan key on page 15-16.) ® USING THE WINDOWS -BASED BROTHER SMARTUI CONTROL CENTER 17 - 6... -
Page 238: Scan To E-Mail
E-mail application, which is installed on your system. If you wish to change the attachment file type click on the Link Preferences button to display a list of file types. ® 17 - 7 USING THE WINDOWS -BASED BROTHER SMARTUI CONTROL CENTER... -
Page 239: Scan To File
You can save the file to the default PaperPort folder ® so the file appears in PaperPort or you can select another folder/directory by clicking the Browse button. ® USING THE WINDOWS -BASED BROTHER SMARTUI CONTROL CENTER 17 - 8... -
Page 240: Scan To Image
To configure the Scan to Image feature left-click on the Scan to Image button and the following screen will appear. You have the ability to change the configuration, which includes the destination image format or document application. ® 17 - 9 USING THE WINDOWS -BASED BROTHER SMARTUI CONTROL CENTER... - Page 241 The resolution can be changed from 100 to 1200 dpi. You can define the size of the paper you’re using, and you can adjust the brightness and contrast of the image before scanning. ® USING THE WINDOWS -BASED BROTHER SMARTUI CONTROL CENTER 17 - 10...
-
Page 242: Scan To Ocr
To configure the Scan to OCR feature left-click on the Scan to OCR button and the following screen will appear. You have the ability to change the configuration, which includes the destination applications. ® 17 - 11 USING THE WINDOWS -BASED BROTHER SMARTUI CONTROL CENTER... - Page 243 You can select the File Type according to your needs. You have the option to choose your OCR setting from Single column output to Auto orient page. ® USING THE WINDOWS -BASED BROTHER SMARTUI CONTROL CENTER 17 - 12...
-
Page 244: Software Section
Scan to Image applications. The Copy section contains one button for one to one copying. The Fax section button is for sending faxes using the Brother PC-FAX application and the Custom section contains three buttons with which you can assign your own function. -
Page 245: Scan
MFC and print the copies using any of the features of the MFC printer driver—OR—you can direct the copy output to any ® standard Windows printer driver installed on the PC including network printers. ® USING THE WINDOWS -BASED BROTHER SMARTUI CONTROL CENTER 17 - 14... -
Page 246: Fax
Send a Fax (Brother PC-FAX)—enables you to scan a page or document and automatically send the image as a fax from the PC using the Brother PC-FAX software. Custom Scan to File—These buttons have been pre-programmed for the Scan to File feature. You can change the configuration of each of these buttons to meet your specific requirements by right-clicking on a button and following the configuration menus. -
Page 247: Scan To File
To configure the file type and save to directory right-click on the Scan to File button and click Configuration. The Scan Action tab is set to File and should not be changed. ® USING THE WINDOWS -BASED BROTHER SMARTUI CONTROL CENTER 17 - 16... - Page 248 Browse button. You can default setting by selecting the Other Folder button and then clicking Browse and selecting the folder in which you wish to save your files. ® 17 - 17 USING THE WINDOWS -BASED BROTHER SMARTUI CONTROL CENTER...
-
Page 249: Scan To E-Mail
The Scan Action tab is set to E-mail and should not be changed. To change the E-mail application click on the Configuration tab. From Application pull down list select your preferred E-mail application. ® USING THE WINDOWS -BASED BROTHER SMARTUI CONTROL CENTER 17 - 18... - Page 250 To change the file type of the attachment click the Link Preferences button to set up links. Check the Convert attachments to specified file type box and then select the appropriate file type from the pull down list. ® 17 - 19 USING THE WINDOWS -BASED BROTHER SMARTUI CONTROL CENTER...
-
Page 251: File Attachments
3.0 Image Item (*.max) Windows Bitmap (*.bmp) PC Paintbrush (*.pcx) PCX Multi-page (*.dcx) JPEG (*.jpg) TIFF-Uncompressed (*.tif) TIFF Group 4 (*.tif) Multi-Page -Uncompressed (*.tif) Multi-Page - Group 4 (*.tif) ® USING THE WINDOWS -BASED BROTHER SMARTUI CONTROL CENTER 17 - 20... -
Page 252: Scanner Settings
Scanner settings You have the ability to change the scanner settings used to create the file attachments. Click on the Scan Settings tab and select the appropriate settings. ® 17 - 21 USING THE WINDOWS -BASED BROTHER SMARTUI CONTROL CENTER... -
Page 253: Scan To Ocr (Word Processing Program)
To change the word processing application click on the Configuration Tab. You can select the destination word processing application from the Application pull down list. ® USING THE WINDOWS -BASED BROTHER SMARTUI CONTROL CENTER 17 - 22... - Page 254 To change the program link preferences click the Link Preferences button. File Type—From the pull-down list, select the file format you want to use for documents. OCR—Select the OCR application from the OCR pull down list. ® 17 - 23 USING THE WINDOWS -BASED BROTHER SMARTUI CONTROL CENTER...
-
Page 255: Scan To Graphics Application (Example: Microsoft Paint)
Configuration. The Scan Action tab is set to Application and should not be changed. To change the configuration of the destination application click on the Configuration Tab. ® USING THE WINDOWS -BASED BROTHER SMARTUI CONTROL CENTER 17 - 24... - Page 256 Update original item if item sent is modified—If you save changes to the image in the image editing program, the modified image replaces the original image on the Paper Port desktop. ® 17 - 25 USING THE WINDOWS -BASED BROTHER SMARTUI CONTROL CENTER...
-
Page 257: Copy
Copy The copy button can be customized to allow you to take advantage of the features built into the Brother printer drivers to do advanced copy functions. The Copy button is automatically linked to the default Windows printer driver. You can set any printer as the default printer including non-Brother printers. - Page 258 ® 17 - 27 USING THE WINDOWS -BASED BROTHER SMARTUI CONTROL CENTER...
-
Page 259: Fax Setting (Pc-Fax Using The Brother Fax Driver)
The MFC includes a PC-Fax driver, which allows any Windows Application to send a Fax as simply as printing a document. The Brother SmartUI automatically configures the Fax button to use the Brother PC-FAX driver no user configuration is required. -
Page 260: Fax Settings
FAX settings Brother PC-FAX To change the driver settings, click on the Setup button and then the Options button. ® 17 - 29 USING THE WINDOWS -BASED BROTHER SMARTUI CONTROL CENTER... - Page 261 Select the Paper Size, Orientation (Portrait or Landscape) and Resolution (200x200 dpi or 200x100 dpi), and click OK. To return to the factory default settings, click the Defaults button. ® USING THE WINDOWS -BASED BROTHER SMARTUI CONTROL CENTER 17 - 30...
-
Page 262: Custom: User-Defined Buttons
Custom: User-defined buttons There are up to three Custom buttons on the Brother SmartUI Control Center. You can set your own preferences and configuration to fit your required application. To configure a Custom Button right click on the button and then click Configuration. -
Page 263: Customizing A User-Defined Button
To configure a Custom button right-click on the button and then click Configuration. Please follow the following guide lines for Custom Button configuration. 1. Select the Scan Action Select the type of scan by clicking the appropriate button. ® USING THE WINDOWS -BASED BROTHER SMARTUI CONTROL CENTER 17 - 32... -
Page 264: Select Configuration For The Scan Type
Select the destination application program from the pull down list. Click on Link Preferences to set the Send to options. You can select the application from the scroll menu on the left. ® 17 - 33 USING THE WINDOWS -BASED BROTHER SMARTUI CONTROL CENTER... - Page 265 ® send the file to the default PaperPort directory or select your own destination directory by selecting Other Folder. Use the Browse button to select the destination directory. ® USING THE WINDOWS -BASED BROTHER SMARTUI CONTROL CENTER 17 - 34...
- Page 266 You can also choose another OCR application from the OCR pull down list if another is installed on you system. ® ® ® ScanSoft TextBridge is installed as port of the PaperPort application. ® 17 - 35 USING THE WINDOWS -BASED BROTHER SMARTUI CONTROL CENTER...
- Page 267 Select the destination E-mail application program from the pull down list. Click on the Link Preferences button to configure the Send To E-mail options. You can select the File type. ® USING THE WINDOWS -BASED BROTHER SMARTUI CONTROL CENTER 17 - 36...
-
Page 268: Select Scan Settings
You can select the scanner settings from each of the Scan Type options for the Custom buttons. You have the option to select Colour Mode, Resolution, Paper Size and Brightness and Contrast settings. ® 17 - 37 USING THE WINDOWS -BASED BROTHER SMARTUI CONTROL CENTER... -
Page 269: Using Mfc Remote Setup
Using MFC Remote Setup ® (For Windows MFC Remote Setup The MFC Remote Setup application lets you to set up your MFC by using the ease and speed of programming on your PC. When you access this application, the settings on your MFC will be downloaded to your PC and displayed on your computer screen. - Page 270 Print button The Print button prints the selected items on the MFC. You cannot print the MFC Remote Setup changes until you click the Apply button to upload the new data to the MFC. Then you can click the Print button to get an up-to-date printout. Export button Click the Export button to save your current settings to a file.
-
Page 271: Using Pc-Fax
(For Windows PC-FAX sending The Brother PC-FAX feature lets you send a file from your PC. You can create a file in any application on your PC, and then send it as a PC FAX. You can even attach a cover page note. -
Page 272: Setting Up User Information
(See Sending a file as a PC-FAX using the Facsimile style on page 19-14.) From the Start menu, select Programs, Brother, Brother MFL-Pro Suite, and then select PC-FAX Setup. The Brother PC-FAX Setup dialog box will appear: You must enter this information create the Fax Header and Cover Page. -
Page 273: Sending Setup
Sending setup From the Brother PC-FAX Setup dialog box, click the Sending tab to display the screen below. Outside line access If you need to enter a number to access an outside line, enter it here. This is sometimes required by a local PBX telephone system (for example, if you must dial 9, to get an outside line in your office). -
Page 274: User Interface
User interface In the Sending tab select user interface. You can choose the Simple Style or the Facsimile Style. Simple style Facsimile style 19 - 4 USING PC-FAX... -
Page 275: Speed Dial Setup
Speed Dial setup From the Brother PC-FAX Setup dialog box, click the Speed Dial tab. (To use this feature you must select the Facsimile Style user interface.) You can register a Member or Group on each of the ten Speed Dial buttons. -
Page 276: The Address Book
The Address Book From the Start menu, select Programs, Brother, Brother MFL-Pro Suite, and then click Address Book. The Brother Address Book dialog box will appear: 19 - 6 USING PC-FAX... -
Page 277: Setting Up A Member In The Address Book
Setting up a Member in the Address Book In the Brother Address Book dialog box you can add, edit and delete stored information of Members and Groups. In the Address Book dialog box, click the icon to add a Member. -
Page 278: Setting Up A Group For Broadcasting
Setting up a Group for Broadcasting If you often send the same PC-FAX to several Members, you can combine them in a Group. In the Brother Address Book dialog box, click the icon to create a Group. The Group Setup dialog box appears: Type the name of the new Group in the Group Name field. -
Page 279: Editing Member Information
Editing Member information Select the Member or Group you want to edit. Click the edit icon. Change the Member or Group information. Click OK to save your changes. Deleting a Member or Group Select the Member or Group you want to delete. Click the delete icon. - Page 280 Select OK to save the data. Type the name of the file, and then select Save. 19 - 10 USING PC-FAX...
-
Page 281: Importing To The Address Book
Importing to the Address Book You can import ASCII text files (*.csv) or Vcards (electronic business cards) into your Address Book. To import an ASCII text file: From the Address Book select File, point to Import, and then click Text. —OR—... -
Page 282: Setting Up A Cover Page
From the PC-FAX dialog box click . To access the PC-Fax Cover page setup screen. (See Sending a file as a PC-FAX using the Facsimile style on page 19-14.) The Brother PC-FAX Cover Page Setup dialog box will appear: 19 - 12 USING PC-FAX... -
Page 283: You Can Enter Information In Each Field
You can enter information in each field If you are sending a fax to more than one recipient, the recipient information will not be printed on the Cover Page. From Comment Type the comment you want to add to the cover page. Select Cover Page Form Select the cover page format you want to use. -
Page 284: Sending A File As A Pc-Fax Using The Facsimile Style
Create a file in Word, Excel, Paint, Draw or any other application on your PC. From the File menu, select Print. The Print dialog box will appear: Select Brother PC-FAX as your printer, and then click OK. The Fax Sending dialog box will appear. 19 - 14 USING PC-FAX... -
Page 285: Redial
Enter the fax number using any of the following methods: ■ Using the dial pad enter the number. ■ Click any of the 10 Speed Dial buttons. ■ Click the Address Book button, and then select a Member or Group from the Address Book. If you make a mistake you can click Clear to delete all the entries. - Page 286 Select Brother PC-FAX as your printer, and then click OK. The FAX Sending dialog box will appear: In the To: field, type the fax number of the recipient. You can also use the Address Book to select destination fax numbers by clicking the To: button.
-
Page 287: Using The Photocapture Center
Using the PhotoCapture ™ Center from your PC ® (For Windows Introduction ® For Windows 2000 users, to access the PhotoCapture ™ ® Center features from your PC you must first install a Windows 2000 update. Please see the Quick Setup Guide for installation instructions. - Page 288 You can edit the file and save it to another drive on your PC. When you take out a media card, do the following to keep from damaging it: In the My Computer window, right-click the removable disk icon and select “Eject” from the Context menu. Wait until the LED on the MFC stops blinking before taking out the media card.
-
Page 289: Overview Of Basic Steps
® ® Using ArcSoft PhotoPrinter ® Arcsoft PhotoPrinter 4 software is for editing and printing your images including templates that aid you in printing multiple images on one page and the ability to crop, rotate and add special effects to your picture. -
Page 290: Using The Photocapture Center ™ From Your Pc
Click on the individual images that you want to create thumbnails for. Click Open to generate thumbnails. Select the thumbnail of the image you want to use, and then click Okay. ™ 20 - 4 USING THE PHOTOCAPTURE CENTER FROM YOUR PC... -
Page 291: Using Your Mfc With A Macintosh
Web site (www.apple.com). *2 For Mac OS X 10.2 user, please upgrade to Mac OS X 10.2.1 or greater. (The latest information for Mac OS X, please visit at: http://solutions.brother.com) ® USING YOUR MFC WITH A MACINTOSH 21 - 1... -
Page 292: Using The Brother Printer Driver With Your Apple ® Macintosh ® (Os 8.6-9.2)
Using the Brother printer driver with ® ® your Apple Macintosh (OS 8.6-9.2) To select a Printer: Open the Chooser from the Apple menu. Click the MFL-Pro Color icon. On the right side of the Chooser window, click the printer you want to print to. Close the Chooser. - Page 293 ® From application software such as PaperPort , click File menu and select Print. Click Print to start printing. If you want to change Copies, Pages, Quality, Media Type and Color/Mono, select your settings before clicking Print. Click the Option button to change Document and Printing Options.
-
Page 294: Using The Brother Printer Driver With Your Apple Macintosh (Os X 10.1/10.2.1 Or Greater)
Choosing page setup options From application software such as TextEdit, click the File menu and select Page Setup. Make sure MFC-4820C is selected in the Format for pop-up menu. You can change the settings for Paper Size, Orientation and Scaling, then click OK. -
Page 295: Printing A Document
From application software such as TextEdit, click the File menu and select Print. The print dialog box appears, click Print. Make sure MFC-4820C is selected in the Printer pop-up menu. You can select the number of copies or a range of pages to print. -
Page 296: Choosing Printing Options
Choosing printing options To control special printing features of the printer, choose Print Settings in the Print dialog box. You can change Quality, Media Type, Color/Mono and Bi-Directional Printing settings. ® 21 - 6 USING YOUR MFC WITH A MACINTOSH... -
Page 297: Sending A Fax From Your Macintosh ® Application
® Sending a fax from your Macintosh application ® You can send a fax directly from a Macintosh application by doing the following: ® Create a document in a Macintosh application. To send a fax, select Print from the File menu. The Printer dialog box will appear: When Printer is selected, the top button shows Print and the Address button is grayed. - Page 298 Click Send Fax. The Send Fax dialog box appears: The Send Fax dialog box has two list boxes. The left box shows all the previously Stored Fax Numbers and the right box shows the Destination Fax Numbers as you select them. To address the fax, type a fax number in the Input Fax Number box.
-
Page 299: Setting Up Your Address Book
When you are finished addressing your fax, click Send Fax. To select and only send certain pages of the document, click Cancel to go to the Print dialog box. If you click Send Fax without addressing your fax, the following error message will appear: Click OK to go to the Send Fax dialog box. -
Page 300: Adding A New Group
Click New. The following dialog box will appear: Type the name and fax number. You can store a comment in the Memo field (up to 15 characters). Click OK to go back to the Address Book dialog box. Adding a new Group You can set up a Group of people that you send the same fax to. - Page 301 Click OK to go back to the Address Book dialog box. Click OK to go back to the Print/Facsimile dialog box. Then if you are ready to send your fax, click Send Fax. ® USING YOUR MFC WITH A MACINTOSH 21 - 11...
-
Page 302: Using The Brother Twain Scanner Driver With Your Macintosh ® (For Mac Os 8.6-9.2 And Os X 10.2.1 Or Greater)
Run your Macintosh TWAIN-compliant application software. The first time you use the Brother TWAIN driver (MFL-Pro/P2500), set it as the default by choosing Select Source (or the other menu name to select the device). Afterwards, for each document you scan choose Acquire Image or Scan. -
Page 303: Scanning An Image Into Your Macintosh
® Scanning an image into your Macintosh You can scan a whole page —OR— scan a portion after prescanning the document. Scanning a whole page Place the original face down on the scanner glass. Adjust the following settings, if needed, in the Scanner Setup dialog box: Resolution Color Type... -
Page 304: Prescanning An Image
PreScanning an image PreScanning allows you to scan an image quickly at a low resolution. A thumbnail version will appear in the Scanning Area. This is only a preview of the image, so you can see how it will look. The PreScan button will allow you to crop unwanted areas from the images. -
Page 305: Settings In The Scanner Window
Settings in the Scanner window Image Resolution From the Resolution pop-up menu choose the scanning resolution. Higher resolutions use more memory and transfer time, but produce a finer scanned image. ® USING YOUR MFC WITH A MACINTOSH 21 - 15... - Page 306 Color Type Black & White—Set the image Type to Black and White for text or line art. For photographic images, set the image type to Gray (Error diffusion) or True Gray. Gray (Error Diffusion)—is used for documents with photographic images or graphics. (Error Diffusion is a method for creating simulated gray images by placing black dots instead of the true gray dots in a specific matrix instead of true gray dots.) True Gray—is used for documents with photographic images or...
-
Page 307: Scanning Area
Scanning Area Set the Size to one of the following: ■ Letter (8.5 × 11 inches) A4 (210 × 297 mm) ■ A5 (148 × 210 mm) ■ ■ B5 (182 × 257 mm) Executive (7.25 × 10.5 inches) ■ ■... -
Page 308: Adjusting The Image
Adjusting the Image Brightness Adjust the Brightness setting to get the best image. The Brother TWAIN Scanner driver offers 100 Brightness levels (-50 to 50). The default value is 0, representing an ‘average’ setting. You can set the Brightness level by dragging the slide bar to the right to lighten the image or to the left to darken the image. -
Page 309: Colour Sync Dialog
Colour Sync Dialog Perceptual Matching—All the colours of a given gamut (range of colours) are scaled proportionally to fit within another gamut (printable range of colours). The purpose is to maintain the balance between the colours of the image. This is the best way to get realistic viewable or printable images, for photographs and photo realistic graphics. -
Page 310: Scanner Profile
Colours that fall within the gamuts of both devices are left unchanged. Scanner Profile Select your Brother MFC. ® 21 - 20 USING YOUR MFC WITH A MACINTOSH... -
Page 311: Mfc Remote Setup (Mac Os 10.1/10.2.1 Or Greater)
MFC. ® The ‘MFC Remote Setup’ application icon is in Macintosh HD/Library/Printers/Brother/Utility. This starts the process of uploading the data to the MFC and exiting the remote setup program. If an error message is displayed enter the correct data again. - Page 312 Cancel This exits the remote setup application without uploading the data to the MFC. Apply This uploads the data to the MFC, but does not exit the remote setup application. Print This command prints the selected items on the MFC. You cannot print the data until it is uploaded to the MFC.
-
Page 313: Using The Photocapture Center
™ Using the PhotoCapture Center from ® a Macintosh ® You can access the Media Card inserted into the MFC from a Macintosh For Mac OS 8.6 only You have to download “USB Mass Storage Support 1.3.5” ® ® software from the web site of Apple Macintosh ®... - Page 314 Quit all applications which are running stored data on the media card and drag the removal disk icon onto Trash before you remove the media card from the MFC. ™ The PhotoCapture Center will only read one card at a time so do not insert more than one media card at a time.
-
Page 315: Overview Of Basic Steps
® Using ArcSoft PhotoPrinter ® ® Arcsoft PhotoPrinter 4 software is for editing and printing your images including templates that aid you in printing multiple images on one page and the ability to crop, rotate and add special effects to your picture. - Page 316 Select the image file and click Open. (from Mac OS 10.2.1) ® 21 - 26 USING YOUR MFC WITH A MACINTOSH...
-
Page 317: Important Information
Important information TAR ® International E Compliance Statement NERGY TAR ® As an E Partner, Brother Industries, Ltd. has determined NERGY TAR ® that product meets the E guidelines for energy NERGY efficiency. Important safety instructions Read all of these instructions. - Page 318 This product should be operated from the type of power source indicated on the label. If you are not sure of the type of power available, call your dealer or local power company. This product is equipped with a 3-wire grounding type plug, a plug having a third (grounding) pin.
-
Page 319: Trademarks
Trademarks The Brother logo is a registered trademark of Brother Industries, Ltd. Brother is a registered trademark of Brother Industries, Ltd. PhotoCapture Center is a trademark of Brother International Corporation. MFL-Pro Suite is registered trademarks of Brother International Corporation. © Copyright 2003 Brother Industries, Ltd. All rights reserved. -
Page 320: Important-For Your Safety
IMPORTANT-For Your Safety To ensure safe operation the three-pin plug supplied must be inserted only into a standard three-pin power point which is effectively grounded through the normal household wiring. Extension cords used with the equipment must be three-conductor and be correctly wired to provide connection to ground. Use of extension cords is not recommended. -
Page 321: Troubleshooting And Routine Maintenance
Troubleshooting and routine maintenance Troubleshooting Error Messages As with any sophisticated office product, errors may occur. If this happens, your MFC identifies the problem and displays an error message. The most common error messages are shown below. ERROR MESSAGES ERROR CAUSE ACTION MESSAGE... - Page 322 ERROR MESSAGES ERROR CAUSE ACTION MESSAGE You tried to poll a fax machine that is not in Check the other fax machine’s CONNECTION Polled Waiting mode. polling setup. FAIL The scanner cover is not closed completely. Pull the Scanner Cover Release COVER OPEN Lever and lift the scanner cover and then close it again.
- Page 323 TEMPERATURE The MFC has a mechanical problem. Unplug the machine, and then call MACHINE ERROR Brother or your dealer for service. The media card is either bad or not formatted. Reinsert the correct media card. MEDIA ERROR One or more of the ink cartridges are running Order a new ink cartridge.
-
Page 324: Printer Jam Or Paper Jam
Printer Jam or Paper Jam Remove the jammed paper depending on where it is jammed in the MFC. Paper is jammed in the paper tray. Push the lever as shown below, and remove the jammed paper. Paper is jammed inside the paper tray. Remove any paper from the paper tray that is not jammed. - Page 325 Pull the paper tray out of the MFC. Paper Tray Pull up the jammed paper to remove it. Jammed paper Reinstall the paper tray. Paper Tray TROUBLESHOOTING AND ROUTINE MAINTENANCE 23 - 5...
- Page 326 Paper is jammed inside the MFC. Open the scanner cover by releasing the scanner cover release lever and lifting the scanner cover. Scanner Cover Release Lever Scanner Cover Remove the jammed paper. Close the scanner cover. Do not touch the ink tube because it can cause damage to the machine itself.
-
Page 327: If You Are Having Difficulty With Your Mfc
Mono Copy key function and see if the same top and bottom of sentences problem occurs. If the copy is also bad, call your Brother dealer for are cut off. service. - Page 328 DIFFICULTY SUGGESTIONS Received colour fax prints only Replace the colour ink cartridges that are empty or nearly empty, and in black and white. then ask the other person to send the colour fax again. (See Replacing the ink cartridges on page 23-20.) Check that Fax Storage is set to OFF. (See Setting Fax Storage on page 8-1.) Left and Right margins are cut Turn on Auto Reduction.
- Page 329 Brother or your dealer for service. Scanning Difficulties TWAIN errors appear while Make sure the Brother TWAIN driver is selected as the primary source. ® scanning. In PaperPort , click Scan in the File menu and select the Brother TWAIN driver.
- Page 330 Make sure the MFC is not showing an error message on the LCD. Connect Failure’ Error Message appears. ‘MFC Connect Failure’ If the MFC is not connected to your PC and you have loaded the Brother software, the PC will show ‘MFC Connect Failure’ each time you restart ® Windows .
-
Page 331: How To Improve Print Quality
MFC will go back standby mode automatically. If you clean the print head at least five times and the print has not improved, call Brother your dealer for service. Print Quality Check If the print quality is not good, you can print a Print Quality Check Sheet to help you find the settings you may need to change. - Page 332 STEP A: Colour block quality check The LCD shows: IS STEP “A” OK? 1.YES 2.NO Check the quality of the four colour blocks on the sheet. (BLACK/CYAN/YELLOW/MAGENTA). If all lines are clear and visible, press (YES) to go to STEP B. —OR—...
- Page 333 STEP B: Alignment Check The LCD shows: IS STEP “B” OK? 1.YES 2.NO Check the 600 DPI and 1200 DPI test prints to see if number 5 most closely matches number 0. If the number 5 sample of both the 600 DPI and 1200 DPI are the best matches, press (YES) to finish STEP B.
- Page 334 Quality Check Sheet. If the problem still exists, repeat the cleaning and test print procedures at least five times for the new ink cartridge. If ink is still missing, call your Brother dealer or Brother for service. Caution Do NOT touch the print head. Touching the print heads may cause permanent damage and may void the print head’s warranty.
-
Page 335: Checking The Ink Volume
Checking the ink volume You can check the ink that is left in the cartridge. Menu/Set Press Press to select the colour you INK VOLUME want to check. BLACK Menu/Set Press The LCD shows the ink volume. BLACK Stop/Exit Press TROUBLESHOOTING AND ROUTINE MAINTENANCE 23 - 15... -
Page 336: Packing And Shipping The Mfc
Packing and shipping the MFC Whenever you transport the MFC, use the packaging that came with it. If you do not pack the MFC properly, you may void your warranty. WARNING Do NOT unplug the MFC after a print job until you hear the final click. Pull the scanner cover release lever and lift the scanner cover. - Page 337 Remove the paper tray from the MFC. Paper Tray Unplug the MFC from the telephone wall socket (phone socket). Unplug the MFC from the AC power outlet. Unplug the USB cable from the MFC. Remove the telephone line cord, and put all the parts in their original packaging or protective wrapping.
- Page 338 Place the MFC in the original box with the original packaging. Pack the attachable parts and printed materials in the box. DO NOT pack the used ink cartridges. Close the box. 23 - 18 TROUBLESHOOTING AND ROUTINE MAINTENANCE...
-
Page 339: Routine Maintenance
Routine maintenance Cleaning the scanner Lift the document cover. Clean the scanner glass and the white film with isopropyl alcohol on a soft lint-free cloth. White Film Scanner Glass Document Cover TROUBLESHOOTING AND ROUTINE MAINTENANCE 23 - 19... -
Page 340: Replacing The Ink Cartridges
Replacing the ink cartridges Your MFC is equipped with an ink dot counter that automatically monitors the ink level in each colour cartridge. When the counter detects an ink cartridge is out of ink, the MFC will notify you with a message INK EMPTY on the LCD. - Page 341 Each colour has its own correct position. Insert the new ink cartridge into its carriage by pressing until it clicks. Insert until it clicks New Ink Cartridge After installing the ink cartridges, close the ink cartridge cover, output paper support and scanner cover. If you replaced an ink cartridge while NEAR EMPTY XXXX was displayed on the LCD, the LCD will ask you to verify that it was a brand new one.
- Page 342 If the INK EMPTY message is on the display after you have installed ink cartridges, check that the ink cartridges are installed correctly. If you still cannot solve a problem with your MFC, call Brother Customer Service. 23 - 22 TROUBLESHOOTING AND ROUTINE MAINTENANCE...
-
Page 343: When You Dispose Of The Machine
When you dispose of the machine This machine contains an Ni-MH battery for memory back-up purposes. If local legislation requires you to remove the battery when you dispose of the machine, please remove it from the machine. Dispose of the battery separately following local battery disposal legislation. -
Page 344: Glossary
Glossary Auto Dial List A listing of names and numbers stored in Speed Dial memory, in numerical order. Automatic fax transmission Sending a fax without picking up the Speaker Phone external telephone’s handset or pressing Automatic Redial A feature that enables your MFC to redial the last fax number if the original fax did not go through because the line was busy. - Page 345 External phone A TAD (telephone answering device) or telephone that is plugged into socket. F/T Ring Time The length of time that the Brother machine rings (when the receive mode setting is FAX/TEL) to notify you to pick up a voice call that it answered.
- Page 346 Fax Storage You can print stored faxes later, or retrieve them from another location using Fax Forwarding, Paging, or Remote Retrieval functions. FAX/TEL You can receive faxes and telephone calls. Do not use this mode if you are using a telephone answering device (TAD). Fax tones The signals sent by sending and receiving fax machines while communicating information.
- Page 347 Out of Paper Reception Receives faxes into the MFC’s memory when the machine is out of paper. Overseas Mode Makes temporary changes to the fax tones to accommodate noise and static on overseas phone lines. Paging Feature enables your fax unit to call your pager when a fax is received into its memory.
- Page 348 Ring Delay The number of rings before the MFC answers in FAX mode. Ring Volume Volume setting for the MFC’s ring. Scanning The process of sending an electronic image of an original paper document into your computer. Scan to Card You can scan a black and white or colour original into a Media Card.
-
Page 349: Specifications
Specifications Product description The MFC-4820C is a 7in1 Multi-Function Center: Colour Printer, Colour Copier, Colour Scanner, TAD, Plain Paper Colour Fax, ™ PhotoCapture Center and PC-FAX Sending (via your PC). General Memory Capacity 16MB Paper Tray Up to 100 Sheets (80 g/m... -
Page 350: Print Media
Print media Paper Input Paper Tray ■ Paper type: Plain paper, inkjet paper (coated paper), glossy paper, transparencies and envelopes ■ Paper size: A4, A5, Executive, envelopes (commercial No. 10, DL, C5), Post card, Index card. Width: 89-216 mm Height: 127-356 mm For more details, see Paper Specifications for Paper Tray, on page 2-2. -
Page 351: Fax
Compatibility ITU-T Group 3 Coding System Mono: MH/MR/MMR Colour: JPEG Modem Speed 14400 bps Automatic Fallback Original Size Scanner Width: Max. 216 mm Scanner Height: Max. 297 mm Scanning Width 208 mm Printing Width 204 mm Grey Scale Mono: 64 Colour: 256 levels (Error Diffusion) Polling Types Standard, Secure, Delayed Sequential: B&W only Contrast Control... -
Page 352: Scanner
Scanning Width 208 mm Grey Scale 256 levels Printer ® Printer Driver Windows 98/98SE/Me/2000 Professional and XP driver supporting Brother Native Compression mode and bi-directional capability ® ® ® Apple Macintosh QuickDraw Driver For OS 8.6-9.2/OS X 10.1/10.2.1 or greater... -
Page 353: Computer Requirements
Remote Setup only) NOTE: All registered trademarks referenced herein are the property of their respective companies. For the latest drivers, access the Brother Solutions Center at http://solutions.brother.com Consumable Items Black and 3 individual colour ink cartridges separate from the print heads. -
Page 354: Index
....11-6, 11-13 Broadcasting ....6-13 reducing ......11-7 setting up Groups for ..7-3 scanner glass ....11-2 Brother Control Center single ......11-2 using and configuring ..16-1 temporary settings ..11-4 BT Call Sign ..... 5-14 Credit Card Numbers .. - Page 355 reducing to fit on paper ...5-7 retrieving from a remote ECM (Error Correction Mode) site .......8-7 ........... 1-9 ring delay, setting ...5-3 entering text ......4-4 sending envelopes .....2-2, 2-5 at end of conversation ..6-5 error messages on LCD ..23-1 colour fax .......6-9 CHECK PAPER .....
- Page 356 Outgoing Message (TAD MESSAGE) ....... 9-2 ink cartridges checking ink volume ..23-15 replacing ...... 23-20 PABX ........4-8 Paper ......2-1, S-2 capacity ......2-2 jacks Type ......... 4-1 EXT. jack ® PaperPort external telephone ..1-10 accessing ....... 15-3 TAD (answering machine) exporting ......
- Page 357 ........ 23-4 OCR ......15-24 resolution ......S-4 Setup specifications ....S-4 Date and Time ....4-2 Station ID (fax header) ..4-3 software Quality key (copying) Brother Control Center ..16-1 ........11-4, 11-6 ® ® ScanSoft PaperPort ...15-21 Speed Dial ......1-6 changing ......7-2 Receive mode storing .......7-1...
- Page 358 if you are having difficulty incoming Calls .... 23-8 phone line difficulty ..23-8 printer difficulties ..23-9 printing or receiving faxes ........23-7 sending faxes ....23-8 Volume, setting ....4-6 beeper ......4-6 ring ........4-6 speaker ......4-7 I - 5 INDEX...
-
Page 359: Remote Retrieval Access Card
Remote Retrieval Access Card If you plan to retrieve voice or fax messages while away from your MFC, carrying the Remote Retrieval Access Card printed below will serve as a convenient reminder of the retrieval procedures. Simply cut out the card and fold it to fit in your wallet or organizer. Keeping it handy will help you derive the full benefit of your MFC’s Forwarding, Paging and Remote Retrieval features. - Page 360 R - 2...
- Page 361 This machine is approved for use in the country of purchase only, local Brother companies or their dealers will only support machines purchased in their own countries. UK/IRE/SAF/PAN NORDIC Version A...