Table of Contents
Advertisement
Advertisement
Table of Contents

Related Manuals for VTech CS5111-2


Summary of Contents for VTech CS5111-2
- Page 1 User’s manual w w w . v t e c h p h o n e s . c o m Models: CS5111-2 CS5111-3...
-
Page 2: Important Safety Instructions
This manual has all the feature operations and troubleshooting necessary to install and operate your new VTech telephone. Please review this manual thoroughly to ensure proper installation and operation of this innovative and feature rich VTech product. For support, shopping, and everything new at VTech, visit our website at www.vtechphones.com. -
Page 3: Table Of Contents
Table of contents Getting started ....1 Volume ....12 Parts checklist . - Page 4 Table of contents Dial a speed dial number ..23 Warranty ....45 Reassign speed dial locations ..24 FCC, ACTA and IC regulations .
-
Page 5: Getting Started
1 (800) 267-7377. 4. Chargers and charger adapters 1. Handsets 3. Telephone base 2. Telephone line cord power adapter 1 for CS5111-2, 2 for CS5111-2, 2 for CS5111-3 3 for CS5111-3 5. Battery compartment 6. Batteries covers 8. -
Page 6: Telephone Base And Charger Installation
Getting started Telephone base and charger installation Install the telephone base and charger as shown below. Make sure that the • Use only the electrical outlet is not controlled by a wall switch. If you subscribe to high-speed power adapters Internet service (Digital Subscriber Line - DSL) through your telephone lines, supplied with this product. -
Page 7: Battery Installation And Charging
Getting started Battery installation and charging Install the battery as shown below. The battery may have enough charge for • If the handset will short calls. For best performance, charge the battery for at least 16 hours before not be used for a long period of use. -
Page 8: Mounting Bracket Installation
Getting started Mounting bracket installation Your telephone base comes with the mounting bracket installed, ready for desktop use. You may also mount your telephone onto a standard telephone wall plate. Wall mounting bracket installation: AC 7.5V To prepare the telephone base for wall mounting, you will need to remove the bracket if it is currently attached for desktop use. - Page 9 Getting started Mounting bracket installation (continued) Desktop/tabletop bracket installation: Your telephone comes ready for table or desktop use. If you have repositioned the bracket for wall mounting and now want to return to desktop use, follow these steps: Insert the lower portion tabs of the mounting bracket into the upper grooves of the telephone base.
-
Page 10: Handset Layout
Getting started Handset layout /VOL+/ • Press to display the directory when the phone CHARGE light is not in use. • Press and hold to adjust the ringer volume • On when the handset is charging in the when the telephone is not in use. telephone base or charger. -
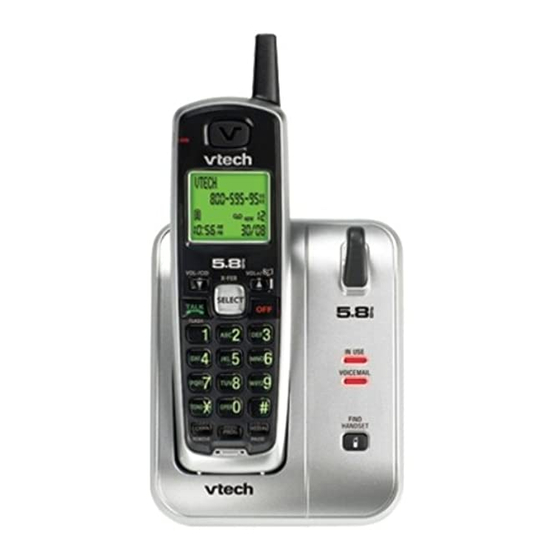
Page 11: Telephone Base Layout
Getting started Telephone base layout IN USE light • Flashes when there is an incoming call. • On when the handset is in use. VOICEMAIL light • Flashes when you have new voicemail from your telephone service provider. FIND HANDSET •... -
Page 12: Telephone Settings
Telephone settings Date and time If you subscribe to caller ID service, the date and time will be set automatically • In the event of a with the next incoming call. If you do not have caller ID service, you can set the power failure, the date and time manually and individually for each system handset. -
Page 13: Ringer
Telephone settings Ringer You can select from different ringers. • If the ringer Press PROG when the handset is not in use. volume is set to OFF, Press until the screen displays RINGER: and the current setting. RINGER OFF Press SELECT. The current setting flashes, and you will hear a sample of the ringer. will be Press to select RINGER: 1, 2, 3, or 4. -
Page 14: Dial Mode
Telephone settings Dial mode If you have touch tone service, the telephone is ready for use as soon as the • If, in the future, battery is charged. If you have pulse (rotary) service, you will need to change your telephone the dial mode. -
Page 15: Language
Telephone settings Language Press PROG when the handset is not in use. • The clear Press until LANGUAGE is displayed. voicemail feature only turns off the Press SELECT. The current setting flashes. display NEW VOICEMAIL Press until the screen displays the desired language (ENGLISH, on the ESPANOL or FRANCAIS). -
Page 16: Telephone Operation
Telephone operation Make calls • Press /FLASH and then use the dial pad keys to dial a number. • The call timer -OR- will be activated during a call to Enter the phone number first. You can press to backspace and press show call duration. -
Page 17: Call Waiting
Telephone operation Call waiting If you subscribe to call waiting service and you are on a call when a new call comes in, you will hear a beep. The caller ID information will be displayed if you subscribe to combined caller ID with call waiting service from your telephone service provider. -
Page 18: Redial
Telephone operation Redial • The telephone stores the five most recently dialed telephone numbers on the redial list. When the list is full, the oldest entry is deleted to make room for the new entry. • Press REDIAL/PAUSE, then press or REDIAL/PAUSE repeatedly to review the redial list. -
Page 19: Transfer An External Call
Telephone operation Transfer an external call An external call can be forwarded to another handset during a conversation. While on a call, press SELECT/X-FER on the originating handset and its screen will show CALL TRANSFERED. When the other handset rings, press /FLASH on that handset to answer and its screen will show TRANSFERED CALL. -
Page 20: Directory
Telephone operation Directory The directory can store up to 20 entries (including nine speed dial entries). Each • Each handset has entry may consist of a number up to 24 digits and a name up to 14 characters. an independent directory. -
Page 21: Character Chart
Telephone operation Character chart Use the dial pad keys and the chart below to enter a name (up to 14 characters). • When you reach An error tone will sound if you try to enter more than 14 characters. Each press the end of the list of a particular key causes the characters to be displayed in the following order: in the directory,... -
Page 22: Edit A Directory Entry
Telephone operation Edit a directory entry Press /VOL+/ when the handset is not in use. The screen displays DIRECTORY. Press to scroll through the entries stored in the directory alphabetically. - OR - Press the dial pad key for the first letter of the entry you want to edit. If necessary, scroll to find the desired entry. -
Page 23: Delete A Directory Entry
Telephone operation Delete a directory entry Press /VOL+/ when the handset is not in use. The screen displays DIRECTORY. Press to scroll through the entries stored in the directory alphabetically. - OR - Press the dial pad key for the first letter of the entry you want to delete. If necessary, scroll to find the desired entry. -
Page 24: Copy A Directory Entry Into Speed Dial
Telephone operation Copy a directory entry into speed dial Press /VOL+/ when the handset is not in use. The screen displays DIRECTORY. Press to scroll through the entries stored in the directory alphabetically. - OR - Press the dial pad key for the first letter of the entry you want to copy. If necessary, scroll to find the desired entry. -
Page 25: Speed Dial
Telephone operation Speed dial Your telephone can store up to nine telephone numbers with names (up to 14 • The entries stored characters and 24 digits in each location) in the speed dial memory locations in the speed you assign in the handset. dial memory will be numbered Store a speed dial entry... -
Page 26: Edit A Speed Dial Entry
Telephone operation Edit a speed dial entry Press and hold the speed dial location key (1-9) of the desired entry when the handset is not in use. When the screen displays the entry you want to edit, press SELECT. Then press until EDIT flashes. -
Page 27: Delete A Speed Dial Entry
Telephone operation Delete a speed dial entry Press and hold the speed dial location key (1-9) of the desired entry when the handset is not in use. When the screen displays the desired entry, press SELECT. Then press until DEL (delete) flashes. Press SELECT. -
Page 28: Reassign Speed Dial Locations
Telephone operation Reassign speed dial locations Press and hold the speed dial location key (1-9) of the desired entry when the handset is not in use. SPEED EDIT DEL When the screen displays the desired entry, press 8005959511 SELECT. Press until SPEED flashes. -
Page 29: About Caller Id
Telephone operation About caller ID The caller ID with call waiting feature in this telephone lets you see the name and telephone number of the caller before answering the call, even when already on a call. These features require services provided by your telephone service provider. -
Page 30: Call Log
Telephone operation Call log • If you answer Caller’s name VTECH a call before the information appears on the 800-595-9511 Caller’s telephone screen, it will not number be stored in the New call log indicator and call log. location in the call log... -
Page 31: Review The Call Log
Telephone operation Review the call log Press /VOL-/CID to view the call log. • If you have Press to scroll through the entries. programmed a home area code There will be an error tone when you reach the end of the call log list and the (page 10), only screen will display END OF LIST. -
Page 32: Dial A Call Log Number
Telephone operation Dial a call log number Press /VOL-/CID to enter the call log when the telephone is not in use. Press to select the desired entry, then press /FLASH. -OR- Press /VOL-/CID to enter the call log when the telephone is not in use. Press to select the desired entry. -
Page 33: Save A Call Log Entry To The Directory
Telephone operation Save a call log entry to the directory Press /VOL-/CID to enter the call log when the telephone is not in use. Press to select the desired entry. If you wish to change how the number is saved, press # repeatedly 800-595-9511 until the desired option displays. -
Page 34: Delete From The Call Log
Telephone operation Delete from the call log Delete an entry: Press /VOL-/CID to enter the call log when the telephone is not in use. Press to select the entry to be deleted. Press CHAN/REMOVE. You will hear a confirmation beep. Delete all entries: Press and hold CHAN/REMOVE when the telephone is not in use. -
Page 35: Call Log Display Screen Messages
Telephone operation Call log display screen messages Displays: When: The caller is blocking the name information. PRIVATE NAME The caller is blocking the telephone number PRIVATE NUMBER information. The caller is blocking the name and number PRIVATE CALLER information. This caller’s name is unavailable. UNKNOWN NAME This caller’s number is unavailable. -
Page 36: Appendix
Handset display screen messages Displays: When: The battery needs to be recharged. LOW BATTERY There are no call log entries. CID EMPTY The cordless handset is searching for the telephone base. CONNECTING... There are no directory entries. DIRECTORY EMPTY The directory is full. MEMORY FULL There are unreviewed calls in the call log. -
Page 37: Battery
Battery After the battery is fully charged for 16 hours, you can expect the following performance: Operation Operating time While in use (talking) Five hours While not in use (standby*) Six days *Handset is off the telephone base but not in use. The battery needs charging when: •... -
Page 38: Important Safety Instructions
Important safety instructions When using your telephone equipment, basic safety precautions should always be followed to reduce the risk of fire, electric shock and injury, including the following: Read and understand all instructions. Follow all warnings and instructions marked on the product. Unplug this product from the wall outlet before cleaning. -
Page 39: Troubleshooting
Troubleshooting If you have difficulty with your telephone, please try the suggestions below. For Customer Service, visit our website at www.vtechphones.com, or call 1 (800) 595-9511; in Canada, call 1 (800) 267-7377. Problem Suggestion My telephone does not • Make sure the battery is installed and charged correctly (page 3). For optimum daily work at all. - Page 40 Troubleshooting Problem Suggestion The battery does not • Make sure the handset is placed in the telephone base or charger correctly. The handset CHARGE light on the handset should be on. charge in the handset or the handset battery • Remove the battery from the handset and then re-install it in the handset.
- Page 41 Troubleshooting Problem Suggestion There is no dial tone. • First, try all the above suggestions. • Move the handset closer to the telephone base. It might be out of range. • The telephone line cord might be malfunctioning. Try installing a new telephone line cord. •...
- Page 42 Troubleshooting Problem Suggestion The telephone does • Make sure the ringer is on (page 9). not ring when there is • Make sure the telephone line cord and power adapter are plugged in properly (page 2). an incoming call. • The handset may be too far from the telephone base.
- Page 43 Troubleshooting Problem Suggestion There is noise • The handset may be out of range. Move it closer to the telephone base. or interference • Appliances or other cordless telephones plugged into the same circuit as the telephone base during a telephone can cause interference.
- Page 44 Troubleshooting Problem Suggestion I hear other calls when • Disconnect the telephone base from the telephone jack. Plug in a different telephone. If there using the telephone. are still other calls, the problem is probably in the wiring or local service. Call your telephone service provider.
- Page 45 Troubleshooting Problem Suggestion The system does • Make sure you subscribe to caller ID with call waiting features provided by your telephone not receive caller ID, service provider. or the system does • The caller may not be calling from an area which supports caller ID. not display caller ID •...
- Page 46 Troubleshooting Problem Suggestion My cordless handset • Make sure the power cord is securely plugged into the telephone base. Plug the unit into a beeps and is not different working electrical outlet not controlled by a wall switch. performing normally. •...
- Page 47 Troubleshooting Problem Suggestion icon and NEW VOICEMAIL appear on • Your telephone has voicemail indication. If the icon and the handset and the VOICEMAIL light is flashing on the telephone base, your telephone has NEW VOICEMAIL received a signal from your telephone service provider that you have a voicemail message appear on the handset waiting for you to retrieve from them.
-
Page 48: Operating Range
Operating range This cordless telephone operates with the maximum power allowed by the Federal Communications Commission (FCC). Even so, this handset and telephone base can communicate over only a certain distance - which can vary with the locations of the telephone base and handset, the weather, and the layout of your home or office. When the handset is out of range, the handset will display POWER FAILURE OR OUT OF RANGE. -
Page 49: About Cordless Telephones
How long is the limited warranty period? The limited warranty period for the Product extends for ONE (1) YEAR from the date of purchase. If VTech repairs or replaces a Materially Defective Product under the terms of this limited warranty, this limited warranty also applies to the repaired or replacement Product for a period of either (a) 90 days from the date the repaired or replacement Product is shipped to you or (b) the time remaining on the original one-year warranty;... - Page 50 VTech assumes no risk for damage or loss of the Product in transit. If the Product failure is not covered by this limited warranty, or proof of purchase does not meet the terms of this limited warranty, VTech will notify you and will request that you authorize the cost of repair prior to any further repair activity.
-
Page 51: Fcc Part 68 And Acta
The telephone base shall be installed and used such that parts of the user’s body other than the hands are maintained at a distance of approximately 20 cm (8 inches) or more. If you choose to use a clipping device, please make sure to only use the supplied VTech belt clip. -
Page 52: The Rbrc ® Seal
VTech product service centers. Please call 1-800-8-BATTERY for information on Ni-Cd battery recycling and disposal bans/restrictions in your area. VTech’s involvement in this program is part of its commitment to protecting our environment and conserving natural resources. RBRC ®... -
Page 53: Technical Specifications
Technical specifications Frequency control Crystal controlled PLL synthesizer Transmit frequency Handset: 5857.20-5865.90 MHz Telephone base: 912.75-917.10MHz Channels Nominal effective range Maximum power allowed by FCC and IC. Actual operating range may vary according to environmental conditions at the time of use. Size Handset: 7.32in X 2.01in X 1.57in (186.0mm X 51.0mm X 40.0mm) Telephone base: 4.33in X 5.34in X 3.78in (110.0mm X 135.6mm X 96.0mm) -
Page 54: Index
Index Dial a speed dial number 23 Dial mode 10 About caller ID 25 Directory 16 About cordless telephones 45 DSL filter Answer calls 12 Edit a directory entry 18 Battery 3, 33 Edit a speed dial entry 22 End calls Call log 26 Call log display screen messages 31 FCC, ACTA and IC regulations 47... - Page 55 Index Maintenance 44 Technical specifications 49 Make call log entries ready to dial 27 Temporary tone dialing 13 Make calls Transfer an external call Mounting bracket installation 4 Troubleshooting 35 Operating range 44 Volume 12 Parts checklist 1 Warranty 45 RBRC seal 48 ®...
- Page 56 VTECH TELECOMMUNICATIONS LTD. A member of THE VTECH GROUP OF COMPANIES. Distributed in the U.S.A. by VTech Communications, Inc. Beaverton, Oregon Distributed in Canada by VTech Technologies Canada, Ltd., Richmond, B.C. Copyright ©2008 for VTECH TELECOMMUNICATIONS LTD. Printed in China.