Table of Contents
Advertisement
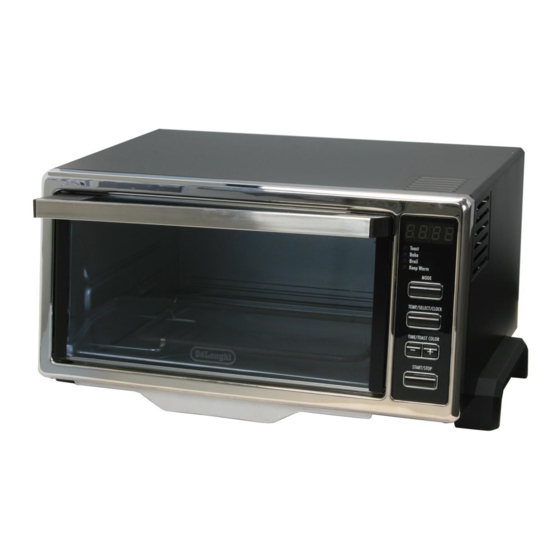
ELECTRIC OVEN
FOUR ÉLECTRIQUE
HORNO ELÉCTRICO
FORNO ELETTRICO
DO400
Register this product on-line and receive a free trial issue of Cook's
Illustrated. Visit www.delonghiregistration.com.
Visit www.delonghi.com for a list of service centers near you. (U.S. and
Canada Only)
Enregistrez ce produit en ligne et recevez un numéro gratuit de Cook's
Illustrated. Visitez www.delonghiregistration.com.
Visitez www.delonghi.com pour y voir une liste des centres de réparation
proches de chez vous. (É.-U. et Canada uniquement)
Registre este producto en línea y reciba un ejemplar gratis de Cook's
Illustrated. Visite www.delonghiregistration.com.
Visite www.delonghi.com para ver la lista de centros de servicios cerca-
nos a usted. (Solamente en los Estados Unidos y Canada)
Registra questo prodotto "on-line" per ricevere una copia omaggio della
rivista Cook's Illustrated. Visita www.delonghiregistration.com
Visita www.delonghi.com per una lista dei centri di servizio a te piu
vicini. (Solo negli Stati Uniti e Canada)
Instructions for use
Keep these instructions
Mode d'emploi
Conservez cette notice
Instrucciones para el uso
Repase y guarde estas instrucciones
Lea cuidadosamente este instructivo antes de usar su aparato.
Istruzioni per l'uso
Leggere e conservare queste istruzioni
ELECTRONIC CHARACTERISTICS: CARACTÉRISTIQUES ÉLECTRIQUES:
CARACTERISTICAS ELECTRICAS: CARATTERISTICHE ELETTRICHE:
120V~60Hz 1400W
Advertisement
Table of Contents

Related Manuals for DeLonghi DO400


Summary of Contents for DeLonghi DO400
-
Page 1: Electric Oven
Register this product on-line and receive a free trial issue of Cook's Illustrated. Visit www.delonghiregistration.com. Visit www.delonghi.com for a list of service centers near you. (U.S. and Canada Only) Enregistrez ce produit en ligne et recevez un numéro gratuit de Cook's Illustrated. - Page 2 ELECTRICAL CONNECTION Only use a three-pin, 120 Volt, 60 Hz power outlet GROUNDING INSTRUCTIONS MAKE SURE THAT THE PLUG IS CORRECTLY GROUNDED This appliance must be grounded: in the event of short circuits, the ground connection reduces the risk of elec- tric shock, allowing the electrical current to be dispersed.
-
Page 3: Table Of Contents
CONTENTS SECTION 1 GENERAL Control panel ..........3 Description of the appliance . -
Page 4: Description Of The Appliance
1.2 - DESCRIPTION OF THE APPLIANCE A Control panel B Glass door C Bottom heating element D Wire rack Bake pan Top heating element G Upper guide H Lower guide Drop down crumb tray Broil rack... -
Page 5: Important Safeguards
IMPORTANT SAFEGUARDS 1.3 - When using electrical appliances, a number of fundamental safety rules must be observed, including the fol- lowing: 1. READ ALL THE INSTRUCTIONS 2. Do not touch the hot surfaces. Only use the knobs or handles to operate the appliance. 3. -
Page 6: Summary Table
1.4 - SUMMARY TABLE Wire rack and TEMP./SELECT/ Program MODE button Notes/Tips CLOCK button accessory position Keep warm KEEP WARM 1 1 8 8 0 0 ° ° F F Ideal for cooking stuf- fed vegetables, fish, and small poultry. For Traditional oven BAKE details on how to use... -
Page 7: Section 2 Using The Controls And Setting The Modes
SECTION 2 - USING THE CONTROLS AND SETTING THE MODES 2.1 - SETTING THE CLOCK • When the appliance is connected to the power supply for the first time, or after a power outage, four dashes will appear on the display (--:--). In order to set the time of day, proceed as described below: 1 Press for 5 seconds the TEMP./SELECT/CLOCK but- ton (7) (the hours flash on the... -
Page 8: Bake Mode
2.2 - BAKE MODE 1 Press the MODE button (6) until the BAKE indicator light (3) is °f on. The display will show the temperature 3 3 5 5 0 0 ° ° F F . 2 If necessary, the desired tem- perature can be modified by pressing repeatedly... - Page 9 TIPS FOR GOOD RESULTS: • Place the wire rack (D) in the lower guide (H). • The oven should always be preheated. Wait for the audible signal (3 short “beeps”) before placing the bake pan (E) with food in the oven. •...
-
Page 10: Broil Mode
2.3 - BROIL MODE 1 Press the MODE button (6) until the BROIL indicator light (4) is on. The display will show the message b b r r l l . 2 Set the cooking time (max 1 hour) pressing TIME/TOAST COLOR buttons (8). -
Page 11: Toast Mode
MODE Wire rack Food Times Comments and tips knob position Pork chops BROIL 26 min. upper Turn after 14 minutes. Hot dogs 20 min. Turn after 11 minutes. “ “ Hamburgers 25 min. Turn after 13 minutes. “ “ Sausages 26 min. -
Page 12: Keep Warm Mode
• When toasting bread, both the top and bottom heating elements are on to toast both sides at the same time. • Should it be necessary for any reason to suspend the cooking, you only need to press the START/STOP button (9). -
Page 13: Section 3 Cleaning And Maintenance
SECTION 3 - CLEANING AND MAINTENANCE 3.1 - CARE AND CLEANING Frequent cleaning prevents the formation of smoke and bad odors during cooking. Do not let fat accumula- te inside the appliance. Before any maintenance or cleaning operation, unplug the oven and wait for it to cool down. Clean the door, the inside walls and the exterior surface of the oven with a soap and water solution;... - Page 14 If repairs become necessary, see contact information below: U.S. Residents: Please contact our toll free hotline at 1-800-322-3848 or log onto our website at www.delonghi.com. For all accessories, spare parts or replacement parts, please contact our parts division at 1-800-865-6330.