Table of Contents
Advertisement
Advertisement
Table of Contents

Related Manuals for Kenmore Kenmore 385.11206300


Summary of Contents for Kenmore Kenmore 385.11206300
- Page 1 ® SEWING MACHINE Owner's Manual MAQUINA DE COSER Manual de Instrucciones MACHINE A COUDRE Manuel d'instructions Model, Modelo, ModUle 385.11206300 I I IIIIIIII i m f Sears, Roebuck and Co., Hoffman Estates, IL 60179 U.S.A. 639-B00-567 Sears Canada Inc, Toronto,...
- Page 2 Use ontyattachmentsrecommendedby the manufactureras contained in this owner's manual. 3. Never operatethissewingmachineif it has a damaged cordor plug, if itis notworkingproperly,if ithas been droppedor damaged,or droppedintowater. Returnthissewingmachineto the nearest Sears store or servicecenter for examination,repair,electricalor mechanical adjustmenL 4, Never operatethe appliancewith any air openingblocked, Keep ventilationopeningsof thissewingmachineand foot controllerIres from accumulation of lint, dustand loose cloth.
- Page 3 Nunca utilice esta m&quina de coser si tiene un enchule o un cable en mal estado, si no funciona ¢orrectamente, si se ha golpeado o est& dafiada, o si ha ca/do en agua. Envie esta m&quina de eoser a la tienda o centro de mantenimiento Sears m_s cercano si es necesario examinada, repararla o someterla a ajL]stes el_ctdcos o mec&nicos.
- Page 4 I'eau., ..- " Retournez la machine & coudre au magasin ou au.centre de r_paration Sears :le.plus proche, afin,de la faire examiner, rSparer ou d'effectuer des r6glages _lectriques oum_caniques, '.
- Page 5 Annual Preventive Maintenance Check at your 1-800-361-6665. request -- no extra charge Fast help by phone -- phone support from a Sears technic{an on products requiring in-home repair, plus convenient repair scheduling [] Power surge protection against electrical damage due...
- Page 6 [] Mantenimiento Anual Preventive a su pedido- sin cargo extra. [._Ayuda Rdpida per Tel_fono -- ayuda telef6nica per un t6cnice especialista de Sears en productos qua requieren arreglo en casa, adem_s puede fijar Lmacita conveniente para reparacL6n+ [] Proteccion El_ctrica contra fluctuacionesde la efectricidad...
- Page 7 _ toute heure du jour ou de la nuit ou bien prendre rendezvous par internet. Sears dispose de plus de 12000 sp6cialistes de la rbparation qui . ont acc_s _ plus de 4,5 millions de pi6oes et accessoires de qualitY.
- Page 8 Garantie complete de 25 arts pour tous d6fauts dans les pi_ces ou la fabrication Pour une p6riode de 25 arts & partir de la date d'achat, Sears assurers, sans frais, ta reparation de tous d6fauts dens les pi_ces ou la fabrication qui peuvant survenir darts le m6canisme interne de la machine _,coudre.
- Page 9 Garantle complete de 25 ans pour tous d6fauts clans les pi6ces ou la fabrication Pour une p6riode de 25 ans _ partir de la date d'achat, Sears assurera, sans _rais, la r6paration de tous d6fauts darts les pi_ces ou la fabrication qui pouvant survenir dans te m6canisme interne de la machine & coudre.
- Page 10 Machine Specifications Item Specification • Sewing speed (Maximum): Over 550 s.p.m. Stitch length: 4 mm (Maximum) Stitch width: 5 rnm (Maximum) Stitch package (Stitch functions): (Built-in stitches): Buttonhole: 4 step built-in buttonhole Machine dimensions: W 12,8" (325 ram) x D 5.6" (143 ram) x H I0.0" (255 ram) 11.0 Ibs (5.0kg) ,_ Weight (Net): Especificaciones...
-
Page 11: Table Of Contents
TABLE OF CONTENTS SECTION i. NAMES OF PARTS SECTION IV. ZIGZAG STITCH SEWING Names of Parts .............. Basic Zigzag ..........;....36 Available Accessories and Attachments ......4 Monogramming ............Overcasting Stitch ............SECTION !1. GETTING READY TO SEW SECTION V. - Page 12 INDICE SECCION Ill. COSTURA DE PUNTADA RECTA SECCION !. NOMBRE DE LAS PARTES Puntada recta ..............Nombre de tas partes ......_......3 ° Para empezar a coser ....,........31 Accesodos y refacciones dispontbles ......... 5 • Para terminar la coser ..........;..31 SECGION I1.
- Page 13 TABLE DES MATIERES PARTIE IV. POINTS ZIG-ZAG PARTIE I. IDENTIFICATION DES PII_CES DE LA MACHINE ZIg-zag simple ................ identification des pi_ces ............Monogrammes ............... Accessolres et pieces disponibles ........... 5 Surfilage ................. PARTIE il. PRI_PAREZ-VOUS ,_.COUDRE PARTIE V. POINTS UTILITAIRES El"...
-
Page 14: Section I. Names Of Parts
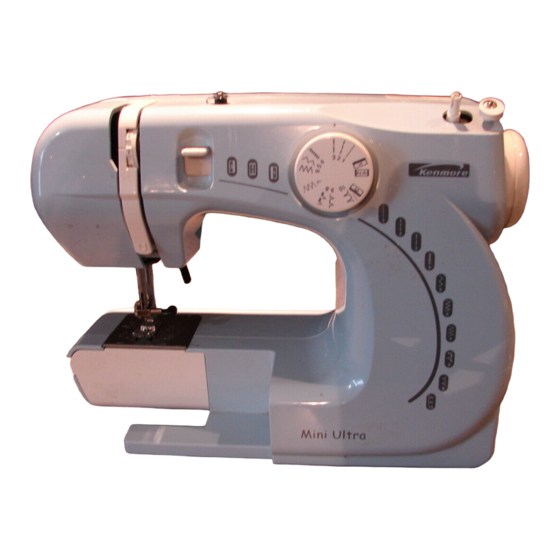
SECTION I. NAMES OF PARTS Names of Parts (_) Stitch selector (_) Reverse stitch control Bobbin winder spindle (_ Bobbin winding tension disk ® Upper needle thread guide _ Thread take-up lever (_) Thread tension dial _8__ Face cover (_ Needle plate Extension table (Accessory box) (_ Handwheel @ Power switch... -
Page 15: Seccion !. Nombre De Las Partes
SECCION I. NOMBRE DE LAS PARTES PARTIE L IDENTIFICATION DES Pli=CES DE LA MACHINE Nombre de Ias partes Identification des pi_ces (_ Selector de patr6n (_ Selecteur de point (_) Control de puntada reversa _) Bouten de marche arri0re (_ E_edotdevanador de canillas 3_) Er_rouleur de la eanette (_) Gu[ahiles dot hito de la canilla Bobineuse a disque de tension... -
Page 16: Available Accessories And Attachments
Available Accessories and Attachments To order parts and accessories listed below; call: 1-800-366-PART (1-800-366-7278)(USA only) 6 am - 11 pm, CST, 7 days a week 1-800-4-MY-HOME (1-800-469-4663) (CANADA only) 24 hours a day, 7 days a week When ordering parts and accessories, provide the following information: 1. -
Page 17: Accesodos Y Refacciones Dispontbles
Accessoires et pi_ces disponibles Accesorios y refacciones d|sponibles Pour commander lee pi_ces et !es accessoires list6s ci-dessous, composez: AI ordenar partes y accesorios, proporcione la siguiente informaci6n: t-800-LE-FOYER (1-800-533-6937) (Canada) 1, N0mero de parte Pour commander des pi_ces ou accessoires, veuillez pr_.parer lee 2. -
Page 18: Section !1. Getting Ready To Sew
SECTION il. GETTING READY TO SEW Connecting Machine to Power Supply Power supply plug (_ Power switch Outlet (_ Machine socket ('_ Machine plug Before connecting the power cord, make sure the voltage and frequency shown on the machine conform to your electrical power. -
Page 19: Conexi6N De La Maqutna A La Red El@Ctrica
SECCION II. PREPARACION DE LA PARTIE II. PRI_PAREZ-VOUS _. COUDRE • MAQUINA PARA COSER Branchez ia machine Conexi6n de la mdquina a la red el_ctrica Prise 61ectfique tavija de toma de cordente Interrupter de corriente |nterrupteur de courant (_ Red electrica Prise de courant Prise de ta machine nchufe de ta m_quina... -
Page 20: Setting Spool Pins
Setting Spool Pin (_ spoolpin The spool pin holds the spool of thread for feeding the thread to the machine. Pull out the spool pin and place the felt on it. Presser Foot Lifter (_ Presser foot lifter (_) Normal up position (_) Highest position The presser foot lifter raises and lowers the presser foot. -
Page 21: Palanca De Elevaci6N Del Prensatelas
Pose de la broche _ bobine Ajuste del porta-carrete Portacarrete O Broche _.boblne El portacarrete se utilize pare sostener el carrete de bile y Le porte-bobine servent & retenlr le bobine de fil en vue de alimentar asf ala m&qutna con el hilo. proc6der t_t'enfitage du fi[ sup6deur. -
Page 22: Changing Presser Foot
Changing Presser Foot Loosen the screw and replace the presser foot. Tighten the screw. Presser Foot Types * Zigzag foot Use this foot tot both straight and zigzag stitching, For:Straight stitch (Page 30) Basic Zigzag (page 36) Overcasting stitch (page 38) Blind hem stitch (page 38) Lace work... -
Page 23: Changement De Pied Presseur
Cambio de prensatelas Changement de pied presseur Afloje el tornUlo y substituya el prensatetas. Apeiete el tornillo. Desserrez ta vis et substituez le pied de presser. Serrez la vis. Tipos de prensatelas Diffdrents ple<ls presseurs • Prensatelas pare zig-zag • Pied zig-zag Utilice este prensatelas pare puntada recta y p_ntada de Ce pied convient pour les points zig-zags et les points droits. -
Page 24: Selecting Needle And Fabric
Selecting Needle and Fabric For general sewing, use needle sizes 11 or 14. A fine thread and needle should be used for sewing lightweight fabdcs, so the fabric will not be marred. Heavy fabrics require a needle large enough to pierce the fabric without fraying the needle thread. In the needle set, there is one each of sizes 11, 14, 16, and 18, and a blue needle. -
Page 25: Prensatelas Para Puntada Recta
Selecci6n de hilo y tela Para el costdogeneral se util}zan agujas del tama6o 11 e 14. • Los hilos y agujas delgados deber&n utilizarse para coser tejidos ltgeros evltando asf que 6stos se puedan echar a perder. Cosa tejidos gruesos con una aguja Io suficientemente gruesa come para que pueda penetrar el tejido sin que el hito de la aguja se deshi]ache. - Page 26 Choix de raiguiUe et tissu Pour los coutures normales, utitisez une aiguill_ n°1! ou 14. On devrait utiliser du fil fin et une aiguil[e fine avec los tissus 16gers pour ne pas los endommager. Los tissus 1ourds n6cessJtent une aigu_lle assez grosse pour percer le tissu sans effilocher le fil de I'aiguiHe. Darts un jeu d'aiguilles, il y a une aigullle de chaque grosseur 11, 14, 16, 18 et une aiguille &...
- Page 27 (blank page) (p__ginablanc.a) (page blanche)
-
Page 28: Bobbin Winding
Bobbin Winding • Removing bobbin case Remove the extension table from the machine by pulling it to the left. Open the shuttle cover(_ by pulling down the embossed part on the left of the cover. Raise the needle to its highest position by rotating the handwheet toward you, (_) Shuttle cover (_) Bobbin case... -
Page 29: C6Mo Sacar El Portacanillas
Embobinado de la caniila Remplir la canette • C6mo sacar el portacanitlas • Retrait de ia porte-canette Retire la extension desliz_ndota hacia la izquierda. Abra la Retirez r'emboiture du socle en la t/rant vers la gauche. tape tanzadera (_ jalando hacia abajo la parte hueca de} A l'aide de la prise situ_e _ la gauche du couvemle_ de ta lado izquterdo de la tape. -
Page 30: Bobbin Winding
Bobbin winding (continued) [] Push the bobbin to the right. [] With the free end of the thread held in your hand, depress the foot control. Stop the machine when it has made a few turns, and cut the thread c{ose to the hole in the bobbin. - Page 31 Embobinado de ia canilla (Continuaci6n) Remp|ir la canette (suite) PousPez la canette vers la droite. [_ Empuje la canilta ata derecha. [_Sujete el final det hito con |os dedos y pise el pedal de control tenant I'extr_mit6 llbre du fil _.la main, appuyez su[ la p_dale de contr61e.
-
Page 32: Inserting Bobbin
• Inserting bobbin Place a bobbin in the bobbin case, making sure the thread feeds clockwise from the bobbin. Draw the thread through the slot of the case. [] Continue to draw the thread under the tension spring Q and through the opening. Pull out about 4"... -
Page 33: Insertion De La Canette
• Colocacibn de la caniila • Insertion de la canette _Coioque ta canilla en el portacanilLa asegur_ndose que eI tntrodt_isoz la can_tte dans le portocanette en prenant soin hilo se alimente en el sent_do alas agujas del reloi y salga que le fLIse d_roule vers ia droite et qu'i! sorte de ta canette. -
Page 34: Threading The Machine
Threading the Machine = Threading the machine * Raise the thread take-up lever to its highest position by turning the handwheet counterclockwise. * Raise the presser foot lifter. * Place a spool on the spool pin, with thread coming off as shown. -
Page 35: Enhebrado Del Hilo De La Aguja
Enhebrado del hiio de ia aguja Enfilage de la machine * Enfilage de la machine • Enhebrado del hilo de la aguja * Faites monter te tevier releveur tendeur de fll le plus haut • Suba el tirahltos hasta su posic_Sn m_s alta girando et vo_ante possible en tournant te volant &... -
Page 36: Adjust The Needle Thread Tension For Straight Stitch
Adjust the Needle Thread Tension for a Straight Stitch • Correct tension (_) Needle thread (Top thread) _) Bobbin thread (Bottom thread) ® To loosen (_ To tighten The ideal straight stitch has threads locked between two layers of fabric, as illustrated (magnified to show detail). If you look at the top and bottom of a seam, notice that the_'eare no gaps;... -
Page 37: El Hllo Est& Demasiado Fiojo
Ajuste de la tensibn del hilo de la aguja para R6glage de la tension du fil de I'aiguiile pour le puntada recta point droit • Tensi6n correeta • Tension correcte _-_Fi] de I'aiguille.(Filsupdrieur) Hito de la aguja (Hilo superior) Hilo de la canilla (Hilo inferior) Fit de la canette (Fil inf6rieur) Pour re]&eher la tension "... -
Page 38: Adjust The Needle Thread Tension For Zigzag Stitch
Adjust the Needle Thread Tension for Zigzag Stitch For an ideal zigzag stitch, the bobbin thread does not show on the right side (Top side) of the fabric and needle thread shows slightly on the wrong side (Bottom side) of the fabric. -
Page 39: El Hilo Est,. Dernasiado Flojo
Ajuste de la tensi6n del hilo de la aguja para R_glage de la tension du fil de I'aiguille pour le puntada zig-zag point zig-zag Lorsqu'un point zig-zag est effeclu_ correctement, te til'de la En la puntada zig-zag ideal, el hilo de la canilla no apareeera en la parte de ardba de ta tela y el hiLode la aguja se verd canette ne parait jamais sur le c6t6 endroit du tissu et le fil de ligeramente en la parte de abajo de la tela. -
Page 40: Stitch Selector
Stitch Selector _) Setting mark (_) Stitch 8elector Raise the needte above the fabric. rum the dial to select the desired pattern. NOTE: To avoid needle or fabric damage, make sure the needle is up and out of the fabric while selecting a stitch. Reverse Stitch Control Press the reverse _tch control to sew in reverse. -
Page 41: Selecteur De Point
Sdlecteur de point SeLector de patr6n (_ Mama de ajuste ep_re de r_glage (_ Selector de patr6n S61ecteurde point Levante la aguja hasta la poslcibnm&s alta. Levez r aiguille au-dessaus du tissu. Seleccione el patr6n deseado girando el selector de patr6n. Tournez le s_lecteur de point pour choisir le motif desir6eo REMARQUE;... -
Page 42: Section I!1. Straight Stitch Sewing
SECTION II1. STRAIGHT STITCH SEWING Straight Stitch (_ Stitch selector: 1 - 3 Needle thread tension: 2 to 6 Presser foot: Zigzag foot f" • Starting to sew Raise the presser foot and positionthe fabric next to a seam guide line on the needle plate (5/8" (1.6 cm) is most common). -
Page 43: Para Empezar A Coser
SECCION III. COSTURA DE PUNTADA RECTA PARTIE Iil. COUTURE AU POINT DROIT Point droit Puntada recta (_ Setecteur de point: 1 - .3 elector de patr6n: 1 - 3 _<)Tension du fi! de l'aiguille: 2 & 6 Tensi6n del hilo de la aguja: 2 a 6 Pied presseur."... -
Page 44: Zipper Sewing
Zipper Sewing (_ Stitch selector: 3to6 2(_Needle thread tension: (_) Presser foot: Zipper foot (optional) • Fabric preparation 1. Place right sides of fabric together and sew to the end of the z{pper opening. (_) 2era (4.5") Reverse stitch to lock the seam. Set the stitch selector at 3 and set the needle thread tension at 0. -
Page 45: Costura De Crematleras 6 Cierres
Costura de cremalleras 6 cierres La couture des fermetures b glissi_re (_ Selector de patr6n: 1 - 3 Seteeteur de point: 1 - 3 (_) Tensi6n del hilo de la aguja: 3 a 6 Tension du fil de I'aigui!le: - 3 _.6 (_) Prensatelas: Prensateias pars Pied presseur:... -
Page 46: Using The Darning Plate
Using the Darning Plate Sometimes when you sew, you want to control the fabric yourself. The darning plate covers the feed dogs so the feed dogs do not touch the fabdc. To put on the darning plate: Position the darning plate with the pins on the buttorn. Fit the darning plate pins into the needle prate hotes. -
Page 47: C6Mo Bajar/Subir Los Dientes Del Transporte
Plaque d repriser Uso de la tapa zurcido il se peut padois que vous voulez contr61er ]e mouvement du Aigunas veces al coser, usted desea e}ercer el control sobre la tissu que vous cousez. La plaque de reptsage couver les griffes te_a. -
Page 48: Section Iv. Zigzag Stitch Sewing
SECTION IV. ZIGZAG STITCH SEWING Basic Zigzag (_ Stitch selector: 4 - 6 (_ Needle thread tension: 2 to 5 (_) Presser foot: Zigzag foot ® The zigzag stitch is one of the most common and versatile stitches. It can be a utility stitch for button sewing, buttonhole making, hemming, overcasting, mending and darning. -
Page 49: Monogramas
PARTIE IV. POINTS ZIG-ZAG SECCtON IV. PUNTADAS DE ZIG-ZAG Zig-zag simple Puntada de zig-zag (_) Selector de patr6n: S(_leoteur de point; 4 - 6 Tension du fit de l'algu_!le: 2 & 5 _3 ensi6r_de! hilo de la aguja: Prensatelas para zig-zag (_) Pied presseur: Pied zig-zag Prensatelas:... -
Page 50: Overcasting Stitch
Overcasting Stitch .'_. Stitch selector: _ Needle thread tension: ! to 4 -.l_t "_i Presser foot: Zigzag foot "-._3 _'," ® This stitch is useful in garment construction, and in |tnist_ing the raw edges of any sewing project. Start overcasting about I/8"(0.3 cm) inside the raw corner of a seam. -
Page 51: Puntada De Sobrehllado O Remate
Puntada de sobrebilado o remate Surfilage ',_.',: Selector de patrbn: (_ S_tecteur de point:: ,;2i Tensi6n det t_ilo de In aguja: I a 4 (2) Tension du fil de aiguille: 1 _ 4 :_:: Prensa_elas: Prensatelas para zig-zag (3..)Pied presseur Pied zig-zag Muy '3til en la construcci6n de prendas y para sobrehilar o rematar Ce point est utile pour le montage des v6temenls et pour finir lee... -
Page 52: Lace Work
Lace Work (_ Stitch selector: 8 or 9 (_ Needle threadtension: 1 to 4 {_ Presserfoot: Zigzag foot Lace adds a fanciful, feminine touch IQ blouses and lingerie. Table linens and pillows become more elegant when trimmed with lace. Fold the raw edge of the fabric at least 5/8" (1.5 cm). Place thelace underneath and topstitch with a blind hem stitch. -
Page 53: Puntada De M
Dentelle Trabajos con encajes _,1_ S_lecteur de point: 8 ou 9 Selectorde patr6n: (_ Tenston du til de I'atgulEle: I _ 4 _) ensi6n del hilo de la aguJa: Prensatelas pare zig-zag (_ Pied presseur: Pied zigzag Prensatelas: La dentelle ajoule unetouchef_mlnineaux chemisteTset &la Encajes aSadenun toque fine y femenino a blusas y fencerfa+ tingede, Le linge de table et te_ oreilters deviennentplus raflin_s Manteles y fundas de aimohadas quedar_n m_s elegantes... -
Page 54: Section Vii, Buttonhole
SECTION VI. BUTTONHOLE Buttonhole -_: Stitch se,eclor: _[__ _ (_; Needle thread tension: 1 to 5 ,_ Presser foot: Sliding buttonhole foot •%.\__ • Starting to sew Attachthe buttonhole foot on the presser foot holder. Carefully mark the buttonholelength on the fabric. Place thefabdc under the foot, with thebuttonhole marking running toward you. -
Page 55: Para Empezar A Coser
PARTIE VI. BOUTONNIERE SECCION VI. OJALES Boutonniere Ojal fncorporado ___ S_lecteur de point: G_.,o 8etector de patr6n: [_r_ C._ Tensiondu fil de I'alguille: (_._ Tensisndel htlo de la aguja: 1 a 5 Pied & boutonniere Pied presseur: Prensalelas: Prensatelas para ojales coulissant corredizo •... - Page 56 Buttonhole (continued) Set ',hestitch selector at _. Sew fou_(4) to six (6) stitches. Stop sewing at a right stitch. Set the stitch selector at ['J. Sew until you return to the start mark ofthe buttonhole. Stop sewingat a right stitch. Set the stitch selector at 12t.
- Page 57 Boutonniere (suite) Oja! (eontlnuaci6n) R6glez le selecteur de point sur _. Cousez quatre (4) _ Wx (6) Ajuste el selector de puntada a _]. Oosa de cuatro (4) a seis (6) puntad_s. Tem_in_ cosiendo con una puntada derecha. points. Arr6tez la couture avec t'aiguille t_ droite. R_glez le s_lecteur de point sur El.
-
Page 58: Section Viii, Care Of Your Machine
SECTION VII.CARE OF YOUR MACHINE NOTE: Unplugthe machine, Do not dismantle the machine other than as 7- \X" explained in thissection. Do not store the machine in a high-humidity area, near a heat radiator or in direct sunlight. Clean the outside of the machine with a soft cloth and mild soap. -
Page 59: Limpieza De Los Dientes Del Transporte
SECCION VII. MANTENIMIENTO DE LA PARTIE VII. ENTRETIEN DE VOTRE MACHINE MAQUINA REMARQUE: D_branchez la roachlne. ' NOTA: ! Desenchufela m_quina. Ne d_montez rien d'autre quece qui est d_crit dane _ chapitre. N'entreposez pas t_ machine dane un endrott humidei,pr_.sd'un ! No desmontela mdqulna de ningunaotra forma que la radiateur de chauffagecentralou expos_e &... -
Page 60: Cleaning The Shuttle Race
Cleaning the Shuttle Race This area must be kept free of dust, lint and tangled thread. Clean the shuttle race area every three months. ® • Cleaning the shuttle area _ Bobbin case _ Lever_ __ _:j- _:::_ ._i.'/"_ ,_ Shuttle race cover Shuttle ._ Shuttle race _._Center pin on the shuttle... -
Page 61: Limpieza De La Corredera De La Lanzadera
Limpieza de ta corredera de la ]anzadera Nettoyage de la coursibre La navettedolt _tre gard_e exempts de poussi_re,de Esta _rea deberd mantenerse libre de potvo, pelusa y de charpieet de boutsde fil emm_l_s. Nettoyez la navetle a ocestonales hilosatorados. Limpie la _rea de ta corredera de la toustes trois mote. -
Page 62: Oiling The Machine
Oiling the Machine Oil the points as shown at least once a year. Use good qtfalitysewing machine oil, One or two drops of oll is sufflclent, Remove the excess oi!, otherwise it may stain the fabric. if the machine has not b_en used for a long time, oil it before sewing. -
Page 63: Lubrique La _,Rea De Ta Ianzadera
Huilage de la machine Lubricacl6n de la m_qufna Huilez la machine une lois par an minimum_ tousles endroits Lubrlquela mdquina, lospuntosilustradospor Io menos una montr_s sur cette page suivantes,slnon elle pen:ira son v_z al aSo. Una o dosgoresde aceite serd suficiente. rendement d'origineet ellecognera bruyamment.Si vousutiltsez Elirnine el exceso de acelte, de otro modo podr_a manchar la fr_quemmentvotre machine, alors huilez a tousles trotsreels,St... -
Page 64: Troubleshooting
Troubleshooting Condition Reference Ca use The needle thread t. Tl_e needle thread is not threaded properly. Page 22 breaks. 2. The needle thread tension is too tight. Page 26 3. The needle is bent or blunt. Page 8 4. The needle is incorrectly inserted, Page 8 5. -
Page 65: Soluci6N De Problemas De Funcionamiento
(1-800-533-6937) (1-888-784-6427) www.sears.ca SEARS ® Registered Trademark t'r_ Trademark / s_ Service Mark of Sears, Roebuck and CQ,. _' Mama Registrada I Marca de F&brica I su Mama de Servlcio de Sears, Roebuck and Co. @ Sears, Roebuck and Co.