Table of Contents
Advertisement
Available languages
Available languages
Quick Links
Advertisement
Table of Contents

Related Manuals for Kenmore 385.16231


Summary of Contents for Kenmore 385.16231
- Page 1 ® SEWING MACHINE Owner's Manual MAQUINA DE COSER Manual de instrucciones MACHINE A COUDRE Manuel d'instructions Model, Modeio, ModUle 385.16231 IIIIIIII I 505-800-123 Sears, Roebuck and Co., Hoffman Estates, tL 60'179 U.S.A. www sears,corn...
- Page 2 Use this appliance only for its intended use as described in this owner's manual Use only attachments recommended Never operate this sewing machine if it has a damaged cord or plug, if it is not working properly, if it has been dropped or damaged, or dropped into water...
- Page 3 INSTRUCCIONES Cuando se utiliza un aparato et_ctrico es necesario tomar ciertas precauciones b_sicas de seguddad, incluso la siguiente: Lea todas las instrucciones antes de utilizar este aparate, ELI R %_1%,# -- Para reducir el desgo de choque el_ctrico: '1_ No deje nunca e! aparato sin vigilancia mientras est_ enchufado. Desenchufe siempre la m&quina de Ia toma eI_ctrica inmediatamente Desenchufe la m&quina cada vez que vaya a cambiar la bombilla.
- Page 4 CONSIGNES Pour utiliser un appareil @lectrique, il faut toujours respecter les consignes de s@curit@ fondamentates, notamment le consigne suivantes : Avant d'utiliser cet appareil, lisez toutes ces instructions. OANGF_.R- Pour r6duire les risques d'61ectrocution. 11 ne faut jamais laisser un appareil sans surveillance lorsqu'il est branch6.. II faut toujours d6brancher cette machine & coudre de ]a prise 61ectrique murale, apr_s son utilisation ou avant de ta netteyer, I1faut toujours d_brancher la machine avant de remplacer une ampoule _lectrique.
- Page 5 90 day warranty described betow_ 2 Year Limited Warranty on Sewing Machine Exterior Components For 2 years from the date of purchase, Sears will provide free repair for all components of the sewing machine exterior if they are defective in material or workmanship.
- Page 6 Garantia de la m_quina de coser Kenmore Garantfa limitada de 25 aries para la estructura A partir de fa fecha de cempra, Sears fe ofrece una garantia de 25 aSos que le permitir reparar de forma gratuita la estructura interna de metal moldeado de su m_quina de coser, en case de que haya algun ripe de defecto en e{ material o en ta mane de obra...
- Page 7 Garantie pour machine coudre Kenmore Garantie limit_e de 25 ans pour I'armature interne en m_tal maul de la machine Pendant les 25 ans suivant la date d'achat, Sears prendra machine coudre en cas de d_faut mat_riet ou de fabrication Garantie limit_e de t0 ans pour les composants...
- Page 8 Item Sewing speed (Maximum) (By Foot control): (By Start/Stop button): Stitch length: Stitch width: Stitch package (Stitch functions): (Built-in stitches): Buttonhole: Machine dimensions: Weight (Net): Articulo Velocidad de costura (M_xima) (a trav_s de Pedal de control): (a trav_s de BotSn de inicio parada): Longitud de puntada: Ancho de puntada:...
- Page 9 Master Protection Agreements Congratulations on making a smart purchase, Your new Kenmore@ product is designed and manufactured for years of dependable operation, But like all products, it may require preventive maintenance or repair from time to time That's when having a Master Protection...
- Page 10 En Estados Unidos Contratos de Protecci6n Experta Felicidades per haber hecho una compra inteligente aparato Kenmore® ha side diseSado y fabricado para darle largos aries de funcionamiento confiable Sin embargo, al igual que redes los productos, en ocasiones puede requerir mantenimiento...
-
Page 11: Table Of Contents
SECTION i. NAME OF PARTS Cabinets and Sewing Machine Tote Bag ... 2 Names of Parts ... Available Accessories and Attachments SECTION II. GETTING READYTO Connecting Machine to Power Supply ...6 Before Using Your Sewing Machine ... 6 For Your Safety ... - Page 12 SECCION L NOMBRE DE LAS PARTES Gabinete y boba de mane Nombre de 1as partes Accesofios y refaccienes disponibtes SECCION II, PREPARAClON DE LA MAQUtNA PARA OOSER Conexi6n de ]a m_quina a la red et_ctdca ... Cuando utilice per pfimera vez su m__quina de cose ... Para su seguridad Clavija polarizada ...
-
Page 13: Levier De R_Gtage De La Pression
PARTIE I. IDENTIFICATION DES PII_CES MACHINE Des meubles et sac de transport Identification des pi_ces ... Accessoires et pj_ces disponibles ;... 5 PARTIE II. PREPAREZoVOUS A COUDRE Branchez la machine Les premi6res lois que vous utilisez votre machine ... Consignes de s_curit_ ... Prise polaris_e Contr61ez la vitesse de couture ... -
Page 14: Cabinets And Sewing Machine Tote Bag
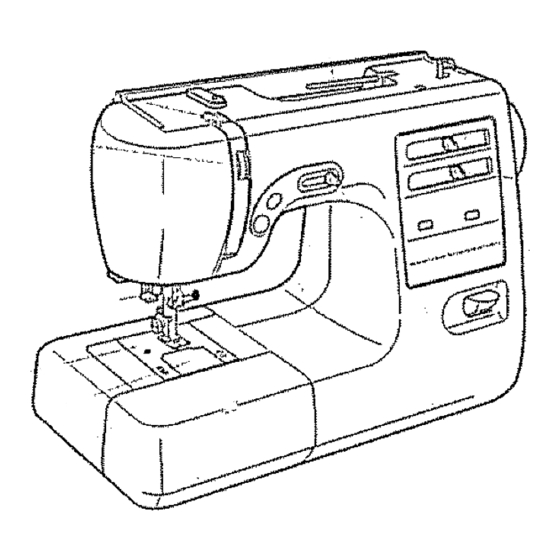
Cabinets and Sewing Machine Tote Bag (RSOS # 976'11) Sewing Machine cabinets and Tote bag are available through the RSOS (Retail Special Order System) catalog at your nearest Sears retail store (USA, only),_ Names of Parts O Reverse stitch control... -
Page 15: Des Meubles Et Sac De Transport
SECCION i. NOMBRE DE LAS PARTES Gabinete y bolsa de rnano (RSOS #97611) Usted encentrar& una linea compfeta de gabinetes y bolsa de mane para su maquina de coser en e{ cat&logo RSOS que est_ disponible en tas tiendas Sears Nombre de las partes O Control de puntada reversa... -
Page 16: Available Accessories And Attachments
Available Accessories and Attachments To order parts and accessories listed below, call: 1-800-366-PART (1-800-366-7278) 6 am - 11 pm, CST, 7 days a week When ordering parts and accessories, provide the following information: 1o Part Number 2 Part Name 3. Model Number of Machine :{el. -
Page 17: Accessoires Et Pj_Ces Disponibles
Accesorios y refacciones disponibles Para ordenar las partes y accesorios listados abajo, Hameal: 1-800-366-PART (1-800-366_7278) de 6 AM a 11 PM, hera del centre, los siete d[as de la semana AI ordenar partes y accesorios, proporcione la siguiente informacibn: 1, Numero de parte 2, Nombre de la parte 3 Modelo de la m&quina NSmero de... -
Page 18: Getting Readyto Sew
4 Turn the power switch. Before Using Your Sewing Machine Before using your sewing machine for the first time, place a waste fabric under the presser foot and run the machine with thread for a few minutes. Wipe away any oil which may... -
Page 19: Preparezovousa Coudre Branchez La Machine 7 Les Premi6Res Lois Que Vous Utilisez Votre Machine
SECCION !1. PREPARACION PARA COSER Conexi6n de la m_quina a ia red et_ctrica 3_ Clavija de pedal de control Clavija de la maquina Ctavija de toma de corriente nterruptor de corriente Cable de conexi6n Pedal de control Antes de enchufar el cable de conexi6n a la red de corriente asegurese de que el voltaje y la frecuencia de la m_quina, mostrados en la placa de identificaciOn, coincidan con los de la red de suministro en su hogar,,... -
Page 20: Machine Operating Buttons
Machine Operating Buttons (_ Start/stop button Up!down needle button Speed control lever Start/stop Button _ Start/stop button Press the button to start or stop the machine, The machine starts running slowly for the first few stitches; it then runs at the speed set by the speed control lever Up/down Needle... -
Page 21: Commandes De La Machine
Botones de operaci6n de la mdquina O Bot6n de inicio parada (_) Bot6n de subidaibajada de Eaaguja (_) Palanca de control de velocidad Bot6n de inicio parada (_) Bot6n de inicio parada Pulse ei bot6n para iniciar o porter en marcha la m_quina, La m_quina funclona ientamente en las primeras puntadas y tuego adquiere la velocidad fijada con la paIanca de control de la velocidad... -
Page 22: Pressure Adjusting Lever
Pressure Adjusting Lever (_ Pressure adjusting lever The pressure adjusting lever should be set at "3" for regular sewingo Reduce the pressure to "2" for applique, cut work, draw work and basting Set the pressure at "1" when sewing chiffon, lace, organdy and other fine fabrics_ Velour and knits with a lot of stretch may also require the pressure at "1"... -
Page 23: Coupe-Fil
Ajuste de la presi6n del prensatelas (_ Palanca del ajuste de la presi6n La palanca de1 ajuste de la presi6n debe ser situada en el "3" para costura normal Reducir ta presiSn a "2" para hacer aplique, calado e hilvanado Situe la presiSn en "1"... -
Page 24: Changing Needle
Changing Needle (_ Needle clampscrew (_)Needle clamp [_Turn offthepower s witch.. Raise theneedle to itshighest position byturning the handwheel counterclockwise, toward you,andlowering thepresser f oot Loosen theneedle clamp screw(_by turning itcounterclockwise. Remove t heneedle fromthe needle clamp _, [] Insert a newneedle intotheneedle clamp(_with the flatsidetothe rear.Wheninserting theneedle intothe needle clamp (_, pushit upasfarasit goes. -
Page 25: Changer I'aiguille
Cambio de aguja ornil_ode sujeci6n de la aguja Alojamiento de la aguja Apague la m_.quina con el interrupter de corriente Suba la aguja hasta su posiciSn m_s alta girando el volante en el sentido contrario alas agujas del reloj, y baje el prensatefas. -
Page 26: Presser Foot Types
Presser Foot Types o Zigzag foot (Foot A) Use this foot for both straight and zigzag stitching For: Straight stitch Topstitching Quilting Darning Basic zigzag Bar tacking Button sewing Overcasting Lace work Multiple zigzag stitch Box stitch Fagoting stitch Two-point shell stitch Two-point box stitch Overedge stitch Decorative stitch patterns... -
Page 27: Diff_Rents Pieds Presseurs
Tipos de prensatetas • Prensatelas para zig-zag (Prensatelas Utilice este prensatelas para puntada recta y puntada zig_zag.. Para: Puntada recta Costura a la vista Acolchador Zurcido Puntada de zig-zag Puntada de refuerzo Costura de botones Puntada de sobrehilado o remote Trabajos con lazes Puntada de multiple zig-zag Puntada de caja... -
Page 28: F: Satin Stitch Foot
Presser Foot Types (continued) , Satin stitch foot (Foot F) Use this foot for satin stitch and outlining applique., For: Darning Satin stitch Monograming Applique Shell stitch Decorative stitch patterns Twin needle stitches Smocking - Overedge foot (Foot C) This foot is specially constructed for stitching and/or overcasting seams. -
Page 29: C: Pied & Surjeter
Tipos de prensatetas (continuaci6n) • Prensatelas para puntada decorativa (Prensatelas Utilice este prensatelas para puntada decorativa y aplicaciones,, Para: Zurcido Puntada en sat#n Monogramas Aplicaciones Puntada en forma de concha Puntadas decorativeas Puntada de dob]e aguja Puntada de pluma o Prensatelas para coser a punto per encima (Prensatelas Este prensatelas es construido especiatmente para costuras de puntada y/o sobrehilado, El peque5o cepitlo y el guiado por... -
Page 30: Selecting Needle And Fabric
Selecting Needle and Fabric For general sewing, use needJe sizes 11 or 14. A fine thread and needle should be used for sewing lightweight fabrics, so the fabric wilt not be marred. Heavy fabrics require a needle large enough to pierce the fabric without fraying the needle thread in the needle set, there is one each of sizes 11, 14, 16, and 18, and a blue needle.. - Page 31 Selecci6n de hiio y tela Para el cosido general se utilizan agujas del tama_o 11 o I4 Los hilos y agujas delgados deber#,n utilizarse para coser tejidos Iigeros evitando asf qua estos se puedan echar a perder. Cosa tejidos gruesos con una aguja to suficientemente pueda penetrar el tejido sin qua el hilo de la aguja se deshilache.
-
Page 32: Choix De T'aiguille Et Tissu
ChoixdeI'aiguilleettissu Pourlescoutures normales, utiiisez u neaiguille n °11 ou14.Ondevrait utiliser dufil finetune aigui[le fineavec lestissus ! _gers p our n epaslesendornmager aiguille a ssez g rosse p our p ercer l etissu sans effilocher lefildeI'aiguille Dans unjeud'aiguilles, ilya une aiguitle dechaque g rosseur 11,14,16, 1 8 bteu., Uaiguiile &... - Page 33 (blank page) (p&glna blanca) (page b lanche)
-
Page 34: Bobbin Winding
Winding Bobbin = Horizontal spool pin O Spool pin (_ Large spool holder (_) Small spool holder Lift up the spool pin(_ Place a spool of thread on the spool pin with the thread coming off the spool as shown Attach the large spool holder (_), and press it firmly against the spool of thread, The small spool holder(_)is... -
Page 35: Remplissage De La Canette
Bobinado de la canilla • Portacarretes horizontal (_ Portacarretes (_) Tapa-carretes grande (_ Tapa-carretes pequeSo Levante et portacarretes _ y coloque un carrete de hilo en el portacarretes con el final del hilo sal[endo del carrete como se muestra. Coloque el tapa-carretes grande (_, contra el carrete El tapa-carretes... -
Page 36: Bobbinwinding
° Bobbinwinding [] Put! t hehandwheel outtotheright. [] Draw thethread fromthespool. [_ Guide thethread around thethreadguide_ ® Forthehorizontal spool p in (_ Fortheadditional spool p in [_Threadthrough theho_e inthebobbin fromtheinside to theoutside. [] Putthebobbin onthebobbin winder s pindle. [] Push thebobbin totheright [_ Withthefreeendofthethreadheldinyourhand,depress thefootcontrol, S topthemachine when it hasmade a fewturns,andthencutthethread closetotheholeinthe... -
Page 37: Remplissage De Ta Canette
. Bobinado de la canilla Hale _a volante manual a ta derecha Saque el hilo del carette. Gufe el hilo alrededor del gu[ahilos de bobinado. /(_ Para el portacarretes horizontal (..B.) Para el prortacarretes adicional Pase el h]lo por el agujero de la canilla desde dentro hacia afuera tal cemo se indica en Ia ilustraciSn.. -
Page 38: Removing The Hook Cover Plate
= Removing the hook cover plate (_ Hook cover plate release button (_ Hook cover plate Slide the hook cover plate release buttonQto and remove the cover plate (_. Inserting the bobbin _) End of thread (_ Notch (_ Notch @ Threading diagram [] Place a bobbin in the bobbin holder with the thread running off counterclockwise,,... -
Page 39: Retrait De La Canette
° C6mo sacar la canilla 1_) Putsador de apertura de fa tape de acceso a canilla (_)Tapa de acceso a canilla Deslice el pulsador(l_hacla la derecha y quite la tapa(_. • Colocaci6n de ta canilla en el portacanilfas (_) Extreme de hilo anura Ranura (_ Esquema de enhebrado... -
Page 40: Threading The Machine
Threading the Machine o Threading the machine * Raise the thread take-up lever to its highest position by turning the handwheel counterclockwise. * Raise the presser foot lifter. * Place a spool on the spool pin, with the thread coming off as shown [] Draw the end of the thread around the upper thread guide. -
Page 41: Enffiage De La Machine
Enhebrado dei hilo de la aguja . Enhebrado del htlo de la aguja * Suba el tirahilos hasta su posici6n m&s alta girando el volante en e] sentido contrario alas agujas de! refoj. * Levante la patanca de elevaciSn del prensatelaso * Coloque un carrete en el portacarretes con el bite safiendo, tal come se muestra. -
Page 42: Drawing Up Bobbin Thread
° Drawing up bobbin thread [] Raise the presser foot. Hold the needle thread lightly with your left hand and rotate the handwheel counterclockwise for one complete turn. [] Bring the bobbin thread up by pulling the needle thread [] Pull both threads 4" to 6" (1 &0 to 150 cm) under and behind the presser foot. -
Page 43: Comment Remonter Le Fil De La Canette
o Extracci6n del hilo de la canilla Suba el prensatetas. Sujete ligeramente el hilo de la aguja con su mano izquierda y gire el volante en el sentido contrario alas agujas def reloj una vuelta completa Saque el hilo de la canilta tirando del hilo de la aguja,, Pase ambos hilos hacia arras per debajo de! prensatelas., Deje un sobrante de ambos hitos de aproximadamente 15,0 cm (4"... -
Page 44: Tension Is Too Loose
o Tension is too loose O Needle thread (Top thread) (_ Bobbin thread (Bottom thread) (_ To tighten tension (_ Right side (Top side) of fabric (_ Wrong side (Bottom side) of fabric The needle thread shows through on the wrong side of the fabric, and the stitch feels bumpy. -
Page 45: Si La Tension Est Trop Faible
- El hilo estd demasiado flojo (_ Hilo de ta aguja (Hilo superior) (_) Hilo de la canilla (Hilo inferior) (_ Para apretar arte de arriba de la tela Parte de abajo de fa teta El hilo de la aguja aparece por la parle de abajo de la teia y se sentirA desigual. -
Page 46: Stitch Selector
Stitch Selector (how to select d._Sewing guide display (_) Red indicator (_) Stitch selector Turn the stitch selector until the red indicator reaches the desired stitch The bottom row of stitches on the pattern indicating panel is selected when the stitch length control is set at the stretch stitch position. -
Page 47: Bouton De S_Lection De Points
Seleccionador de puntadas (come puntadas) O Pantalla de guia de costura O Indicador rojo (_) Seleccionador de puntada Gire el seleccionador de puntada hasta que el indicador rojo alcance la puntada deseada. La ilia inferior de puntadas del panel indicador de patrones es seleccionado cuando el control de largo de puntada se fija en Ia posici6n de estiramiento de la puntada, El ancho recomendado... -
Page 48: Stitch Width Control
Stitch Width Control (how to adjust the stitch width) Slide the stitch width controi to the desired stitch width number, The higher the number, the greater the stitch width The _' mark shows the adjustment range when using the twin needle, The blue zone is the appropriate adjustment range for buttonhole sewing°... -
Page 49: R6Glage De Fa Iargeur Du Point
Control de ta anchure de puntada (c6mo ajustar la anchure de las puntadas) Destice el control de la anchura hasta al nL_mero deseado, Numeros m_s altos proporcionar_.n mayor anchura de puntada, esta marca indica el radio de ajustes cuando use una aguja doble,, La zona azu[ es el radio de ajustes apropiado para la costura de ojales * Antes de girar el control de Ia anchura de puntada asegurese... -
Page 50: Adjusting Stretch Stitch Balance
Adjusting Stretch Stitch Balance 1_ Feed balancing dial if the stretch stitch patterns are uneven when you sew on a particular fabric, adjust them with the feed balancing dial(_. To adjust the distorted patterns: [] tf the patterns are drawn out, correct them by turning the dial in the "-"... -
Page 51: Pour Corriger Un Motif D_Forrn
Equilibrio patrones de los distorsionados (_) Eje equilibrador de puntada Si observa alguna distorsi6n al coser patrones de puntada el,_stica en una tela especifica, ajustelos con el eje equilibrador de puntada(_. Para equitibrar los patrones de puntada distorsionada: [] Si los patrones est_n expandidos, corrija!os girando el eje equilibrador de puntada hacia el signo "-"... -
Page 52: Straight Stitch Sewing
SECTION lB. STRAIGHT SEWING Straight Stitch 6t08 (_ Stitch selector: ® Stitch width: Red zone (_ Stitch length: 2to6 (_ Needle thread tension: ® Presser foot A: Zigzag foot ® Presser foot H: Straight stitch foot NOTE: There are three straight stitch needle position settings, left, center and right When using the straight stitch foot, make sure to use center needle position°... -
Page 53: Partie I!T, Couture Au Point Droit
SECCION IlL COSTURA DE PUNTADA Puntada recta elector de puntada: Anchura de [a puntada: Zona roja Longitud de la puntada: ensiSn del hiio de [a aguja: Prensatelas para zig-zag Prensatelas A: Prensatelas H: Prensatelas para puntada recta Cuando use el pie pare puntada recta, asegurase de poner la aguja en la pesiciSn det centro_ De lo contrario, la aguja OTA: chocar_, centre el prensatelas yes posib_e qua sa rompa... -
Page 54: Topstitching
Topstitching (_ Stitch selector: 6 to 8 (_ Stitch width: t_ Stitch length: Red zone (_ Needle thread tension: 2 to 6 (_ Presser foot A: Zigzag foot Presser foot H: Straight foot NOTE: When using the straight stitch foot, make sure to use the center needle position, otherwise the needle may strike the presser foot and possibly break.. -
Page 55: Surpiq_3Re
Costura a la vista elector de puntada: Anchura de Eapuntada: Zona roja Longitud de la puntada: Tensi6n del hilo de Ia aguja: Prensatelas para zig-zag PrensateTas A: @ Prensatelas H: Prensatelas pare puntada recta Cuando use el pie para puntada recta, aseg_rese de poner la aguja en la posici6n dei centro,, De to contrario, la aguja NOTA"... -
Page 56: Using Walking Foot (Option)
Using Walking Foot (Option) (_ Thumb screw (_) Foot holder ® Lever ® Needle clamp ® Presser bar This is a special attachment for hard-to-feed materials. This foot prevents fabric slipping or puckering by feeding fabrics with both upper and lower feed dogs The walking foot is great for fine fabrics, knits, leather and matching aTuidS"... -
Page 57: Utifisation Du Pied & Niveleur (Option)
C6mo usar el prensatelas de doble arrastre (opcibn) ornillo Soporte del prensatelas Palanca Soperte de la aguja Barra del prensatelas _ste es un accesorio especial para materiales que son dificiles de alimentar Este prensatetas evitar que la tefa se deslice o frunza, al alimentar la tela con las garras transportadoras superiores e inferiores E1 prensatelas de doble arrastre es ideal para telas finas, tejidos y cuero e para empatar diseSos a... -
Page 58: Zipper Sewing
Zipper Sewing (1_Stitch selector: ® Stitch width: ® Stitch length: @ Needle thread tension: 2 to 6 ® Presser foot E: Zipper foot • To snap on the zipper foot (_ Groove ® Pin ®To sew left side @ To sew right side Fit the pin on the zipper foot into the groove on the foot holder,, •... -
Page 59: La Couture Des Fermetures & Glissi_Re
Costura de cremalleras o cierres Selector de patron: Anchura de la puntada: Longitud de la puntada: TensiOn del hilo de la aguja: 2 a 6 Presnsatelas E: Prensatelas para cremalleras = COme colocar el prensatelas para cremalleras nctavadura Pasador Para coser el lade izquierdo Para coser el lade derecho Encaje el pasador del pie para cremalleras en la enctavadura del enmangue,... - Page 60 Zipper Sewing (Continued) []Raise and release foot, and re-attach it on left-hand side of pin. Take the upper fabric layer and lay it flat over the zipper.. Starting just beiow zipper bottom stop, sew across fabric to about 3/8" to 1/2" distance from the basting stitch line. Turn fabric 90 °...
- Page 61 Costura de cremalleras o cierres Levante y fibere el prensatelas y vuelva a colocarlo en ei lade izquierdo del poste, Tome la capa superior de la tela y exti_ndala sobre ta crematlera Comience justo abajo del tope de [a cremallera y cosa a Io ancho de la techa hasta una distancia de 1 a 1,3 cm (3/8"...
-
Page 62: To Drop Or Raise The Feed Dogs
To Drop or Raise the Feed Dogs The drop feed dogs lever is located underneath the free arm bed on the back side of the machine.. (_ To drop the feed dogs, push the lever in the direction of the arrow, as illustrated. (_) To raise the feed dogs, push the lever in the direction of the arrow, as illustrated, and turn the handwheel toward you... -
Page 63: Comment Monter Et Descendre Les Griffes D'entrainement
C6mo subir/bajar los dientes La palanca de mando para los dlentes deFtransporte est_ debajo del brazo libra colocabo en ta parte dal rev6s de la m_quina (_ Para bajar los dientes de] transporte empuje la pafanca de mando en la direcciSn indicada por ia fiecha como se muestra en la ifustracibn Pour subir los dientes del transporte empuje la paJanca de mando en la direcci6n indicada por Ia flecha como se muestra... -
Page 64: Zigzag Stitch Sewing
SECTION IV. ZIGZAG STITCH SEWING Basic Zigzag (_ Stitch selector: (_ Stitch width: 1 to 6°5 _ Stitch length: Red zone (_ Needle thread tension: 3 to 5 _) Presser foot A: Zigzag foot The zigzag stitch is one of the most common and versatile stitches It can be a utility stitch for button sewing, buttonhole making, hemming, overcasting, mending and... -
Page 65: Partie Iv, Points Zig-Zag Zig-Zag Simple
SECCION IV. PUNTADAS DE ZIG-ZAG zig-zag Puntada L<_Selector de puntada: 1 a6..5 nchura de ta puntada: Zona roja Longitud de la puntada: Tensi6n del hilo de Taaguja: Prensatelas para zig-zag Prensatelas A: La puntada de zig-zag es una de las puntadas m_s comunes y m&s vers&tiles. -
Page 66: Monogramming
Monogramming 0 Stitch selector: ® Stitch width: ® Stitch Iength: 05 to 1 4@Needle thread tension: I to 4 @ Presser foot F: Satin stitch foot L_ Pressure adjusting lever: 1 or 2 Attach a piece of stabilizer on the wrong side (Bottom side) of the fabric, Draw letters on the fabric with tailor's chaiko Form each pattern with a satin stitch, adjusting the stitch width,... -
Page 67: Appliques
Monogramas Sefector de puntada: Anchura de la puntada: Longitud de la puntada: 0 5 a 1 Tensi6n del hilo de la aguja: 1 a 4 (_ Prensatelas F: Prensatelas pare puntada decorativa (_ Palaca del ajuste de la presi6n: 1 o 2 Cotoque la entretela por la parte de abajo de la tela, Dibuje Ins letras sobre la tela utilizando tiza de costura, carla modelo ajustando el ancho de la puntada... -
Page 68: Bar Tacking
Bar Tacking (_ Stitch selector: (_) Stitch width: 2 to 6.5 (_) Stitch length: 0,,5 to 1 @ Needle thread tension: 2 to 6 (_) Presser foot A: Zigzag foot This is similar to a very short satin stitch, and is used to reinforce points of strain such as corners, pockets and straps of lingerie°... -
Page 69: Brides De Renfort
Puntada de refuerzo Selector de puntada: Anchura de la puntada: 2 a 6.5 Longitud de ta puntada: 0,5 a 1 @ Tensi6n del hilo de la aguja: 2 a 6 (_ Prensatelas A: Prensatelas para zig-zag Esta puntada es similar a una puntada de saten muy corta y se utifiza para reforzar los puntos que reciben el mayor esfuerzo, come esquinas o bolsiltos y fas tiras en ropa interior Cosa de quatro (4) a seis (6) puntadas de zig-zag... -
Page 70: Button Sewing
Button Sewing (_ Stitch selector: ® Stitch width: 2 to 6,5 ® Stitch length: (_ Needle thread tension: 2 to 6 ® Presser foot A: Zigzag foot (_ Feed dogs: Dropped 1,. Drop the feed dogs° Place the button below the zigzag foot, making sure to align the holes with the horizontal slot in the foot. -
Page 71: Pose Des Boutons
Costura de botones elector de puntada: 2a65 Anchura de la puntada: Cualquier nt_mero Longitud de la puntada: (_) Tensi6n del hiio de la aguja: Prensatelas A: Prensatelas para zig-zag Dientes de transporte: Bajados 1, Baje las garras Cotoque el bot6n debajo del prensatelas de zigzag, asegur4ndose de aiinear los agujeros con la ranura horizontal del prensatelas Baje el prensatelas para mantener... -
Page 72: Blind Hem Stitch
SECTION V. UTILITY AND DECORATIVE STITCHES Blind Hem Stitch (_) Stitch selector: (_ Stitch width: 2 to 3 Stitch length: Red zone (_ Needle thread tension: 2 to 6 (_ Presser foot G: Blind hem foot Use the same color thread as the fabric.. On heavy weight fabrics that ravel, the raw edge should be overcast first. -
Page 73: Outlet Invisible
SECCION V. PUNTADAS UTILES Y PUNTADAS DECORATIVAS Dobladillo invisible 6) Selector de patr6n: nchura de la puntada: Zona roja Longitud de la puntada: Tensi6n del hilo de ta aguja: Prensatelas para puntada de (_) Prensatelas G: dobladitto invisible En telas gruesas que se enredan, primeramente rematarse el horde bruto. -
Page 74: Lace Work
Lace Work (_ Stitch selector: (_) Stitch width: 2 to 3 {_ Stitch length: (_ Needle thread tension: 1 to 4 _) Presser foot A: Zigzag foot Lace adds a fanciful, feminine touch to blouses and lingerie, Table linens and pillows become more elegant when trimmed with lace Fold the raw edge of the fabric at least 5/8"... -
Page 75: Dentetle
Trabajos con lazos Selector de patr6n: Anchura de la puntada: 2 a 3 Longitud de la puntada: Tensi6n del hilo de la aguja: 1 a 4 _') Prensatelas A: Prensatelas para zig-zag Lazes aSaden un toque fino y femenino a bfusas y lencerla Manteles y fundas de almohadas quedar&n m_s elegantes cuando los adome con lazoso Doble el borde por lo menos 1 5 cm (5/8"), Celoque et lazo por... -
Page 76: Shell Stitch
Shell Stitch (]) Stitch selector: ® Stitch width: 3 to 65 (_) Stitch length: Red zone Needle thread tension: 4 to 9 (_) Presser foot F: Satin stitch foot Use a lightweight fabric (tricot, for example), Fold the fabric in bias and stitch on the fold_ Allow the needle to just clear the folded edge to create a shelled edge,, You may need to increase the needle thread tension slightly_ if you sew rows of shell stitches, space the rows at ieast... -
Page 77: Point Coquille
Puntada en forma de concha Selector de patr6n: Anchura de la puntada: 3 a 6 5 Longitud de la puntada: Zona roja Tensi6n del hiio de la aguja: 4 a 9 (_) Prensatelas F: Prensatelas para puntada deco rativa Use tetas ligeras come son las prendas de tricot° Doble ta tela y punt_ela en diagonal Quiz&s tenga que incremantar ligeramente la tensi6n del hilo de la aguj&... -
Page 78: Fagoting Stitch
Fagoting Stitch (1_ Stitch selector: ® Stitch width: 5 to 65 (_ Stitch length: 0,5 to 2 (_) Needle thread tension: 3 to 8 Presser foot A: Zigzag foot (_ Paper or tear-away backing ® 1/8"(0..3cm) Use this stitch to join two pieces of fabric to create an open work appearance, and add design interest. -
Page 79: Couture Ajour_,E
Puntada para deshilachados (_ Selector de patrSn: Anchura de la puntada: 5 a &5 Longltud de puntada: 05 a 2 5_ TensiSn del hilo de la aguja: 3 a 8 Prensatefes A: Prensateias para zig-zag apel o cinta desprendible 03 cm (1/8") Use esta puntada de costura pare unir dos telas y crear una apariencia de trabajo abierto (deshilachado) disefio,, Hega un dobiez de unos 13 cm (1/2") en cada uno de los... -
Page 80: Overedge Stitch
Overedge Stitch (_ Stitch selector: (_) Stitch width: 3 to 6.5 Stitch length: ! to 3 (_ Needle thread tension: 3 to 8 ® Presser foot A: Zigzag foot (_ Presser foot C: Overedge foot * When using an Overedge foot, make sure to set the stitch width at 5 or more, otherwise the needle may hit the overedge foot. -
Page 81: Point De Bordure
Puntada para rebordados elector de patr6n: 3a65 Anchura de fa puntada: Longitud de puntada: Tensi6n del hilo de ta aguja: Prensatetas para zig-zag Prensatelas A: Prensatelas coser a punto pot Prensatelas C: encima * At utilizar el prensatelas de sobrehifado, asegt;trese de ajustar la anchura de puntada a un valor mayor que 5, pues de Io contrario la aguja puede golpear el prensatelas de sobrehilado. -
Page 82: Twin Needle Stitches (Option)
Twin Needle Stitches (Option) 13 to 18 Stitch selector: 1 to 25 (_) Stitch width: Gold stretch stitch position (_ Stitch length: or green zone 3 to 7 C4_ Needle thread tension: (_) Presser foot A: Zigzag foot (_ Presser foot F: Satin stitch foot (_ Needle: Twin needle (optional item) -
Page 83: Aiguilles Jumel_Es (Option)
Puntadas de doble aguja (Opci6n) 13a18 (_ Selector de patrSn: la25 Anchura de la puntada: Longitud de la puntada: Posici6n oro de puntada el&stlca o zone verde (_Tensi6n de hilo de fa aguja: Prensatelas pare zig-zag rensatelas A: Prensatelas pare puntada Prensatelas F: decorativa (_ Aguja:... -
Page 84: Stretch Stitches
SECTION Vl. STRETCH STITCHES Straight Stretch 6 to 8 (_ Stitch selector: ® Stitch width: (_ Stitch length: Gold stretch stitch position 2to6 Needle thread tension: (_) Presser foot A: Zigzag foot (_) Presser foot H: Straight foot NOTE: When using the straight stitch foot, make sure to use center needle position,, Otherwise the needle may strike the presser foot and possibly break This strong, durable stitch is recommended where both... -
Page 85: Partie Vl. Points Extenslbles Point Droi! Extensible 73 Croquet Extensible
PUNTADAS ELASTICAS SECCION Puntada recta triple (_ Setector de patr6n: &5 Anchura de la puntada: PosiciSn oro de puntada Longitud de la puntada: el&stica @ Tensi6n det hilo de la aguja: Prensatelas para zig-zag (_) Prensateias A: Prensateias para puntada (_ Prensatelas H: recta NOTA:... -
Page 86: Overcast Stretch Stitching
Overcast Stretch Stitching O Stitch selector: (_) Stitch width: 3 to 6,5 (_ Stitch length: Gold stretch stitch position (_ Needle thread tension: 2 to 6 (_ Presser foot A: Zigzag foot This stitch is for sewing a seam with an overcast finish, it is used when making swim wear, ski pants and other garments which require stretch, - To sew... -
Page 87: Suffilage Extensible
Puntada el_stica de remate o sobrehilado (_ Selector de patr6n: 3a6r5 Anchura de la puntada: Posici6n oro de puntada Longitud de la puntada: eiAstica @ Tensi6n del hito de la aguja: (_) Prensatelas A: Prensatelas para zig-zag Esta puntada de costura es para coser costuras de remate o sobrehilado Esta puntada es usada cuando se cosen trajes de baPto, pantalones de esquiar y otras prendas que requieren de... -
Page 88: Serging
Serging (_ Stitch selector: 3 to 65 (_) Stitch width: (_) Stitch length: Gold stretch stitch position 3to6 (_ Needle thread tension: ® Presser foot A: Zigzag foot (_) Presser foot C: Overedge foot * When using Overedge foot, make sure to set the stitch width at 5 or more;... -
Page 89: Point De Surjet
Puntada de dobladillo elector de patr6n: 3a65 Anchura de la puntada: Posici6n oro de puntada Longitud de la puntada: ef&stica (4_ Tensi6n def hilo de la aguja: (_) Prensatelas A: Prensatelas para zig-zag Prensatelas coser a punto Prensatelas C: por encima * AI utillzar el prensatelas de sobrehilado, asegurese de ajustar la anchura de puntada a un valor mayor que 5, pues de lo contrario la aguja puede golpear el prensatelas... -
Page 90: Herring Bone Stretch
Herring Bone Stretch (_)Stitch selector: 3 to 6,5 ®Stitch width: Gold stretch stitch position (_Stitch length: 2 to 6 @Needle thread tension: Zigzag foot ® Presser foot A: ® Presser foot C: 0veredge foot * When using an Overedge foot, make sure to set the stitch width at 5 or more, otherwise the needle may hit the ove redge foot Use as a hemming stitch for blankets, tablecloths and... -
Page 91: Point D'_Pine Extensible
Puntada de espiga el_stica elector de patr6n: 3a65 Anchura de la puntada: Longitud de puntada: Posici6n de puntada elAstica dorada @Tension del hilo de la aguja: Prensatelas para zig-zag (6@Prensatetas Prensatelas C: Prensatelas coser a punto per encima * AI utilizar el prensatelas de sobrehilado, asegt]rese de ajustar la anchura de puntada a un valor mayor que 5, pues de Io contrario la aguja puede golpear el prensatelas de sobrehilado Use esta puntada pare coser dobladit!os en mantas, edredones,... -
Page 92: Buttonhole
SECTION VII. BUTTONHOLE Automatic Buttonhole i] (BH) (_ Stitch selector: 3 to 6.5 (_ Stitch width: 0,25 to 1 0 ® Stitch length: 2 to 6 @ Needle thread tension: Automatic buttonhole foot Presser foot R: ° Preparation for sewing L_ Groove (_) Pin Attach the automatic buttonhole foot Ro Make sure the... -
Page 93: Pour Coudre
SECCION VII. OJALES Ojal autom_tico _] (BH) (_ Selector de puntada: 3a6o5 nchura de la puntada: 025 a 1,0 Longitud de la puntada: 4@Tensi6n del hilo de Ia aguja: Prensatelas para oja! (_ Prensatelas R: autom&tico • Preparaci6n para coser nclavadura Pasador Coloque el Prensatelas R para ojales autom&ticos... - Page 94 (_ Mark for placement of buttonhole @ Starting point @ Slider _There should be no gap (_) Spring holder (_ Difference [] Draw both threads to the left under the foot. Insert the garment under the foot, and lower the needle into the fabric to the starting point.
- Page 95 arca para hacer el ojal Punto de comienzo Destizador No debera haber holgura (_ Soporte del resorte Diferencia Pase ambos hilos hacia la izquierda por debajo del prensatelas Introduzca ta prenda debajo del prensatetas, y bale la aguja en el punto donde va a comenzar a coser, Luego baje el prensatetas para ojales automd, ticos_ Pise el pedal de control, La maquina coser_ e! ojal y se detendrd autom_ticamente...
-
Page 96: Hew To Adjust Buttonhole Stitch Density
If the button is extremely thick, make a test buttonhole. If it is difficult to fit the button through the test buttonhole, lengthen the buttonhole by pulling the button holder back to create a gap(_ (_Gap • How to adjust buttonhole stitch density Slide the stitch length control to adjust stitch density. -
Page 97: Comment R6Gler La Densit_ Pour Boutonnieres
Si el botSn es extremadamente grueso, haga un oial de prueba Si no pudiera meter el bot6n en el ojal de prueba: Alargue el ojal desplazando hacia atr#,s el alojamiento del botSn del pn_nsatelas para aumentar la !ongitud del oiaL (_ Holgura , C6mo ajustar la densidad de los ojales... -
Page 98: Corded Buttonhole
Corded Buttonhole [] Use the same procedure as the automatic buttonhole procedure, * Set the stitch width to match the thickness of the cord used, With the buttonhole foot raised, hook the filler cord on the spur at the back of the buttonhole foot, Bring the ends toward you under the buttonhole foot, clearing the front end, Hook the filler cord into the forks(_)on the front of the... -
Page 99: Boutonniere Passepoil_Es
Costura de ojales con cord6n Emplee el mismo procedimiento que para la costura de ojafes autom_ticos Ajuste el ancho de la puntada en concordancia con el cord6n que utiliee. Con el prensatelas para oiales elevado, coloque el cord6n en el enganche que se encuentra en fa parte trasera del prensatelas Tire de los extremes del cord6n hacia usted per debajo, del prensatelas... -
Page 100: Manual Buttonhole (Option)
(Option) Manual Buttonhole OStitch selector: _] (BH) (_ Stitch width: 3 to 6,5 (_ Stitch length: 0.25 to 1+0 (_ Needle thread tension: 2 to 6 (_ Presser foot B: Buttonhole foot . To sew If the diameter of the button is more than 1,0" (2+5 cm), a buttonhole must be made manually as follows: [_ Turn the handwheel toward you to raise the needle to its highest position. -
Page 101: Boutonniere Manuelle (Option)
Ojal manual (Opci6n) I (BH) efector de puntada: 3a6o5 Anchura de la puntada: 025a10 Longitud de la puntada: Tensi6n del hilo de la aguja: Prensatelasparaojafes 5_ Prensatelas B: , Para coser Si el di&metro del bot6n es m&s de 25 cm (1.0"), el ojal se debe hacer a manualmente como sigue: Gire el volante hacia usted para levantar la aguja hasta la... -
Page 102: Automatic Buttonhole (Option)
Automatic Buttonhole (Option) For more varied and accurate buttonholes, use the buttonhole attachment and templates. The buttonhole attachment consists of the illustrated parts L_ Guide slot (_ Measure marking (_ Catch @ Buttonhole guide plate ® Buttonhole templates (_) Guide block Two pins (_ Hook (_ Lever... -
Page 103: Boutonniere Automatlque (Option)
Ojal autom_tico (Opci6n) Para mayor vadedad y ojales m_s precisos, use el accesorio para ojales, el cuat consiste de ias partes ilustradas anura guia Marcas de medida Enganche laca gufa de ojales PiantiIlas de ojaEes Dos pasadores loque gufa Garfio afanca Dentada Placa base... -
Page 104: To Sew
Automatic Buttonhole (Continued) • TO sew (_ Stitch selector: ® Stitch width: (_ Stitch length: 3 to 4 (_ Needle thread tension: 2 to 6 (_ Presser foot: Buttonhole foot NOTE: Best results are obtained by using #60 or #80 lightweight thread, it is advisable to use a #11 blue stretch needle when sewing knits and synthetic fabrics You can obtain buttonholes with wider cutting space for the opening by... -
Page 105: Pour Coudre
Ojal autom_tico (continuaci6n) • Para coser (_ Selector de puntada: Anchura de la puntada: Longitud de la puntada: 3 a 4 (_ Tensi6n de hilo de la aguja: 2 a 6 Prensatetas : Prensatetas para ojales NOTA: Conseguir__ mejores resu_tados usando hilo ligero No,60 o No. - Page 106 Automatic Buttonhole (Continued) (_ Guide slot (_) Guide block Buttonhole guide plate ('_ Buttonhole template ® Catch (_) Setting mark F_ Gear (_) Base plate (_ Lever Select a buttonhole template @. Pull back the guide plate catch (_, and slide the template into the guide plate (_ to get the desired buttonhole.
- Page 107 Ojal autom,_tico (continuacibn) Bloque gu[a Pfaca gufa para ojales anura guia P[antilla de ojales @ Enganche Dentada Placa base arca de pesicidn Patanca Despu_s de seleccionar una plantilla (_ con el estilo y tamaSo del oial, des=lice ta plantilia en ia placa gu[a (_. enganche (._ hacia usted mientras introduce la plantilla (_ hasta que el ojal elegido quede sobre la marca de posici6n (_, la dentada de la placa base _7_en la ranura gu[a de la plantilla (_...
-
Page 108: To Adjust Stitch Density
Automatic Buttonhole (Continued) (_ Marked buttonhole on fabric ® Center marking on buttonhole foot (_ Measure marking on the guide plate @ Fabric Mark the buttonhole position carefully on the fabric. the fabric behind the machine; insert the fabric between the guide plate and the buttonhole foot as illustrated, Align the marked buttonhole (_ with the center marking on the buttonhole foot®,... -
Page 109: R_Glage De Ta Densit_ Du Point
Ojal autorm&tico (continuaci6n) jal marcado en la tela Marca central en el pie para oiales Marca de medida en ta placa guia Te_a Marque la posici6n del ojal cuidadosamente Colocando la tela detr&s de la m_quina, introdt3zcala entre la placa guia y el prensateias para ojales come es demostrado la ilustraci6n. -
Page 110: Care Of "Four Machine
SECTION Viii. CARE OF YOUR MACHINE NOTE; * Unplug the machine. * Do not dismantle the machine other than as explained in this section. * Do not store the machine in a high-humidity area, near a heat radiator, or in direct sunlight * Clean the outside of the machine with a soft cloth and mild soap. -
Page 111: Partie Viii. Entretien De Votre Machine Remplacement De Rampoule
SECCION VIIL MANTENIMIENTO MAQUINA NOTA: * Desenchufe la m&quina. * No desmonte [a m&quina de ninguna otra forma que la explicada en esta secci6n * No guarde la mAquina en un [ugar muy humedo, cerca de un radiador o bajo la luz directa de Ios rayos del sol * Limpie ef exterior de la mAquina con un pa5o suave y jab6n neutro Cambiando... -
Page 112: Cleaning The Shuttle Race And Feed Dogs
Remove excess oil, otherwise it may stain the fabric. In case the machine has not been used for a long period, oi_ it before sewing. Use quality sewing machine oil. Remove t heneedle a lint brush. Wipe position the bobbin ®... - Page 113 Limpieza dei garlic y los dientes Desenchufe la m_quina y quite el prensatelas y ia aguja Destornille el tomillo que sujeta la placa de aguja con un destornillador. Quite la placa de aguja (_ y saque la cani[la (_ Placa de aguia Levante el portacaniilas (_ y s&quelo (_) Portacanillas Cepille el polvo y la pefusa dentro de portacanillas.
-
Page 114: Troubleshooting
2, Lint has built up in the shuttle or the shuttle race Cause For customer assistance call or e-,mail: 1-877-SEWING-U (1-877-739-4648) 9 am - 4:30 pro, CST, Monday - Friday support @kenmore-sewing.com Reference Page 28 Pages 30, 32 Page 12 Page 12 Pages 30, 40... -
Page 115: Para Coser
Soluciones para problemas de funcionamiento !" Condicion 1. El hilo de fa aguja no se ha enhebrado correctamente.. Se rompe el hilo de 2. La tensi6n de! hilo de la aguja es excesiva. la aguja. 3. La aguja est& despuntada o doblada 4.. -
Page 116: En Cas De Probl6Me
En cas de probl6me Probl_me Le fil de |'aiguitle 1 Le fii de l'aiguilte n'est pas penfil_ correctemenL casse+ 2, La tension du fil d'aiguille est trop forte 3 L'aiguille est tordue ou _meuss_e 4 L'aiguilte est mar instatl_e+ 5 Le fi+ eraiguilfe et celui de la canette ne sent pas pass6s correctement sous le pied presseur au debut de la couture 6 Le tissu n'est pas tire vers I'arri6re &... - Page 117 Get it fixed, at your home or ours! For repair-in your lawn and garden equipment, no matter who made it, no matter For the replacement owner's manuals For Sears professional and items like garage 1-800-4-MY-HOME Call anytime, wwwosears.com For repair of carry-in and electronics, call or go on-line for the location Sears Parts &...