
Related Manuals for Sunbeam Mini Bake & Grill BT2600


Summary of Contents for Sunbeam Mini Bake & Grill BT2600
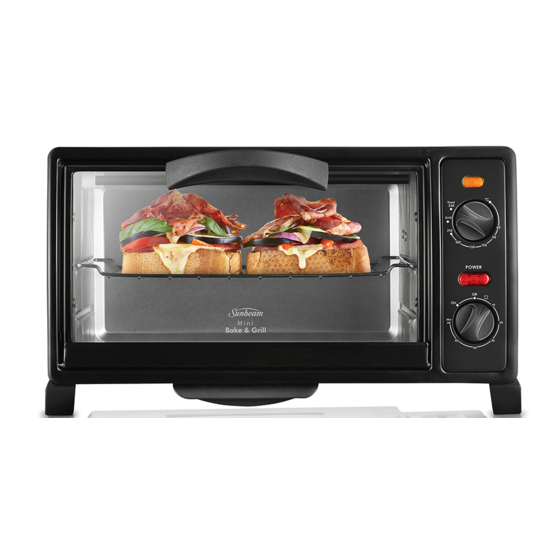
- Page 1 Mini Bake & Grill Instruction Booklet BT2600 Please read these instructions carefully and retain for future reference.
-
Page 2: Table Of Contents
Contents Sunbeam’s safety precautions Features of your Mini Bake & Grill Using your Mini Bake & Grill Cooking guide Roasting guide Grilling guide Roasting tips for vegetables Care and cleaning Recipes Important instructions – retain for future use. -
Page 3: Sunbeam's Safety Precautions
• Avoid contact with oven surfaces, including oven door, during and after use, as they will • Do not use in confined spaces. be hot. • Do not immerse the unit in water. • Use well away from walls and curtains. Sunbeam is very safety conscious when • Do not use an appliance for any purpose designing and manufacturing consumer products, other than its intended use. but it is essential that the product user also • Do not place an appliance on or near a hot gas exercise care when using an electrical appliance. -
Page 4: Features Of Your Mini Bake & Grill
Features of your Sunbeam Mini Bake & Grill – BT2600 Rack support guides With two rack support guides: middle and lower, each cooking function is maximised. Chrome plated wire racks The removable wire rack is reversible and may be used in the raised or sunken position, giving you greater versatility when cooking (wire rack shown in the sunken position). Removable crumb tray This conveniently positioned crumb tray slides out for emptying without the need to open the door and has a cool touch handle for added safety. - Page 5 Thermostat light Light on indicates that the oven is heating. When the set temperature is reached, the light will switch off. During the cooking process this light will turn on and off occasionally to ensure that the desired temperature is maintained constantly throughout the oven. 1400 watt element Powerful 1400 watt oven for a fast heat-up. Power on light Indicates when the oven is turned on. Will light up when the timer or 'ON' setting has been selected. Non-slip rubber feet Keeps the oven secure on the bench top during use and prevents scratching of bench top surfaces. Aluminium baking pan Great for cooking small roasts, chicken, biscuits and scones.
- Page 6 Features of your Sunbeam Mini Bake & Grill continued Oven Settings Toast: Using the Toast setting allows maximum heat for fast, quick toasting. Top and bottom elements are used in this function. Grill: Placing the temperature dial on Grill allows maximum heat of the top elements only. Using the grill function is fast and efficient making it ideal for grilling open sandwiches, sausages and vegetables. Alternatively, placing the dial on any of the temperatures will allow the Mini Bake and Grill to work as an oven, ideal for roasting, baking and heating. 60 minute timer and on/off control The timer can be set up to 60 minutes and will automatically turn the oven off and sound a bell at the end of the cooking time. Alternatively, the dial can be set to the ON position for continuous operation, until it is turned off manually. Placing the dial on the toast icon is perfect for even browning of toast every time.
-
Page 7: Using Your Mini Bake & Grill
Using your Mini Bake & Grill Position the oven on a dry, level surface, the timer was selected. Alternatively, turn ensuring that the ventilation slots on the side the timer control to OFF position if the and top of the appliance are not obstructed. continuous mode was selected. Plug the power cord into a 230-240 volt To grill power outlet and turn the power on. The top two elements will heat when the Note: When turned on for the first time, 'Grill' setting has been selected. your Bake & Grill may give off vapours for 1. P lace the wire rack, into the highest rack up to 10 minutes. This is due to the initial support guide. heating of the materials used. It is safe, not 2. P osition the food on the baking tray. Place detrimental to the performance of the oven the baking tray on the wire rack. and will not reoccur. 3. T urn the oven setting clockwise to ‘Grill’. Important: Do not force open the oven door beyond its limit or let the door drop open as Note: For best results, allow the oven to this will distort the doors ability to maintain a preheat for 5 -10 minutes or as per recipe proper seal. -
Page 8: Cooking Guide
Cooking Guide TEMPERATURE OVEN TEMPERATURE FUNCTION/FOOD SETTING ºC DESCRIPTION Low / 60 Moderately Warm Warming plates/dishes Moderately Warm Slow reheating 120 Warm Shortbread 150 Warm Cakes, reheating 180 Moderate Roasts, biscuits 210 Moderately Hot Pizza, frittata 240 Hot Scones Roasting Guide For best results cook all beef, lamb, veal or pork at 200˚C for 15 minutes, then reduce to 180˚C and use the remaining cooking times from the chart below: Approximate time per 500g cooked at MEAT 180ºC (after initial 15mins @ 200°C) Beef – Rare 15 minutes... -
Page 9: Grilling Guide
Grilling Guide Preheat compact oven to maximum heat for 5 minutes. Oven rack should be positioned in the highest rack support guide with the rack either sitting raised or sunken position depending on the height of your meat. Place meat on baking pan. Food Type Approximate Cooking Times Thin Sausages – up to 10 sausages 11 minutes, turning occasionally Thick sausages – up to 8 sausages 18 minutes, turning occasionally Lamb Chops – up to 6 small chops 5-7 minutes, turning once Steaks – 2-4 steaks, depending on size 5-10 minutes, turning once. Note: Cooking time will vary depending on thickness of food and individual preferences. Roasting Tips for Vegetables Grilled Capsicum • Mix through 1 tablespoon of olive oil and spread over baking tray. • Preheat compact oven to maximum heat using the Grill setting. Place rack in the • Bake 30 - 40 minutes, turning tray half top shelf in the raised position. way or until onion is soft and browned. • Cut capsicum in half and remove seeds and membrane. Spray with vegetable oil Roasted Sweet Potato or Potatoes spray. -
Page 10: Care And Cleaning
Care and Cleaning Note: Never immerse the compact oven • Always turn the power off and remove the plug from power outlet after use and before in water. cleaning. Allow the compact oven to cool • The interior walls and ceiling of the before cleaning. compact oven can be wiped with a mild • It is recommended that you clean the detergent and a damp cloth. compact oven after each use to prevent a • To clean the exterior of the compact oven, build up of grease and to avoid unpleasant wipe the walls with a cloth dampened with odours. mild detergent. Polish with a soft dry cloth. Note: Do not clean any part of the compact • To clean the glass door, wipe with a damp oven in the dishwasher. sponge and dry. • The wire rack, baking pan and crumb tray, may be washed in warm soapy water and rinsed. -
Page 11: Recipes
Recipes Note: In the following recipes we make reference to the wire rack in the sunken or raised positions. Shown here is the wire rack in these positions. Sunken Position Raised Position Soya Sauce Chicken Wings Makes 10 Stuffed Mushrooms Makes 6 6 chicken wings 6 medium field mushrooms 2 tablespoons honey 2 rashers bacon, chopped cup low salt soy sauce 125g cream cheese, softened 1 teaspoon Chinese cooking wine 1 small clove garlic, crushed 1 clove garlic, crushed bunch chopped chives 2 teaspoons grated fresh ginger cup grated fresh parmesan 1. P reheat compact oven to 240°C. Place wire rack on the lower shelf in the raised 1. P reheat compact oven to 210°C. position. Place wire rack on the top shelf in the sunken position. 2. C ut wings at joints and discard tips. 2. R emove stalks from mushrooms. - Page 12 Recipes continued Supreme Pizza Lamb Rack with Garlic Makes 2 pizzas and Parmesan Crust Serves 2 2 individual sized pizza bases 2 x 200g lamb rack roast, French trimmed cup pizza sauce or tomato paste 3 slices day old bread, crust removed and 1 small onion, chopped finely roughly chopped small green capsicum, chopped finely 1 clove garlic, chopped 1 stick cabanossi, sliced 1 tablespoon grated fresh parmesan 2 button mushrooms, sliced 2 tablespoons chopped fresh rosemary 50g diced ham 1 tablespoon seeded mustard 2 tablespoons sliced olives, optional Olive oil spray 1 cup pizza cheese (blend of tasty and 1. P reheat compact oven on 180°C for 10 mozzarella) minutes. Place wire rack on the bottom shelf in the raised position. 1. P reheat compact oven to 210°C. Place 2. P lace lamb racks on the baking tray, having wire rack in the bottom shelf in the raised the bones interlocked in the middle.
- Page 13 Recipes continued Marinated Lamb Roast Roast Chicken with Stuffing Serves 2-3 Serves 4 1 tablespoon olive oil 1.4kg whole fresh chicken 1 tablespoon chopped fresh rosemary sea salt 2 cloves garlic, crushed freshly ground black pepper 1 teaspoon grated lemon rind Stuffing 2 tablespoons lemon juice 1 small onion, chopped finely 2 teaspoons Dijon mustard 2 teaspoons olive oil ¼ cup mango chutney 2 cups fresh bread crumbs 2 x 300g mini roast lamb rumps 30g softened butter 1. C ombine oil, rosemary, garlic, rind, juice, 1 teaspoon grated lemon rind mustard and chutney in a large zip lock 2 tablespoons chopped fresh sage bag or large dish. 1. P reheat oven to 210°C. Place wire rack on 2. P lace lamb in marinade; cover and the bottom shelf in the sunken position.
- Page 14 Recipes continued Roast Vegetables Sweet Potato and Rocket Frittata Serves 2 Serves 8 200g butternut pumpkin 1 small sweet potato 2 small onions 80g baby rocket leaves 1 large carrot 200g fetta cheese, crumbled 4 small new potatoes 250ml thickened cream sea salt 10 eggs freshly ground black pepper Sea salt and freshly ground black pepper, to taste 40g butter, melted ½ cup grated tasty cheese 3. P reheat oven to 210°C. Place wire rack in the bottom shelf in the raised position. 1. P reheat compact oven to 210°C. Place wire rack on the lower shelf in the sunken 4. C ut pumpkin into wedges leaving the skin position. on. Cut onions into quarters. Cut carrot into 4 pieces lengthways. 2. G rease and line base of a 19cm square shallow cake tin.
- Page 15 Recipes continued DESSERTS Lemon Scones Makes about 15 Glazed Orange Poppy Seed Cake Serves 8 3 cups self raising flour 125g butter, softened 1 tablespoon finely grated lemon rind ¾ cup caster sugar 1 teaspoon icing sugar mixture 1 tablespoon finely grated orange rind 2 eggs 60g butter 1 cup self raising flour 420ml buttermilk cup milk 1. P reheat oven to 240°C. Place wire rack on 1 teaspoon vanilla extract the bottom shelf in the raised position. ¼ cup poppy seeds 2. C ombine the flour, lemon rind, icing sugar Glaze mixture and butter in a food processor until 2 teaspoons orange zest the mixture resembles fine breadcrumbs. ½ cup orange juice Transfer to a large bowl. ½ cup caster sugar 1. P reheat oven to 150°C. Place wire rack on 3. A dd the buttermilk and mix until just the bottom shelf in the sunken position.
- Page 16 Recipes continued Chocolate Chip Cookies Chocolate Chunk Muffins Makes about 30 Makes 6 125g butter, softened 1 cup self raising flour ½ cup firmly packed soft brown sugar ¼ cup plain flour ½ cup caster sugar ¼ cup cocoa powder 1 teaspoon vanilla extract ½ cup chocolate chips 1 egg ½ cup firmly packed brown sugar 1 ¾ cup self raising flour 1 egg, lightly beaten 1 cup choc chips ¾ cup milk 1. P reheat compact oven to 180°C. Place wire ½ cup vegetable oil rack on the bottom shelf in raised position. 1. P reheat compact oven to 180°C. Place Line tray with baking paper. wire rack on the bottom shelf in the raised 2. B eat butter, sugars and vanilla with an position. Grease a six hole, cup capacity electric mixer until light and creamy. muffin tray.
- Page 17 Notes...
- Page 18 Notes...
- Page 19 12 months of purchase (3 months commercial use) due to faulty materials or manufacture, we will replace it for you free of charge. Should you experience any difficulties with In Australia you are entitled to a your appliance, please phone our customer replacement or refund for a major failure and service line for advice on 1300 881 861 in for compensation for any other reasonably Australia, or 0800 786 232 in New Zealand. foreseeable loss or damage. You are also Alternatively, you can send a written claim entitled to have the goods repaired or to Sunbeam at the address listed below. replaced if the goods fail to be of acceptable On receipt of your claim, Sunbeam will quality and the failure does not amount to seek to resolve your difficulties or, if the a major failure. appliance is defective, advise you on how Should your appliance require repair or to obtain a replacement or refund. service after the guarantee period, contact Your Sunbeam 12 Month Replacement your nearest Sunbeam service centre. Guarantee naturally does not cover misuse For a complete list of Sunbeam’s authorised...
- Page 20 Visit www.sunbeam.co.nz Or call 0800 786 232 is a registered trademark. ‘Mini Bake & Grill’ is a trademark of Sunbeam Corporation. Made in China. Due to minor changes in design or otherwise, the product may differ from the one shown in this leaflet.