Table of Contents
Advertisement
Advertisement
Table of Contents

Related Manuals for Sunbeam BT7100


Summary of Contents for Sunbeam BT7100
- Page 1 QUICK START BT7100 DIGITAL OVEN User Guide...
-
Page 2: Table Of Contents
Contents Sunbeam’s Safety Precautions Features of your Quick Start Oven Using your Quick Start Oven Toast Function Crumpet Function Pizza Function Bake Function Grill Function Cookies Function Roast Function Warm Function Defrost Function Reheat / Preheat Function Rack Positioning Guide... -
Page 3: Sunbeam's Safety Precautions
If you have any concerns regarding the performance and use of your appliance, please visit www.sunbeam.com.au or contact the Sunbeam Consumer Service Line. Ensure the above safety precautions are understood. -
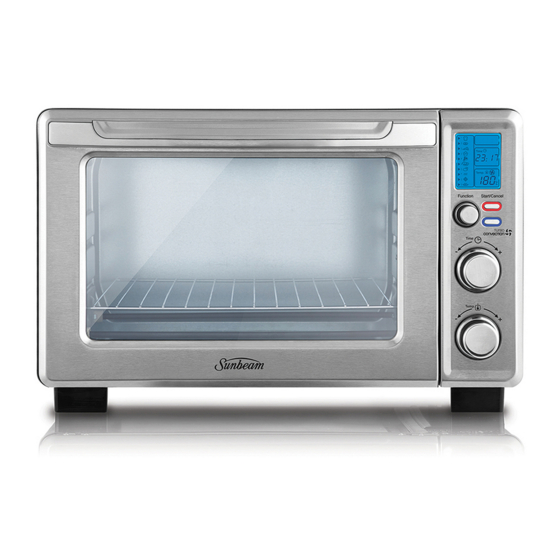
Page 4: Features Of Your Quick Start Oven
Features of your Sunbeam Quick Start Oven Easy Clean Interior Walls Allows fast clean up. Removable Wire Rack See Rack Positioning Guide on page 18. Tempered Glass Door For front viewing of food. Hot Surface Do Not Touch This symbol indicates, temperature of... - Page 5 Features of your Sunbeam Quick Start Oven Three Rack Positions LCD Display Function Selector Dial Select cooking function by turning dial to desired setting. Start/Cancel Button Press this button to turn the appliance off. Turbo Convection Heat Button Use to activate or cancel turbo convection heat.
- Page 6 Features of your Sunbeam Quick Start Oven (continued) Aluminium pizza tray Cooks up to a 30cm pizza to perfection Enamel baking pan Enamel baking pan can be used on its own or with the drip tray insert. Enamel drip tray insert...
- Page 7 Features of your Sunbeam Quick Start Oven (continued) LCD Display 1. Function Indicator – Toast, Crumpet, Pizza, Bake, Grill, Cookies, Roast, Warm, Defrost, Reheat/Preheat 2. Function Indicator Arrow 3. 1-7 colour shade setting indicator 4. Time Indicator 5. Turbo Convection Heat Icon 6.
-
Page 8: Using Your Quick Start Oven
Using your Quick Start Oven Position the oven on a dry, level surface, ensuring that the ventilation slots on the side and top of the appliance are not obstructed. Plug the power cord into a 220-240 volt power outlet and turn the power on. The oven will emit 2 long ‘beeps’... -
Page 9: Toast Function
Using the Toast Function Step 1. Turn the Function Dial to the Toast function. When you select the Toast function, the 1-7 colour shade setting indicator will become visible on the LCD. Both upper and lower heating elements will heat. Default Colour Shade Setting is 4. -
Page 10: Crumpet Function
Using the Crumpet Function Step 1. Turn the Function Dial to the Crumpet function. When you select the Crumpet function, the 1-7 colour shade setting indicator will become visible on the LCD. The upper and lower heating elements will heat. Default Colour Shade Setting is 4. -
Page 11: Pizza Function
Using the Pizza Function It is advised to use the Preheat function to heat the oven before using the Pizza function. See page 17. Step 1. Turn the Function Dial to the Pizza function. When you select the Pizza function, the Turbo Convection Heat will automatically activate. -
Page 12: Bake Function
Using the Bake Function It is advised to use the Preheat function to heat the oven before using the Bake function. See page 17. Step 1. Turn the Function Dial to the Bake function. When you select the Bake function, the Turbo Convection Heat will automatically activate. -
Page 13: Grill Function
Using the Grill Function It is advised to use the Preheat function to heat the oven before using the Bake function. See page 17. Step 1. Turn the Function Dial to the Grill function. When you select the Grill function, the upper heating elements will heat. -
Page 14: Cookies Function
Using the Cookies Function It is advised to use the Preheat function to heat the oven before using the Cookies function. See page 17. Step 1. Turn the Function Dial to the Cookies function. When you select the Cookies function, the Turbo Convection Heat will automatically activate. -
Page 15: Roast Function
Using the Roast Function Step 1. Turn the Function Dial to the Roast function. When you select the Roast function, the Turbo Convection Heat will automatically activate. Step 2. If you wish to switch to the regular Roast function, press the Turbo button once to turn off the Turbo Convection Heat default selection. -
Page 16: Warm Function
Using the Warm Function Step 1. Turn the Function Dial to the Warm function. When you select the Warm function, the lower heating elements will heat. Default Temperature: 65˚C. Default Time: 60 minutes. You may manually activate the Turbo Convection Heat by pressing the Turbo button once to turn it on. -
Page 17: Defrost Function
Using the Defrost Function Step 1. Turn the Function Dial to the Defrost function. Default Temperature: 230˚C. Default Time: 16 minutes. You may manually activate the Turbo Convection Heat by pressing the Turbo button once to turn it on. The blue light of the Turbo button will turn on. -
Page 18: Reheat / Preheat Function
Using the Reheat /Preheat Function This function can be used to reheat food or to preheat the oven before using one of the other function. Preheating the oven is advised before using the Pizza, Bake and Cookies functions. Step 1. Turn the Function Dial to the Reheat/Preheat function. -
Page 19: Rack Positioning Guide
Rack Positioning Guide • To accommodate a wide variety of foods NOTE: the oven rack may tilt downward the oven has three rack positions. The rack causing food to shift when the rack is pulled can be inserted in the oven in the upper or out, proceed with caution. -
Page 20: Care And Cleaning
Care and Cleaning • Always turn the power off and remove the • The interior walls and ceiling of the oven plug from power outlet after use and before can be wiped with a mild detergent and a cleaning. Allow the oven to cool before damp cloth. -
Page 21: Recipes
Recipes PIZZA FUNCTION Pizza Dough Pumpkin, Caramelized Onion and Goats Cheese Pizza Makes: 2 small or 1 large Makes: 2 Pizzas 2 teaspoons (7g) dry yeast 1kg pumpkin, peeled, deseeded, cubed 1 teaspoon caster sugar 3 onions, sliced ¾ cup warm water 1 clove garlic, crushed 2 cups plain flour 1 teaspoon fresh thyme cup olive oil... - Page 22 Recipes continued PIZZA FUNCTION ROAST FUNCTION Meat Lovers Pizza Roast Leg of Lamb Makes: 2 pizzas Serves: 6-8 1 quantity basic pizza dough, rolled out into 5 sprigs fresh rosemary two 26cm circles 2kg leg of lamb 1 cup tomato puree 4 cloves garlic, quartered 1 red onion, finely sliced ¼...
- Page 23 Recipes continued BAKE FUNCTION Potato Gratin Sticky Maple Pork Ribs Serves: 6-8 Serves: 3-4 1kg Sebago potatoes, peeled, thinly sliced 12 pork spare ribs 3 cloves garlic, crushed 4 cloves garlic, crushed 1 tablespoon olive oil ½ cup maple syrup 1 teaspoon dried chilli flakes ¼...
- Page 24 Recipes continued BAKE FUNCTION Easy Carrot Cake White Chocolate Raspberry Muffins 4 eggs Makes: 12 1½ cups caster sugar 2 cups plain flour ¾ cup vegetable oil 1½ teaspoons baking powder ½ cup buttermilk 1 cup caster sugar 2 teaspoons vanilla essence 2 eggs 2 cups grated carrots 1 cup milk...
-
Page 25: Cookie Function
Recipes continued COOKIE FUNCTION Chocolate Chip Cookies Afghan Biscuits 125g butter, softened 1 cup sugar ½ cup firmly packed brown sugar 350g butter ½ cup caster sugar 2½ cups plain flour 1 teaspoon vanilla extract ½ cup Dutch cocoa (or best you can get) 1 egg 6 VitaBrits 1¾... - Page 26 Notes...
- Page 27 Australia www.sunbeam.com.au 1300 881 861 Units 5 & 6, 13 Lord Street, Botany NSW 2019 Australia New Zealand www.sunbeam.co.nz 0800 786 232 Level 6, Building 5, Central Park, 660-670 Great South Road, Greenlane, Auckland New Zealand...
-
Page 28: Your Appliance
Level 6, Building 5, Central Park, 660–670 Great South Road, Greenlane, Auckland. Sunbeam Corporation Limited | ABN 45 000 006 771 Sunbeam is a registered trade mark. Made in China to Sunbeam’s specification. Due to minor changes in design or otherwise, the product you buy may differ slightly from the one shown here.