Advertisement
- 1 Safety Precautions
- 2 Features of your Device
- 3 Using your Device
- 4 Using the Toast Function
- 5 Using the Crumpet Function
- 6 Using the Pizza Function
- 7 Using the Bake Function
- 8 Using the Grill Function
- 9 Using the Cookies Function
- 10 Using the Roast Function
- 11 Using the Warm Function
- 12 Using the Defrost Function
- 13 Using the Reheat /Preheat Function
- 14 Rack Positioning Guide
- 15 Care and Cleaning
- 16 Documents / Resources
Safety Precautions
SAFETY PRECAUTIONS FOR YOUR SUNBEAM QUICK START OVEN.
- Always operate on a flat surface.
- Avoid contact with oven surfaces, including oven door, during and after use, as they will be hot.
- Use well away from walls and curtains.
- Do not place items on top of the oven whilst in use.
- Do not block or cover the air vents on the top, back or side of the oven.
- Do not use in confined spaces.
- Do not immerse the unit in water.
Sunbeam is very safety conscious when designing and manufacturing consumer products, but it is essential that the product user also exercise care when using an electrical appliance. Listed below are precautions which are essential for the safe use of an electrical appliance:
- Read carefully and save all the instructions provided with an appliance.
- Always turn the power off at the power outlet before you insert or remove a plug. Remove by grasping the plug - do not pull on the cord.
- Turn the power off and remove the plug when the appliance is not in use and before cleaning.
- Do not use your appliance with an extension cord unless this cord has been checked and tested by a qualified technician or service person.
- Always use your appliance from a power outlet of the voltage (A.C. only) marked on the appliance.
- This appliance is not intended for use by persons (including children) with reduced physical, sensory or mental capabilities, or lack of experience and knowledge, unless they have been given supervision or instruction concerning use of the appliance by a person responsible for their safety.
- Children should be supervised to ensure that they do not play with the appliance.
- The temperature of accessible surfaces may be high when the appliance is operating.
- Never leave an appliance unattended while in use.
- Do not use an appliance for any purpose other than its intended use.
- Do not place an appliance on or near a hot gas flame, electric element or on a heated oven.
- Do not place on top of any other appliance.
- Do not let the power cord of an appliance hang over the edge of a table or bench top or touch any hot surface.
- Do not operate any electrical appliance with a damaged cord or after the appliance has been damaged in any manner. If damage is suspected, return the appliance to the nearest Sunbeam Appointed Service Centre for examination, repair or adjustment.
- For additional protection, Sunbeam recommend the use of a residual current device (RCD) with a tripping current not exceeding 30mA in the electrical circuit supplying power to your appliances.
- Do not immerse the appliance in water or any other liquid unless recommended.
- Appliances are not intended to be operated by means of an external timer or separate remote control system.
- This appliance is intended to be used in household and similar applications such as: staff kitchen areas in shops, offices and other working environments; farm houses; by clients in hotels, motels and other residential type environments; bed and breakfast type environments.
If you have any concerns regarding the performance and use of your appliance, please visit www.sunbeam.com.au or contact the Sunbeam Consumer Service Line.
Ensure the above safety precautions are understood.
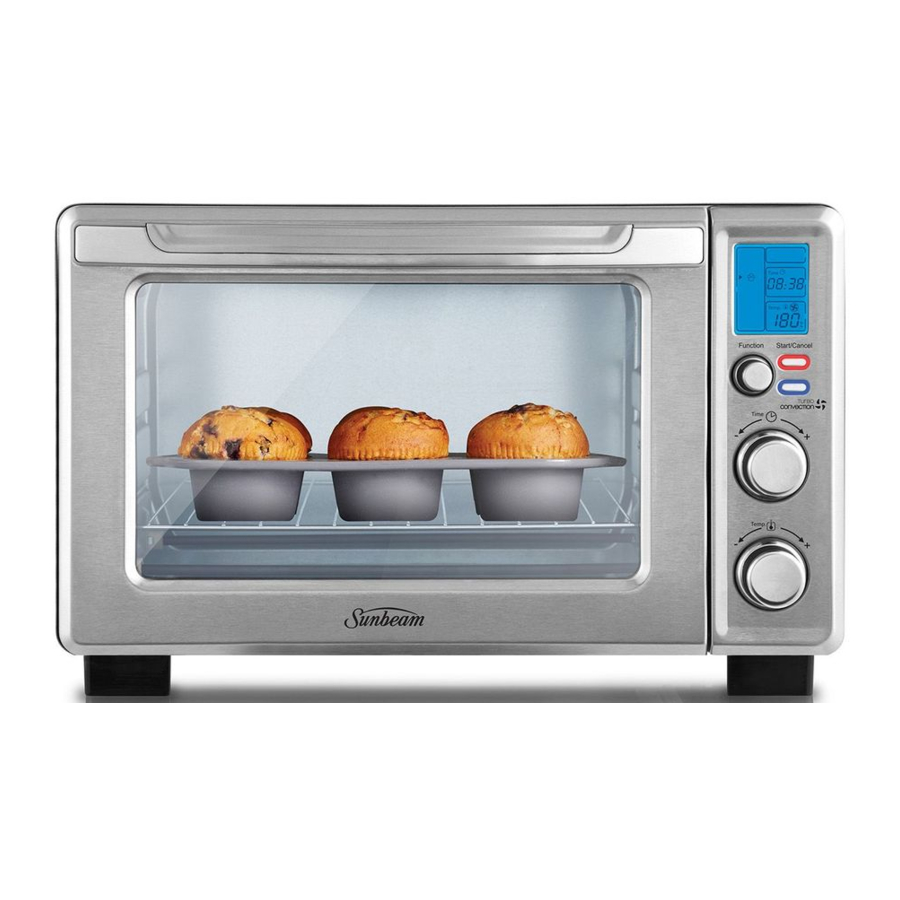
Features of your Device


Function Selector Dial
Select cooking function by turning dial to desired setting.
Turbo Convection Heat Button
Use to activate or cancel turbo convection heat.
Removable Crumb Tray
For crumb or fallen food particles collection. Pulls out for easy cleaning.
 Hot Surfaces
Do Not Touch
This symbol indicates, temperature of accessible surfaces may be high when the appliance is operating and for some time after use.
Aluminium pizza tray
Cooks up to a 30cm pizza to perfection

Enamel baking pan
Enamel baking pan can be used on its own or with the drip tray insert.

Enamel drip tray insert
The drip tray insert sits inside the baking pan and allows fats to drain away for fat-free cooking. The drip tray also helps to prevent splattering.

LCD Display

- Function Indicator – Toast, Crumpet, Pizza, Bake, Grill, Cookies, Roast, Warm, Defrost, Reheat/Preheat
- Function Indicator Arrow
- 1-7 colour shade setting indicator
- Time Indicator
- Turbo Convection Heat Icon
- Temperature Indicator
| Function | Default Temperature | DefaultTime | Default Turbo |
 Toast Toast | Fixed | 7 browning settings | N/A |
 Crumpet Crumpet | Fixed | 7 browning settings | N/A |
 Pizza Pizza | 200˚C | 20 minutes | On |
 Bake Bake | 170˚C | 20 minutes | On |
 Grill Grill | 230˚C | 15 minutes | Off |
 Cookies Cookies | 170˚C | 14 minutes | On |
 Roast Roast | 180˚C | 60 minutes | On |
 Warm Warm | 65˚C | 60 minutes | Off |
 Defrost Defrost | 230˚C | 16 minutes | Off |
 Reheat/Preheat Reheat/Preheat | 165˚C | 5 minutes | Off |
Using your Device
Position the oven on a dry, level surface, ensuring that the ventilation slots on the side and top of the appliance are not obstructed.
Plug the power cord into a 220-240 volt power outlet and turn the power on. The oven will emit 2 long 'beeps' and the LCD screen will illuminate.
Note: When turned on for the first time, your Quick Start Oven may give off vapours for up to 10 minutes. This is due to the initial heating of the materials used. It is safe, not detrimental to the performance of the oven and will not reoccur.

Do not force open the oven door beyond its limit or let the door drop open as this will distort the doors ability to maintain a proper seal.
The LCD screen will be illuminated for 30 seconds and then go out if no other buttons or knobs are pressed or moved.
Note: Once the blue LCD display goes out – you can press or move any button or knob to 'wake up' the display and operate as normal.
- Select Function:
Turn the 'Function' dial to choose one of the following 10 options from the menu:
Toast![]() , Crumpet
, Crumpet ![]() , Pizza
, Pizza ![]() , Bake
, Bake ![]() , Grill
, Grill ![]() , Cookies
, Cookies ![]() , Roast
, Roast ![]() , Warm
, Warm ![]() , Defrost
, Defrost ![]() and Reheat/Preheat
and Reheat/Preheat ![]() . The indicator arrow will move from function to function as the dial is turned.
. The indicator arrow will move from function to function as the dial is turned.
 , Crumpet
  , Bake
  , Grill
  and Reheat/Preheat
  . The indicator arrow will move from function to function as the dial is turned.
Note: If the cooking process is not started or no further buttons or dials are pressed within 30 seconds the blue backlight will turn off.
- Time:
Turn the time![]() dial to increase or decrease the cooking time. The maximum time setting is 60 minutes.
dial to increase or decrease the cooking time. The maximum time setting is 60 minutes. - Temperature:
Turn the temperature![]() dial to increase or decrease the temperature setting.
dial to increase or decrease the temperature setting.
Using the Toast Function
- Turn the Function Dial to the Toast
![]() function. When you select the Toast function, the 1-7 colour shade setting indicator will become visible on the LCD. Both upper and lower heating elements will heat.
function. When you select the Toast function, the 1-7 colour shade setting indicator will become visible on the LCD. Both upper and lower heating elements will heat.
Default Colour Shade Setting is 4. This will be the default every time the oven is unplugged and plugged back in. If the oven remains plugged in since the last time you have selected a different shade for the Toast![]() function (even if not activated), the oven will remember the last shade setting you selected.
function (even if not activated), the oven will remember the last shade setting you selected.
NOTE: The middle rack position is recommended for toasting.
The temperature is not adjustable for the Toast function.
The time adjusts automatically with shade adjustment. The temperature or time is not adjustable during the Toast function.
![]()
- To adjust the shade colour:
Turn the Time![]() Dial to adjust the shade colour. The colour shade-setting indicator will show your selection as you turn the dial.
Dial to adjust the shade colour. The colour shade-setting indicator will show your selection as you turn the dial.
![]()
![]()
- To Start:
Press the Start/Cancel Button to start the toasting process.
The red Start/Cancel Button light will illuminate. The LCD Display will show the Toast Function, the shade colour selection and the countdown time. The oven will begin to operate and the timer will start counting down.
When the Toasting is complete, the oven will emit 3 'beeps'. The LCD and the Start/Cancel Button Light will turn off after 30 seconds.
![]()


NOTE: You can cancel the toasting cycle at any time by pressing the Start/Cancel Button once. The red Start/Cancel Button light will turn off whenever a function has been completed or a function is manually cancelled.
Using the Crumpet Function
- Turn the Function Dial to the Crumpet
![]() function. When you select the Crumpet function, the 1-7 colour shade setting indicator will become visible on the LCD. The upper and lower heating elements will heat. Default Colour Shade Setting is 4. This will be the default every time the oven is unplugged and plugged back on. If the oven remains plugged-in since the last time you have selected a different shade for the Crumpet
function. When you select the Crumpet function, the 1-7 colour shade setting indicator will become visible on the LCD. The upper and lower heating elements will heat. Default Colour Shade Setting is 4. This will be the default every time the oven is unplugged and plugged back on. If the oven remains plugged-in since the last time you have selected a different shade for the Crumpet ![]() function (even if not activated), the oven will remember the last shade setting you selected.
function (even if not activated), the oven will remember the last shade setting you selected.
NOTE: The middle rack position is recommended for crumpet toasting. The temperature is not adjustable for the Crumpet function. The time adjusts automatically with shade adjustment. The temperature or time is not adjustable during the Crumpet function.
![]()
- To adjust the shade colour:
Turn the Time![]() Dial to adjust the shade colour. The colour shade-setting indicator will show your selection as you turn the knob.
Dial to adjust the shade colour. The colour shade-setting indicator will show your selection as you turn the knob.
![]()
![]()
- To Start:
Press the Start/Cancel Button to start the crumpet toasting process. The red Start/Cancel Button light will illuminate. The LCD Display will show the Crumpet Function, the shade colour selection and the countdown time. The oven will begin to work and the timer will start counting down. When the Crumpet toasting is complete, the oven will emit 3 'beeps'. The LCD and the Start/Cancel Button Light will turn off after 30 seconds.
![]()


NOTE: You can cancel the crumpet toasting cycle at any time by pressing the Start/Cancel Button once. The red Start/Cancel Button light will turn off whenever a function has been completed or a function is manually cancelled.
Using the Pizza Function
It is advised to use the Preheat function to heat the oven before using the Pizza function.
- Turn the Function Dial to the Pizza
![]() function. When you select the Pizza function, the Turbo Convection Heat will automatically activate.
function. When you select the Pizza function, the Turbo Convection Heat will automatically activate.
![]()
- If you wish to switch to the regular Pizza function, press the Turbo
![]() button once to turn off the Turbo Convection Heat default selection. The blue light of the Turbo Convection Heat button will turn off. The Turbo Convection Heat Function turns on a built-in fan that circulates hot air in the oven chamber, cooking your food faster and more evenly.
button once to turn off the Turbo Convection Heat default selection. The blue light of the Turbo Convection Heat button will turn off. The Turbo Convection Heat Function turns on a built-in fan that circulates hot air in the oven chamber, cooking your food faster and more evenly.
Default Temperature: 200˚C.
Default Time: 20 minutes.
![]()
- To set the temperature:
Turn the Temperature![]() Dial if you wish to increase or decrease the temperature setting. For the Pizza Function, the temperature can be set from 170˚C to 230˚C in 15-degree increments.
Dial if you wish to increase or decrease the temperature setting. For the Pizza Function, the temperature can be set from 170˚C to 230˚C in 15-degree increments.
![]()
- To set the time:
Turn the Time![]() Dial if you wish to increase or decrease the cooking time. The maximum time setting for Pizza is 60 minutes (1 hour). Once you have selected the desired cooking time, press the Start button to initiate the cooking process.
Dial if you wish to increase or decrease the cooking time. The maximum time setting for Pizza is 60 minutes (1 hour). Once you have selected the desired cooking time, press the Start button to initiate the cooking process.
![]()
- To Start:
Press the Start/Cancel Button to start the cooking process. The red Start/Cancel button light will illuminate. The LCD Display will show the Pizza Function, the countdown time and the selected temperature. The oven will begin to heat and the timer will start counting down. When the Pizza function cycle is complete, the oven will emit 3 'beeps'. The LCD and the Start/ Cancel Button Light will turn off after 30 seconds.
![]()
![]()


NOTE: You can cancel the cooking cycle at any time by pressing the Start/Cancel Button once. The red Start/Cancel Button light will turn off whenever a function has been completed or a function is manually cancelled.
Using the Bake Function
It is advised to use the Preheat function to heat the oven before using the Bake function.
- Turn the Function Dial to the Bake
![]() function. When you select the Bake function, the Turbo Convection Heat will automatically activate.
function. When you select the Bake function, the Turbo Convection Heat will automatically activate.
![]()
- If you wish to switch to the regular Bake function, press the Turbo
![]() button once to turn off the Turbo Convection Heat default selection. The blue light of the Turbo Convection Heat button will turn off. The Turbo Convection Heat Function turns on a built-in fan that circulates hot air in the oven chamber, cooking your food faster and more evenly.
button once to turn off the Turbo Convection Heat default selection. The blue light of the Turbo Convection Heat button will turn off. The Turbo Convection Heat Function turns on a built-in fan that circulates hot air in the oven chamber, cooking your food faster and more evenly.
Default Temperature: 170˚C.
Default Time: 20 minutes.
![]()
- To set the temperature:
Turn the Temperature![]() Dial if you wish to increase or decrease the temperature setting. For the Bake Function, the temperature can be set from 65˚C to 230˚C in 1-degree increments.
Dial if you wish to increase or decrease the temperature setting. For the Bake Function, the temperature can be set from 65˚C to 230˚C in 1-degree increments.
![]()
- To set the time:
Turn the Time![]() Dial if you wish to increase or decrease the cooking time. The maximum time setting for Bake is 60 minutes (1 hour). Once you have selected the desired cooking time, press the Start button to initiate the pre-heating process.
Dial if you wish to increase or decrease the cooking time. The maximum time setting for Bake is 60 minutes (1 hour). Once you have selected the desired cooking time, press the Start button to initiate the pre-heating process.
![]()
- To Start:
Press the Start/Cancel Button to start the cooking process.
The red Start/Cancel button light will illuminate. The LCD Display will show the Bake Function, the countdown time and the selected temperature. The oven will begin to heat and the timer will start counting down. When the Bake function cycle is complete, the oven will emit 3 'beeps'. The LCD and the Start/Cancel Button Light will turn off after 30 seconds.
![]()
![]()


NOTE: You can cancel the cooking cycle at any time by pressing the Start/Cancel Button once. The red Start/Cancel Button light will turn off whenever a function has been completed or a function is manually cancelled.
Using the Grill Function
It is advised to use the Preheat function to heat the oven before using the Bake function.
- Turn the Function Dial to the Grill
![]() function. When you select the Grill function, the upper heating elements will heat. Place the rack on the highest setting and place food onto the enamel drip tray with rack insert for best results.
function. When you select the Grill function, the upper heating elements will heat. Place the rack on the highest setting and place food onto the enamel drip tray with rack insert for best results.
Default Temperature: 230˚C.
Default Time: 15 minutes.
![]()
- To set the temperature:
Turn the Temperature![]() Dial if you wish to increase or decrease the temperature setting. For the Grill Function, the temperature can be set from 200˚C to 230˚C in 15-degree increments.
Dial if you wish to increase or decrease the temperature setting. For the Grill Function, the temperature can be set from 200˚C to 230˚C in 15-degree increments.
![]()
- To set the time:
Turn the Time![]() Dial if you wish to increase or decrease the cooking time. The maximum time setting for Grill is 60 minutes (1 hour). Once you have selected the desired cooking time, press the Start button to initiate the pre-heating process.
Dial if you wish to increase or decrease the cooking time. The maximum time setting for Grill is 60 minutes (1 hour). Once you have selected the desired cooking time, press the Start button to initiate the pre-heating process.
![]()
- To start:
Press the Start/Cancel Button to start the grilling process. The red Start/Cancel button light will illuminate. The LCD Display will show the Grill Function, the countdown time and the selected temperature. The oven will begin to heat and the timer will start counting down. When the Grill function cycle is complete, the oven will emit 3 'beeps'. The LCD and the Start/Cancel Button Light will turn off after 30 seconds.
![]()
![]()


NOTE: You can cancel the cooking cycle at any time by pressing the Start/Cancel Button once. The red Start/Cancel Button light will turn off whenever a function has been completed or a function is manually cancelled.
Using the Cookies Function
It is advised to use the Preheat function to heat the oven before using the Cookies function.
- Turn the Function Dial to the Cookies
![]() function. When you select the Cookies function, the Turbo Convection Heat will automatically activate.
function. When you select the Cookies function, the Turbo Convection Heat will automatically activate.
![]()
- If you wish to switch to the regular Cookies function, press the Turbo
![]() button once to turn off the Turbo Convection Heat default selection. The blue light of the Turbo Convection Heat button will turn off. The Turbo Convection Heat Function turns on a built-in fan that circulates hot air in the oven chamber, cooking your food faster and more evenly.
button once to turn off the Turbo Convection Heat default selection. The blue light of the Turbo Convection Heat button will turn off. The Turbo Convection Heat Function turns on a built-in fan that circulates hot air in the oven chamber, cooking your food faster and more evenly.
Default Temperature: 170˚C.
Default Time: 14 minutes.
![]()
- To set the temperature:
Turn the Temperature![]() Dial if you wish to increase or decrease the temperature setting. For the Cookies Function, the temperature can be set from 65˚C to 230˚C in 1-degree increments.
Dial if you wish to increase or decrease the temperature setting. For the Cookies Function, the temperature can be set from 65˚C to 230˚C in 1-degree increments.
![]()
- To set the time:
Turn the Time![]() Dial if you wish to increase or decrease the cooking time. The maximum time setting for Cookies is 60 minutes (1 hour). Once you have selected the desired cooking time, press the Start button to initiate the pre-heating process.
Dial if you wish to increase or decrease the cooking time. The maximum time setting for Cookies is 60 minutes (1 hour). Once you have selected the desired cooking time, press the Start button to initiate the pre-heating process.
![]()
- To Start:
Press the Start/Cancel Button to start the cooking process.
The red Start/Cancel button light will illuminate. The LCD Display will show the Cookies Function, the countdown time and the selected temperature. The oven will begin to heat and the timer will start counting down. When the Cookies function cycle is complete, the oven will emit 3 'beeps'. The LCD and the Start/Cancel Button Light will turn off after 30 seconds.
![]()
![]()


NOTE: You can cancel the cooking cycle at any time by pressing the Start/Cancel Button once. The red Start/Cancel Button light will turn off whenever a function has been completed or a function is manually cancelled.
Using the Roast Function
- Turn the Function Dial to the Roast
![]() function. When you select the Roast function, the Turbo Convection Heat will automatically activate.
function. When you select the Roast function, the Turbo Convection Heat will automatically activate.
![]()
- If you wish to switch to the regular Roast function, press the Turbo
![]() button once to turn off the Turbo Convection Heat default selection. The blue light of the Turbo Convection Heat button will turn off. The Turbo Convection Heat Function turns on a built-in fan that circulates hot air in the oven chamber, cooking your food faster and more evenly.
button once to turn off the Turbo Convection Heat default selection. The blue light of the Turbo Convection Heat button will turn off. The Turbo Convection Heat Function turns on a built-in fan that circulates hot air in the oven chamber, cooking your food faster and more evenly.
Default Temperature: 180˚C.
Default Time: 60 minutes.
![]()
- To set the temperature:
Turn the Temperature![]() Dial if you wish to increase or decrease the temperature setting. For the Roast Function, the temperature can be set from 65˚C to 230˚C in 1-degree increments.
Dial if you wish to increase or decrease the temperature setting. For the Roast Function, the temperature can be set from 65˚C to 230˚C in 1-degree increments.
![]()
- To set the time:
Turn the Time![]() Dial if you wish to increase or decrease the cooking time. The maximum time setting for Roast is 60 minutes (1 hour). Once you have selected the desired cooking time, press the Start button to initiate the pre-heating process.
Dial if you wish to increase or decrease the cooking time. The maximum time setting for Roast is 60 minutes (1 hour). Once you have selected the desired cooking time, press the Start button to initiate the pre-heating process.
![]()
- To Start:
Press the Start/Cancel Button to start the cooking process. The red Start/Cancel button light will illuminate. The LCD Display will show the Roast Function, the countdown time and the selected temperature. The oven will begin to heat and the timer will start counting down. When the Roast function cycle is complete, the oven will emit 3 'beeps'. The LCD and the Start/ Cancel Button Light will turn off after 30 seconds.
![]()
![]()


NOTE: You can cancel the cooking cycle at any time by pressing the Start/Cancel Button once. The red Start/Cancel Button light will turn off whenever a function has been completed or a function is manually cancelled.
Using the Warm Function
- Turn the Function Dial to the Warm
![]() function. When you select the Warm function, the lower heating elements will heat.
function. When you select the Warm function, the lower heating elements will heat.
![]()
Default Temperature: 65˚C.
Default Time: 60 minutes.
You may manually activate the Turbo Convection Heat by pressing the Turbo![]() button once to turn it on. The blue light of the Turbo button will turn on.
button once to turn it on. The blue light of the Turbo button will turn on.
![]()
- To set the temperature:
Turn the Temperature![]() Dial if you wish to increase or decrease the temperature setting. For the Warm Function, the temperature can be set from 65˚C to 95˚C in 15-degree increments.
Dial if you wish to increase or decrease the temperature setting. For the Warm Function, the temperature can be set from 65˚C to 95˚C in 15-degree increments.
![]()
- To set the time:
Turn the Time![]() Dial if you wish to increase or decrease the cooking time. The maximum time setting for Warm is 60 minutes (1 hour). Once you have selected the desired cooking time, press the Start button to initiate the pre-heating process.
Dial if you wish to increase or decrease the cooking time. The maximum time setting for Warm is 60 minutes (1 hour). Once you have selected the desired cooking time, press the Start button to initiate the pre-heating process.
![]()
- To Start:
Press the Start/Cancel Button to start the warming process.
The red Start/Cancel button light will illuminate. The LCD Display will show the Warm Function, the countdown time and the selected temperature. The oven will begin to heat and the timer will start counting down. When the Warm function cycle is complete, the oven will emit 3 'beeps'. The LCD and the Start/Cancel Button Light will turn off after 30 seconds.
![]()
![]()


NOTE: You can cancel the warming cycle at any time by pressing the Start/Cancel Button once. The red Start/Cancel Button light will turn off whenever a function has been completed or a function is manually cancelled.
Using the Defrost Function
- Turn the Function Dial to the Defrost
![]() function.
function.
![]()
Default Temperature: 230˚C.
Default Time: 16 minutes.
You may manually activate the Turbo Convection Heat by pressing the Turbo![]() button once to turn it on. The blue light of the Turbo button will turn on.
button once to turn it on. The blue light of the Turbo button will turn on.
![]()
- To set the temperature:
Turn the Temperature![]() Dial if you wish to increase or decrease the temperature setting. For the Defrost Function, the temperature can be set from 65˚C to 230˚C in 1-degree increments.
Dial if you wish to increase or decrease the temperature setting. For the Defrost Function, the temperature can be set from 65˚C to 230˚C in 1-degree increments.
![]()
- To set the time:
Turn the Time![]() Dial if you wish to increase or decrease the cooking time. The maximum time setting for Defrost is 60 minutes (1 hour). Once you have selected the desired cooking time, press the Start button to initiate the pre-heating process.
Dial if you wish to increase or decrease the cooking time. The maximum time setting for Defrost is 60 minutes (1 hour). Once you have selected the desired cooking time, press the Start button to initiate the pre-heating process.
![]()
- To Start:
Press the Start/Cancel Button to start the defrosting process.
The red Start/Cancel button light will illuminate. The LCD Display will show the Defrost Function, the countdown time and the selected temperature. The oven will begin to heat and the timer will start counting down. When the Defrost function cycle is complete, the oven will emit 3 'beeps'. The LCD and the Start/Cancel Button Light will turn off after 30 seconds.
![]()
![]()


NOTE: You can cancel the Defrost cycle at any time by pressing the Start/Cancel Button once. The red Start/Cancel Button light will turn off whenever a function has been completed or a function is manually cancelled.
Using the Reheat /Preheat Function
This function can be used to reheat food or to preheat the oven before using one of the other function. Preheating the oven is advised before using the Pizza, Bake and Cookies functions.
- Turn the Function Dial to the Reheat/Preheat
![]() function.
function.
![]()
Default Temperature: 165˚C.
Default Time: 5 minutes.
You may manually activate the Turbo Convection Heat by pressing the Turbo![]() button once to turn it on. The blue light of the Turbo button will turn on.
button once to turn it on. The blue light of the Turbo button will turn on.
![]()
- To set the temperature:
Turn the Temperature![]() Dial if you wish to increase or decrease the temperature setting. For the Reheat/Preheat Function, the temperature can be set from 65˚C to 230˚C in 1-degree increments.
Dial if you wish to increase or decrease the temperature setting. For the Reheat/Preheat Function, the temperature can be set from 65˚C to 230˚C in 1-degree increments.
![]()
- To set the time:
Turn the Time![]() Dial if you wish to increase or decrease the cooking time. The maximum time setting for Reheat/ Preheat is 60 minutes (1 hour). Once you have selected the desired cooking time, press the Start button to initiate the pre-heating process.
Dial if you wish to increase or decrease the cooking time. The maximum time setting for Reheat/ Preheat is 60 minutes (1 hour). Once you have selected the desired cooking time, press the Start button to initiate the pre-heating process.
![]()
- To Start:
Press the Start/Cancel Button to start the cooking process.
The red Start/Cancel button light will illiminate. The LCD Display will show the Reheat/Preheat Function, the countdown time and the selected temperature. The oven will begin to heat and the timer will start counting down. When the Reheat function cycle is complete, the oven will emit 3 'beeps'. The LCD and the Start/Cancel Button Light will turn off after 30 seconds.
![]()
![]()


NOTE: You can cancel the Reheat/Preheat cycle at any time by pressing the Start/Cancel Button once. The red Start/Cancel Button light will turn off whenever a function has been completed or a function is manually cancelled.
Rack Positioning Guide
- To accommodate a wide variety of foods the oven has three rack positions. The rack can be inserted in the oven in the upper or lower rack guides. (See diagram below)

- Before removing the rack allow the unit to cool.
- To remove the rack, open the oven door and pull the rack towards the front of the oven. The rack will slide on the rack guides on the inside of the oven.

NOTE: the oven rack may tilt downward causing food to shift when the rack is pulled out, proceed with caution.
- Positioning of the oven rack will depend on the size of the food and desired browning. Move the rack to the lower rack position to prevent top browning and move the rack to the upper rack position to prevent bottom browning.
Care and Cleaning
- Always turn the power off and remove the plug from power outlet after use and before cleaning. Allow the oven to cool before cleaning.
- It is recommended that you clean the oven after each use to prevent a build up of grease and to avoid unpleasant odours.
NOTE: Do not clean any part of the oven in the dishwasher.
- The wire rack, baking pan and pizza tray, may be washed in warm soapy water and rinsed.
NOTE: Never immerse the oven in water.
- The interior walls and ceiling of the oven can be wiped with a mild detergent and a damp cloth.
- To clean the exterior of the oven, wipe the walls with a cloth dampened with mild detergent. Polish with a soft dry cloth.
- To clean the glass door, wipe with a damp sponge and dry.

Documents / ResourcesDownload manual
Here you can download full pdf version of manual, it may contain additional safety instructions, warranty information, FCC rules, etc.
Advertisement
Thank you! Your question has been received!


Need Assistance?
Do you have a question about the BT7100 that isn't answered in the manual? Leave your question here.