Table of Contents
Advertisement
Advertisement
Table of Contents

Related Manuals for Olivetti d-Copia 18MF


Summary of Contents for Olivetti d-Copia 18MF
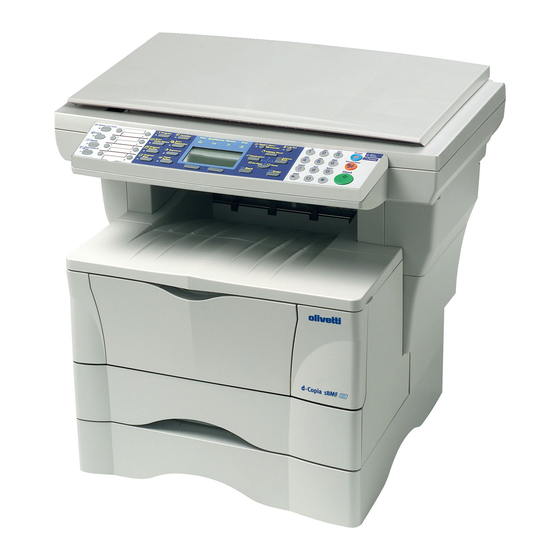
- Page 1 d-Copia 18MF d-Copia 18MF d-Copia 18MF d-Copia 18MF Operation Guide...
- Page 2 PUBLICATION ISSUED BY: Olivetti S.p.A. Gruppo Telecom Italia Via Jervis, 77 - 10015 Ivrea (ITALY) www.olivetti.com Copyright © 2005, Olivetti All rights reserved mark affixed to the product certifies that the product satisfies the basic quality May 2005 requirements. The manufacturer reserves the right to carry out modifications to the product described in this manual at any time and without any notice.
- Page 3 Making Full Use of This Machine’s Advanced Functions Enlarging/reducing copies to Copying at a previously Making clear reproductions a desired size between 50 % registered zoom ratio of photographs Image and 200 % Zoom mode Standard Zoom mode quality selection (Refer to (Refer to page 4-4) (Refer to page 4-4) page 4-1)
- Page 4 • Document Processor (Refer Changing the operational A full range of optional to the Advanced Operation environment by each equipment is available Guide) individual user User Login (Refer to the Advanced Operation Guide) • Paper Feeder (Refer to the • Expansion Memory (Refer to •...
-
Page 5: Table Of Contents
Contents Legal and Safety Machine Parts Main Body ..............1-1 Operation Panel. - Page 6 Scan to Folder ............. 4-11 Recipient Selection from One-Touch Keys .
-
Page 7: Legal And Safety
Legal and Safety CAUTION: No liability is assumed for any damage caused by improper installation. Notice The information in this guide is subject to change without notification. Additional pages may be inserted in future editions. The user is asked to excuse any technical inaccuracies or typographical errors in the present edition. - Page 8 Legal and Safety Legal Restriction On Copying It may be prohibited to copy copyrighted material without permission of the copyright owner. It is prohibited under any circumstances to copy domestic or foreign currencies. Copying other items may be prohibited. Agfa Japan License Agreement “Software”...
-
Page 9: Energy Star Program
Legal and Safety Your exclusive remedy and the sole liability of Agfa Japan in connection with the Software and Typefaces is repair or replacement of defective parts, upon their return to Agfa Japan. In no event will Agfa Japan be liable for lost profits, lost data, or any other incidental or consequential damages, or any damages caused by abuse or misapplication of the Software and Typefaces. - Page 10 Legal and Safety Paper Recycling The Energy Star Program encourages the use of environmentally friendly recycled paper. Your sales or service representative can provide information about recommended paper types. Please read this Operation Guide before using the machine. Keep it close to the machine for easy reference.
- Page 11 Legal and Safety The following symbols indicate that the related section includes information on actions which must be performed. Specifics of the required action are indicated inside the symbol..[Alert of required action] ..[Remove the power plug from the outlet] ..
-
Page 12: Caution Labels
Legal and Safety IMPORTANT - PLEASE READ FIRST. CAUTION LABELS Caution labels have been attached to the machine at the following locations for safety purposes. Be sufficiently careful to avoid fire or electric shock when removing a paper jam or when replacing toner. -
Page 13: Installation Precautions
Legal and Safety Installation Precautions Environment CAUTION: Avoid placing the machine on or in locations which are unstable or not level. Such locations may cause the machine to fall down or fall over. This type of situation presents a danger of personal injury or damage to the machine. -
Page 14: Handling Of Plastic Bags
Legal and Safety During copying, some ozone is released, but the amount does not cause any ill effect to one's health. If, however, the machine is used over a long period of time in a poorly ventilated room or when making an extremely large number of copies, the smell may become unpleasant. -
Page 15: Precautions For Use
Legal and Safety Precautions for Use Cautions when Using the Machine WARNING: Do not place metallic objects or containers with water (flower vases, flower pots, cups, etc.) on or near the machine. This situation presents a danger of fire or electrical shock should they fall inside. Do not remove any of the covers from the machine as there is a danger of electrical shock from high voltage parts inside the machine. - Page 16 Legal and Safety CAUTION Do not pull the power cord when removing it from the outlet. If the power cord is pulled, the wires may become broken and there is a danger of fire or electrical shock. (Always grasp the power plug when removing the power cord from the outlet.) Always remove the power plug from the outlet when moving the machine.
-
Page 17: Cautions When Handling Consumables
Legal and Safety CAUTION Use of controls or adjustments or performance of procedures other than those specified herein may result in hazardous radiation exposure. Do not look directly at the light from the scanning lamp as it may cause your eyes to feel tired or painful. - Page 18 Legal and Safety Laser Safety (Europe) Laser radiation could be hazardous to the human body. For this reason, laser radiation emitted inside this machine is hermetically sealed within the protective housing and external cover. In the normal operation of the product by user, no radiation can leak from the machine.
- Page 19 Legal and Safety Safety Instructions Regarding the Disconnection of Power (Europe) CAUTION: The power plug is the main isolation device! Other switches on the equipment are only functional switches and are not suitable for isolating the equipment from the power source. VORSICHT: Der Netzstecker ist die Hauptisoliervorrichtung! Die anderen Schalter auf dem Gerät sind nur Funktionsschalter und können nicht verwendet werden, um...
- Page 20 Legal and Safety Introduction This Basic Operation Guide has following chapters: Machine Parts identifies the names and functions of the machine and operation panel. Loading Paper - contains explanations on loading paper and attaching the Face-up Tray. Preparations - contains information on setting the machine up ready for use. Basic Operation - explains how to make simple copies and prints and how to scan originals.
- Page 21 Legal and Safety Network tool for Clients Operation Guide Network tool for Clients is a network printing utility intended to monitor and configure the printing system. This guide describes how to install and operate Network tool for Clients. This guide is stored on the CD-ROM as a PDF document. Network tool for Direct Printing Operation Guide Network tool for Direct Printing is a utility that allows you to directly print PDF files without starting Adobe Acrobat by directly sending a PDF file through the Windows spooler.
-
Page 23: Machine Parts
1 Machine Parts Main Body Original Cover Platen Original Size Indicator Plate Operation Panel Top Cover Front Cover Process Unit Charger Cleaner Lock Lever Toner Container Toner Container Release Lever OPERATION GUIDE... - Page 24 Machine Parts Output Tray Stopper Extension Lock Paper Stopper Paper Width Guides Cassette Paper Width Guides (MP Tray) MP (Multi-Purpose) Tray MP Tray Extension OPERATION GUIDE...
- Page 25 Machine Parts Document Processor Connector Parallel Interface Connector USB Interface Connector Right Cover Anchor Pin Network Interface Connector Rear Cover (Face-up Tray) Power Switch Power Cord Receptacle OPERATION GUIDE...
-
Page 26: Operation Panel
Machine Parts Operation Panel Status/Job Cancel Key and Indicator Send Key and Indicator Copy Key and Indicator Original Quality Key and Indicator One-touch Keys (1 to 8) Original Size Key and Indicator Scan Color Select Key and Indicator Exposure Key and Indicator Program Key and Indicator Paper Select Key and Indicator Scan Resolution Key and Indicator... -
Page 27: Message Display
Machine Parts Message Display The following examples explain the messages and icons used on the message display. Ready to copy. Ready to send. Dest. :h_pttr@owl-net.net 100% Left Zoom Subject Placemnt Copier Screen Send Screen Reference Meaning number Indicates the current status of the machine. Also displays the title of the current menu whenever the operation panel is being used. - Page 28 Machine Parts OPERATION GUIDE...
-
Page 29: Loading Paper
2 Loading Paper Paper can be loaded into the cassette or on the MP tray. For details on the media types that can be used, refer to the Advanced Operation Guide. After taking new paper out of its packet, fan it to separate the sheets before loading it. - Page 30 Loading Paper Adjust the paper width by pressing in on the release buttons and sliding the guides to fit the width of the paper. Place the paper in the cassette, with side to be printed downward, so that the leading edge is aligned against the paper stopper.
-
Page 31: Adjusting The Paper Stopper For Folio Or Oficio Ii Size Page
Loading Paper Adjusting the Paper Stopper for Folio or Oficio II Size Page Slide the paper stopper towards the rear of the cassette until the grooves that are cut into the paper stopper are aligned with the rear edge of the cassette. Remove the stopper extension lock from the paper stopper. - Page 32 Loading Paper Open the MP tray towards you until it click into place. Pull out the MP tray extension and then flip it open. Adjust the paper width guides to fit the width of the paper. Slide the paper, with the side to be copied or printed onto is facing upward, along the paper width guides, as far as it will go.
-
Page 33: Using The Face-Up Tray
Loading Paper Using the Face-up Tray When copying and printing onto special paper, such as thick paper (90 to 163 g/m²), and transparencies, always use the face-up tray. The face-up tray has a storage capacity of approximately 30 sheets of standard paper (80 g/m²) but only 1 sheet of special paper should be stored there at one time. - Page 34 Loading Paper OPERATION GUIDE...
-
Page 35: Preparations
3 Preparations Connecting the Cables The machine can be connected to a network or directly to a computer. Connecting the Network Cable When connecting the machine to the network, use the appropriate network cable (10BASE-T or 100BASE-TX). Turn the machine off, and remove the power cord from the outlet. -
Page 36: Connecting The Power Cord
Preparations Connect the printer cable to the appropriate connector located at the rear side of the Parallel machine. Cable Cable Connect the other end of the printer cable to the appropriate connector on your computer. Connecting the Power Cord Connect the power cord to the rear of the machine. -
Page 37: Accessing Menu Items
Preparations Accessing Menu Items When you configure the machine, you do so by accessing a menu item and making your setting from there. Each configuration instruction in this guide tells you to access the menu item and provides a route map to direct you to that item. An example of a route map and its significance is shown below. -
Page 38: Network Settings
Preparations Network Settings Registering the IP Address Check the IP address with your network administrator before performing this setting. This will only function if the DHCP setting is Off and the TCP/IP setting is On. Any changes made to the network settings will become valid after you turn the power to the machine off and then back on again. -
Page 39: Registering The Default Gateway
Preparations Registering the Default Gateway Access Default Gateway. System Menu/ If you are unsure how to use this route map refer to Accessing Menu Items on Counter page 3-3. Use the numeric keys to enter each segment of the Default Gateway in turn, System Setting pressing or [*.] to move between segments. -
Page 40: Summer Time Setting
Preparations Summer Time Setting You can also make this setting using embedded Web Server. For details on embedded Web Server, refer to the Advanced Operation Guide. Access Summer Time. System Menu/ Counter If you are unsure how to use this route map refer to Accessing Menu Items on page 3-3. -
Page 41: Default Operation Mode
Preparations Default Operation Mode Use the following procedure to set the operation mode selected when the machine is powered on. Modes available are Copy Operation, Send Operation or Status Operation. It is recommended you select the most commonly used mode as the default. -
Page 42: Character Entry
Preparations Character Entry To enter an e-mail address, etc., the characters are entered using the Numeric Keys. To move the cursor, use the , and keys. Keys Used for Entering Characters Address Entry: h_pttr@ Cancel Text Cursor — Characters are entered by the cursor. To delete a character, move the cursor to the corresponding character and then press Stop/Clear. -
Page 43: Available Characters
Preparations Available Characters The following characters types are available. Press right Select to switch between types of characters. Type Available Characters Alphabetic/ Refer to List of Character Assignments below. Symbol Text Numeric Text Symbol Special characters, etc., can be entered from the Symbol List. Text Symbols ”... -
Page 44: Entering Characters
Preparations Entry mode Available characters Alphabetic/Symbol w x y z W X Y Z 9 Numeric Alphabetic/Symbol . , - _ ’ ! ? (space) 0 Numeric Alphabetic/Symbol Switch between upper-/lowercase Numeric * or . (decimal point) Alphabetic/Symbol/ Numeric Entering Characters This section explains the procedure to enter characters using the key pad. -
Page 45: Selecting Message Language
Preparations Selecting Message Language You can select the language of the messages display by following the procedure in the Advanced Operation Guide. You can optionally download messages in other languages. Contact your dealer for information. The following languages are available for selection: English, Français, Deutsch, Italiano, Nederlands, Español, Português, and the downloaded languages. - Page 46 Preparations 3-12 OPERATION GUIDE...
-
Page 47: Basic Operation
4 Basic Operation Basic Copying Procedure To change the default settings for the machine, refer to the Advanced Operation Guide. Turn the machine on. At the end of warm-up, the Start indicator will light. Select from the copier’s various functions. Press Paper Select to select the paper feed location, and press Enter. - Page 48 Basic Operation The copy exposure can be adjusted either automatically or manually. This machine is initially set for manual exposure adjustment. Normally there will be no need for you to adjust the copy exposure. Enter the number of copies required. Up to 999 can be entered.
-
Page 49: Canceling Copy
Basic Operation Canceling Copy Press Stop/Clear. The Pausing Job List screen will be displayed. Press to select the copying job to cancel. Press left Select. Cancel Job. Are you sure? is displayed. Press left Select. Canceling is displayed and the copying is canceled. The Pausing Job List screen is displayed. -
Page 50: Zoom Copies
Basic Operation Zoom Copies It is possible to change the zoom ratio in order to make copies of an enlarged or reduced size. The following modes are available for selecting the desired zoom ratio. Mode Description Standard Zoom Copies can be made at one of the fixed zoom ratios. The following ratios are registered in the machine: 200 %, 141 % (A5 A4), 129 % (Statement... -
Page 51: Variable Zoom
Basic Operation Variable Zoom Perform the following procedure to make settings for the Variable Zoom mode. Press Copy. Press left Select. Press to select Zoom Entry. Press Enter. Press , as appropriate, to change the displayed zoom ratio to the desired ratio. -
Page 52: Collate Mode
Basic Operation Collate Mode Multiple originals can be collated. To use the collate mode turn the continuous scan function on. For details, refer to the Advanced Operation Guide. Originals Copies Press Copy. Press Function. Press to select Collate. Press Enter. Press to select On. -
Page 53: Print Override Mode
Basic Operation Print Override Mode The print override mode temporarily stops processing of the current job to enable copies of a more urgent job to be made. After the print override processing is completed, the interrupted job will be resumed. Press Function. -
Page 54: Low Power Mode
Basic Operation Low Power Mode The machine has a Low Power Timer that is used to conserve power when the machine is not in operation. You can adjust the length of time (between 1 minute and 240 minutes) the machine waits before entering low power mode. The factory default time is 5 minutes. -
Page 55: Basic Scanning Procedure
Basic Operation Basic Scanning Procedure You can scan documents and send them to e-mail addresses or a folder. The folder can be on a PC or FTP server. The recipients address can be entered from an internal address book, external address book (LDAP) or using a one-touch key. Refer to the Advanced Operation Guide for the registration method to an address book and one-touch keys. - Page 56 Basic Operation Press to select E-mail and press Enter. Enter the destination e-mail address. Refer to Character Entry on page 3-8 for information on entering characters. Once you have completed entering the address, press Enter. To enter a subject and/or message, press right Select. If you do not need subject and message, go directly to step 10 without pressing right Select.
-
Page 57: Scan To Folder
Basic Operation Press Enter. Press to select E-mail. Press Enter. Completed will appear and the message display returns to the basic screen. Place the original on the platen and press Start. The scanned image is sent to the destination e-mail address as an attachment. The image (PDF) is named as doc plus the date and time at which it was transmitted. - Page 58 Basic Operation Enter the login user name and press Enter. If you also have a domain name, enter it after the user name. Enter the login password and press Enter. Press Enter. Place the original on the platen and press Start. The scanned image is sent to the destination e-mail address as an attachment.
-
Page 59: Recipient Selection From One-Touch Keys
Basic Operation Place the original on the platen and press Start. The scanned image is sent to the destination e-mail address as an attachment. The image (PDF) is named as doc plus the date and time at which it was transmitted. For example, a pdf attachment named doc04252005101530.pdf is a file sent on 2005 April 25th at 10:15:30. -
Page 60: Basic Printing Procedure
Basic Operation Basic Printing Procedure Be sure that the machine’s printer cable or network cable and the power cord are properly connected. Installing the Printer Driver To use the printer function, the printer driver must be installed. For information on how to install the printer driver software, refer to the KM Driver Operation Guide. -
Page 61: Maintenance
5 Maintenance Cleaning the Machine CAUTION: For safety purposes, always remove the power cord from the outlet when performing cleaning. Always use a soft cloth dampened with alcohol or mild detergent to clean the machine. Open the original cover and wipe the platen and the original cover, as shown in the illustration. -
Page 62: Replacing Toner Container
Maintenance Replacing Toner Container Open the top cover. Open the front cover. Lift the process unit, together with the toner container, out of the machine and place it on a clean, level surface. Do not stand the process unit on end and never expose the drum to normal lighting for more than five minutes. - Page 63 Maintenance Shake the new toner container horizontally 5 or 6 times to distributed the toner inside. Remove the orange protective seal. Align the knob on the left side of the container with the groove in the process unit and insert it. Push on the PUSH HERE marks until the container clicks into place.
-
Page 64: Cleaning The Charger And The Registration Roller
Maintenance Cleaning the Charger and the Registration Roller Slide the charger cleaner knob backwards and forwards 2 to 3 times, then return it to the CLEANER HOME POSITION. If the charger cleaner is not properly restored a black band will appear on copies. Use the cleaning cloth supplied to clean paper dust and dirt accumulated on the metal registration roller (A) inside the... -
Page 65: Reinstalling The Transport Pin
Maintenance Reinstalling the Transport Pin Follow the instructions below to reinstall the transport pin before moving the machine Access Transport mode. System Menu/ Counter If you are unsure how to use this route map refer to Accessing Menu Items on page 3-3. - Page 66 Maintenance OPERATION GUIDE...
-
Page 67: Troubleshooting
6 Troubleshooting General Guidelines The table below provides basic solutions for problems you may encounter with the machine. We suggest you consult this table to troubleshoot the problems before calling for service. Symptom Check Item Corrective Action Reference Nothing lights on the Is the power plug connected to Connect the plug to an AC —... - Page 68 Troubleshooting Symptom Check Item Corrective Action Reference Black or white bands Is the charger cleaner in the Remove the process unit and page 5-4 on copies. CLEANER HOME POSITION? return the charger cleaner to its home position. If you are using the optional Clean the slit glass.
-
Page 69: Maintenance And Error Messages
Troubleshooting Maintenance and Error Messages When any of the following messages appears on the message display, perform the procedure provided below. Message Procedure Reference Add paper to (paper source). The paper has run out. Add paper to the paper source; page 2-1 Casset. - Page 70 Troubleshooting Message Procedure Reference Insert Cassette1. The paper feeder was selected, but cassette 1 is not — installed properly. Push the upper cassette securely into the machine. Insufficient memory. Memory shortage occurred during processing of other — jobs. Unable to start job. KPDL error.
- Page 71 Troubleshooting Message Procedure Reference Replace Toner. Toner has run out so further copying or printing is page 5-1 impossible. Replace the toner container using a new toner kit. Scan memory overflow. Job Press right Select to cancel the copying procedure. page 4-3, is canceled.
- Page 72 Troubleshooting Message Procedure Reference Send error. 3101: SMTP Authentication error. Consult with your Advanced network administrator to verify that the Login Account Operation #### Name and Login Password required for SMTP Guide Authentication are correct. The SMTP server or FTP server is not operating properly.
-
Page 73: Paper Jam
Troubleshooting Paper Jam If a paper jam occurs, a message will be displayed about the jam and copying or printing will stop. Leave the power switch on and to remove the jammed paper refer to MP Tray and Inside Machine on page 6-7. Jam Location Indicators Indicator Meaning... - Page 74 Troubleshooting Open the front cover. Take the process unit out of the machine. If the leading edge of the jammed paper is visible, pull it out towards you. If the paper is not visible, perform the Cassette procedure. If the paper has been fed to the rear of the machine but the leading edge is not visible, perform the Face-up Tray procedure.
-
Page 75: Cassette
Troubleshooting Cassette Pull out the cassette that is in use. Remove the jammed paper. If a paper jam occurs in the optional paper feeder, the procedure is the same as for the cassette. Push the cassette back in securely. The misfeed indications will disappear. -
Page 76: Optional Document Processor
Troubleshooting Close the rear cover. Open and then close the top cover. The jam indications will disappear. Optional Document Processor Remove all of the originals from the document feed tray. Open the left cover of the document processor. Remove the jammed original. If the original is caught in the rollers or difficult to remove, proceed to the next step. - Page 77 Troubleshooting Open the document processor. Remove the jammed original. Close the document processor. Place the originals. OPERATION GUIDE 6-11...
- Page 78 Troubleshooting 6-12 OPERATION GUIDE...
-
Page 79: Specifications
7 Specifications NOTE: Specifications are subject to change without notice. Main Body Item Specification Printing system Electro-photographic Originals Sheets of paper, books and 3-dimensional objects Copy sizes Cassette A4, A5, ISO B5, JIS B5, Folio, 16K, 8 1/2 × 14 inches (Legal), 8 1/2 ×... -
Page 80: Copying Functions
Specifications Item Specification Memory Standard model 96 MB (64 MB fixed and 32 MB detachable) Option memory Up to 256 MB to replace 32 MB Ambient conditions Temperature 10 to 32.5 °C Humidity 20 to 80 %RH Altitude Maximum 2,000 m (6,500 feet) Illumination 1,500 lux or less Power source... -
Page 81: Printing Functions
Specifications Printing Functions Item Specification Printing speed 8 1/2 × 11 inches (Letter)/A4: 18 copies/min. A5: 10 copies/min. 8 1/2 × 14 inches (Legal): 15 copies/min. First print 8 1/2 × 11 inches (Letter)/A4: Approx. 8 sec. Resolution 300, 600 dpi, and Fast 1200 Compatible operation system Microsoft Windows 95/98/Me Microsoft Windows NT 4.x/2000/XP... -
Page 82: Document Processor (Option)
Specifications Document Processor (Option) Item Specification Original feed system Automatic feeding Originals Sheets of paper Original sizes Maximum: 8 1/2 × 14 inches (Legal) and Folio Minimum: 5 1/2 × 8 1/2 inches (Statement) and A5R Original paper weight 50 to 120 g/m² Maximum number of 50 (50 to 80 g/m²) originals... - Page 83 INDEX Low power mode 4-8 Application software 4-14 Maintenance 5-1 Maintenance messages 6-3 Canceling copy 4-3 Message display 1-5 Cassette 2-1 MP tray 2-3 Caution labels Legal and Safety-xi Character assignments 3-9 Charger 5-4 Charger cleaner knob 5-4 Names of machine parts 1-1 Cleaner home position 5-4 Network (TCP/IP) settings 3-4 Cleaning 5-1...
- Page 84 Scan to E-mail 4-9 Text mode 4-1 Scan to Folder 4-11 Text+Photo mode 4-1 Scanning 4-9 Time zone 3-5 Sleep mode 4-8 Toner container 5-1 Specifications 7-1 Transfer roller 5-4 Copying Functions 7-2 TWAIN 4-13 Document Processor (Option) 7-4 Environmental Specifications 7-4 Main Body 7-1 Paper Feeder (Option) 7-4 Variable zoom 4-4...
- Page 85 DIRECTIVE 2002/96/CE ON THE TREATMENT, COLLECTION, RECYCLING AND DISPOSAL OF ELECTRIC AND ELECTRONIC DEVICES AND THEIR COMPONENTS INFORMATION 1. FOR COUNTRIES IN THE EUROPEAN UNION (EU) The disposal of electric and electronic devices as solid urban waste is strictly prohibited: it must be collected separately. The dumping of these devices at unequipped and unauthorized places may have hazardous effects on health and the environment.