Table of Contents
Advertisement
Quick Links
Advertisement
Table of Contents

Related Manuals for Olivetti d-Copia 18MF


Summary of Contents for Olivetti d-Copia 18MF
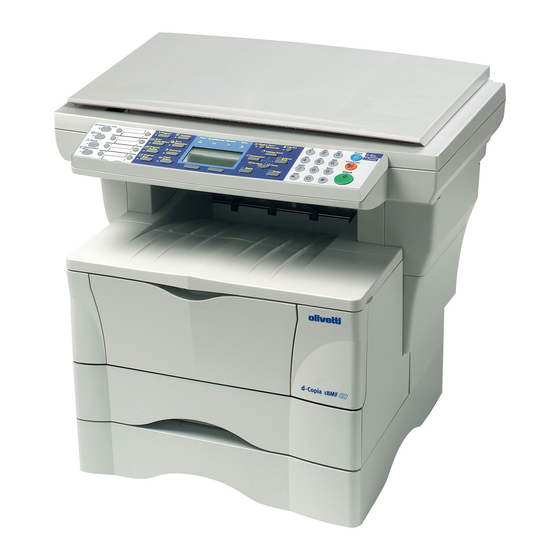
- Page 1 18MF d-Copia 18MF d-Copia 18MF d-Copia 18MF Network Scanner Setup Guide...
-
Page 3: Introduction
Introduction About this Guide This guide contains instructions on the initial setup of the scanner functions and the basic procedures for using this machine as a network scanner. Trademark Information • Microsoft, Windows, Windows NT and Internet Explorer are registered trademarks of Microsoft Corporation of America and other countries. -
Page 4: Getting Connected
Introduction Getting connected The following procedures are required in order to use this machine as a scanner. Connect the machine to your PC (Example Connection) Connecting the scanner to your PC network with a network Page 1 cable (100BASE-TX or 10BASE-T) KYOCERA COMMAND Network Send E-mail... -
Page 5: Table Of Contents
Introduction Perform the required operation at the machine Date and Time settings Page 3 (register the time zone, date and time, etc.) Page 5 Network settings (register the IP address, subnet mask, etc.) Perform the required operation at the PC Accessing COMMAND CENTER Page 7 (Internal HTML web page) - Page 6 Introduction NETWORK SCANNER SETUP GUIDE...
- Page 7 Contents Introduction ..............i About this Guide .
- Page 8 Contents NETWORK SCANNER SETUP GUIDE...
-
Page 9: Preparations
1 Preparations Connecting the Cables The machine can be connected to a network or directly to a PC. Connecting the Network Cable When connecting the machine to the network, use the appropriate network cable (10BASE-T or 100BASE-TX). Ensure the machine is off, and remove the power cord from the outlet. -
Page 10: Connecting The Power Cord
Preparations Connect the printer cable to the appropriate Parallel connector located at the rear of the Cable machine. Cable Connect the other end of the printer cable to the appropriate connector on your PC. Connecting the Power Cord Connect the power cord to the rear of the machine. -
Page 11: Date And Time Settings
2 Setup Date and Time Settings Setting the Time Zone You can also make this setting using the COMMAND CENTER. For details on COMMAND CENTER, refer to Accessing COMMAND CENTER on page 7. Access Time Zone. System Menu/ Counter Press to select the time zone that you are in. -
Page 12: Setting The Current Date And Time
Setup Setting the Current Date and Time You can also make this setting using COMMAND CENTER. NOTE: Periodically check the time that is shown in the message display and adjust as necessary to match the current time. Press to select Year/Time. Press Enter. -
Page 13: Network Settings
Setup Network Settings Registering the IP Address Check the IP address with your network administrator before changing this setting. You can enter an IP address only when the DHCP setting is Off and the TCP/IP setting is On. Any changes made to the network settings will only become effective after you turn the machine off and then back on again. -
Page 14: Registering The Subnet Mask
Setup Registering the Subnet Mask Press to select Subnet Mask. Press Enter. Use the numeric keys to enter each segment of the Subnet Mask in turn, pressing or [*.] to move between segments. If you make an error in entering a portion of the Subnet Mask, press return to the previous block of digits and re-enter the correct number. -
Page 15: Accessing Command Center
Setup Accessing COMMAND CENTER COMMAND CENTER refers to the machine’s integrated web-based interface. This enables you to verify the operating status of the machine and change settings related to security, network printing, e-mail transmission and advanced networking. Open the web browser. In the Address or Location bar, enter the machine’s IP address as the URL, e.g. -
Page 16: E-Mail Setting
Setup The table below lists the settings displayed on the TCP/IP General Settings page. Item Description Host Name Specifies a name for the machine system network component. This name is also used as the NetBEUI Printer Name and the SNMP sysName object. IP Address Assigns the Internet Protocol address on the machine system network component. -
Page 17: Advanced > E-Mail > Smtp > General Page
Setup Advanced > E-mail > SMTP > General page The scanner system network component offers e-mail functionality. SMTP is an embedded protocol to support this function. To use the e-mail function, the scanner system should be connected to an e-mail server using the POP3 protocol. NETWORK SCANNER SETUP GUIDE... - Page 18 Setup The table below lists the settings displayed on the SMTP Protocol Settings page. Item Description SMTP Protocol Enables or disables SMTP protocol. To use e-mail, this protocol must be enabled. SMTP Port Number Set the SMTP Port Number or use the SMTP default port 25. SMTP Server Name Enter the SMTP server name or its IP address.
-
Page 19: Enabling Smb Function
Setup Enabling SMB Function The SMB function enables scanned images to be stored as individual files in a folder on your PC. The SMB parameters can be set through the COMMAND CENTER. The following information about each server needs to be registered on this machine. •... -
Page 20: Enabling Ftp Function
Setup Enabling FTP Function The FTP transmission function converts the data of originals scanned on this machine to the PDF, TIFF, or JPEG format and uploads it directly to an FTP server. The FTP parameters can be set through the COMMAND CENTER. The following information is required about each server in order to register them on this machine. -
Page 21: Registering The Address Book
Setup Registering the Address Book This machine has an address book function. When an e-mail address, the path to a PC folder (SMB), FTP server's path, and FAX number are registered in the address book, it can transmit directly from the operation panel. Basic >... - Page 22 Setup Adding a New Contact Open the Address Book Contacts page. Click Add Contact and enter the information for the contact. You can specify a fax number even if the FAX System is not installed. Click Submit. NETWORK SCANNER SETUP GUIDE...
- Page 23 Setup The table below lists the settings displayed on the Address Book Contacts Add page. Item Description Number Select the number of this address book. Name Enter the registration name. E-Mail Address Enter the e-mail address. Host Name Enter the PC (FTP server) name or IP address of PC (FTP server). Path Enter the path of the required folder for uploading data.
-
Page 24: Registering External Address Book
Setup Editing the Group Open the Address Book Groups page. Click the number or name of the group to be edited. Click Add Members to add the contacts to the group or click Delete Members to delete the contacts from the group. You can only add one SMB or FTP address to a group. -
Page 25: Registering User Login
Setup The table below lists the settings displayed on the LDAP page. Item Description LDAP Enables or disables access to the LDAP server. LDAP Server Name Specifies a name or IP address for the LDAP server. LDAP Port Number Specifies a port number for LDAP or use the LADP default port 389. Search Timeout Specifies a period of time for searching the LDAP server. -
Page 26: Adding A New User Login
Setup Adding a New User Login Open the User Login page. Click Add and enter the information of the user needed for the User Login. Click Submit. Editing the User Login Open the User Login page. Click the desired number or name to edit the user and modify their information. Click Submit. -
Page 27: Entering User Login
Setup Entering User Login If the message display prompts you to login, follow the instructions below: Use the numeric keys to enter the User ID. User ID: Password: Cancel When the password has been set, press User ID: to select Password, use the numeric keys to 1118 enter the Password and press Enter. - Page 28 Setup NETWORK SCANNER SETUP GUIDE...
-
Page 29: Operation
3 Operation Basic Scanning Procedure You can scan documents and send them to e-mail addresses or a folder. The folder can be on a PC or FTP server. The recipient’s address can be entered from an internal address book, external address book (LDAP) or using a one-touch key. Press Send. - Page 30 Operation Press to select a desired name and Address Book: press Enter. Harold Tiger Cancel Menu Press to select the destination and Harold press Enter. 0123456789 When the (SMB or FTP) is selected, the h_pttr@owl-net.net login user name input screen is displayed. Sales_01 When the (E-mail) or...
- Page 31 Operation Press left Select. Ready to send. Dest. :Sales_01 Left Subject Placemnt Press to select the original Orig. Placement: placement required and press Enter. The Top Edge to Rear display shows Completed and returns to the basic screen. Top Edge to Left Cancel Using the Platen Top Edge to Rear...
-
Page 32: Function Defaults
Operation Place the original document in the document processor or on the platen. Program the settings as required to use additional functions. To change the default value, refer to Function Defaults in the table below. Press Start. The Scanning screen is displayed and scanning will begin.