Table of Contents
Advertisement
Advertisement
Table of Contents

Related Manuals for Kenwood XD-V555


Summary of Contents for Kenwood XD-V555
-
Page 1: Instruction Manual
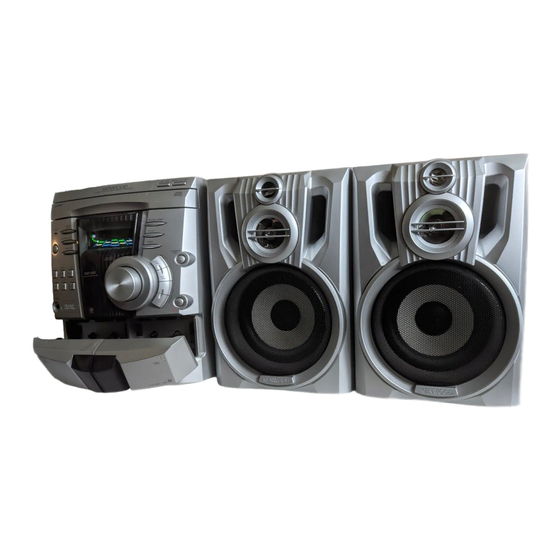
COMPACT HI-FI SYSTEM XD-SERIES XD-V858 XD-V757 XD-V555 XD-V252 INSTRUCTION MANUAL KENWOOD CORPORATION This instruction manual is for some models.Model availability and features (functions) may differ depending on the country and sales area. B60-5095-00 00 MA (M,I) KW 0101 TINSZ0718AWZZ... -
Page 2: Before Applying Power
BEFORE APPLYING POWER Caution : Read this page carefully to ensure safe operation. Units are designed for operation as follows. * AC voltage selection China ..........AC 220 V only The AC voltage selector switches on the rear Other countries .... AC 110 / 127 / 220 / 230- panel are set to the voltage that prevails in the 240 V switchable* area to which the unit is shipped. -
Page 3: Table Of Contents
CONTENTS Page Page BEFORE APPLYING POWER ......2 VIDEO CD OPERATION SAFETY PRECAUTIONS ......... 2 (During PBC off mode) ....... 26 - 34 ACCESSORIES ............ 3 KARAOKE PLAYBACK ........ 35 - 36 HANDLING OF DISCS AND TAPES ..... 4 MP3 OPERATION ........37 - 38 NAMES OF CONTROLS AND INDICATORS .. -
Page 4: Handling Of Discs And Tapes
HANDLING OF DISCS AND TAPES Discs which can be played with this unit Disc handling precautions CD (12 cm, 8 cm), VCD and the audio part of CD-G, Handling CD-EG and CD-EXTRA. Use discs that comply with Hold the discs so that you do not the IEC standard, for example a disc carrying the touch the playing surface. -
Page 5: Names Of Controls And Indicators
NAMES OF CONTROLS AND INDICATORS FRONT PANEL ª º ⁄ 1 EX.BASS / DEMO button & Display 2 STANDBY / TIMER indicator * Disc tray 3 REVERSE MODE button ( DISC SKIP button ) 0 OPEN / CLOSE button ON / STANDBY button 5 VIDEO / AUX button ¡... - Page 6 DISPLAY 45 67 8 1 Timer Related Indicator 9 Tuned Indicator 2 Disc Number Indicator 0 Equalizer Indicator 3 Repeat Indicator ! Spectrum Analyzer / Volume level Indicator 4 FM Stereo Mode Indicator @ Record Indicator 5 Play Indicator # Extra Bass Indicator 6 Programme Indicator $ Forward / Reverse Play Indicator 7 Pause Indicator...
-
Page 7: Numeric Buttons
REMOTE CONTROL 1 Disc Number Select buttons 2 Numeric buttons 3 CLOCK button 4 TUNING / TIME (% fi) buttons 5 2 (Reverse Play) button 6 7 (Stop) / RETURN button POWER 7 OSD button DISC 1 DISC 2 DISC 3 8 PAL/NTSC button CD/VCD 9 VCD AUTO button... -
Page 8: Preparation For Use
PREPARATION FOR USE • Unplug the AC power cord from the AC socket before connecting or disconnecting any component. Speakers (XD-V252) Speakers (XD-V858, XD-V757, XD-V555) Right speaker Left speaker Right speaker Left speaker Black Black Black Black Speaker connection Connect each speaker wire to the SPEAKERS terminals as shown. Use speakers with an impedance of 6 Ω... -
Page 9: Antenna Connection
TV/monitor connection If the TV/monitor has a video input, connect it to VIDEO OUT socket on the rear panel of the unit. Video cable Note : To Video input socket • If the TV/monitor does not have a video input, the VIDEO OUT socket on the unit should be connected to a VCR with a video input, which in turn should be connected to the TV/monitor... -
Page 10: Demo Mode
Demo mode To enter into the demonstration mode: EX.BASS When the unit is in the standby mode, press the /DEMO EX.BASS/DEMO button. To cancel the demonstration mode: Press the EX.BASS/DEMO button. • The demonstration mode will be cancelled and the unit will be in the standby mode. Notes : •... -
Page 11: Setting The Clock
SETTING THE CLOCK In this example, the clock is set for the 24 hours (0:00) system. Press the ON/STANDBY button to enter CLOCK the standby mode. STANDBY MEMORY /SET Press the CLOCK button. TUNING/ TIME (%UP Within 5 seconds, press the MEMORY/SET fiDOWN) button. -
Page 12: Channel Space Setting
To see the time display : To change the clock time : Press the CLOCK button. 1 Press the CLOCK button. 2 Within 5 seconds, press the MEMORY/SET but- • The time display will appear for about 5 seconds. ton. 3 Perform steps on page 11 . -
Page 13: Sound Control
SOUND CONTROL Volume Main unit Remote control (Main unit operation) When the VOLUME CONTROL is turned clockwise, the volume will increase. When it is turned anti-clock- wise, the volume will decrease. (Remote control operation) Press the VOLUME up button (%) to increase the volume and the VOLUME down button (fi) to de- crease the volume. -
Page 14: Compact Disc Operation
COMPACT DISC OPERATION CD playback Press the ON/STANDBY button to turn the power on. Press the CD (CD/VCD) button. Press the 0 OPEN/CLOSE button to open the disc tray. Place the CD(s) in the disc tray, label side up. • CDs can be placed in any open position on the disc tray. -
Page 15: Direct Search System
To remove the CDs : Cautions : Whilst in the stop mode, press the 0 OPEN/CLOSE • Do not carry the unit with discs left in the disc button. trays. The disc may get displaced inside the • The disc tray will open. Remove the two discs. unit and damaged or cause damage to the Then, press the DISC SKIP button to rotate the unit. - Page 16 Random playback (Remote control operation) The tracks on the disc(s) can be played in random order automatically. Load a disc(s) and close the disc tray. Press the RANDOM button to begin random play- back. • “RDM” will light up on the display. Notes : P.CALL •...
- Page 17 Cue and review Load a disc and begin playback. Hold down the P . CALL ¡ ¢ button for fast forward, and hold down the P . CALL 4 1 button for fast reverse. P.CALL Normal playback will resume when the P . CALL 4 1 or ¡...
-
Page 18: Program Playback
Program playback You can playback the tracks on the CDs in the disc 1-3 position in any desired order. By specifying the disc numbers from 1 to 3, and the track numbers from 1 to 99, you can choose up to 32 selections for playback in the order you like. -
Page 19: Radio Operation
RADIO OPERATION Tuning Press the ON/STANDBY button to turn the power on. Press the TUNER (BAND) button to select the desired frequency band. (FM ST, FM or AM) Press the TUNING/TIME (%UP or fiDOWN) but- ton to tune into the desired station. Manual tuning : Press the TUNING/TIME (%UP or fiDOWN) button as many times as required to adjust the frequency... -
Page 20: Preset Tuning
Preset tuning You can store up to 40 stations in memory (40 sta- tions consisting of any combination of FM and AM stations) and recall them at the push of a button. To enter stations into memory : Perform steps in the “Tuning”... - Page 21 Preset memory scan The stations saved in the preset memory can be scanned automatically. To scan the preset stations, press the P . CALL (4 1 or ¡ ¢) button for more than 0.5 second. P.CALL • The station preset number will flash and the programed stations will be tuned in sequentially, ¡...
-
Page 22: Types Of Discs Which Can Be Played
TYPES OF DISCS WHICH CAN BE PLAYED The disc symbols are found on the disc labels or jackets. Video Audio Label Symbol Disc Size recording recording sides format format CD single 8 cm (3”) 1 side Digital (max. 20 min) CD (Compact Disc) 12 cm (5”) 1 side... -
Page 23: Before Using Video Cd
BEFORE USING VIDEO CD Adjusting the TV and VCR The input selection of the TV and VCR varies ac- cording to how the connections have been made, so be sure to make the settings correctly. (After making the settings, follow the playback procedure on pages 24 - 25 to confirm the setting.) Set the input selector to VCR... -
Page 24: Video Cd Operation
VIDEO CD OPERATION (During PBC on mode) Playing a Video CD Press the ON/STANDBY button to turn the power on. Press the CD (CD/VCD) button. Press the 0 OPEN/CLOSE button to open the disc tray. 12 cm (5") Place the video CD with PBC on the disc tray, label side up. - Page 25 To display the next menu screen or to return to the previous menu screen (when the menu screen is more than 1 page) : Press the P . CALL 4 1 or ¡ ¢ button whilst in the stop mode. •...
-
Page 26: Video Cd Operation
VIDEO CD OPERATION (During PBC off mode) Playing a Video CD Press the ON/STANDBY button to turn the power on. Press the CD (CD/VCD) button. Press the 0 OPEN/CLOSE button to open the 12 cm (5") disc tray. Place the video CD(s) on the disc tray, label side 8 cm (3") •... - Page 27 Direct search system Press the DISC SKIP button to activate the “TOC READ” process for every disc in the disc tray. Press the disc number button (DISC 1 - DISC 3) button to select the desired disc. Use the numeric buttons to select the desired tracks. •...
-
Page 28: Bookmark Function
Bookmark function (To create a bookmark) The bookmark function marks the desired scene on the video CD to play it back easily. (Up to 9 scenes per disc can be marked.) To create a bookmark : Press the DISC SKIP button to activate the “TOC READ”... - Page 29 Program playback You can playback the tracks on the CDs in the disc 1-3 position in any desired order. By specifying the disc numbers from 1 to 3, and the track numbers from 1 to 99, you can choose up to 32 selections for playback in the order you like.
-
Page 30: Random Playback
Random playback (Remote control operation) The tracks on the disc(s) can be played in random order automatically. Load a disc(s) and close the disc tray. Press the RANDOM button to begin random play- back. • “RDM” will light up on the display. Notes : •... -
Page 31: Disc Digest Selection
Scan playback Load a disc and begin playback. Hold down the P . CALL ¡ ¢ button for fast forward, and hold down the P . CALL 4 1 P.CALL button for fast reverse. Normal playback will resume when P . CALL ¡ ¡... - Page 32 Track digest selection Each track is divided into 9 section. You can look at the sections and select the scene you want to start watching from. This function is convenient when you want to start a disc some- where in the middle of a track which has not already been subdivided, for example, a movie.
-
Page 33: Time Search Selection
Time search selection You can playback from the desired scene by speci- fying the time. Press the 3 (3/SELECT) button to start the play- back. Hold down the DIGEST/TIME SEARCH button for more than 1 second to enter the time search mode. -
Page 34: Resume Playback
Resume playback This function is to playback from the last point where the playback has stopped. During stop mode, hold down the 3 (3/SELECT) button for more than 1 second. • Playback will begin at the point where playback has stopped. Notes : •... -
Page 35: Karaoke Playback
KARAOKE PLAYBACK Normal karaoke playback To protect the speakers from shock noise and to avoid disturbing noises, adjust the microphone volume to the minimum by turning the MIC LEVEL control counterclockwise until it stop. Connect the microphone to the MIC socket. •... - Page 36 Audio mode switching The audio mode can be changed to STEREO, L-CH, R-CH and V-CANCEL (VOCAL CANCEL). The audio mode function is used when the left and right channels have different signals from each other. When playing a sound multiplexed disc on which both vocal and music have been separately recorded, select the audio mode as desired.
-
Page 37: Mp3 Operation
MP3 OPERATION (TV Screen) P.CALL Folder P a g e 4 1 ¡ ¢ name number Tr a c k name Folder selection In a MP3 disc, there are several folders and each folder contains several tracks. A folder must be selected first before the tracks beneath it can be displayed. -
Page 38: Mp3 Operation
P.CALL 4 1 ¡ ¢ 7/RETURN 3/SELECT Playing a MP3 disc After a desired track is selected, press the 3 (3/SELECT) button to start the playback. During playback, press the P . CALL ¡ ¢ button, it will go to the beginning of the next track and start playback automatically. -
Page 39: Cassette Operation
CASSETTE OPERATION TAPE A or TAPE B playback Press the ON/STANDBY button to turn the power on. Press the TAPE (A/B) button. Open the cassette door by pushing the area marked “PUSH OPEN” . Load the cassette into the TAPE A or TAPE B cassette compartment. -
Page 40: Recording (Tape B Only)
RECORDING (TAPE B only) • When recording important selections, be sure to make a preliminary test to ensure that the desired material is being properly recorded. • The volume and sound quality can be adjusted with no effect on the recorded signals (Variable Sound Monitor). -
Page 41: Dubbing From Tape To Tape
Recording from the built-in radio Tune in to the desired station. (see pages 19 - Load a cassette into the TAPE B cassette com- partment. Press the REC PAUSE button “REC. ” and “¶ 2 3” will flash. • Press the 2 button to record on side A or 3 (3/ SELECT) button to record on side B. -
Page 42: Erasing Recorded Tapes
Erasing recorded tapes • Make sure that TAPE A is not in use. Load the tape to be erased into the TAPE B cas- sette compartment. Press the TAPE (A/B) button until “TAPE B” ap- pears in the display. Press the REC PAUSE button. “ERASE”... -
Page 43: How To Use The Built-In Timer
HOW TO USE THE BUILT-IN TIMER • Before setting the timer, make sure that the clock setting is correct. (page 11) Timer playback Press the ON/STANDBY button to turn the power on Press the CD (CD/VCD), TUNER (BAND), TAPE STANDBY/TIMER (A/B) or VIDEO/AUX button to select the desired function, and then adjust the sound volume us- STANDBY... -
Page 44: Timer Recording
Timer recording Press the ON/STANDBY button to turn the power on. • Load a cassette for recording into the TAPE B STANDBY/TIMER cassette compartment. Press the TUNER (BAND) or VIDEO/AUX button STANDBY TIMER to select the desired function, and then adjust VIDEO the sound volume using the VOLUME CON- MEMORY... -
Page 45: Sleep Operation
Sleep operation The radio, compact disc and cassette deck can be turned off automatically. TIMER Play back the desired sound source. MEMORY Press the TIMER button repeatedly until “ ” /SET is displayed. TUNING/TIME (%UP fiDOWN) To change the sleep time : Whilst the sleep time is displayed, press the TUNING/TIME (%UP or fiDOWN) button to adjust the time. -
Page 46: Using External Units
USING EXTERNAL UNITS Video/Auxiliary (Audio signal) input To listen to or record signals from external sources through this unit : Use a separately available RCA cord to connect the desired external unit to the VIDEO/AUX sockets. (red = right channel, white = left channel) •... -
Page 47: Resetting The Microcomputer
RESETTING THE MICROCOMPUTER Reset the microcomputer under the following con- ditions : • To erase all of the stored memory contents (clock and timer settings, and tuner and CD presets). • If the display is not correct. • If the operation is not correct. SOUND Press the ON/STANDBY button to enter... -
Page 48: Maintenance
MAINTENANCE Cleaning the heads and peripheral components Cotton swab For maintaining the best condition of the deck and for longer service life, always keep the heads, capstan and pinch roller clean. Capstan To clean them, perform the following: 1) Open the cassette holder. 2) Using a cotton swab dipped in alcohol, clean the head, cap- stan and pinch roller carefully. -
Page 49: In Case Of Difficulty
IN CASE OF DIFFICULTY What seems to be a malfunction is not always so. Before calling for service, check the follow- ing table according to the symptom of your trouble. Amplifier / Speaker section Sound is not produced. \ Connect the speakers properly. (page 8) \ Increase the volume level. - Page 50 CD / VIDEO CD player section A CD is placed in the player but it cannot be played. \ Place the disc properly, with the label side facing upward. \ Clean the disc as described in “Disc handling precautions” . (page 4) \ Refer to “Caution on condensation”...
-
Page 51: Display Message List
Cassette deck section Sound cannot be produced by pressing the play button. \ Clean the head as described in “MAINTENANCE” . (page 48) \ The tape is wound too tight due to irregular winding. (page 4) \ Play a recorded tape. No operation occurs even when an operation button is pressed. -
Page 52: Specifications
SPECIFICATIONS (XD-V858 / XD-V757) Main Unit [CD (VIDEO CD) player section] Laser wave length ......770 to 795 nm [Amplifier section] Laser power class ........1 (IEC) Rated power output Wow & Flutter ..Less than unmeasurable limit 1 kHz, 1% T.H.D., 6 Ω ..(RMS) 122 W + 122 W Video Output format ...... -
Page 53: Tuner Section
SPECIFICATIONS (XD-V555) Main Unit [CD (VIDEO CD) player section] Laser wave length ......770 to 795 nm [Amplifier section] Laser power class ........1 (IEC) Rated power output Wow & Flutter ..Less than unmeasurable limit 1 kHz, 1% T.H.D., 6 Ω ..... (RMS) 72W +72W Video Output format ...... - Page 54 SPECIFICATIONS (XD-V252) Main Unit [CD (VIDEO CD) player section] Laser wave length ......770 to 795 nm [Amplifier section] Laser power class ........1 (IEC) Rated power output Wow & Flutter ..Less than unmeasurable limit 1 kHz, 1% T.H.D., 6 Ω .... (RMS) 38W + 38W Video Output format ......
-
Page 56: For Your Records
For your records Record the serial number, found on the back of the unit, in the spaces designated on the warranty card, and in the space provided below. Refer to the model and serial numbers whenever you call upon your dealer for information or service on this product.