Table of Contents
Advertisement
BAND
MODE
TRACK
TUNE SEEK
DISC
E-COM
PWR
MUTE
ILLUMI
CD8053
MODEL
ESN E8 CD Tuner with
Multi Control and NOB Remote
OWNER'S MANUAL
We appreciate your purchase of this tuner.
Please read through this manual for correct operation.
We suggest that after reading it you keep this manual
in a safe place for future reference.
Advertisement
Table of Contents

Related Manuals for Eclipse CD8053


Summary of Contents for Eclipse CD8053
- Page 1 MODE TRACK TUNE SEEK DISC E-COM MUTE ILLUMI CD8053 MODEL ESN E8 CD Tuner with Multi Control and NOB Remote OWNER'S MANUAL We appreciate your purchase of this tuner. Please read through this manual for correct operation. We suggest that after reading it you keep this manual...
- Page 2 CD8053 Warnings and caution signs, illustrated below, are posted throughout this manual as well as on the CD8053. They show safe and correct ways to handle the product so as to prevent personal injury to you and others and avoid damage to property.
- Page 3 • Do not place the vinyl storage bag over a person. It may cause a serious accident or death by suffocation. • Do not adjust the controls while driving the car. To adjust the controls, stop the car in a safe location. •...
- Page 4 • To prevent a short circuit from occurring, disconnect the battery's negative terminal before installing this product. Otherwise, an electric shock or injury may result. • When using an existing nut and/or bolt from the vehicle to ground this product, do not use any that secure parts of the steering or braking systems.
- Page 5 • Play the audio at a moderate volume level that permits you to hear sounds from outside the car. Driving without being able to hear outside sounds may result in an accident. • Keep foreign objects out of the disc slot. They may cause fire or electrical shock.
- Page 6 • Avoid installing this product in places where it may get wet, such as near windows, or in places that are moist or dusty. Presence of liquid, moisture or dust inside this product can cause short circuiting, resulting in smoke or fire. •...
-
Page 7: Table Of Contents
Table of Contents Operating precautions...10 Notes on operation ...10 About compact discs ...11 About cleaning a CD ...13 Names of controls and parts ...14 ESN (Key CD) security operating procedure ...15 How to program the Key CD ...15 How to cancel the Key CD ...16 How to change the Key CD ...17 How to resume normal operation (ESN security lock out)...17 What happens if an incorrect CD is inserted? ...18... - Page 8 How to operate the MP3 player ...48 About MP3...48 Listening to MP3 file ...51 Advancing to the next track (file) or returning to the beginning of the track (file) being played ...52 Skipping to the next or previous folder ...52 Return to the root directory of the CD ...52 Playing the beginning of files (SCAN) ...53 Repeating the same file (REPEAT)...53...
- Page 9 How to use an optional Card remote control ...106 Turning the power on/off ...106 Adjusting the audio volume ...106 Switching playback modes ...107 How to play the tuner ...107 How to play CDs...108 Enabling the optional E-COM feature...109 Switching the remote control settings...110 Replacing the battery ...111 How to operate the receiver with an optional CD changer connected...112...
-
Page 10: Operating Precautions
Operating precautions Operating precautions <Your CD8053 will perform well over a long period of time through correct handling and care.> Notes on operation • For your safety, play only at volume levels that allow outside sounds to be heard. • We recommend using with this player a disc with the logo shown to the left. -
Page 11: About Compact Discs
About compact discs • The signal recorded on a compact disc is read by a laser beam, so nothing touches the disc surface. A scratch on the recorded surface or a badly warped disc may cause deteriorated sound quality or intermittent playback. - Page 12 Operating precautions About brand new CDs • You may notice that some brand new discs are rough around the center hole or outside edge. Remove the rough edges with the side of a ballpoint pen, etc. Rough edges may prevent proper loading in the deck.
-
Page 13: About Cleaning A Cd
About borrowed CDs • Do not use a CD with glue or remnants of adhesive tape or labels. They may cause the CD to get stuck inside or damage the deck. How to remove CDs • When removing the ejected disc, pull it straight out along the slot. -
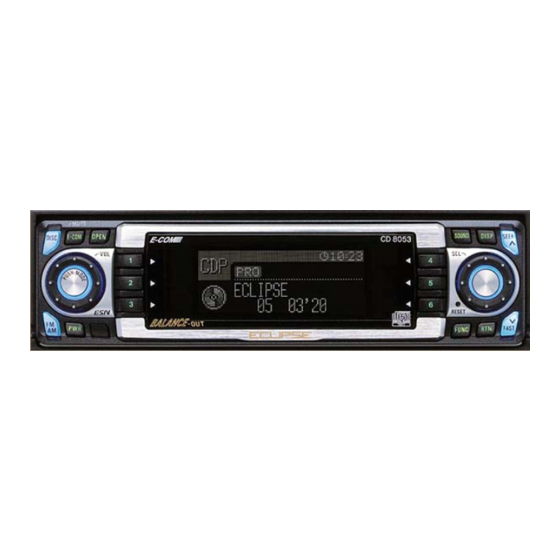
Page 14: Names Of Controls And Parts
Names of controls and parts Names of controls and parts Front view ①② ③ ④ ⑭ ⑬⑫ With the front open Never place an object or rest your hands or the like on the front panel. Caution [DISC] button [E-COM] button* [OPEN] button Buttons [1] to [6] [SOUND] button... -
Page 15: Esn (Key Cd) Security Operating Procedure
A [SEC] message appears, then in two seconds it will change to [DISC]. The front panel opens; the CD8053 is now ready to accept your Key CD in the CD slot. Insert the CD into the slot. -
Page 16: How To Cancel The Key Cd
A [SEC] message appears, then in two seconds it will change to [DISC]. The front panel opens; the CD8053 is now ready to accept your Key CD in the CD slot. Insert your Key CD into the slot. -
Page 17: How To Change The Key Cd
When the power is turned on after disconnecting the battery power, a [SEC] message will appear for two seconds. Thereafter, the message changes to [DISC] and the CD8053 is ready to accept your Key CD into the slot. Insert your Key CD. -
Page 18: What Happens If An Incorrect Cd Is Inserted
ESN (Key CD) security operating procedure What happens if an incorrect CD is inserted? An [ERR] message will be appear, then change to a flashing [DISC], then the CD will be ejected. You will have five uninterrupted attempts to insert the correct After the 5th incorrect attempt, the display reads [HELP]. -
Page 19: How To Turn The Security Indicator On/Off
[ESN] appears on the display, followed by an eight-digit number; this number is your electronic serial number (ESN). You may use this number to identify your Eclipse CD8053 in the event it is recovered after being stolen. ESN (Key CD) security operating procedure... -
Page 20: Basic Operation
Basic operation Basic operation [PWR] button This section covers basic operating procedures. For additional details, please refer to the sections on specific functions. Turning the power on and off Turning the power on and off. When the power is turned on, the state used when the power was turned off such as CD and tuner playing is restored. -
Page 21: Listening To A Cd
[OPEN] button [DISC] button Listening to a CD Press the [OPEN] button. The front panel opens. Insert a CD into the disc slot, label side up. The CD will immediately start playing. When a CD is already loaded, press the [DISC] button to switch to the CD mode. -
Page 22: Listening To The Tuner
Basic operation [FM AM] button Listening to the tuner Press the [FM AM] button. This will turn the tuner on. Press the [FM AM] button to switch to the desired FM or AM bands. For example, radio bands will switch from FM1 ➔ FM2 ➔ FM3 ➔... -
Page 23: Adjusting Audio Volume
[E-COM] button [AUDIO CONTROL] button Adjusting audio volume Turn the [AUDIO CONTROL] button to the left or right. Turn to the right: Increases the volume. Turn to the left: Press the [E-COM] button for more than one second if E-COM is connected and less than one second if E-COM is not connected ATTENTION to cut the volume or restore it instantly. -
Page 24: Switching Audio Control Modes
Basic operation [AUDIO CONTROL] button Switching audio control modes Various audio control modes may be fine-tuned using this procedure. Press the [AUDIO CONTROL] button for less than one second to select the item to be adjusted. Modes will switch in the order shown below each time the button is pressed. - Page 25 [AUDIO CONTROL] button TREB (TREBLE) Mode Adjusts treble level. In pro mode, treble can be adjusted for each source (CDP/CDC, FM and AM). Turn the [AUDIO CONTROL] button to the left or right. Turn to the right: Emphasizes high sounds. Turn to the left: Softens high sounds.
-
Page 26: Enabling The Loudness Control
Basic operation [AUDIO CONTROL] button Enabling the loudness control The loudness control may be turned on to emphasize low and high frequencies at low volume levels. Loudness compensates for the apparent weakness of low and high frequencies at low volume by boosting the bass and treble levels. Press and hold the [AUDIO CONTROL] button until the [LOUD ON] display appears on the screen. -
Page 27: Making Changes With Display Adjustment Mode
Making changes with Display Adjustment Mode This mode lets you adjust the display brightness, change the button illumination color and turn the display on and off. Press the [DISP] button for less than one second. Enters display adjustment mode. If you press the [DISP] button during display adjustment mode, the display adjustment mode is canceled and the mode returns ATTENTION to normal music mode. -
Page 28: Switching The Brightness
Basic operation Switching the brightness Adjust the display brightness to the best level. Turn the [SEL] button to select Bright. The selected item will be highlighted. Press the [SEL] button. The mode will change to luminance adjustment mode. Turn the [SEL] button to adjust brightness. When the button is turned, the brightness level changes in the following order. -
Page 29: Disabling The Display
Disabling the display You can turn the display on and off in the following way. Turn the [SEL] button to select Disp on/off. The selected item will be highlighted. Press the [SEL] button. The screen for turning the screen display on and off will appear. -
Page 30: Making Changes With Function Mode
Basic operation Making changes with Function Mode A variety of settings can be changed. Press the [FUNC] button. The function mode is activated. If you press the [FUNC] button during function mode, the adjustment mode is canceled and the mode returns to normal ATTENTION music mode. - Page 31 [FUNC] button Disabling the guide tone feature (for button operation) The receiver is set at the factory to emit a beep tone in response to button operation. The guide tone feature may be disabled in the following procedure: Turn the [SEL] button to select Guide Tone. The selected item will be highlighted.
- Page 32 Basic operation CLOCK DISPLAY on/off Switches the clock display to ON/OFF. Turn the [SEL] button to select Clock on/off. The selected item will be highlighted. Press the [SEL] button. The clock display ON/OFF mode is activated. Turn the [SEL] button to select ON or OFF. The selected item will be highlighted.
-
Page 33: Setting The Time
[FUNC] button Setting the Time This receiver uses the 12-hour display notation. Turn the [SEL] button to select Clock Adjust. The selected item will be highlighted. Press the [SEL] button. The clock adjustment mode is activated. Turn the [SEL] button to display the item to be selected for adjustment. -
Page 34: Others
Basic operation [E-COM] button [OPEN] button Others Enabling E-COM feature Press the [E-COM] button for one second. Pressing the button will switch the E-COM feature on or off. Adjustment of the front panel angle Press and hold the [OPEN] button for more than one second. -
Page 35: Displaying A Memo
Buttons [1] to [5] Displaying a memo If memos have been set, a memo recorded corresponding to a number button [1] to [5] appears on the screen when the number button is pressed briefly while the power of the main unit is turned off. -
Page 36: Deleting A Memo
Basic operation Turn the [SEL] button to the left or right to select characters. Turn to the right: Advances the character forward in its type. Turn to the left: [Upper-case alphabet characters] Initial value [A] A B C . . . X Y Z [Numeric characters] Initial value [1] . -
Page 37: Changing The Display Mode
Changing the display mode You can change the details that are shown in display mode in the following way. Press the [DISP] button for one second or more. Each time the button is pressed in this way, the display switches between A mode and B mode. A mode: In this mode, the preset button functions are displayed. -
Page 38: How To Operate The Cd Player
How to operate the CD player How to operate the CD player [DISC] button First press the [DISC] button to switch to the disc mode. It is assumed here that a CD has already been loaded into the unit. Listening to CDs Press the [DISC] button. -
Page 39: Advancing To The Next Track Or Returning To The Beginning Of The Track Being Played
Advancing to the next track or returning to the beginning of the track being played Turn the [SEL] button to the left or right. Turn to the right: Advances to the next track. Turn to the left: Fast Forward/Rewind Fast forward or rewind the song currently being played. Press and hold the [SEEK ] or [FAST ] button. -
Page 40: Repeating The Same Track (Repeat)
How to operate the CD player Repeating the same track (REPEAT) Press button [5] to repeat the track being played. To cancel, press button [5] again. Playing tracks in random order (RANDOM) Press button [6] to play the tracks in random order. To cancel, press button [6] again. -
Page 41: Switching A Cd To Pause/Play
[OPEN] button Button [3] Switching a CD to pause / play Press button [3]. It pauses playing a CD. To cancel, press button [3] again. Ejecting the disc Press the [OPEN] button for less than one second. The front panel opens fully and ejects the disc. Remove the disc and press the [OPEN] button. -
Page 42: Creating A Title For A Cd
How to operate the CD player Creating a title for a CD A CD title may be created, attached and displayed for your discs. If external CD changers are connected, a title for a CD will be created in the same way. It is assumed here that the CD to be titled is playing. - Page 43 Turn the [SEL] button to the left or right to select characters. Turn to the right: Advances the character forward in its type. Turn to the left: Moves the character backward in its type. [Upper-case alphabet characters] Initial value [A] A B C .
-
Page 44: Changing A Previously Set Title
How to operate the CD player Changing a previously set title If external CD changers are connected, a previously set title for a CD will be changed in the same way. It is assumed here that the disc mode is selected. Press the [FUNC] button while in the disc mode. -
Page 45: Deleting A Previously Created Title
Deleting a previously created title If external CD changers are connected, a previously created title for a CD will be deleted in the same way. It is assumed here that the disc mode is selected. Press the [FUNC] button while in the disc mode. Turn the [SEL] button to select Title. -
Page 46: Changing The Number Of Cd Titles
How to operate the CD player Changing the number of CD titles The number of CD titles that can be set can be changed by changing the memory allocation. The number of CD titles is fixed for each pattern and the number of tuner bands that can be recorded is also changed at the same time. -
Page 47: Displaying Cd Text
Displaying CD text Only the built-in CD player supports CD TEXT. It can not be displayed with the optional CD changer. If the CD came with a logo shown below, it is recorded with a disc title and track titles. These information will be displayed during playback. -
Page 48: How To Operate The Mp3 Player
How to operate the MP3 player How to operate the MP3 player MP3 files can only be played when E-COM is connected. About MP3 The making of MP3 files by recording from sources such as broadcasts, records, recordings, videos and live performances ATTENTION without permission from the copyright holder for uses other than personal enjoyment is prohibited. -
Page 49: Format Of Discs
Media Media capable of playing MP3 includes CD-ROM and CD-R discs. Compared to CD-ROM media commonly used for music discs, CD-R discs are fragile in high temperature/high humidity environments and one section of the CD-R may become incapable of playback. Fingerprints or scratches on the disc may prevent playback or cause skipping during playback. -
Page 50: File Names
How to operate the MP3 player File names Only files with the MP3 file extension ".mp3" can be recognized as MP3 and played. Be sure to save MP3 files with the ".mp3" file extension. The "MP" letters of the file extension will be recognized whether entered as uppercase letters or lowercase letters. -
Page 51: Listening To Mp3 File
[DISC] button Listening to MP3 file Press the [DISC] button. This starts MP3 file play. If an external CD changer is connected, each additional press of the [DISC] button will switch modes from CD changer 1 ➔ CD changer 2 ➔ CD player. A changer or player with no discs loaded will be skipped. -
Page 52: Advancing To The Next Track (File) Or Returning To The Beginning Of The Track (File) Being Played
How to operate the MP3 player Buttons [1] and [2] Advancing to the next track (file) or returning to the beginning of the track (file) being played Turn the [SEL] button to the left or right. Turn to the right: Advances to the next track (file). Turn to the left: Skipping to the next or previous folder Press button [1] or [2]. -
Page 53: Playing The Beginning Of Files (Scan)
Playing the beginning of files (SCAN) Press button [4]. Press the button briefly to play just the first 10 seconds of each song for all the files in the same layer of the folder being played. Pressing the button until [FOLDER SCAN] is displayed will play just the first 10 seconds of the first song in each folder. -
Page 54: Playing Files In Random Order (Random)
How to operate the MP3 player Playing files in random order (RANDOM) Press button [6]. Press the button briefly to randomly play the files in the same layer as the folder being played. Pressing the button until [FOLDER RAND] is displayed will randomly play the files in all the folders. -
Page 55: Displaying Title
Displaying title Press the [DISP] button for more than one second. The title display details and display mode change as follows each time the button is pressed. (Refer to page 37 for details on the display mode.) Folder Name / File Name * (Display mode:A mode) Folder Name / File Name * (Display mode:B mode) Tag (Display mode:A mode) Tag (Display mode:B mode) -
Page 56: How To Operate The Tuner
How to operate the tuner How to operate the tuner [FM AM] button First, press the [FM AM] button to start tuner operation. There are automatic and manual methods for setting stations in memory. The receiver will accept up to 24 stations in memory: six in AM and 18 in FM (6 each for FM1, FM2 and FM3.) (Initial setting) Tuning to a station Press the [FM AM] button to switch to the desired FM or... -
Page 57: Entering Stations Into Memory Automatically (The Automatic Preset Mode: Asm)
[FM AM] button Entering stations into memory automatically (The automatic preset mode: ASM) Press the [FM AM] button to switch to the desired FM or AM bands. Radio bands will switch from FM1 ➔ FM2 ➔ FM3 ➔ AM in order each time the button is pressed. -
Page 58: Manually Setting Stations Into Memory
How to operate the tuner [FM AM] button Manually setting stations into memory This section covers the setting of stations in memory under the numbered buttons. Press the [FM AM] button to switch between FM and AM. Turn the [SEL] button to the right or left to tune to the station to be entered in memory. -
Page 59: Preset Station Scan
Preset station scan This function enables reception of all the stations in the preset buttons for five seconds each. Press the [SEL] button for less than one second. [P SCAN] will appear at the display, and stations stored under preset buttons [1] through [6] will be played for five seconds each. -
Page 60: Setting A Station Name
How to operate the tuner Setting a station name Station name settings can be changed. Press the [FUNC] button while in the tuner mode. Turn the [SEL] button to select Station Name. The selected item will be highlighted. Press the [SEL] button. The station name setting mode is activated. - Page 61 Turn the [SEL] button to the left or right to select characters. Turn to the right: Advances the character forward in its type. Turn to the left: Moves the character backward in its type. [Upper-case alphabet characters] Initial value [A] A B C .
-
Page 62: Deleting A Station Name
How to operate the tuner Deleting a station name Press the [FUNC] button while in the tuner mode. Turn the [SEL] button to select Station Name. The selected item will be highlighted. Press the [SEL] button. The station name that is displayed at this point will be deleted. Hold the [6] button down for more than two seconds. -
Page 63: Changing The Number Of Bands
Changing the number of bands The number of bands can be changed by changing the memory allocations. The number of bands is fixed for each pattern and the number of CD titles that can be set is also changed at the same time. -
Page 64: Fm Reception Characteristics
How to operate the tuner FM reception characteristics In general, FM has much better tonal quality than AM. However, FM and FM stereo reception encounter several characteristic problems not encountered with AM. FM is more difficult to receive than AM in a moving vehicle. -
Page 65: Reception Area Of Fm Broadcasts
RECEPTION AREA OF FM BROADCASTS A home receiver can catch weak FM stereo signals through the use of a tall, directional or ultra-sensitive antenna. In a moving vehicle, the area for good reception is limited because of varying conditions encountered while driving, including the types and heights of broadcast antenna structures, signal strength, engine noise, etc. -
Page 66: How To Operate The Sound Adjustment Mode
How to operate the Sound Adjustment Mode How to operate the Sound Adjustment Mode About Sound Adjustment Mode This unit is equipped with two different sound adjustment modes: normal mode and pro mode. In normal mode, the acoustic characteristics inside the vehicle can be adjusted using comparatively simple settings. -
Page 67: Graphic Equalizer
GRAPHIC EQUALIZER The graphic equalizer lets you select from six preset equalizer modes in accordance with the genre and instruments of the music being played, and also lets you make fine adjustments within each mode. PARAMETRIC EQUALIZER A variety of materials are used inside a vehicle to manufacture the seats and windows, and because these materials absorb and reflect sound in different ways, the parametric equalizer lets you adjust the peaks and dips of the frequency... - Page 68 How to operate the Sound Adjustment Mode [Parametric equalizer characteristics] ①. Median frequency can be varied. High [Sound pressure] ②. Gain can be varied. High [Sound pressure] ③. Q (sharpness/band width) can be varied. High [Sound pressure] When this unit is in normal mode, a single parametric equalizer function is available in addition to the 13-band graphic equalizer, so that points that cannot be adjusted using the graphic equalizer can be corrected using the single-band...
-
Page 69: Time Alignment
How to operate the Sound Adjustment Mode TIME ALIGNMENT With vehicle audio systems, the installation position of the speakers and the position of the listener mean that the distances from the listener to the left and right speakers are almost always different. These differences in the distance from the listener to each speaker in turn means that the time taken for the sound to reach the listener is different for each speaker. - Page 70 How to operate the Sound Adjustment Mode CROSSOVER The frequency band that is stored by audio media such as CDs is a fairly wide range from 20 Hz to 20 kHz, and it is difficult for a single speaker to be able to play back all frequencies in such a wide range.
- Page 71 • The crossover function is a filter that allocates specified frequency bands. • A high-pass filter (HPF) is a filter that cuts out frequencies that are lower than the specified frequency (bass range) and allows higher frequencies (treble range) to pass through. •...
- Page 72 How to operate the Sound Adjustment Mode MP3 HARMONIZER When original sounds are converted to MP3 format, frequency ranges that are not normally audible to the human ear are compressed. The MP3 harmonizer can be used to play back these compressed sounds at as close to their original form as possible so that clear and powerful sound can be enjoyed.
-
Page 73: Operations During Normal Mode
Operations during Normal Mode Press the [SOUND] button for less than one second. The mode will change to sound adjustment mode. Press the [SOUND] button for more than two seconds. The mode switches between normal mode and pro mode each time the button is pressed. - Page 74 How to operate the Sound Adjustment Mode EQUALIZER ADJUSTMENT (EQ) EQ (equalizer) mode can be used to adjust the frequency of the audio channels being played back in accordance with the genre and instruments of the music being played. In addition, correction of the frequency characteristics inside the vehicle is also possible using the 13-band graphic equalizer and the single-band parametric equalizer.
- Page 75 Buttons [1] to [5] Press the [RTN] button. At this time, other adjustments can also be made in normal mode. Press the [SOUND] button for less than one second to exit sound adjustment mode. The initial EQ settings are factory preset. ATTENTION Fine-tuning EQ functions Fine adjustments can be made in each equalizer mode.
- Page 76 How to operate the Sound Adjustment Mode Selecting an equalizer mode from memory Press a preset button to select the equalizer mode set in memory for the button. The buttons that set equalizer modes in memory are called preset buttons. Turn the [SEL] button to select EQ.
- Page 77 Making fine adjustments to the parametric equalizer You can select and adjust frequencies using the parametric equalizer (single-band). When the following operations are carried out, the parametric equalizer settings that have been made previously will be ATTENTION changed. Turn the [SEL] button to select EQ and press the [SEL] button.
- Page 78 How to operate the Sound Adjustment Mode Press the [6] button to select the Q curve pattern. Each time the button is pressed, the Q curve changes in the following order. NORMAL Press the [SEL] button for more than one second. The mode will return to equalizer setting mode.
- Page 79 SIMPLIFIED TIME ALIGNMENT SETTINGS (Time Alignment) This function corrects the position characteristics and frequency characteristics in order to delay the signals being output from the various speakers so that the signals from each speaker reach the listening position at the same time. Turn the [SEL] button to select Time Alignment.
- Page 80 How to operate the Sound Adjustment Mode Position selector setting (Position) When the position of the listener's seat is selected, the time taken for the sound to travel from the speakers to the listener can then be adjusted in order to obtain a more natural sound orientation.
- Page 81 Selecting the type of vehicle (Car Type) You can select the time alignment settings to match your vehicle from a range of preset settings for different types of vehicle, allowing you to select the optimum time alignment settings automatically. Turn the [SEL] button to select Car Type. The selected item will be highlighted.
- Page 82 How to operate the Sound Adjustment Mode Tweeter settings (Tweeter) You can select the tweeter installation location and whether or not a tweeter is being used or not, allowing you to select the optimum time alignment settings automatically. Turn the [SEL] button to select Tweeter. The selected item will be highlighted.
- Page 83 Rear speaker position selection (Rear SP) You can select the rear speaker installation location, allowing you to select the optimum time alignment settings automatically. Turn the [SEL] button to select Rear SP. The selected item will be highlighted. Press the [SEL] button. The mode will change to rear speaker position setting mode.
- Page 84 How to operate the Sound Adjustment Mode CROSSOVER ADJUSTMENT (X-Over) The frequencies for the front and rear speaker high-pass filter (HPF) and woofer low-pass filter (LPF) can be set within a range of 63 to 200 Hz. (This is the same as the HPF and LPF cutoff frequencies.) Turn the [SEL] button to select X-Over.
- Page 85 NON-FADER PHASE SELECTION (NON-F Phase) The merging of sound between the front and rear speakers and the woofer can be improved by selecting the phase. Switch the phase to a phase which lets the speakers combine without any disharmony. Turn the [SEL] button to select Non-F Phase. The selected item will be highlighted.
-
Page 86: Operations During Pro Mode
How to operate the Sound Adjustment Mode Operations during Pro Mode Press the [SOUND] button for less than one second. The mode will switch to sound adjustment mode. Press the [SOUND] button for more than two seconds. The mode switches between normal mode and pro mode each time the button is pressed. - Page 87 PARAMETRIC EQUALIZER ADJUSTMENT (PEQ) Mid-Band (Group-1) Parametric adjustment in 5-Bands of 25 Frequencies. Hi-Band (Group-2) Parametric adjustment in 5-Bands of 20 Frequencies. Eclipse has by default assigned arbitrary frequencies for each of the 5-Bands (Hi/Mid for 10 parametric bands total). Frequencies in each group (Mid-Group or Hi-Group) cannot be duplicated (repeated).
- Page 88 How to operate the Sound Adjustment Mode There are 10 Mid & Hi-Frequency locations (5 + 5) available for the parametric equalizer. The Parametric Equalizer is divided into two groups Mid & Hi. Any frequency assigned is highlighted in White, and is unavailable for use elsewhere.
- Page 89 Turn the [SEL] button to select PEQ. The selected item will be highlighted. Press the [SEL] button. The mode will change to parametric equalizer adjustment mode. Press the [SEL] button for less than one second to select the channel and band to be adjusted. Each time the button is pressed, the selection changes in the following order.
- Page 90 How to operate the Sound Adjustment Mode Press the [SEEK This adjusts the frequency level. [SEEK ] button: Increases level. [FAST ] button: Decreases level. Press the [6] button to select the Q curve pattern. Each time the button is pressed, the Q curve changes in the following order.
-
Page 91: Selecting An Equalizer Mode From Memory
Selecting an equalizer mode from memory Press a preset button to select the equalizer mode set in memory for the button. The buttons that set equalizer modes in memory are called preset buttons. Turn the [SEL] button to select PEQ. Press the [SEL] button. - Page 92 How to operate the Sound Adjustment Mode TIME ALIGNMENT ADJUSTMENT (Time Alignment) The delay time and level of the sound from each speaker can be adjusted in order to correct any phase mismatches in the sound resulting from the listening position. Turn the [SEL] button to select Time Alignment.
- Page 93 Refer to the following for the method of calculating the delay time. A = (B-C) / 34 A: Delay time (ms) B: Distance from listening position to furthest speaker (cm) C: Distance from listening position to the speaker to be adjusted (cm) (Example) Listening position: Driver's seat (left) B: 200 (cm)
- Page 94 How to operate the Sound Adjustment Mode CROSSOVER ADJUSTMENT (X-Over) This adjustment is for 3-way speaker system which uses different speakers for different ranges (treble range: tweeters, medium range: Mid, bass range: woofers). In this case, the crossover function applies the HPF to the treble-range speakers, it applies the HPF and LPF to the medium-range speakers, and it applies the LPF to the bass-range speakers to adjust the respective playback ranges so that the sounds from...
- Page 95 Press the [SEEK /FAST [SEEK ] button : The slope becomes more gentle. [FAST ] button : The slope becomes steeper. The slope can be set to "PASS", "6dB/oct", "12dB/oct", "18dB/oct" or "24dB/oct". Repeat the operations in steps settings for each channel. Press the [RTN] button.
- Page 96 How to operate the Sound Adjustment Mode MP3 HARMONIZER SETTINGS (MP3 Harmonizer) This function uses harmonic synthesis to restore the high- frequency component that is lost as a result of the compression process so that fresher sound can be obtained during MP3 playback.
- Page 97 NON-FADER PHASE SELECTION (NON-F Phase) The merging of sound between the front and rear speakers and the woofer can be improved by selecting the phase. Switch the phase to a phase which lets the speakers combine without any disharmony. Turn the [SEL] button to select Non-F Phase. The selected item will be highlighted.
-
Page 98: How To Use The Nob Remote Control
How to use the NOB remote control How to use the NOB remote control Precautions in use of the remote control • Be careful when handling the control, especially because it is small and light. Dropping or striking it hard may damage it, wear out the battery or cause a malfunction. -
Page 99: Turning The Power On/Off
Remote-control light receptor Turning the power on/off When the power is turned on, the state used when the power was turned off such as CD and tuner playing is restored. Press the [PWR] button. The power turns on or off each time the button is pressed. When the main unit is shut down, the remote control will not work. -
Page 100: Switching Playback Modes
How to use the NOB remote control [BAND] button Switching playback modes Press the [MODE] button. Press the button to switch modes in the following sequence: Tuner Disc How to play the tuner Select the tuner mode first. Selecting the FM/AM band Press the [BAND] button. -
Page 101: How To Play Cds
[BAND] button TUNE•SEEK ] buttons Selecting a station (manually or automatically) A short press of the button will allow manual station tuning. Pressing for more than one second will start automatic tuning. Press the [ ] button: Tunes to higher frequency stations. ] button: Tunes to lower frequency stations. -
Page 102: Illuminating The Nob Remote Control
How to use the NOB remote control TRACK ] buttons [E-COM] button Advancing to the next track or returning to the beginning of the track being played Press the [ ] button: Skips to the next track. ] button: Returns to the beginning of the track being played. -
Page 103: Switching The Remote Control Settings
[SEL] button [FUNC] button [RTN] button Switching the remote control settings Remote control functions can be switched to the three patterns. Press the [FUNC] button of the main unit. Turn the [SEL] button to select Remote Func. The selected item will be highlighted. Press the [SEL] button. -
Page 104: Replacing The Battery
How to use the NOB remote control Replacing the battery To prevent accidents, store batteries out of the reach of children. If a child has swallowed one, consult a doctor Warning immediately. Use two AA-size batteries. Remove the back cover of the remote control unit by gently pressing and sliding it in the direction indicated by the arrow. - Page 105 •Be extremely careful not to swallow the battery. •The battery life is approximately one year. If the remote Caution control unit does not operate correctly or if the button lamp gets dim, replace the batteries. •Be sure to orient the batteries correctly so that the positive and negative poles match the diagram.
-
Page 106: How To Use An Optional Card Remote Control
How to use an optional Card remote control How to use an optional Card remote control Remote-control light receptor Turning the power on/off When the power is turned on, the state used when the power was turned off such as CD and tuner playing is restored. Press the [PWR] button. -
Page 107: How To Play The Tuner
Switching playback modes Press the [MODE] button. Press the button to switch modes in the following sequence: Tuner Disc How to play the tuner Select the tuner mode first. Selecting the FM/AM band Press the [BAND] button. Each press will switch tuner modes from FM1 ➔ FM2 ➔ FM3 ➔... - Page 108 How to use an optional Card remote control Selecting a station (manually or automatically) A short press of the button will allow manual station tuning. Pressing for more than one second will start automatic tuning. Press the [ ] button: Tunes to higher frequency stations. ] button: Tunes to lower frequency stations.
-
Page 109: Enabling The Optional E-Com Feature
[MUTE] button TRACK•APS ] buttons Advancing to the next track or returning to the beginning of the track being played Press the [ ] button: Skips to the next track. ] button: Returns to the beginning of the track being played. -
Page 110: Switching The Remote Control Settings
How to use an optional Card remote control [SEL] button [FUNC] button [RTN] button Switching the remote control settings Remote control functions can be switched to the three patterns. Press the [FUNC] button of the main unit. Turn the [SEL] button to select Remote Func. The selected item will be highlighted. -
Page 111: Replacing The Battery
Replacing the battery To prevent accidents, store batteries out of the reach of children. If a child has swallowed one, consult a doctor Warning immediately. Use one CR2025 battery. On the back of the remote control, while pressing the locking knob on the battery slot cover toward your right, pull out the battery carrier with your fingernail. -
Page 112: How To Operate The Receiver With An Optional Cd Changer Connected
How to operate the receiver with an optional CD changer connected How to operate the receiver with an optional CD changer connected [DISC] button This section covers the operation of an optional CD changer that is connected to the receiver. To switch from another mode, press the [DISC] button. -
Page 113: Fast Forward/Rewind
How to operate the receiver with an optional CD changer connected Fast Forward/Rewind Fast forward or rewind the song currently being played. Press and hold the [SEEK ] or [FAST ] button. [SEEK ] button: Fast forward. [FAST ] button: Rewind. Playing the beginning of tracks (SCAN) Press button [4]. -
Page 114: Repeating The Same Track (Repeat)
How to operate the receiver with an optional CD changer connected Repeating the same track (REPEAT) Press button [5]. Pressing on the button causes the changer to repeat the track currently being played, until the button is pressed again. Hold the button until the [ALL REPEAT] display appears to repeat all tracks on the CD being played. -
Page 115: Skipping To The Next Or Previous Cd
How to operate the receiver with an optional CD changer connected Skipping to the next or previous CD Press button [1] or [2]. Button [1]: Selects the next higher number disc. Button [2]: Selects the next lower number disc. Specifying a CD to play A CD of your choice is directly selectable out of the loaded discs. -
Page 116: Others
Others Others [DISC] button Button [1] Connecting Portable Audio Players to the AUX Jack Use a commonly available accessory cord with stereo mini-plug to connect the audio output jack (LINE) or headphone jack of a portable audio player to the AUX (auxiliary) jack of this system. Turn on the portable audio player and start its play function. -
Page 117: If You Have A Question
If you have a question: First check the items mentioned below before attempting to troubleshoot problems. If a problem occurs, for instance when the unit does not respond to any button presses, or the display doesn't work correctly, Caution press the [RESET] button using a sharp tool. Pressing the [RESET] button will delete all the entries from memory. -
Page 118: Displayed Information (For Troubleshooting)
If you have a question: Displayed information (for troubleshooting) The information listed in the chart below is displayed to show the status of the CD player and CD changer. Refer to the chart for the appropriate action. Information Code Table Information Contents 2 NO DISC LOADED IN THE MAGAZINE... - Page 119 Mode Problem Is the volume control up sufficiently? Is the muting function in effect (MUTE)? Dead or Is the fader or balance control set far weak sound to one side? Other probable causes include broken audio-signal wiring or a faulty speaker.
- Page 120 If you have a question: Mode Problem The disc cannot be inserted. The disc is ejected as soon as it is insertaed. Or, the disc cannot be ejected. The disc cannot be changed. Sound skips around. Sound is intermittent. Sound is bad in quality. The disc cannot be ejected.
-
Page 121: Specifications
Specifications < > GENERAL Power Supply Current Drain Dimensions (W x H x D) In-Dash Unit Mass (weight) < > FM TUNER Frequency Range Usable Sensitivity Frequency Response Stereo Separation < > AM TUNER Frequency Range Usable Sensitivity < > CD SECTION Frequency Response Wow &... -
Page 122: Before Installation
Before installation Before installation Note Be sure to disconnect the battery's negative terminal before installing the receiver. Components Main unit Mounting sleeve Side bracket Rear bracket Bezel Bushing Self-tapping screw (6 x 16 mm) Stud bolt Phillips type screw (5 x 8 mm) Hex-head bolt (5 x 20 mm) Hex nut (5 mm) Interconnecting cable... -
Page 123: Installation Angle
Installation angle To maintain proper function, the unit must be mounted less than 30 degrees. If the angle is in excess of 30 degrees, CD skipping and improper CD ejection may occur. Before installation FRONT WITHIN AN ANGLE OF 30 DEGREES STANDARD... -
Page 124: Mounting Instruction
Mounting instruction Mounting instruction Note Be sure to install the back strap to support the main unit. Failure to install the back strap correctly may cause CD skipping. Mounting the main unit Insert the mounting sleeve into the opening in the vehicle console. - Page 125 Mount the stud bolt to the main unit. Insert the main unit into the mounting sleeve until it locks in place. Fasten the rear of the main unit using either method [A] or [B]. Select method [A] or [B] to suit the interior configuration of the vehicle.
-
Page 126: Names Of Lead Wires And Destinations
Mounting instruction Note To prevent unconnected leads from shorting out, insulate them by wrapping their tips with electrical tape. Similarly, insulate the ends of connected leads. If an external amplifier is to be connected to the receiver, be sure to ground its outside housing to the vehicle body (a metal part). -
Page 127: System
Mounting instruction System... - Page 128 Mounting instruction...
- Page 129 Mounting instruction...
- Page 130 Mounting instruction...
- Page 131 IMPORTANT RECORD YOUR “KEY CD” HERE… STORE YOUR “KEY CD” ALONG WITH YOUR OWNER’S MANUAL IN YOUR SOCK DRAWER.
- Page 132 CUSTOMER NOTICE Please retain this booklet and write in the serial number of your CD8053 for identification. The serial number is labeled or stamped on the chassis. Serial No. DIVISION OF FUJITSU TEN CORP. OF AMERICA 19600 SOUTH VERMONT AVENUE, TORRANCE, CA 90502...