Table of Contents
Advertisement
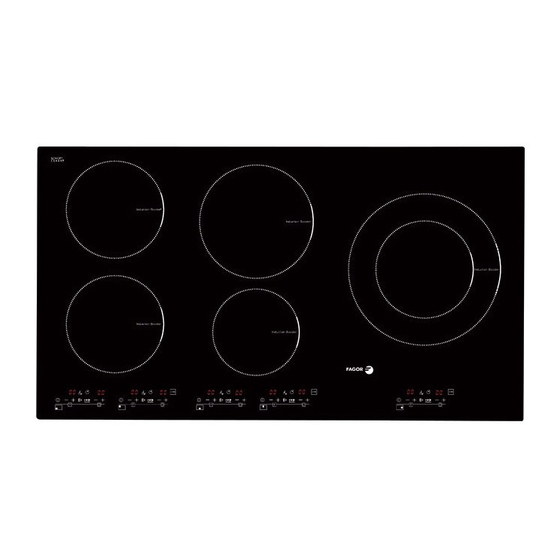
C60T379A2.qxd 14/3/07 16:10 Página 23
ES MANUAL DE UTILIZACIÓN
ES MANUAL DE UTILIZACIÓN
EN GUIDE TO INSTALLATION
EN GUIDE TO INSTALLATION
FR GUIDE D'UTILISATION
FR GUIDE D'UTILISATION
DE BETRIEBSANLEITUNG
DE BETRIEBSANLEITUNG
PT GUIA DE UTILIZAÇÃO
PT GUIA DE UTILIZAÇÃO
P P l l a a c c a a d d e e c c o o c c c c i i ó ó n n
C C o o o o k k i i n n g g H H o o b b
T T a a b b l l e e d d e e c c u u i i s s s s o o n n
K K o o c c h h f f e e l l d d
P P l l a a c c a a d d e e c c o o z z i i n n h h a a
Advertisement
Table of Contents

Related Manuals for Fagor IF-900S


Summary of Contents for Fagor IF-900S
- Page 1 PT GUIA DE UTILIZAÇÃO P P l l a a c c a a d d e e c c o o c c c c i i ó ó n n C C o o o o k k i i n n g g H H o o b b...
- Page 2 C60T379A2.qxd 14/3/07 16:10 Página 23...
- Page 3 C60T357A4.qxd 14/3/07 15:55 Página 1...
- Page 4 C60T376A8.qxd 14/3/07 16:21 Página 1...
- Page 5 • The nameplate features the technical and identification data for the appliance. • This manual must be consulted before making any electrical connections. • The electrical connections must be made by a specialist who is aware of the legal procedures and the standard requirements in each country.
-
Page 6: Table Of Contents
C60T376A8.qxd 14/3/07 16:21 Página 3 INDUCTION HOBS INDEX INSTALLATION 1. DESCRIPTION OF THE APPLIANCE 2. FRAME DIMENSIONS 3. FASTENING THE WORKTOP 4. INSTALLATION POSITION 1. TYPE OF APPLIANCE •Power of each hob 2. DESCRIPTION OF THE COMMANDS •Command with special functions -Funciones •Operation... -
Page 7: Installation
FRAME DIMENSIONS You appliance must be positioned so that the electricity network installation is accessible. The distance between the edge of the hob plate and the side or rear wall (or panel) must be at least 40 mm (zone A). - Page 8 C60T376A8.qxd 14/3/07 16:21 Página 5 FRAME DIMENSIONS 40 máx. 40 máx. 40 máx. 60 máx.
-
Page 9: Installation Position
Fix the four hob plate hooks underneath in the unit space cor- ners. INSTALLATION POSITION There must be a current of fresh air to cool your induction hob’s electronics circuits as shown in the diagram. 40mm minimum 5mm minimum 5mm minimum... -
Page 10: Type Of Appliance
C60T376A8.qxd 14/3/07 16:21 Página 7 USING INDUCTION HOBS TYPE OF APPLIANCE TYPE A Type “A” appliances have commands with special functions or with basic functions TYPE B Type "B" appliances have compact commands POWER OF EACH HOB Hob size Type “A” power Type “B”... -
Page 11: Description Of The Commands
Allows you to select the cooking time for the chosen hob between 0 and 99 minutes. If we press “-” and “+” at the same time, the timer is set to 0. If these buttons are held down the minutes increase at a faster rate. -
Page 12: Operation
• Whenever you wish you can activate the safety sensor by holding your finger over it for three seconds. • If you leave an object on top of the sensors, the hob top will beep and switch off. • The hob top switches off automatically after an estimated safety time, which varies according to the power level you have selected. -
Page 13: Timer Function
This time will count down until it reaches zero and then the hob will switch off. IMPORTANT If no time is selected and the display shows 00, the timer will switch off, and if it indicates 99, it will take 99 minutes as its timer time. ACOUSTIC SIGNAL It is possible to silence the appliance, or deactivate the acoustic signals. -
Page 14: Special Functions
By using the “BOOSTER” function, if the other hob is switched on the same side of the hobplate, the maximum power level which can be used is 6. This is due to the fact that in this function the appliance takes power from the adjacent hob. - Page 15 4. Validate the time by pressing the button (the digits will then flash). 5. Adjust the time to when you wish cooking to finish with the “ -” and “+” buttons from zones (B) and (E). 6. Validate by pressing the button.
-
Page 16: Command With Basic Functions
This function allows greater power to be obtained during a certain time. •The “P.” function (P point) is obtained by pressing the “+” button as far as the “P.” position, release the command and the “P.” will flash, press the command again and it will be put in the maximum power “P.”... -
Page 17: Compact Command
, the hob position will rotate. Once the hob to time has been selected, the time is assigned using the “+” or “-” timer buttons. This will display the time in minutes. If you start with ”+” the display will initially read “00”... -
Page 18: Safety
YOUR INDUCTION HOB GENERATES MAGNETIC FIELDS CLOSE BY. So that there is no interference between your cooking worktop and a pacemaker, it is necessary for the pacemaker to be designed in compliance with the relevant standard. As far as the compliance of the pacemaker is concerned, or possible incompatibilities, you can consult its manufacturer or your doctor. - Page 19 A flashing “H” will appear whilst it is hot. Do not touch these areas. PROTECTION IN THE EVENT OF SPILLAGE In the event of overflow, the hob with stop and a symbol will appear as shown in (Fig. A), and a warning beep (depending on the model) can be activated in any of the following three cases.
- Page 20 RECIPIENTS If the recipient is not appropriate, the power indicator will flash. Only glass, clay, aluminium without a special base, copper and some non magnetic stainless steels are not suitable for induction cooking.
-
Page 21: Care And Cleaning
Fo l l ow e a c h p r o d u c t ’s plate. So cleaning is much instructions . easier. -
Page 22: Electrical Connection
5 WIRE CABLES 220-240 V single phase 400 V 2N 3-phase 2 x 230 V three phase Separates the 2 live cables L1, L2 32 amp fuse 16 amp fuse and Neutral N1 N2 before making Separates the 2 live cables L1, L2 the connection. - Page 23 When switching the hob plate on for the first time or after a long time without use, a code will light up on the command panel.
-
Page 24: Troubleshooting
The plate gives off a smell New appliance Nothing, the message will when you cook on it for the disappear after 30 first few times. seconds. The plate does not The electronics circuit... - Page 25 C60T376A8.qxd 14/3/07 16:21 Página 22 ENVIRONMENTAL WARNINGS In order to look after the environment, hand in your used appliance to an official collection centre or a recycling centre. Before throwing away your used appliance make it unusable by cutting off the...
- Page 26 C60T376A8.qxd 14/3/07 16:21 Página 23...
- Page 27 C60T376A8.qxd 14/3/07 16:21 Página 24 03-07 C60T376A8 Printed on recycled paper...