Table of Contents
Advertisement
Available languages
Available languages
Quick Links
Istruzioni per installazione, uso e manutenzione
Montage und Bedienungsanleitung
Installation, use and maintenance instructions
Bruciatori di gas ad aria soffiata
I
Gas-Gebläsebrenner
D
Forced draught gas burners
GB
Funzionamento monostadio
Einstufiger Betrieb
One stage operation
CODICE - CODE
20098812
20098813
20098814
20098815
20098817
20098818
MODELLO - MODELL - MODEL
BS2F
BS2F-GPL
BS3F
BS3F-GPL
BS4F
BS4F-GPL
TIPO - TYP - TYPE
912 T2
912 T2
913 T2
913 T2
914 T2
914 T2
20098824 (1) - 07/2015
Advertisement
Chapters
Table of Contents

Related Manuals for Riello BS2F-GPL


Summary of Contents for Riello BS2F-GPL
- Page 1 Funzionamento monostadio Einstufiger Betrieb One stage operation CODICE - CODE MODELLO - MODELL - MODEL TIPO - TYP - TYPE 20098812 BS2F 912 T2 20098813 BS2F-GPL 912 T2 20098814 BS3F 913 T2 20098815 BS3F-GPL 913 T2 20098817 BS4F 914 T2...
- Page 2 La qualità viene garantita mediante un sistema di qualità e management certificato secondo UNI EN ISO 9001. Legnago, 21.05.2015 Direttore Generale Direttore Ricerca e Sviluppo RIELLO S.p.A. - Direzione Bruciatori RIELLO S.p.A. - Direzione Bruciatori Ing. U. Ferretti Ing. F. Comencini...
- Page 3 Die Qualität wird durch ein gemäß UNI EN ISO 9001 zertifiziertes Qualitäts- und Managementsystem garantiert. Legnago, 21.05.2015 Generaldirektor Leiter der Abteilung Forschung und Ent- RIELLO S.p.A. - Geschäftsleitung Brenner wicklung RIELLO S.p.A. - Geschäftsleitung Brenner Ing. U. Ferretti Ing. F. Comencini...
- Page 4 The quality is guaranteed by a quality and management system certified in accordance with UNI EN ISO 9001. Legnago, 21.05.2015 Executive General Manager Research & Development Director RIELLO S.p.A. - Burner Department RIELLO S.p.A. - Burner Department Mr. U. Ferretti Mr. F. Comencini...
-
Page 5: Table Of Contents
INDICE DESCRIZIONE DEL BRUCIATORE ..........1.1 Materiale a corredo . -
Page 6: Descrizione Del Bruciatore
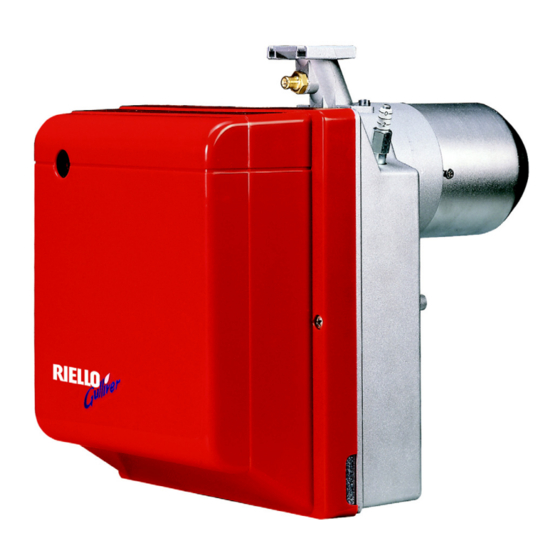
DESCRIZIONE DEL BRUCIATORE Bruciatore di gas ad aria soffiata con funzionamento monostadio. Fig. 1 0 4 2 68 20087417 1 – Pressostato aria 7 – Gruppo porta testa 2 – Presa 6 poli per rampa gas 8 – Presa di pressione “+” 3 –... -
Page 7: Dati Tecnici
Potenza elettrica assorbita 0,155 kW 0,20 kW 0,355 kW 0,485 kW 0,42 kW 0,60 kW Modello BS2F-GPL BS3F-GPL BS4F-GPL 35 ÷ 91 kW 65 ÷ 200 kW 110 ÷ 250 kW Portata 30,1 ÷ 78,2 Mcal/h 55,9 ÷ 172 Mcal/h 94,6 ÷... -
Page 8: Dimensioni
Alimentazione a gas naturale (Famiglia 2) per i diversi paesi: PAESE AT - IT - DK - CH GB - IE LU - PL CATEGORIA GAS II2H3B/P II2H3P II2ELL3B/P II2Er3P II2L3B/P II2E3B/P I2E(R)B, I3P – – – – – – PRESSIONE –... -
Page 9: Campi Di Lavoro
2.3 CAMPI DI LAVORO (G20 - G30 - G31) I campi di lavoro sono stati definiti in conformità alle prescrizioni della norma EN 676. Il bruciatore è applicabile per funzionamento con camera di combustione in depressione (fino a - 2 mbar), secondo i termini di approvazione previsti dalla norma EN 746-2 per l’intero apparecchio equipaggiato. - Page 10 GENERATORI DI PROVA Il campo di lavoro è stato ottenuto su generatori di prova secondo la norma EN 676. GENERATORI DI CALORE COMMERCIALI L’abbinamento bruciatore-generatore di calore non pone problemi se il generatore e le dimensioni della camera di combustione sono prossime a quelle previste nella norma EN 676. Se invece il bruciatore viene abbinato ad un generatore commerciale e le dimensioni della camera di com- bustione sono nettamente più...
-
Page 11: Installazione
INSTALLAZIONE L’INSTALLAZIONE DEL BRUCIATORE DEVE ESSERE EFFETTUATA IN CONFORMITÀ ALLE LEGGI E NORMATIVE LOCALI. 3.1 FISSAGGIO AL GENERATORE Allargare, se necessario, i fori dello schermo isolante (3, fig. 3). Fissare alla portina del generatore (1) la flangia (5) mediante le quattro viti (4) e (se necessario) i dadi (2) ... -
Page 12: Rampa Gas
3.3 RAMPA GAS (secondo EN 676) La rampa gas viene fornita a parte; per la sua regolazione vedere le istruzioni che l’accompagnano. RAMPA GAS ATTACCHI BRUCIATORE IMPIEGO ABBINABILE TIPO CODICE INGRESSO USCITA MBDLE 405 B01 3970547 Rp 3 / 4 Flangia 2 Gas naturale e GPL BS2F... -
Page 13: Linea Di Alimentazione Gas
3.5 LINEA DI ALIMENTAZIONE GAS Fig. 6 Legenda – Condotto arrivo gas – Saracinesca manuale (a carico dell’installatore) – Manometro pressione gas (a carico dell’installatore) – Filtro – Pressostato gas – Valvola di sicurezza – Stabilizzatore di pressione 20106930 – Valvola di regolazione M1 –... -
Page 14: Collegamenti Elettrici
3.6 COLLEGAMENTI ELETTRICI LEGENDA – Condensatore CN1 – Connettore sonda – Elettrodo – Contaore MV – Motore PA – Pressostato aria PG – Pressostato gas minima RS – Reset remoto SO – Sonda ionizzazione – Spia blocco (230V - 0,5 A max) T6A –... -
Page 15: Funzionamento
S7795 CODICE REGOLAZIONE MODELLO TIPO TESTA 20098812 BS2F 912T2 20098813 BS2F-GPL 912T2 kcal/h 20098814 BS3F 913T2 20106925 20098815 BS3F-GPL 913T2 210.000 20098817 BS4F... -
Page 16: Regolazione Serranda Aria
RIMONTAGGIO GRUPPO TESTA Rimontare con procedura inversa a quanto sopra descritto, riposizionando il gruppo testa (1) come in origi- ATTENZIONE Avvitare le viti (7) (senza bloccarle) fino a battuta; quindi bloccarle con una coppia di serraggio di 3 - 4 Nm. ... -
Page 17: Pressostato Aria
4.6 PRESSOSTATO ARIA Eseguire la regolazione del pressostato aria dopo aver effettuato tutte le altre regolazioni del bruciatore con il pressostato aria regolato a inizio scala. Con il bruciatore funzionante alla potenza minima aumentare la pressione di regolazione girando lentamente in senso orario l’apposita manopolina fino al blocco del bruciatore. -
Page 18: Manutenzione
4.11 IDENTIFICAZIONE TESTA È possibile identificare il tipo di testa installata controllando la presenza o meno della lettera incisa sul distributore gas. Fig. 10 20083158 Tipo gas G30 - G31 MANUTENZIONE Prima di effettuare qualsiasi operazione di pulizia o controllo, togliere alimentazione elettrica al bru- ciatore agendo sull’interruttore generale dell’impianto e chiudere la valvola d’intercettazione del gas. -
Page 19: Diagnostica Visiva Apparecchiatura
5.1 DIAGNOSTICA VISIVA APPARECCHIATURA L’apparecchiatura in dotazione ha una funzione diagnostica attraverso la quale è possibile individuare le eventuali cause di mal funzionamento (segnalazione: LED ROSSO). Per utilizzare tale funzione, è necessario premere il pulsante di sblocco per almeno 3 secondi dall’istante di messa in sicurezza (blocco). -
Page 20: Anomalie / Rimedi
ANOMALIE / RIMEDI Si elencano alcune cause e i possibili rimedi a una serie di anomalie che potrebbero verificarsi e portare ad un mancato o non regolare funzionamento del bruciatore. Un’anomalia, nel funzionamento nella maggior parte dei casi, porta alla accensione della segnalazione all’interno del pulsante di sblocco dell’apparecchia- tura di comando e controllo (4, fig. - Page 21 ANOMALIE POSSIBILE CAUSA RIMEDIO Verificare la pressione in rete e/o re- Le elettrovalvole fanno passare golare l’elettrovalvola come indicato in troppo poco gas. questo manuale. Le elettrovalvole sono difettose. Procedere ad una loro sostituzione. bruciatore Verificare il corretto inserimento dei blocco dopo la fase di connettori.
-
Page 22: Anomalie In Funzionamento
6.2 ANOMALIE IN FUNZIONAMENTO ANOMALIA POSSIBILE CAUSA RIMEDIO Verificare la corre tta p osizio ne ed eventualmente aggiustarla secondo quanto indicato in questo manuale. Sonda a massa. Provvedere alla pulizia o la sostituzione della sonda di ionizzazione. Il bruciatore va in Verificare la pressione del gas in rete e/ blocco in funziona- Sparizione della fiamma per 4 volte. - Page 23 INHALT BESCHREIBUNG DES BRENNERS ..........1.1 Mitgeliefertes Zubehör .
-
Page 24: Beschreibung Des Brenners
BESCHREIBUNG DES BRENNERS Gas-Gebläsebrenner mit einstufigem Betrieb. Fig. 1 0 4 2 68 20087417 1 – Luftdruckwächter 8 – Druckentnahmestelle “+” 2 – 6 - polige Steckdose für Gasstrecke 9 – Flammrohr 3 – Steuergerät mit 7 - poliger Steckdose 10 –... -
Page 25: Technische Merkmale
Primär 230V / 0,2A - Sekundär 8 kV / 12 mA Leistungsaufnahme 0,155 kW 0,20 kW 0,355 kW 0,485 kW 0,42 kW 0,60 kW Modell BS2F-GPL BS3F-GPL BS4F-GPL 35 ÷ 91 kW 65 ÷ 200 kW 110 ÷ 250 kW Brennerdurchsatz 30,1 ÷ 78,2 Mcal/h 55,9 ÷ 172 Mcal/h 94,6 ÷... -
Page 26: Abmessungen
Erdgasversorgung (2. Gasfamilie) für die verschiedenen Länder: LAND AT - IT - DK - CH GB - IE LU - PL GASKATEGORIE II2H3B/P II2H3P II2ELL3B/P II2Er3P II2L3B/P II2E3B/P I2E(R)B, I3P – – – – – – GAS - ANSCHLUSS – –... -
Page 27: Arbeitsfelder
ARBEITSFELDER Die Arbeitsfelder sind in Übereinstimmung mit den Vorschriften der Norm EN 676 festgelegt. Der Brenner ist nach den von Norm EN 746-2 für das ganze ausgerüstete Gerät vorgesehenen Genehmi- gungsbedingungen für einen Betrieb mit Brennkammer auf Unterdruck (bis zu - 2 mbar) anwendbar. 20073321 912T2 EN 676... - Page 28 HEIZKESSEL Das Arbeitsfeld wurde an einem Heizkessel, gemäß der Norm EN 676, ermittelt. HANDELSÜBLICHE HEIZKESSEL Die Vereinigung von Brenner und Wärmeerzeuger gibt keine Probleme, falls Heizkessel und Brennkam- merabmessungen jenen von Norm EN 676 vorgesehenen ähneln. Wird der Brenner dagegen mit einem handelsüblichen Heizkessel vereint und die Brennkammerabmessun- gen sind entschieden kleiner als jene von Norm EN 676 angegeben, so müssen die Hersteller zu Rate gezogen werden.
-
Page 29: Installation
INSTALLATION DIE INSTALLATION DES BRENNERS MUSS IN ÜBEREINSTIMMUNG MIT DEN ÖRTLICHEN GESETZEN UND VORSCHRIFTEN AUSGEFÜHRT WERDEN. BRENNERMONTAGE Falls erforderlich, die Bohrungen der Isolierdichtung (3, Abb. 3) erweitern. Mit den Schrauben (4) (falls erforderlich) den Muttern (2) an der Heizkesseltür (1) den Flansch (5) mit ... -
Page 30: Gasstrecken
GASSTRECKE, (nach EN 676) Die Gasstrecke wird extra bestellt; die Einregulierung wird entsprechend der beigefügten Betriebsanleitung durchgeführt. GASSTRECKE ANSCHLÜSSE ABGESTIMMTER GEBRAUCH BRENNER CODE EINGANG AUSGANG MBDLE 405 B01 3970547 Rp 3/4 Flansch 2 Erdgas und Flüssiggas BS2F MBDLE 407 B01 3970544 Rp 3/4 Flansch 2... -
Page 31: Gasanschluss-Schema
GASANSCHLUSS–SCHEMA Abb. 6 Zeichenerklärung – Gaszuleitung – Handabsperrschieber (Sonderzubehör) – Gasdruckmanometer (Sonderzubehör) – Filter – Gasdruckwächter – Sicherheitsventil – Gasdruckregler – Einstellventil 20106930 M1 – Messung, Anschlußdruck M2 – Messung, Brenner- Kopfdruck 20098824... -
Page 32: Elektrisches Verdrahtungsschema
3.6 ELEKTRISCHES VERDRAHTUNGSSCHEMA ZEICHENERKLÄRUNG – Kondensator CN1 – Verbinder Fühler – Zündelektrode – 1. Stufe Stundenzähler MV – Motor PA – Minimalluftdruckwächter PG – Minimalgasdruckwächter – Fernentstörung SO – Flammenfühler – Störabschaltung-Fernmeldung (230V - 0,5A max.) T6A – Sicherung – Brenner-Erdung –... -
Page 33: Betrieb
Das Diagramm dient nur als Hinweis; um die besten Brennerleistungen zu garantieren, wird empfohlen, den Kopf je nach Bedarf des Heiz- kesseltyps einzustellen. S7795 CODE BRENNERKOPF MODELL 20098812 BS2F 912T2 kcal/h 20098813 BS2F-GPL 912T2 20106925 20098814 BS3F 913T2 20098815 BS3F-GPL 913T2 210.000 20098817 BS4F 914T2 20098818 BS4F-GPL 914T2 170.000... -
Page 34: Luftklappeneinstellung
WIEDERZUSAMMENSETZUNG DES KOPFSYSTEMS Für die erneute Montage das oben Beschriebene auf umgekehrte Art ausführen und den Kopfblock (1) wieder wie ursprünglich anbringen. ACHTUNG Die Schrauben (7) bis zum Anschlag anschrauben (aber nicht befestigen), diese dann mit einem Anziehmo- ment von 3 – 4 Nm befestigen. Prüfen, dass es während des Betriebs keine Gasverluste durch die Schrauben gibt. -
Page 35: Luftdruckwächter
LUFTDRUCKWÄCHTER Während der Einregulierung des Gasbrenners wird der Luftdruckwächter auf 0 gestellt. Ist die Einregulierung abgeschlossen, wird der Luftdruck einreguliert. Die Regulierskala langsam im Uhrzei- gersinn drehen, bis der Brenner abschaltet. Dann die Regulierskala entgegengesetz um einen Wert zurüc- kdrehen, bis der Brenner wieder einschaltet. Mit dieser Einstellung den Brennerstart mehrmals wiederholen und bei Bedarf den Luftdruckwächter nachregulieren. -
Page 36: Wartung
4.11 BEZEICHNUNG DES FLAMMKOPFES Es ist möglich den Typ des Flammkopfes zu identifizieren, durch Überprüfen der Anwesenheit oder Abwesenheit des gravierte Bu- chstabens auf dem Gasverteiler. Abb. 10 20083158 Gas Typ G30 - G31 WARTUNG Vor der Durchführung von Reinigungs- oder Kontrollarbeiten, immer die elektrische Versorgung zum Brenner durch Betätigung des Hauptschalters der Anlage abschalten und das Gasabsperrven- til schließen. -
Page 37: Visuelle Diagnostik Des Steuergeräts
5.1 VISUELLE DIAGNOSTIK DES STEUERGERÄTS Das mitgelieferte Steuergerät hat eine Diagnosefunktion, um die eventuellen Ursachen von Betriebsstörungen zu ermitteln (Anzeige: ROTE LED). Um diese Funktion zu benutzen, muss mindestens 3 Sekunden lang ab dem Augenblick der Störabschaltung auf die Entstörtaste gedrückt werden. Das Steuergerät erzeugt eine Impulssequenz, die sich konstant alle 2 Sekunden wiederholt. -
Page 38: Störungen / Abhilfe
STÖRUNGEN / ABHILFE Nachfolgend finden Sie einige denkbare Ursachen und Abhilfemöglichkeiten für Störungen, die den Betrieb des Brenners beeinflussen oder einen nicht ordnungsgemäßen Betrieb des Brenners verursachen könnten. In den meisten Fällen führt eine Störung zum Aufleuchten der Kontrolleuchte in der Entstörtaste des Steu- ergeräts (4, Abb. -
Page 39: Grundlegende Sicherheitsregeln
STÖRUNGEN MÖGLICHE URSACHE ABHILFE Gemäß den Angaben dieser Anleitung Gasdurchsatz zu gering. den Gasdruck prüfen und/oder die Magnetventile einstellen. Die Magnetventile sind verschmutzt. Austauschen. Störabschaltung des Brenners nach Vorlüf- Die richtigen Kabelverbindung über- prüfen. tung, keine Flammen- Kein oder unregelmäßiger bildung. -
Page 40: Betriebsstörungen
6.2 BETRIEBSSTÖRUNGEN STÖRUNGEN MÖGLICHE URSACHE ABHILFE Richtige Position überprüfen und ggf. gemäß den Angaben in dieser Anleitung Geerdeter Fühler. korrekt einstellen. Ionisationsfühler reinigen oder ersetzen. Der Brenner geht Netzgasdruck überprüfen oder Magnet- während des 4-maliges Erlöschen der Flamme. ventil gemäß den Angaben in dieser Betriebs in Störab- Anleitung einstellen. - Page 41 INDEX BURNER DESCRIPTION ............1.1 Burner equipment .
- Page 42 BURNER DESCRIPTION One stage forced draught gas burner. Fig. 1 0 4 2 68 20087417 1 – Pressure switch 7 – Head holder assembly 2 – 6 pole socket for gas train 8 – Pressure test point “+” 3 – Control box with 7 pole socket 9 –...
- Page 43 Absorbed electrical power 0.155 kW 0.20 kW 0.355 kW 0.485 kW 0.42 kW 0.60 kW Model BS2F-GPL BS3F-GPL BS4F-GPL 35 − 91 kW 65 − 200 kW 110 − 250 kW Burner delivery 30.1 − 78,2 Mcal/h 55.9 − 172 Mcal/h 94.6 −...
- Page 44 Natural gas supply (Family 2) for the various countries: COUNTRY AT - IT - DK - CH GB - IE LU - PL GAS CATEGORY II2H3B/P II2H3P II2ELL3B/P II2Er3P II2L3B/P II2E3B/P I2E(R)B, I3P – – – – – – – –...
- Page 45 FIRING RATES Firing rates have been determined in conformity with the provisions of standard EN 676. In addition, burner can be applied for operation with the combustion chamber featuring negative pressure (up to - 2 mbar) according to the approval terms provided for in standard EN 746-2 for the whole unit com- plete with equipment.
- Page 46 TEST HEAT GENERATOR The working field has been defined according to EN 676 standard. COMMERCIAL HEAT GENERATORS The burner-heat generator team does not pose problems provided the generator and size of the combustion chamber are similar to those provided for in standard EN 676. If, on the other hand, the burner is teamed with a commercially-available heat generator and the combustion chamber is much smaller than the size indicated in standard EN 676, you should consult the manufacturers.
- Page 47 INSTALLATION THE BURNER MUST BE INSTALLED IN CONFORMITY WITH LEGISLATION AND LOCAL STANDARDS. HEAT GENERATOR FIXING Widen, if necessary, the insulating gasket holes (3, fig. 3). Fix the flange (5) to the heat generator door (1) using four screws (4) and (if necessary) the nuts (2) ...
- Page 48 GAS TRAIN (according to EN 676) The gas train is supplied separately, for its adjustment see the enclosed instructions. GAS TRAIN CONNECTIONS MATCHED BURNER TYPE CODE INLET OUTLET 3970547 Rp 3/4 Flange 2 Natural gas and LPG MBDLE 405 B01 BS2F MBDLE 407 B01 3970544...
- Page 49 GAS FEEDING LINE Fig. 6 Key to lay-out – Gas supply pipe – Manual cock (charged to the installer) – Gas pressure gauge (charged to the installer) – Filter – Gas pressure switch – Safety valve – Pressure governor – Adjusting valve 20106930 M1 –...
- Page 50 3.6 ELECTRICAL WIRING KEY TO LAY-OUT – Capacitor CN1 – Ionisation probe connector – Electrode – Hour counter MV – Motor – Min. air pressure switch – Min. gas pressure svitch – Remote reset – Ionisation probe – Lock-out signal (230V - 0.5A max.) T6A –...
- Page 51 CODE HEAD SETTING MODEL TYPE S7795 20098812 BS2F 912T2 20098813 BS2F-GPL 912T2 20098814 BS3F 913T2 kcal/h 20098815 BS3F-GPL 913T2 20106925 20098817 BS4F 914T2...
- Page 52 WARNING Tighten the screws (7) completely (without locking them); then lock them with a torque wrench setting of 3 - 4 Nm. Check there are no gas leaks from the screws during these operations. AIR DAMPER SETTING, (fig. 8, page 11) Fig.
- Page 53 4.6 AIR PRESSURE SWITCH The air pressure switch is set after all other adjustments have been made. Begin with the switch at the lowest setting. With the burner working at the minimum output, adjust the dial clockwise, increasing its value until the burner shuts down. Now reduce the value by one set point, turning the dial anti-clockwise.
- Page 54 4.11 COMBUSTION HEAD IDENTIFICATION It is possible to identify the type of combustion head installed, by checking the presence or absence of the letter marked on the gas distributor. Fig. 10 20083158 Gas type G30 - G31 MAINTENANCE Disconnect the electric supply to the burner by switching off the main power switch and close the gas shut-off valve before maintaining or checking the system.
- Page 55 5.1 VISUAL DIAGNOSTIC CONTROL BOX The control box has a diagnostic function that can identify the likely causes of any malfunctions (indicator: RED LED). In order to be able to use this function, press and hold the reset button for at least 3 seconds from when the appliance is made safe (lock-out).
- Page 56 FAULTS / SOLUTIONS Here below you can find some causes and the possible solutions for some problems that could cause a failure to start or a bad working of the burner. A fault usually makes the lock-out lamp light which is situated inside the reset button of the control box (4, fig.
- Page 57 FAULTS POSSIBLE CAUSES SOLUTION Check the pressure in the network and/ The solenoid valves is passing too lit- or adjust the solenoid valve according to tle gas. the instructions of this manual. The solenoid valves are defective. Change them. The bu rner lock s out Check the right insertion of the connec- a f t e r t h e p r e p u r g e tors.
- Page 58 6.2 OPERATING IRREGULARITIES FAULTS POSSIBLE CAUSES SOLUTION Check the right position and if necessary set it according to the instructions of this Earth probe. manual. Clean or replace the ionization probe. Check the gas pressure in the network The burner locks out The flame disappears 4 times.
- Page 60 RIELLO S.p.A. I-37045 Legnago (VR) Tel.: +39.0442.630111 http:// www.riello.it http:// www.riello.com Con riserva di modifiche - Änderungen vorbehalten! - Subject to modifications...