Table of Contents
Advertisement
Quick Links
Advertisement
Table of Contents

Related Manuals for Rinnai RB-63SSV-DL


Summary of Contents for Rinnai RB-63SSV-DL
- Page 1 Operation / Installation Manual Built-In Hob RB-63SSV-DL (LPG) RB-63SSV-DL (TG) RB-63SSV-DR (LPG) RB-63SSV-DR (TG) RB-64SSV-D (LPG) RB-64SSV-D (TG) RB-63SSV-AL (LPG) RB-63SSV-AL (TG) RB-63SSV-AR (LPG) RB-63SSV-AR (TG) RB-64SSV-A (LPG) RB-64SSV-A (TG) Rinnai Corporation...
-
Page 2: Table Of Contents
Guide to Appliances RB-64SSV-D & RB-64SSV-A Guide to Appliances RB-633V-DL & RB-633V-AL Guide to Appliances RB-633V-DR & RB-633V-AR Guide to the Appliances Specification Safety Instructions Using for the first time Installation Guide Operation Suitable Pans Cleaning and Care Trouble Shooting Rinnai Customer Care Centers... -
Page 3: Guide To Appliances Rb-64Ssv-D & Rb-64Ssv-A
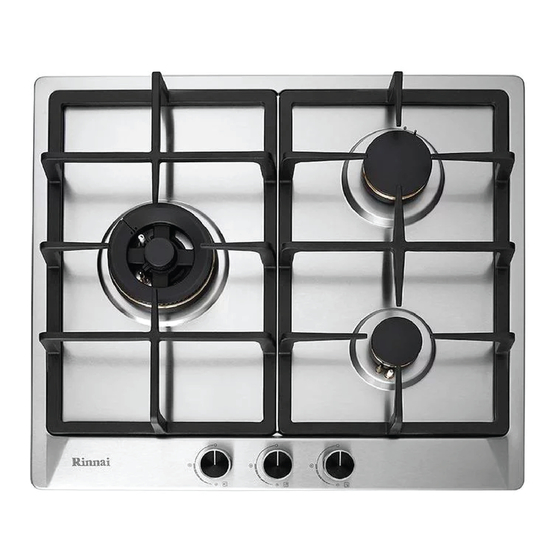
Guide to the Appliances RB–64SSV-D / RB-64SSV-A M Burner S Burner ES Burner S Burner Front Left Rear Left Rear Right Front Right Control Control Control Control... -
Page 4: Guide To Appliances Rb-633V-Dl & Rb-633V-Al
Guide to the Appliances RB–633V-DL / RB-633V-AL S Burner B Burner ES Burner Left Control Rear Right Front Right Control Control... -
Page 5: Guide To Appliances Rb-633V-Dr & Rb-633V-Ar
Guide to the Appliances RB–633V-DR / RB-633V-AR S Burner B Burner ES Burner Front Left Rear Left Right Control Control Control... -
Page 6: Guide To The Appliances
Guide to the Appliances Burner Assembly M, S, ES Burner B Burner 1 Burner cap 1 Simmer cap 2 Burner base 2 Burner base 3 Ignitor 3 Ignitor 4 Thermocouple 4 Thermocouple 5 Burner head 5 Burner head 6 Burner Ring Safety Cut Off System Your hob comes with a safety device (thermocouple) that prevents the flow of... -
Page 7: Specification
Specification (LPG) Rinnai RB-63SSV-DL RB-63SSV-DR RB-64SSV-D Model No. RB-63SSV-AL RB-63SSV-AR RB-64SSV-A Cut-out Size(mm) 555×475 4-R20 555×475 4-R20 555×475 4-R20 Product Size(mm) 580×510×120 580×510×120 580×510×120 Left: 4.5 Right: 4.5 Rear Left : 2.2 Rear Right: 1.8 Rear Left : 1.8 Front Left: 1.2 Front Right: 1.2... -
Page 8: Safety Instructions
You are to contact your local Rinnai Customer Care Centres if there is a need to convert to another type of gas. - Page 9 Safety Instructions o Do not store or use corrosive chemicals, steamers, flammable materials or non-food products below or near this domestic appliance. o If the appliance has not been used for a long period of time it should be thoroughly cleaned before it is used again.
- Page 10 During installation, maintenance and repair work, the appliance must be disconnected from the gas supply and mains electricity supply. While the appliance is under warranty, repairs should only be undertaken by a service technician authorised by Rinnai. Otherwise the guarantee is invalidated.
-
Page 11: Using For The First Time
Using for the first time o Remove any protective foil and adhesive labels. o Clean all removable parts of the burners with a solution of warm water and a little washing-up liquid applied with a soft sponge. Dry all parts thoroughly after cleaning and then reassemble the burners (see "Cleaning and care"). -
Page 12: Installation Guide
Before you begin, turn off the appliance's electricity and gas supply. You are recommended to contact your local Rinnai Customer Care Centres to convert to another type of gas. - Page 13 Installation Guide Fig 1 & Fig 2 1) Front 2) Battery Holder 3) Gas outlet...
- Page 14 Installation Guide Electrical installation This series of hob have 2 type of ignition, DC and AC. For DC hob, please install a DC 1.5v battery into the battery casing at the bottom of the Hood. (Fig 1) For AC connection. The 3 wires come in 3 colour.
- Page 15 Appliances with plugs must only be connected to sockets that have earth wires correctly installed. The supply cable can only be changed by your local Rinnai customer care centre and not the user. The cable type and minimum cross-section must be respected.
- Page 16 Installation Guide Gas Connection (LPG) Fig 3 A) Gas (TG) connector B) O-Ring C) LPG adaptor D) LPG hose E) Hose clip...
- Page 17 Installation Guide Electrical Connection Fig 4 RB-633SSV-DL / RB-63SSV-DR RB-64SSV-D RB-64SSV-D RB-633SSV-DL / RB-63SSV-DR...
-
Page 18: Operation
Operation Control Knob o The control knob is used to ignite the burner and to regulate the strength of the flame. The gas supply is turned off High Flame Low Flame The burners can only be in operation mode by pressing down the appropriate control and turning it anti-clockwise, and switched off by turning the control clockwise. - Page 19 Operation In the Event of a Power Disruption (for AC model only) o If there is an interruption to the electricity supply, the gas hob can be ignited with a match (small naked flame). o Press in the relevant control and turn it anti-clockwise to the large flame symbol. o Hold the control down and light the burner with match sticker (naked flame).
- Page 20 Operation o If using the appliance intensively for prolonged periods, you may require additional ventilation (e.g. by opening a window) or more effective ventilation (e.g. by increasing the hob's ventilation, if possible). o If the burner flames are accidentally blown out, switch off the burner operating control knob and do not try to relight it for at least one minute.
-
Page 21: Suitable Pans
Suitable Pans Suitable Pans Burner Minimum pan diameter Maximum pan diameter Big Burner Medium Burner Small Burner Extra small Burner o Refer to the chart above and ensure that the pan diameter falls within the minimum and maximum diameters given for the burner you are using. A pan which is too small will be unstable on the pan support. -
Page 22: Cleaning And Care
Cleaning and Care Cleaning and Care o The appliance should be cleaned after each use. Allow the appliance to cool down to a safe temperature before cleaning. o To avoid water marks and lime scale deposits, use a soft cloth to dry surfaces that have been cleaned with water. - Page 23 Cleaning and Care Cleaning Cleaning Instructions Stainless Steel Clean stainless steel surfaces with a Printed surfaces Surface solution of warm water and a little washing- (Flame symbols) up liquid applied with a soft sponge. Remove any soiling which comes into contact with the If necessary, you could use the scouring printed flame symbols straight away.
- Page 24 Cleaning and Care To Assemble the B Burner Place burner base onto burner head . Ensure the burner base sit nicely on the burner head with the thermocouple and the ignitor extend through their respective holes in the burner base. Position the Ring burner onto the burner base .
- Page 25 Cleaning and Care To Assemble the M, S & ES Burner Place the burner base onto the burner head so that the thermocouple , the ignitor fit into their respective slot along the burner base . Position the burner cap onto the burner base When correctly positioned it will not slide about.
-
Page 26: Trouble Shooting
Clean the grooves on the burner are dirty. cap & base. If problem persists after the above check, please contact Rinnai Customer Care Centre for Assistance. Please quote the model number of your appliance as shown on the rating plate attached to your equipment. -
Page 27: Rinnai Customer Care Centers
: (86) 20 3821 7976 Fax : (63) 2 292 8187 Email : grrjdq@gzrinnai.com.cn : www.gzrinnai.com.cn Singapore Rinnai Holdings (Pacific) Pte Ltd 61 Ubi Road 1 Indonesia #02-20 & 21Oxley Bizhub Customer Care of PT. Rinnai Indonesia Singapore 408727 Jl. Raya Pejuangan No.21, Tel : (65) 6748 9478 Fax : (65) 6745 9240 Komp.