Multitech FaxFinder FF200 Quick Start Manual
2-port v.34 fax server
Hide thumbs
Also See for FaxFinder FF200:
- Client operation primer (14 pages) ,
- Configuration manual (6 pages) ,
- Administrator user manual (169 pages)
Table of Contents
Advertisement
Quick Links
Advertisement
Table of Contents

Related Manuals for Multitech FaxFinder FF200


Summary of Contents for Multitech FaxFinder FF200
- Page 1 FF200 2-Port V.34 Fax Server Quick Start Guide...
- Page 2 Furthermore, Multi-Tech Systems, Inc. reserves the right to revise this publication and to make changes from time to time in the content hereof without obligation of Multi-Tech Systems, Inc., to notify any person or organization of such revisions or changes. Record of Revisions...
-
Page 3: Table Of Contents
Contents GETTING STARTED... 5 ... 8 UPPLY ... 8 UPPLY LED P ... 9 ANEL PBX C REREQUISITE ETERMINING ... 9 ONFIGURATION SERVER INSTALLATION PROCESS ... 11 A: C ONNECTING THE INDER TO ... 11 THERNET 1. Connect FaxFinder to AC Outlet... 11 2.Verify powering. - Page 4 10. Specifying Administrator’s Client Password ... 32 11. Sending Test Fax from Fax Machine to FaxFinder... 33 12. Adding Client/Users to the Phone Book ... 35 CLIENT SOFTWARE INSTALLATION PROCESS ... 37 NSTALL INDER LIENT OFTWARE SSOCIATE LIENT WITH PECIFIC AKING DDRESS NTRIES...
-
Page 5: Getting Started
POTS Mode PBX Routing Mode. When connected to station ports (2) on a , the FF200 functions as a network fax server with full two- way fax service. Multiple PBX extension numbers are dedicated to incoming fax traffic which is routed to the FF200. (Two station ports are needed. - Page 6 Fax clients on the network can send faxes directly from their PCs using any application program that can print. In response to the ‘Print’ command, the FF200 turns the ‘print file’ image into a fax. It transmits the fax to the public phone system (PSTN) or to another PBX extension.
- Page 7 Multi-Tech FaxFinder Quick Start Getting Started...
-
Page 8: We Supply
Getting Started Multi-Tech FaxFinder Quick Start We Supply • An FF200 FaxFinder with factory-installed software • A set of four self-adhesive plastic feet • One universal power supply with power cord • Two common telephone cables (RJ-11 at both ends) •... -
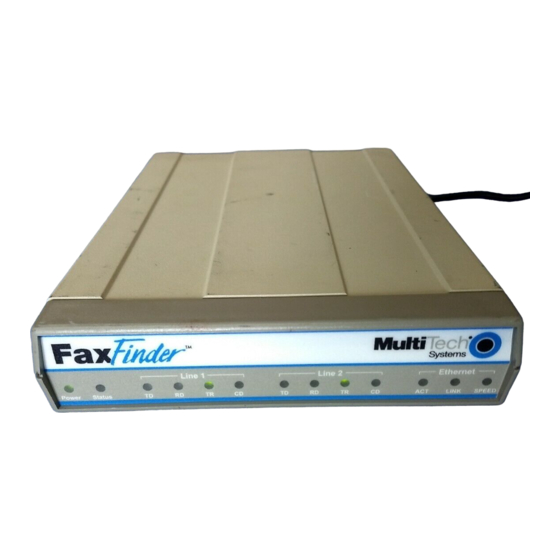
Page 9: Led Panel
PBX users to have their own unique directory numbers for receiving faxes. If you are using the FF200 in conjunction with a PBX and in “PBX Routing Mode,” be sure that the PBX has this multiple- extension-to-single-port capacity and that this capacity is... - Page 10 When an incoming call is received by the PBX for one of these extension numbers, the PBX will ring the station port to which the FF200 is installed. The FF200 will detect the ring and go off hook . When the PBX detects that the line has been seized, it will send DTMF digits to the FF200 identifying the extension number for which the fax was intended.
-
Page 11: Server Installation Process
Server Installation Multi-Tech FaxFinder Quick Start Server Installation Process Part A: Connecting the FaxFinder to Power Outlet and Ethernet Summary: Place the FaxFinder in a convenient location. Then connect it to your AC power outlet, POTS lines or PBX station ports, and Ethernet. -
Page 12: Connect Faxfinder To Ethernet Network
Server Installation Multi-Tech FaxFinder Quick Start 3. Connect FaxFinder to Ethernet Network. Plug one end of your RJ45 ethernet cable into the FaxFinder’s ethernet jack and the other end into your network ethernet hub. This ethernet cable is not included with your FaxFinder unit. -
Page 13: Part B: Connecting To Telephony Service
Multi-Tech FaxFinder Quick Start Part B: Connecting to Telephony Service The FF200’s fax modem can either be connected to a PBX (for use in PBX Routing Mode) or to a POTS line (for use in POTS Mode). Connection for PBX Routing Mode Plug one end of the phone cable into the FaxFinder’s LINE... -
Page 14: Part C: Configuring The Faxfinder Server
Server Installation Multi-Tech FaxFinder Quick Start Part C: Configuring the FaxFinder Server Summary of Configuration Data The table below lists the information you will need to fill in on the various FaxFinder Server screens. Gathering this information in advance will expedite the FaxFinder configuration process. - Page 15 Multi-Tech FaxFinder Quick Start User Parameters (for Server Phonebook, Client Options screen, and Client Add Device Address screen) Name User ID/ Email Username Address Server Installation Password...
-
Page 16: Setting Admin Pc To Startup Ip Address
Server Installation Multi-Tech FaxFinder Quick Start 1. Setting Admin PC to Startup IP Address a. Connect a pc to your network. b. Set the pc IP address to 192.168.2.x subnet (using any address excluding 192.168.2.1). Windows XP Windows 2000 a. From the Windows a. -
Page 17: Logging In (I)
Multi-Tech FaxFinder Quick Start Windows NT a. From the Windows desktop, right-click on “Network Neighborhood,” and select “Properties.” In the Network screen, on the “Protocols” tab, select “TCP/IP Protocol” in the list of Network Protocols. Click “Properties.” c. In the Microsoft Internet Protocol (TCP/IP) Properties screen, record the existing IP address. -
Page 18: Setting Faxfinder Ip Addresses
Name Server Name Server update b. Fill in the IP information that applies to your FF200 FaxFinder Server unit. The fields for “IP Address,” “Subnet Mask,” “Default Gateway” and “Name Server” are required. A “Secondary Name Server” may be considered optional. -
Page 19: Setting Administrative Functions
Multi-Tech FaxFinder Quick Start screen should appear. (If the Login screen does not appear, see the Troubleshooting chapter of the Administrator User Guide.) 6. Setting Administrative Functions Go to the FaxFinder Phone Book screen. Note: The first two rows of the Phone Book list are for special purposes. - Page 20 Server Installation Multi-Tech FaxFinder Quick Start Phone Book User ID E mail Address Name Ad mini strator a dmin Un assign ed Nu mber a. Administator Row: Email Address i. In the “Administrator” row of the Phone Book screen, enter the name and user ID to be used for the FaxFinder administrator (it need not be literally “Administrator”).
- Page 21 Multi-Tech FaxFinder Quick Start At this point, the FaxFinder ‘home’ page is displayed. Click on Phone Book to see the updated values. Phone Book Name User ID E mail Address Pa t -Admin p at-a dmin pa t@a cme 99.com U nassi gned N umbe r b1.
- Page 22 Server Installation Multi-Tech FaxFinder Quick Start b1. Unassigned Number Row: POTS Mode only In the “Unassigned Number” row of the Phone Book screen, enter the email address of the person whom you want to receive all faxes sent to the FaxFinder system.
- Page 23 Multi-Tech FaxFinder Quick Start c. Personal Email Address for Administrator (optional) i. Just below the “Unassigned Number” row of the Phone Book screen, enter the name and user ID that the FaxFinder Administrator can use to send and receive (PBX Routing Mode only) personal faxes. In PBX Routing Mode, enter, in the Ext field, the Administrator’s PBX fax extension.
-
Page 24: Setting Up The Mail Server
Server Installation Multi-Tech FaxFinder Quick Start 7. Setting Up the Mail Server The FaxFinder uses a mail server to send fax log reports, by email, to the administrator. An email is also sent to the administrator each time the FaxFinder is powered up. In all cases, you must specify the address of the mail server and the email address of the administrator. - Page 25 Multi-Tech FaxFinder Quick Start d. At this point the Administrator should receive an email from your FaxFinder saying that the mail server address has been updated. e. Email Server Authentication Parameters. If your email server requires authentication in order to give the FaxFinder access, fill in the lower three fields (Server User ID, Password, Retype Password).
-
Page 26: Configuring The Faxfinder's Modems
Server Installation Multi-Tech FaxFinder Quick Start 8. Configuring the FaxFinder’s Modems Each of the FaxFinder’s Modems directs inbound faxes to client email addresses. a. In the FaxFinder Server software, go to the Modem Configuration screen. b. In the Modem Configuration: POTS Modem 1, screen, enter the modem characteristics needed in your FaxFinder system. - Page 27 Multi-Tech FaxFinder Quick Start Server Installation e. Set the Max DTMF Digits field per the requirements of the PBX with which the FaxFinder will interface (if applicable).
- Page 28 Server Installation Multi-Tech FaxFinder Quick Start f. Fax ID. The value entered in the “Fax ID” field will appear in the fax log printed by the sender’s fax machine and, typically, will be printed at the top of each page of the transmitted fax.
- Page 29 Multi-Tech FaxFinder Quick Start h. Dial Prefix (or ‘access digit’). When the FaxFinder is attached to an extension of a PBX or key phone system, an access digit is often required to ‘get an outside line’ (that is, to make a connection to the PSTN). Often a “9” or an “8” is used for this purpose.
- Page 30 Server Installation Multi-Tech FaxFinder Quick Start k2.Test Call - for POTS Mode (where the Routing field is set to “Pots Line”). From a different POTS phone, dial the number of the phone line to which the FF-200 FaxFinder is attached.
-
Page 31: Changing Admin's Server Password
Multi-Tech FaxFinder Quick Start 9. Changing Admin’s Server Password a. In the Password Administration screen, enter a new Password for the FaxFinder Administrator (something other than “admin”). This password is to be used in that person’s capacity as administrator. Then re-enter the password in the “Confirm Password”... -
Page 32: Specifying Administrator's Client Password
Server Installation Multi-Tech FaxFinder Quick Start 10. Specifying Administrator’s Client Password a. In the Password Administration screen, enter a new Password for the FaxFinder Administrator to be used for sending in that person’s capacity as client/user of the FaxFinder system. Then re-enter the password in the “Confirm Password”... -
Page 33: Sending Test Fax From Fax Machine To Faxfinder
Multi-Tech FaxFinder Quick Start 11. Sending Test Fax from Fax Machine to FaxFinder a. Using a conventional fax machine, send a fax to the fax number established for the FaxFinder Administrator. b. Verify that the fax message sent reaches the email inbox of the administrator. - Page 34 Verify also that you can open the fax in a Tiff viewer program on your computer. The viewer program you use could be either the Multi-Tech Tiff Viewer or a graphic file viewer included with or installed in your PC. (The Multi-Tech Tiff viewer is included on the Product CD and installed with other client programs.
-
Page 35: Adding Client/Users To The Phone Book
Multi-Tech FaxFinder Quick Start 12. Adding Client/Users to the Phone Book You can add entries to the FaxFinder Phone Book by direct data entry (typing in the names, user IDs, email addresses, and phone extension numbers) in the FaxFinder server software. - Page 36 Server Installation Multi-Tech FaxFinder Quick Start ii. Click on Add for each row. The message “Success: [name] was updated” will appear above the Phone Book list. Phone Book Name User ID E mail Address Pa t-Ad mi n p at-a dmin pa t@a cme 99.com...
-
Page 37: Client Software Installation Process
5. A transient screen will appear while files are being copied. 6. You will be asked whether or not you want to associate TIF and CPG files with the Multi-Tech Tiff Viewer. Click Yes (unless you prefer to use a different viewer program). - Page 38 Client Installation Multi-Tech FaxFinder Quick Start 8. If a Question screen appears asking "Warning - the extension TIF is already registered, Overwrite?,” you must respond. Click Yes if you wish to use the TIFF viewer installed with the FaxFinder Client Software. Click No if you prefer to use a different software package for viewing TIF files.
-
Page 39: Associate Client With Specific Faxfinder Unit(S)
Multi-Tech FaxFinder Quick Start Device Manager Associate Client with Specific FaxFinder Unit(s) 1. At the main screen of the FaxFinder Fax Client Software, click on Edit and select “Add Fax Server.”... - Page 40 Client Installation Multi-Tech FaxFinder Quick Start 2. At the Add Device Address screen, in the “Select Server” field, highlight “FaxFinder.” In the “Enter Address” field, enter the IP address or domain name of the FaxFinder unit that the client will use.
- Page 41 Multi-Tech FaxFinder Quick Start 3. Enter, in the appropriate fields, the Username and Password that the client will use when accessing this FaxFinder unit. (The Username in the FaxFinder client software is the same as the User ID in the FaxFinder server software.) If the client is to be associated with multiple...
- Page 42 Client Installation Multi-Tech FaxFinder Quick Start 4. A new FaxFinder entry should appear on the “Device Status” tab of the FaxFinder Fax Client Software screen. The status of the newly registered FaxFinder unit should momentarily go from “Logging in” to “Idle.” If it goes to Login Failure, then one of two things is wrong: a.
-
Page 43: Making Address Book Entries
Multi-Tech FaxFinder Quick Start Device Manager Making Address Book Entries The Address Book in the FaxFinder Fax Client software is a list of persons to whom you expect to send faxes frequently. It is a kind of “outbound list” or recipient list for faxing. You can create... -
Page 44: Making An Address Book By Direct Data Entry
Client Installation Multi-Tech FaxFinder Quick Start Making an Address Book by Direct Data Entry 1. In the FaxFinder Fax Client Software, go to Edit | Add Contact 2. Fill in a Name and Fax Number for the recipient and specify... -
Page 45: Making Address Book Entries By Synchronization With Microsoft Outlook
Multi-Tech FaxFinder Quick Start Making Address Book Entries by Synchronization with Microsoft Outlook 1. In Microsoft Outlook, view the folder from which you want to be able to transfer fax numbers to the the FaxFinder Client Address Book. Confirm that you want those entries in your FaxFinder Client Address Book. - Page 46 Client Installation Multi-Tech FaxFinder Quick Start 3. Click on Browse. Select the desired folder from the Select Contact Folder (Outlook:) screen. Click OK. If a confirmation screen appears, click OK. At the Options screen, click OK. 4. In the FaxFinder Fax Client Software, go to the Device Status tab and select Outlook Synchronizer in the “Device”...
-
Page 47: Send Test Fax
Multi-Tech FaxFinder Quick Start 5. Right-click on Outlook Synchronizer and select Synchronize with Outlook. The Outlook Contact information will be copied into the FaxFinder Address Book. Entries from the FaxFinder Address Book (if any) will also be copied into the Outlook Contact list. -
Page 48: Device Manager Software Functions
Device Manager Multi-Tech FaxFinder Quick Start Device Manager Software Functions The Device Manager software lets you control multiple CallFinder units as a system. It is typical to install the Device Manager program on the administrator’s computer (Windows operating system required). -
Page 49: Installing Device Manager Software
Multi-Tech FaxFinder Quick Start Device Manager Installing Device Manager Software... - Page 50 Device Manager Multi-Tech FaxFinder Quick Start Device Manager Installation (continued) The Device Manager installation is complete.
-
Page 51: Adding Faxfinders
Multi-Tech FaxFinder Quick Start Device Manager Adding FaxFinders Any FaxFinder unit to be added to the system and come under the management of the Device Manager software must be connected to the same IP network as the computer running the Device Manager software. -
Page 52: Synchronizing Phonebooks
Device Manager Multi-Tech FaxFinder Quick Start Synchronizing Phonebooks To synchronize phonebooks is to cause the list of allowable inbound fax recipients on one FaxFinder server to be the same as that on another FaxFinder server. Both FaxFinder servers must be connected to the same Ethernet network. When FaxFinder phonebooks are synchronized, all non-administrative listings match. - Page 53 Multi-Tech FaxFinder Quick Start Device Manager Synchronizing phonebooks entails three steps: 1. Designating one FaxFinder as the master phone book. In the main Device Manager screen, right-click on the unit to be designated as master, scroll to Set Phone Book Sharing, and...
- Page 54 Device Manager Multi-Tech FaxFinder Quick Start 2. Designating all other FaxFinder units participating in phonebook sharing as Copy units. In the main Device Manager screen, right-click on each unit to share the master phonebook, and select Copy. 3. Invoking synchronization. In the main Device Manager screen, open the Edit menu and select Synchronize Phonebooks.
- Page 55 Multi-Tech FaxFinder Quick Start Device Manager...
- Page 56 Device Manager Multi-Tech FaxFinder Quick Start After the master phonebook has been transferred to the first Copy FaxFinder (or CallFinder) unit and that unit has been rebooted, the Device Manager will automatically begin synchronizing the additional Copy FaxFinder (or CallFinder) unit in the system (if any) until all have been synchronized.
-
Page 57: Client Operation
Multi-Tech FaxFinder Quick Start Client Operation Sending a Fax To send a fax by printing from an application program on a client PC, follow the steps listed below. 1. The client PC and the FaxFinder server must both be connected to the same Ethernet LAN system. (See the section “Part B: Configuring the FaxFinder Server”... - Page 58 Client Operation Multi-Tech FaxFinder Quick Start However, you can send faxes through the FaxFinder without bringing up the FaxFinder Fax Client Software screen.
- Page 59 Multi-Tech FaxFinder Quick Start 4. At the application program (for example, a word processing program or drawing program), print to the FaxFinder. Setting the destination of the printing job varies from program to program. For the common Notepad text editor program, for example, you must set the destination printer in the Page Setup screen.
- Page 60 Client Operation Multi-Tech FaxFinder Quick Start 5. After the printing has been initiated by the application program, the FaxFinder Send Fax screen will appear. Click on Address Book. When the Address Book screen appears, click “Add.” At the New Contact screen, enter the recipient’s name, fax number, and any other contact...
- Page 61 Multi-Tech FaxFinder Quick Start The recipient’s fax number should be entered as you would dial it from a phone on the public phone network (as from a residential phone). Click OK. At the Address Book screen, highlight the recipient in the list and click “Select.”...
- Page 62 In it, you can view both the cover page and the main fax page(s). (For more information on this, see the section “Using the Multi-Tech Tiff Viewer” in the Client User Guide.) When satisfied with your fax, close the Multi-Tech Tiff Viewer program and return to the FaxFinder Send Fax screen.
-
Page 63: Receiving A Fax
Multi-Tech FaxFinder Quick Start 7. At the FaxFinder Send Fax screen, click on the “Send Fax Now” button to send the fax. 8. Confirmation of having sent the fax(es) successfully will appear in the “Fax Log” tab of the FaxFinder Fax Client Software screen. -
Page 64: Receiving Faxes In Pbx Routing Mode
Client Operation Multi-Tech FaxFinder Quick Start 3. The recipient opens the email message. The incoming fax message takes the form of a graphic file attachment. The FaxFinder Server has assigned the file an automatic file name. Receiving Faxes in PBX Routing Mode In PBX Routing Mode, the FaxFinder Server delivers incoming faxes to client PCs in their email inboxes. - Page 65 Multi-Tech FaxFinder Quick Start The sender’s “Remote ID” and the recipient’s name appear in the “Subject” line of the email message. (The Remote ID comes from the sending fax machine and is typically the sender’s fax number or name.) 5. The fax recipient (a client of the FaxFinder Server) opens the email message.
-
Page 66: Tech Support
Technical Support department at the phone number or email address for your geographic location as listed on page 2. Product support resources are available at the Multi-Tech web site: www.multitech.com. - Page 67 Multi-Tech FaxFinder Quick Start Client Operation...
- Page 68 Patents This device is covered by one or more of the following patents: 6,031,867; 6,012,113; 6,009,082; 5,905,794; 5,864,560; 5,815,567; 5,815,503; 5,812,534; 5,809,068; 5,790,532; 5,764,628; 5,764,627; 5,754,589; D394,250; 5,724,356; 5,673,268; 5,673,257; 5,644,594; 5,628,030; 5,619,508; 5,617,423; 5,600,649; 5,592,586; 5,577,041; 5,574,725; D374,222; 5,559,793; 5,546,448; 5,546,395; 5,535,204;...