Multitech FF240-IP User Manual
Ip fax server
Hide thumbs
Also See for FF240-IP:
- Administrator's manual (108 pages) ,
- Developer's manual (55 pages) ,
- User manual (35 pages)
Table of Contents
Advertisement
Quick Links
Download this manual
See also:
Administrator's Manual
Advertisement
Table of Contents

Related Manuals for Multitech FF240-IP


Summary of Contents for Multitech FF240-IP
- Page 1 FaxFinder IP ® IP Fax Server Model: FF240-IP Administrator User Guide...
- Page 2 Get answers to your most complex questions, ranging from implementation, troubleshooting, product configuration, firmware upgrades and much more. To create an account and submit a Support Case on the Portal, visit support.multitech.com. Knowledge Base and Support Services: www.multitech.com/support.go The Knowledge Base provides immediate answers to your questions and gives you access to support resolutions for all Multi-Tech products.
-
Page 3: Table Of Contents
Cover Pages ............................51 Store & Forward Fax (T.37) ........................53 Fax Log ..............................55 ............................56 SERS ECTION ............................60 ONTACTS ECTION Personal ............................... 60 Global ..............................61 Personal Groups ........................... 62 Multi-Tech Systems, Inc. FF240-IP Admin User Guide... - Page 4 FF240-IP U ..............72 SSOCIATING LIENT OFTWARE AND SER WITH THE Disassociating the Client from a Specific FF240-IP Unit ..............75 CHAPTER 5 – FAXFINDER-IP OPERATION .................... 76 ............................77 ENDING AXES The Schedule Fax Screen (New Fax) ....................77 Send Fax with Client Software ......................
-
Page 5: Chapter 1 - Product Description & Specifications
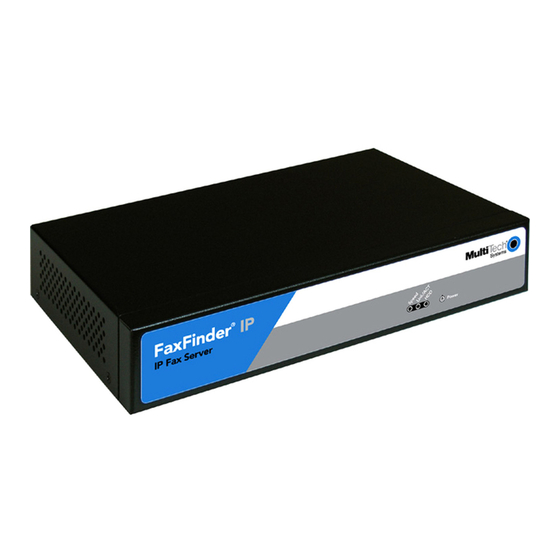
The FaxFinder IP provides fax functionality to an IP-based telephony environment, eliminating the need for analog-based phone connections dedicated to supporting analog fax applications. We Supply FF240-IP • A FF240-IP with factory-installed software • One power supply with power cord • A product CD that contains: a software package for client PCs and additional documentation •... -
Page 6: Technical Specifications
* Multi-Tech Systems, Inc. recommends that the customer incorporate a 10% buffer into their power source when determining product load. ** The difference in maximum size allowed is due to the data encoding for T.37, the client software and API attachments. Multi-Tech Systems, Inc. FF240-IP Admin User Guide... -
Page 7: Chapter 2 - Getting Started
Just like a telephone, the FF240-IP has phone numbers mapped to it. So a call from the analog fax machine is routed to the FF240-IP just as any other call is routed. Once the fax is received on the FF240- IP, it will use its inbound routing settings to send the fax to a printer, network share, email client or any combination of these. - Page 8 FF240-IP turns the ‘print file’ image into a fax. Store and Forward faxing (T.37) allows for emails to be sent through the FF240-IP as a fax or users can simply log in to the web interface (Send Fax screen) and send a fax from the unit directly.
- Page 9 Chapter 2: Getting Started Client software Here the red arrows show the use of the Client software and the green arrows represent the FF240-IP sending that fax to a phone number. This example requires that the FaxFinder Client software be installed on a user’s Windows PC.
-
Page 10: Mechanical Mounting
The ambient temperature of the rack interior must not exceed 40° Celsius. 19-Inch Rack Enclosure Mounting Procedure Attaching the FF240-IP to the rail of an EIA 19-inch rack enclosure will likely require two persons. Essentially, the technicians must attach the brackets to the FF240-IP chassis with the screws provided and then secure unit to rack rails by the brackets. -
Page 11: External Descriptions
Descriptions of the connections available on the back of the FF240-IP unit. Power Connector: Threaded connector for the provided power supply. Console: RJ 45 connection for serial access and control of the FF240-IP units. USB Ports (reserved for future use): These ports are inactive. -
Page 12: Installation Overview
After power is applied, the Power LED comes on immediately. 3. Connect FF240-IP to Ethernet Network. Plug one end of your RJ45 Ethernet cable into the FF240-IP’s Ethernet jack and the other end into your network. This Ethernet cable is not included with your FF240-IP unit. - Page 13 To initially access the FF240-IP, you will need to connect the unit directly to a compatible computer. This process is detailed below. After the first setup, you can change the IP address of the FF240-IP unit to one that is capable of operating on the network where it will permanently reside. If the FF240- IP is already attached to a network, the Client software can Auto-discover the IP address.
- Page 14 (i.e. no third party verification), so your browser displays a warning about this. You may safely continue (more details are given in step 5). B. The Login screen will appear. At this point you can be assured that the FF240-IP is connected to the network.
- Page 15 Having reset the IP address of the administrator’s PC, you must log into the FF240-IP Server software again. Enter the new IP address of the FF240-IP into your browser, and then enter admin as Username and admin as Password to log in again.
- Page 16 Config link in the upper right hand corner to save what you have set so far. The file name “config_nnnn.bin” (with the n’s replaced by the version number and current date) will appear in the dialog for where you can store the file. This config file can then be used to restore the FF240-IP to this configuration.
- Page 17 8. Adding Client-Users It is important to get the users added for the FF240-IP as the contact database is tied to the user account for those users who will send faxes. The best case scenario would have all potential users...
-
Page 18: Chapter 3 - Web Management Interface
Login Screen When you enter the IP address of your FF240-IP unit in a browser, you will first see the certificate warning as noted above. After continuing past the warning, you will be presented with the Login Screen. -
Page 19: Home Screen
Chapter 3: Web Management Interface Home Screen The FF240-IP Home screen displays the model name, software version and contact resources. Multi-Tech Systems, Inc. FF240-IP Admin User Guide... -
Page 20: Status & Logs Section
The System Status screen provides many key pieces of information that can be used diagnostically or simply as a confirmation of correct settings. Current Time This field displays the current time and date on the FF240-IP unit. The format for this display is set in the System Configuration: Time screen. Up Time This displays the running, total time that the FF240-IP has been in operation since the last reboot/reset or disconnection of power. -
Page 21: Fax Status
This column displays the received identification from the remote connection. Modulation This column shows the modulation set for this channel. Action This option is only available to an administrator. Reset Clicking on this link will reset the channel. Multi-Tech Systems, Inc. FF240-IP Admin User Guide... - Page 22 Recipient This will display the recipient Username or channel ID. Remote ID This shows the ID information sent from the fax originator. Pages Received This will show the total number of pages received. Multi-Tech Systems, Inc. FF240-IP Admin User Guide...
- Page 23 This will cancel all further attempts to send this fax. Details Clicking this link will bring up a new windows with details of this specific fax. You may also select to Abort from this window. Multi-Tech Systems, Inc. FF240-IP Admin User Guide...
-
Page 24: Mail Queue
The Mail Queue displays a list of emails residing in the queue waiting to be completed. Information is broken into six sections. Resend Queued Mails Clicking on this link will tell the FF240-IP to resend all mail items in the queue immediately. Date This column displays the date the email was created on. -
Page 25: Mail Log
This column displays a message showing the result of the mail delivery attempt. For example, if there was a problem, SMTP error messages can be shown here; e.g. deferral: Sorry, I wasn’t able to establish an SMTP connection. (#4.4.1). Multi-Tech Systems, Inc. FF240-IP Admin User Guide... -
Page 26: Inbound Fax Log
Chapter 3: Web Management Interface Inbound Fax Log The Inbound Fax Log is a running tally of all of the faxes received by the FF240-IP unit. The individual logs have several categories that are tracked. Descriptions are below. State This will show the current or final state of the fax in question. States include: complete, error – no page received, error –... -
Page 27: Outbound Fax Log
Chapter 3: Web Management Interface Outbound Fax Log The Outbound Fax Log is a running tally of all of the faxes sent by the FF240-IP unit. The individual logs have six categories that are tracked. Descriptions are below. Status This column displays the final result of the outgoing fax. Status messages include: sent, aborted and failed. -
Page 28: Call Log
This column displays the name entered as the intended receiver of the fax. Resolution This column displays the resolution used during the fax transmission. Action Clicking on the Details link will bring up a pop-up window with further information concerning this fax. Multi-Tech Systems, Inc. FF240-IP Admin User Guide... -
Page 29: System Configuration Section
IP Address Enter the IP address that has been set for this FF240-IP unit. If you are setting this FF240-IP up for the first time, remember that once this has been changed, you will have to be on the same network to make further changes. -
Page 30: Smtp
Chapter 3: Web Management Interface SMTP The SMTP section contains the information needed to setup email usage with the FF240-IP, as well as a way to test the setup by sending an email. SMTP Configuration SMTP Server Address Enter the IP address of your simple mail transfer protocol server here. This can be either an IP address or Hostname. -
Page 31: Time
Select the time zone where the FF240-IP will be located from the drop-down list. Changing the time zone requires a reboot of the FF240-IP for it to take effect. A pop-up will alert you that a reboot will be performed, to which you may select cancel if you do not want to reboot at this time. -
Page 32: Printer
Chapter 3: Web Management Interface Printer Here you can add the printers available to the FF240-IP. Until the first printer is added, the section states ‘There are no Printers.’ Click the Add link to add a printer. Printers The Add and Advanced Setup screens are detailed in the next section. Clicking the Add link will bring up the Add Printer screen where you can add a printer to be used by the FF240-IP. - Page 33 When you have entered your information, be sure to click the save button before navigating away from this page, else your changes will be lost. Cancel button Clicking on the cancel button will cause you to lose all information entered and return you to the previous screen. Multi-Tech Systems, Inc. FF240-IP Admin User Guide...
-
Page 34: Shares
Note: It may be necessary to enable ‘Simple File Sharing’ when using a Microsoft Windows network. Shared Resources Domain/Workgroup Enter the domain where the FF240-IP will be operating. This box is pre-populated with the default value of ‘WORKGROUP.’ Save button When you have entered your information, be sure to click the save button before navigating away from this page, else your changes may be lost. - Page 35 When you have entered your information, be sure to click the save button before navigating away from this page, else your changes will be lost. Cancel button Clicking on the cancel button will cause you to lose all information entered and return you to the previous screen. Multi-Tech Systems, Inc. FF240-IP Admin User Guide...
-
Page 36: Certificates
(i.e. no third party verification), so your browser displays a warning about this. You may safely continue (Internet Explorer), or in the case of Firefox, temporarily add the FF240-IP certificate to the exception list. Details on how to add to an exception list can be found in Chapter 2. - Page 37 Chapter 3: Web Management Interface Generate Server Certificate continued: Email Address Enter the email address of who is responsible for the FF240-IP (typically the administrator). This field may be left blank. No more than 64 characters are allowed. Generate button Click on the generate button to create the certificate based on the information above.
-
Page 38: Save/Restore
Restore Factory Defaults Clicking this link will reset all data in the FF240-IP to the default values that were set at the factory. Use this with caution. This will reboot the FF240-IP. -
Page 39: Software Update
Do not power off the FF240-IP during the update process. Note: When the FF240-IP unit is being updated, the HTTPS port (TCP 443 by default) and TCP port 80 (the traditional HTTP port) need to be forwarded (open) to the FF240-IP if there is a firewall or other security software that will potentially block those ports. -
Page 40: Reboot
Clicking on the Reboot button will log off the current user and restart the unit. Please make sure that there are no faxes being sent before you click reboot. The FF240-IP will not be able to send or receive faxes during the reboot process. -
Page 41: Fax Configuration Section
If you need to reset all of the SIP and T.38 settings on this screen back to their factory default settings, click on the Defaults link in the upper right corner. Be aware that the default for many of the boxes is a blank entry. Multi-Tech Systems, Inc. FF240-IP Admin User Guide... - Page 42 SIP call setup messages are transmitted using UDP. There is currently no option for TCP. SIP Proxy/Gateway This displays the IP address of the SIP device the FF240-IP will communicate with when sending faxes. This could be a SIP proxy, SIP Gateway or IP PBX.
- Page 43 Enter the extension length allowed for the channels. Save button When you have entered your information, be sure to click the save button before navigating away from this page, else your changes will be lost. Multi-Tech Systems, Inc. FF240-IP Admin User Guide...
-
Page 44: Inbound Routing
Fax Destination. Incoming faxes from PBXs that provide DTMF digits to the FF240-IP can be routed based on the extension digits to recipients as defined in the Recipient Fax Destination. - Page 45 This displays a destination for inbound faxes to be routed when there is no recipient or extension. Action Here you will find a link to Edit the default routing. Click on the Edit link to assign a default destination other than Admin. Multi-Tech Systems, Inc. FF240-IP Admin User Guide...
- Page 46 Select to either merge the new CSV file with the existing data or to replace the existing data with the new CSV information. Import button Click on the import button to begin the process or all settings will be lost when you navigate away. Multi-Tech Systems, Inc. FF240-IP Admin User Guide...
- Page 47 Share: The full UNC path of the network share. (The share must already be set up on the FF240-IP) Print: The name of the printer. (The printer must already be set up on the FF240-IP) User: The name of the existing FF240-IP user to email...
-
Page 48: Outbound
FF240-IP unit to send multiple faxes to the same phone number at the same time. This is beneficial for fax configurations where a single number is mapped to multiple lines or a trunk. By default, this option is off and the FF240-IP will send faxes to the same number one at a time. Save button When you have checked or unchecked the “Allow simultaneous…”... -
Page 49: Outbound Approval
Chapter 3: Web Management Interface Outbound Approval Outbound approval gives an administrator the ability to restrict outgoing faxes through several categories. The details of each section are found on the next page. Multi-Tech Systems, Inc. FF240-IP Admin User Guide... - Page 50 Click on the Add link to add more times or the Remove link to delete times. Click on the Add link to create a new text box for entering a time (in minutes) for the FF240-IP to send an email reminder to all Approved users.
-
Page 51: Cover Pages
Cover pages must be in the PDF version 1.4 format. The Opt-Out section is available if you use the FF240-IP for advertisement purposes. The “Editable cover pages” link will take you to the Multi-Tech FTP site where the templates are available in the .sla format. - Page 52 Clicking the Add link will take you to the Add Cover Page screen where you can browse to an existing cover page design (PDF file type) that you want to make available as an option on this FF240-IP unit. Even though the browse button allows multiple file types to search for, only PDF files are allowed.
-
Page 53: Store & Forward Fax (T.37)
T.37 that can be input into the FF240-IP unit through the web interface. Store & Forward Fax (T.37): Parameters Enable T.37 To allow the use of Store and Forward faxing on this FF240-IP unit, check this box, else it will not be allowed. Require Authentication Check the Require Authentication box to force users to have a valid username and password to use Store and Forward faxing. - Page 54 Store & Forward Fax (T.37): Additional Hosts Recipient Host This will display a list of additional hostnames and IP addresses that the FF240-IP will accept for Store and Forward faxing. If your hostname is example.FF240-IP.com, and you want to support T.37 faxing from other hostnames (e.g.
-
Page 55: Fax Log
Log files can be set to be cleared on a specific day of the week, or every day of the week. Email Expired Entries If you want to keep the FF240-IP unit clear of log files, yet wish to retain the log files, you can check this to have the log files emailed to the administrator email address. -
Page 56: Users Section
FaxFinder Users This section will list all of the users added to the FF240-IP unit. Click on the Edit action item to see the Contact lists for individual users. Contact lists are the primary source for information when sending out faxes. - Page 57 Each entry can be edited or deleted in the Action column. Edit Groups for username Here is the list of groups that have been associated with this account. There are links for Adding, Editing or Deleting All of the listed groups. Multi-Tech Systems, Inc. FF240-IP Admin User Guide...
- Page 58 Chapter 3: Web Management Interface Clicking the Add link will bring up the Add FF240-IP User screen. Here you will enter the information to be associated with the new user account. Import CSV File Click on the Browse button to navigate to an existing CSV file to import. See Contact CSV File Import Format below for specifics on the fields imported.
- Page 59 User, joe, joe_password, Joe Doe, jdoe@workplace.com, 612-555-1234, 612-555-2222, Workplace Contact,john,Fred Johnson,111-555-1000,Another Company,111-555-1001 Contact,joe,Contact 2,1234,Company 2,5678 Fields may be quoted with double quotes. A header row is optional. A header row is any row that starts with "Type,". Multi-Tech Systems, Inc. FF240-IP Admin User Guide...
-
Page 60: Contacts Section
Clicking on the Edit link will open the editing screen so that the personal contact information can be changed. Delete Clicking on the Delete link will permanently remove this contact from the FF240-IP. Multi-Tech Systems, Inc. FF240-IP Admin User Guide... -
Page 61: Global
Clicking on the Edit link will open the editing screen so that the personal contact information can be changed. Delete Clicking on the Delete link will permanently remove this contact from the FF240-IP. Multi-Tech Systems, Inc. FF240-IP Admin User Guide... -
Page 62: Personal Groups
Clicking on the Edit link will open the editing screen so that the personal contact information can be changed. Delete Clicking on the Delete link will permanently remove this contact group from the FF240-IP. Global Groups The global groups screen will show all of the global groups created by the administrator that are available to all users. -
Page 63: Send A Fax Screen
Chapter 3: Web Management Interface Send a Fax Screen The Send Fax screen is a one page form for sending faxes directly from the FF240-IP unit when accessed from a web browser. Multi-Tech Systems, Inc. FF240-IP Admin User Guide... -
Page 64: Send Fax
If not already populated, enter the organization (if any) of the recipient. If a group was entered, the description will be here. Fax Number If not already populated, enter the fax number of the recipient. Phone Number If not already populated, enter the voice phone number of the recipient. Multi-Tech Systems, Inc. FF240-IP Admin User Guide... - Page 65 Allowed attachment types are: .PDF, .TIF, .TIFF, .TXT, .PS. Options Max Tries Enter the number of tries that you want the FF240-IP to attempt before aborting the fax. Priority Select the transmission priority for this fax. The range is from 1 Priority to Low.
-
Page 66: Logout
Chapter 3: Web Management Interface Logout Clicking this navigational link will log you out of the FF240-IP unit. This is always a good practice to follow when you are finished using the FF240-IP, especially if you were logged in with an administrators privileges for security reasons. -
Page 67: Chapter 4 - Client Software Installation
Your administrator should provide the software or a location where it can be obtained from. You will need to install the Client software on your PC and set the FF240-IP that it is to work with. You will need to be logged in with administrator rights before starting any installation. - Page 68 Chapter 4: Client Installation B. At the Welcome screen, click Next. C. At the Select Installation Folder screen, browse to the desired file location for the FF240-IP client software. In most cases, the default file location is recommended. Clicking on the Disk Cost button will show you the size of the software being installed as well as the available disk space of the target drive.
- Page 69 A transient screen (“Installing FF240-IP Client Software”) will appear while files are being copied. E. The FF240-IP Client software can place a shortcut in the Startup directory so that the client software will start automatically when the PC is booted.
- Page 70 If a Question screen appears asking "Warning - the extension .tif is already registered, Overwrite?”; click Yes if you wish to use the TIFF viewer installed with the FF240-IP Client Software. Click No if you prefer to leave the current association for viewing .tif files.
-
Page 71: Push Installation Method
Push Installation Method Push Installs of the Client Software The FF240-IP Client installer is now available as an MSI package. This provides the ability to perform remote installation using Microsoft Group Policy, SMS, as well as other third party tools. The installer can be run like any other Windows software installer and it can also be invoked from the command line using the Windows Installer command ‘msiexec’. -
Page 72: Setting The Usage Rights For The Printer
FF240-IP units and not assigned to others. This procedure shows you how to make this association so that faxes may be sent from a particular FF240-IP unit to the email inbox of your PC. To do this procedure, you will need to know the IP address of the FF240-IP unit that you are able to use. You should also be given a valid username and password for every unit that you can use. - Page 73 Chapter 4: Client Installation 1. At the main screen of the FF240-IP Fax Client Software, click on Edit and select “Add FF240-IP” if you know the IP address or Host Name of the FF240-IP, otherwise open the Tools menu and select “Auto-Discover Devices”...
- Page 74 If the Auto Discover Devices feature was used, you may Right-click and select Add or double Left- click on the IP address or name of the FF240-IP unit that was detected. Use the ‘X’ in the upper right hand corner to close the Auto Discover window after you have added it to the client.
-
Page 75: Disassociating The Client From A Specific Ff240-Ip Unit
In any event, this procedure severs the tie between your PC and a specific FF240-IP unit so that you will no longer be connected to it for sending fax messages. (Faxes can be received in email form from the FF240-IP server, despite disassociating from the FF240-IP server, as long as the receiving party is defined in the Inbound Routing section of the FF240-IP unit.) In cases where the client is currently associated with more than... -
Page 76: Chapter 5 - Faxfinder-Ip Operation
When viewing received faxes, the PC’s operating system calls up the appropriate viewer (PDF or TIFF). The choice of file types (PDF or TIFF) is made in the FF240-IP Server software. Note that client users can choose to display either on the Multi-Tech TIFF viewer or on a different (non-Multi- Tech) TIFF viewing program. -
Page 77: Sending Faxes
Chapter 5: FaxFinder-IP Operation Sending Faxes Sending faxes through the FF240-IP is quick and simple and offers a variety of methods that can be used to accomplish this. This section will show all the possible ways to send a fax with the FF240-IP. - Page 78 Options are: None; PDF; TIFF. The default attachment type is PDF. Retry Interval Enter the retry interval for instances where the fax does not complete. The default retry time is 5 minutes and 0 seconds. Multi-Tech Systems, Inc. FF240-IP Admin User Guide...
- Page 79 Contacts (button): Brings up the Select Contacts screen from which a fax recipient can be chosen (this is retrieved from the user contacts stored in your user ID on the FF240-IP unit). If enabled on the FF240-IP server, this will also display contacts from Microsoft Outlook. Multiple entries can be selected by holding the Ctrl key (individually) or Shift key (all entries between) while clicking.
- Page 80 By clicking on the down arrow, you will see the selection of cover pages available from the FF240-IP unit. Click to highlight and select the cover page you want to use. View (button): Brings up the cover page to be used.
-
Page 81: Send Fax With Client Software
9. Click the Schedule button in the lower left corner to send the fax according to the options set Send Fax by Printing The easiest and most convenient way to utilize the FF240-IP once the client software is installed on a computer is to take advantage of the Print function of a software program. -
Page 82: Send Fax From Email (T.37)
Send Fax from Web Interface Logging in to the FF240-IP unit via a web browser is another simple way to have a fax sent from the FF240-IP unit. This process is started by simply entering the IP address (e.g. 192.168.2.1) in the address bar of the browser and using the links to access the Send Fax screen. -
Page 83: Send Fax By Web Api
FF240-IP unit. Exit: This will exit the FF240-IP Client software. You will be prompted with a pop-up verifying that you actually want to exit the software. Another option is to click on the window minimize button to return the FF240-IP client to the system tray. -
Page 84: Edit Menu Command Descriptions
FFx30 for the FF130, FF230, FF430 and FF830 FFx20 for the FF120, FF220, FF420 and FF820 Server Address: Enter the IP address of the FF240-IP unit that you want to add. Use SSL: Check this box to use the secure sockets layer when accessing the FF240-IP. - Page 85 Browse button is available for determining the correct folder. The Update Outlook Contacts button will update the entire Outlook contact list in the FF240-IP unit if you have selected the ‘Include Outlook Contacts’ selection above. This will ensures the two sources are synchronized in the case of contact deletions, as by default, the FF240-IP will only automatically track additions and changes.
-
Page 86: Tools Menu Command Descriptions
Any device found can be added by right-clicking and selecting Add or double-clicked to add it to the Client software. FFx20 Cover Page Edit: Selecting this option will open the FF240-IP x20 Cover Page Editing software that was installed with the client. The software allows you to edit existing covers pages or create entirely new ones for the FF240-IP x20 models only. -
Page 87: Devices Tab (Main Window)
FF240-IP unit) and Status (displays the connection state of the FF240-IP unit as well as showing which unit is set as the default unit for use). By right-clicking on the name or IP address of the FF240-IP unit in the Host column, you will get an option window. - Page 88 Selecting this option will attempt to reconnect the user to the selected FF240-IP. Delete Selecting this will delete the FF240-IP unit from use by this software. There is a delete confirmation window that will pop-up prior to actual deletion. Set as Default Selecting set as default will make the unit clicked the default unit for sending faxes through this software.
-
Page 89: Print Capture Tab (Main Window)
Chapter 5: FaxFinder-IP Operation Print Capture Tab (Main Window) Any potential faxes sent from the print to FF240-IP option will be here, ready for additions, setting changes or scheduling. There are two columns to this field: Document (the name of the document ready to be scheduled) and Pages (the total number of pages in the document). -
Page 90: Using The Multi-Tech Tiff Viewer
The most commonly used functions are available as icons on the toolbar. In the diagram below, we label the functions of these icons. While most of these features are common to many graphical programs, some warrant a bit of explanation, provided below. Multi-Tech Systems, Inc. FF240-IP Admin User Guide... -
Page 91: Importing Fax Images Into Other Application Programs
Pasted into a word processing program document. The Windows Clipboard will only hold one copy at a time, so make sure not to use any copy command until you have pasted the current image to the new location. Multi-Tech Systems, Inc. FF240-IP Admin User Guide... -
Page 92: Appendix A - Troubleshooting
Appendix A – Troubleshooting 1. What if I can't see the web page for my FF240-IP? REMEDY: Verify that the Admin PC is actually on the same subnet as the FF240-IP and that it can be “pinged.” Launch a Command Prompt. - Page 93 Appendix A: Troubleshooting CAUSE A: During transmission, the name server’s address could not be resolved (that is, the FF240-IP unit could not contact your name server). RESPONSE A: Contact the FF240-IP unit using secure shell and try to ping the name server.
- Page 94 CAUSE E: The email server does not support SMTP. RESPONSE E: Contact the FF240-IP unit using secure shell either at its IP address or name (if a name server is present) and specify the SMTP Port Number (25 is the common/standard port number, but this number is configurable in the FF240-IP System Configuration | SMTP screen).
-
Page 95: Appendix B - Customization
This section illustrates the HTTP/XML communication between the FF240-IP Web Service (FFWS) and a client. FFWS provides an interface to the FF240-IP units for client applications. Client applications can use FFWS for sending faxes, managing contacts and monitoring fax status. - Page 96 </attachment> <max_tries>3</max_tries> <priority>3</priority> <try_interval>30</try_interval> <receipt>failure</receipt> <receipt_attachment>none</receipt_attachment> <schedule_all_at>2008-08-07T20:30:00</schedule_all_at> </schedule_fax> ----------------------------------- HTTP/1.1 201 Created content-type: application/xml <?xml version="1.0" encoding="UTF-8"?> <response> <message>Success</message> <fax_entry> ..<fax_entry_url>https://192.168.2.1/ffws/v1/ofax/0000001B/0000</fax_entry_url> <fax_url>https://192.168.2.1/ffws/v1/ofax/0000001B</fax_url> <state>preprocessing</state> <schedule_message>New fax entry</schedule_message> <created>2008-08-01 08:43:29</created> <stime>2008-08-01 08:52:29</stime> <try_number>1</try_number> <agent>FFWS</agent> <preview>https://192.168.2.1/ffws/v1/data/preview/0000001B-0000.pdf</preview> Multi-Tech Systems, Inc. FF240-IP Admin User Guide...
- Page 97 Include Modem level information in the response (init_time, connect_time, ...). Requesting this information is costly and it also increases the size of the response. Modem information only exists after the modem has completed at least one full attempt. Multi-Tech Systems, Inc. FF240-IP Admin User Guide...
- Page 98 <subject>Test Subject</subject> <comments>Test Message</comments> </cover_page> <sender> <username>admin</username> <name>Sender Name</name> <organization>Sender Org</organization> <phone_number>111-222-3333</phone_number> <fax_number>111-222-3334</fax_number> <email_address>sender@example.com</email_address> </sender> <recipient> <name>Rcpt 1 Name</name> <organization>Rcpt 1 Org</organization> <fax_number>111-222-3335</fax_number> <phone_number>218-555-3336</phone_number> </recipient> <max_tries>3</max_tries> <priority>3</priority> <try_interval>30</try_interval> <receipt>failure</receipt> <receipt_attachment>none</receipt_attachment> <pages>1</pages> </fax_entry> </response> Multi-Tech Systems, Inc. FF240-IP Admin User Guide...
- Page 99 The fax specified could not be rescheduled. The user may not be the owner of the fax or the fax could not be found Example: PUT /ffws/v1/ofax/0000001B/0000?at=2008-08-09T22%3A30%3A00 HTTP/1.1 content-type: application/xml authorization: Basic YWRtaW46YWRtaW4= ----------------------------------- HTTP/1.1 202 Accepted content-type: application/xml Multi-Tech Systems, Inc. FF240-IP Admin User Guide...
- Page 100 No user found with that username. Example: GET /ffws/v1/users/admin HTTP/1.1 content-type: application/xml authorization: Basic YWRtaW46YWRtaW4= ----------------------------------- HTTP/1.1 200 OK content-type: application/xml <?xml version="1.0" encoding="UTF-8"?> <response> <message>Success</message> <user> <user_url>https://192.168.2.1/ffws/v1/users/admin</user_url> <name>Administrator</name> <username>admin</username> <email_address>admin@example.com</email_address> <phone_number>111-222-3333</phone_number> <fax_number>111-222-3334</fax_number> <organization>Example Org</organization> </user> </response> Multi-Tech Systems, Inc. FF240-IP Admin User Guide...
- Page 101 No user found with that username. Example: GET /ffws/v1/contacts/admin HTTP/1.1 content-type: application/xml authorization: Basic YWRtaW46YWRtaW4= ----------------------------------- HTTP/1.1 200 OK content-type: application/xml <?xml version="1.0" encoding="UTF-8"?> <response> <message>Success</message> <contact> <contact_url>https://192.168.2.1/ffws/v1/contacts/admin/3</contact_url> <name>Contact Name</name> <fax_number>111-222-4444</fax_number> <phone_number>218-555-3336</phone_number> <organization>Contacts Org</organization> </contact> </response> Multi-Tech Systems, Inc. FF240-IP Admin User Guide...
- Page 102 Basic YWRtaW46YWRtaW4= <?xml version="1.0" encoding="UTF-8"?> <contact> <name>Test Recipient</name> <fax_number>111-222-4444</fax_number> <phone_number>218-555-3336</phone_number> <organization>Some org</organization> </contact> ----------------------------------- HTTP/1.1 200 OK content-type: application/xml <?xml version="1.0" encoding="UTF-8"?> <response> <message>Created</message> <contact> <contact_url>https://192.168.2.1/ffws/v1/contacts/admin/6</contact_url> <name>Test Recipient</name> <fax_number>111-222-4444</fax_number> <phone_number>218-555-3336</phone_number> <organization>Some org</organization> </contact> </response> Multi-Tech Systems, Inc. FF240-IP Admin User Guide...
- Page 103 The provided XML is not valid. Example: POST /ffws/v1/contacts/admin/6 HTTP/1.1 content-type: application/xml authorization: Basic YWRtaW46YWRtaW4= <?xml version="1.0" encoding="UTF-8"?> <contact> <name>Change name</name> <fax_number>111-222-4444</fax_number> <phone_number>218-555-3336</phone_number> <organization>Some org</organization> </contact> ----------------------------------- HTTP/1.1 200 OK content-type: application/xml <?xml version="1.0" encoding="UTF-8"?> <response> <message>Modified</message> </response> Multi-Tech Systems, Inc. FF240-IP Admin User Guide...
- Page 104 Authenticated user does not have permission to change data associated with username. 404 Not Found No user found with that username. Example: DELETE /ffws/v1/contacts/admin/6 HTTP/1.1 content-type: application/xml authorization: Basic YWRtaW46YWRtaW4= ----------------------------------- HTTP/1.1 200 OK content-type: application/xml <?xml version="1.0" encoding="UTF-8"?> <response> <message>Deleted</message> </response> Multi-Tech Systems, Inc. FF240-IP Admin User Guide...
- Page 105 HTTP/1.1 200 OK content-type: application/xml <?xml version="1.0" encoding="UTF-8"?> <response> <message>Success</message> <contact_group> <contact_group_url>https://172.16.128.5/ffws/v1/contact_groups/admin/4 </contact_group_url> <name>g one</name> <description>g one</description> <contact>https://172.16.128.5/ffws/v1/contacts/admin/1</contact> <contact>https://172.16.128.5/ffws/v1/contacts/admin/2</contact> <contact>https://172.16.128.5/ffws/v1/contacts/global_contact_list/3 </contact> </contact_group> <contact_group> <contact_group_url>https://172.16.128.5/ffws/v1/contact_groups/admin/6 </contact_group_url> <name>g two</name> <description>g two org</description> <contact>https://172.16.128.5/ffws/v1/contacts/admin/2</contact> <contact>https://172.16.128.5/ffws/v1/contacts/global_contact_list/4 </contact> </contact_group> </response> Multi-Tech Systems, Inc. FF240-IP Admin User Guide...
- Page 106 Basic YWRtaW46YWRtaW4= ----------------------------------- HTTP/1.1 200 OK content-type: application/xml <?xml version="1.0" encoding="UTF-8"?> <response> <message>Success</message> <file> <name>default.pdf</name> <type>application/pdf</type> <url>https://192.168.2.1/ffws/v1/data/cover_pages/default.pdf</url> </file> <file> <name>multitech.pdf</name> <type>application/pdf</type> <url>https://192.168.2.1/ffws/v1/data/cover_pages/multitech.pdf</url> </file> <file> <name>sample1.pdf</name> <type>application/pdf</type> <url>https://192.168.2.1/ffws/v1/data/cover_pages/sample1.pdf</url> </file> <file> <name>sample2.pdf</name> <type>application/pdf</type> <url>https://192.168.2.1/ffws/v1/data/cover_pages/sample2.pdf</url> </file> </response> Multi-Tech Systems, Inc. FF240-IP Admin User Guide...
- Page 107 Basic YWRtaW46YWRtaW4= ----------------------------------- HTTP/1.1 200 OK content-type: application/xml <?xml version="1.0" encoding="UTF-8"?> <response> <message>Verified</message> </response> Retrieving information about the FF240-IP HTTP Request line: GET /ffws/v1/about HTTP/1.1 HTTP Response Status Codes: 200 OK Success Example: GET /ffws/v1/about HTTP/1.1 content-type: application/xml...
- Page 108 <!-- Message added to the comments field on cover page --> <!-- Formatting is not preserved. Newlines and spaces --> <!-- are reduced to a single space. --> <!-- default: "" --> <!-- required: no --> <!-- value: string --> <comments>Test Message</comments> </cover_page> Multi-Tech Systems, Inc. FF240-IP Admin User Guide...
- Page 109 <!-- required: no --> <!-- value: string --> <organization>Rcpt 1 Org</organization> <!-- Recipient Fax Number --> <!-- The fax number to send to --> <!-- required: yes --> <!-- value: string --> <fax_number>111-222-3335</fax_number> Multi-Tech Systems, Inc. FF240-IP Admin User Guide...
- Page 110 <!-- required: yes if location == external --> <!-- value: string --> <url>/ffws/v1/data/userspace/admin/report.pdf</url> </attachment> <!-- Maximum number of tries until failure of fax --> <!-- default: 3 --> <!-- required: no --> <!-- value: integer --> <max_tries>3</max_tries> Multi-Tech Systems, Inc. FF240-IP Admin User Guide...
- Page 111 <!-- If this options is not present then faxes will be --> <!-- scheduled to send as soon as possible. --> <!-- Format: %FT%T --> <!-- required: no --> <!-- value: string --> <schedule_all_at>2008-08-07T20:30:00</schedule_all_at> </schedule_fax> Multi-Tech Systems, Inc. FF240-IP Admin User Guide...
- Page 112 <!-- state. --> <!-- When the fax is pending this field represents --> <!-- the time when FF240-IP will try to send it. --> <!-- When the fax is sending this field represents --> <!-- the time when FF240-IP actually started sending it. -->...
- Page 113 <!-- A modem entry is added for each attempt and is only available --> <!-- after one full attempt has completed. --> <modem_entry> <modem_number>1</modem_number> <status>pass</status> <remote_id>POTS modem 1</remote_id> <size>403498</size> <pages>6</pages> <resolution>Fine</resolution> <baud_rate>33600</baud_rate> <width>1728</width> <height>Variable</height> <data_compression>mh</data_compression> <error_correction>on</error_correction> <init_time>2009-01-30T05:00:09</init_time> <off_hook_time>2009-01-30T05:00:18</off_hook_time> <connect_time>2009-01-30T05:00:51</connect_time> <elapsed_time>172</elapsed_time> <scan_line_time>0</scan_line_time> </modem_entry> </fax_entry> Multi-Tech Systems, Inc. FF240-IP Admin User Guide...
- Page 114 Appendix B: Customization User Element This element represents a user registered on the FF240-IP. <!-- Describes a User --> <user> <!-- Url of this user --> <!-- value: string --> <user_url>https://192.168.2.1/ffws/v1/users/admin</user_url> <!-- Full name of user --> <!-- required: yes -->...
- Page 115 <!-- Contact Phone Number --> <!-- required: no --> <!-- default: "" --> <!-- value: string --> <phone_number>218-555-3336</phone_number> <!-- Contact Organization --> <!-- required: no --> <!-- default: "" --> <!-- value: string --> <organization>Contacts Org</organization> </contact> Multi-Tech Systems, Inc. FF240-IP Admin User Guide...
-
Page 116: T.37 Advanced Usage
COVER-PAGE-ENABLED=true|false Example: FAX=5551234/COVER-PAGE-ENABLED=false@example.test COVER-PAGE-NAME=name Where "name" is the filename of the cover page on the FF240-IP. Example: FAX=5551234/COVER-PAGE-NAME=mts_template2.pdf@example.test ATTN=name Where "name" is the name of the recipient the fax is being sent to and will be filled in on the cover page. - Page 117 If you want to send through an MTA such as mail.multitech.com then mail.multitech.com would need to be configured to forward mail to the FF240-IP for some domain that the FF240-IP will accept mail for. For most mail servers, if the domain of the email can be successfully resolved, the mail server will forward mail to that destination without any extra configuration.
-
Page 118: Appendix C - Creating Cover Pages
Appendix C – Creating Cover Pages Cover pages for the FF240-IP are PDF forms. The FF240-IP will fill out the form fields that it knows about, with information specific to the fax, and insert the PDF as the first page of the fax. In order to do this, the field names in the form must match exactly with the field names that FF240-IP will try to fill in. -
Page 119: Appendix E - Regulatory Compliance
Any number of fax software packages can be used with this product. Refer to the fax software manual for setup details. Typically, the fax branding information must be entered via the configuration menu of the software. Multi-Tech Systems, Inc. FF240-IP Admin User Guide... -
Page 120: Canadian Limitations Notice
Industry Canada This Class A digital apparatus meets all requirements of the Canadian Interference-Causing Equipment Regulations. Cet appareil numérique de la classe A respecte toutes les exigences du Reglement Canadien sur le matériel brouilleur. Multi-Tech Systems, Inc. FF240-IP Admin User Guide... -
Page 121: Appendix F - Environmental Information
For more information about where you can drop off your waste equipment for recycling, please contact your local city office, your household waste disposal service or the vendor from whom you purchased the product. Multi-Tech Systems, Inc. FF240-IP Admin User Guide... - Page 122 Lead in high melting temperature type solders (i.e., tin-lead solder alloys containing more than 85% lead). b. Lead in electronic ceramic parts (e.g., piezoelectronic devices). Moisture Sensitivity Level (MSL) – Analysis is based on the components/material used on the board. Multi-Tech Systems, Inc. FF240-IP Admin User Guide...
- Page 123 或有害物质 (HS) 的名称及含量水平方面的信息 有害/有毒物质/元素 成分名称 铅 汞 镉 六价铬 多溴联苯 多溴二苯醚 印刷电路板 电阻器 电容器 铁氧体磁环 继电器/光学部 件 二极管/晶体管 振荡器和晶振 调节器 电压传感器 变压器 扬声器 连接器 螺丝、螺母以 及其它五金件 交流-直流电源 软件/文档 CD 手册和纸页 底盘 表示所有使用类似材料的设备中有害/有毒物质的含量水平高于 SJ/Txxx-2006 限量要求。 表示不含该物质或者该物质的含量水平在上述限量要求之内。 Multi-Tech Systems, Inc. FF240-IP Admin User Guide...
-
Page 124: Appendix G - End User License Agreement
PRODUCT, YOU AGREE TO BE BOUND BY THE TERMS OF THIS LICENSE. IF YOU DO NOT AGREE TO THE TERMS OF THIS AGREEMENT, DO NOT USE THE MULTI-TECH PRODUCT. INSTEAD, PLEASE CONTACT MULTI-TECH’S CUSTOMER SERVICE DEPARTMENT AT customerservice@multitech.com. 1. DEFINITIONS. The following terms are defined as follows: (a) ”Documentation” means any user guides, data sheets, manuals, specifications, or other written description of the Software provided by Multi-Tech;... - Page 125 You acknowledge that You are age thirteen or older, and by accepting this Agreement, You agree that You are fully authorized, able and competent to enter into this Agreement. Multi-Tech Systems, Inc. 2205 Woodale Drive Mounds View, Minnesota 55112 customerservice@multitech.com Multi-Tech Systems, Inc. FF240-IP Admin User Guide...
-
Page 126: Index
Troubleshooting can't see web page ............92 Mass uninstall ..............71 send test email ............92 SMTP Error codes ............94 Outbound Approval ............49 Users section ..............56 Physical Connections ............11 Multi-Tech Systems, Inc. FF240-IP Admin User Guide...