Advertisement
Quick Links
Advertisement

Related Manuals for GEM e2 2019


Summary of Contents for GEM e2 2019
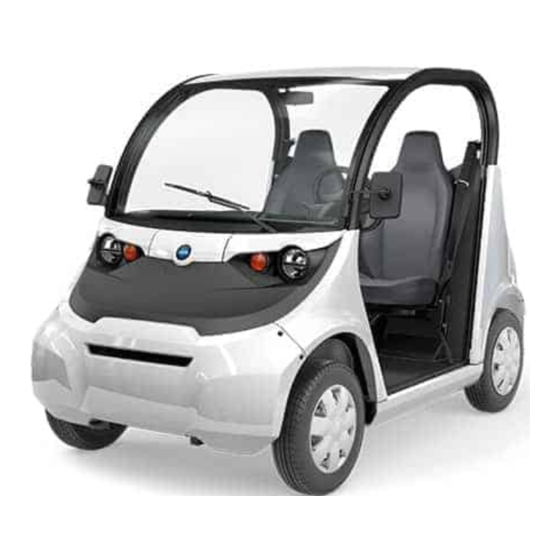
- Page 1 2019 OWNER’S MANUAL GEM e2 GEM e4 GEM e6...
- Page 2 WARNING Read, understand, and follow all of the instructions and safety precautions in this manual and on all product labels. Failure to follow the safety precautions could result in serious injury or death. WARNING Operating, servicing, and maintaining a passenger vehicle or off-road vehicle can expose you to chemicals including engine exhaust, carbon monoxide, phthalates, and lead, which are known to the State of California to cause cancer and birth defects or other reproductive harm.
- Page 3 2019 Owner’s Manual for Maintenance and Safety...
- Page 4 POLARIS®, GEM®, Global Electric Motorcars®, and e6® are trademarks of POLARIS Industries Inc. Copyright 2018 Polaris Industries Inc. All information contained within this publication is based on the latest product information at the time of publication. Due to constant improvements in the design and quality of production components, some minor discrepancies may result between the actual vehicle and the information presented in this publication.
- Page 5 WELCOME Thank you for purchasing a GEM by POLARIS, and welcome to our world-wide POLARIS family of recreational and utility vehicle owners. We believe POLARIS sets a standard of excellence for all recreational and utility vehicles manufactured in the world today. With our many years of experience in design and manufacturing, we proudly bring you only the finest of vehicles: •...
- Page 6 SAFETY SYMBOLS AND SIGNAL WORDS The following signal words and symbols appear throughout this manual and on your vehicle. Your safety is involved when these words and symbols are used. Become familiar with their meanings before reading the manual. DANGER DANGER indicates a hazardous situation that, if not avoided, will result in death to the operator, bystanders or person(s) inspecting or servicing the vehicle.
-
Page 7: Table Of Contents
TABLE OF CONTENTS Introduction ....7 Safety ..... . . 9 Features and Controls . -
Page 9: Introduction
INTRODUCTION OVERVIEW Please familiarize yourself with all laws and regulations concerning the operation of the vehicle in your area. This manual applies to the following GEM vehicles: • GEM e2 (two-passenger) • GEM e4 (four-passenger) • GEM e6 (six-passenger) GENERAL WARNING... - Page 10 Never exceed the GVWR or the GAWR. See page 16. Vehicle Model Number: Vehicle Identification Number: REPLACEMENT KEYS To order an extra or replacement key for the ignition or for accessory locks, please contact GEM customer service. Be prepared to provide your key number and VIN.
-
Page 11: Safety
If any label becomes illegible or comes off, contact your authorized GEM dealer to purchase a replacement. Replacement safety labels are provided at no charge. - Page 12 SAFETY GENERAL WARNING WARNING • Read your owner’s manual before operating this vehicle. • Do not operate this vehicle under the influence of alcohol, drugs or medication. • This vehicle is not intended to be driven at speeds exceeding 25 MPH (40 km/ •...
- Page 13 SAFETY OPERATION WARNING Set the parking brake before leaving the vehicle. Turn the POWER ON key to the OFF position and remove it when the vehicle is not in use. When towing the vehicle, turn the POWER ON key to the OFF position. SOLAR PANEL DO NOT STACK WARNING This label is located at the rear center of the solar panel (if equipped).
- Page 14 • With more than one passenger, or a passenger under age twelve or who cannot comfortably reach the floor and hand holds. • With non-GEM approved accessories - they may seriously affect stability. ALWAYS: • Wear your seat belt, if equipped. Vehicle rollover could cause severe injury or death.
- Page 15 SAFETY PASSENGER/TIRE PRESSURE WARNING WARNING Passengers can be thrown off. This can cause serious injury or death. Never carry passengers in cargo box. IMPROPER TIRE PRESSURE OR OVERLOADING CAN CAUSE LOSS OF CONTROL RESULTING IN SERIOUS INJURY OR DEATH. • Reduce speed and allow greater distance for braking when carrying cargo •...
- Page 16 SAFETY PASSENGER/REAR CARGO WARNING This label is centrally located under the center high mount stop lamp (if equipped) . This label is also located on the S-Bed and TrunkBack. WARNING Never carry passengers on rear platform. Passengers can be thrown off. This can cause serious injury or death.
- Page 17 Your authorized GEM dealer can provide battery-related service. • Do not carry a passenger until you have at least two hours of driving experience with this vehicle.
- Page 18 SAFETY • Always keep both hands on the steering wheel and both feet on the floorboards of the vehicle during operation. • Never consume alcohol or drugs before or while operating this vehicle. • Never operate at excessive speeds. Always travel at a speed proper for the traffic, visibility and operating conditions, and your experience.
- Page 19 Never install any accessory that grounds to the vehicle chassis. The chassis is a floating ground to protect against electrical short circuits and hazards. Do not install any non-GEM-approved accessory or modify the vehicle for the purpose of increasing speed or power. Any modifications or installation of non- GEM-approved accessories could create a substantial safety hazard and increase the risk of bodily injury.
- Page 20 SAFETY AGE RESTRICTIONS This vehicle is an ADULT VEHICLE ONLY. NEVER operate this vehicle if you are under age 16 and NEVER operate without a valid driver’s license. USING ALCOHOL OR DRUGS WARNING Never consume alcohol or drugs before or while operating this vehicle.
- Page 21 SAFETY OPERATING A DAMAGED VEHICLE Operating a damaged vehicle can result in an accident. After any overturn or accident, have qualified service dealer inspect the entire machine for possible damage, including (but not limited to) brakes, accelerator, steering system and electrical system.
- Page 22 SAFETY UNAUTHORIZED USE OF THE VEHICLE Leaving the keys in the vehicle can lead to unauthorized use of the vehicle by someone under the age of 16, without a driver’s license, or without proper training. This could result in an accident or rollover. Always remove the key when the vehicle is not in use.
- Page 23 Your authorized GEM dealer can provide battery- related service. WARNING Do not work in or near the battery compartment or on any other electrical component of the vehicle while charging the batteries.
-
Page 25: Features And Controls
FEATURES AND CONTROLS FEATURES AND CONTROLS CONSOLE Left Control Lever Key Switch Cup Holder Right Control Lever Glove Box Lock Gauge Storage Tray Trip Switch/MODE Switch ELECTRICAL COMPONENTS NOTICE Liquids can damage electrical components and the circuit board. Handle liquids with care. Do not spray water directly into the upper or lower console. Electrical wiring, circuit boards and components are located under and behind the upper and lower console... - Page 26 FEATURES AND CONTROLS STEERING WHEEL ADJUSTER If equipped, the steering wheel can be tilted upward or downward for rider preference. Pull and hold the adjustment lever upward while moving the steering wheel upward or downward. Release the lever when the steering wheel is at the desired position.
- Page 27 FEATURES AND CONTROLS LEFT CONTROL LEVER The left control lever contains the turn signal switch, the horn switch, the headlight on/off switch and the high/low headlight beam switch. TURN SIGNAL SWITCH The key must be in the ON position to activate the turn signals. Check turn signal lamps before each ride.
- Page 28 FEATURES AND CONTROLS RIGHT CONTROL LEVER The right control lever contains the hazard signal switch, the direction switch and the windshield wiper and washer switches (if equipped). HAZARD SIGNAL SWITCH Press the tip of the lever inward cause all turn signal lamps to flash simultaneously.
- Page 29 FEATURES AND CONTROLS WINDSHIELD WIPER Rotate the knurled barrel forward to turn the windshield wipers on. Pull the control lever toward the driver’s seat to activate the washer (if equipped). If the wiper fails to work, check for a blown fuse at the fuse block. See page 67.
- Page 30 FEATURES AND CONTROLS INDICATOR LAMPS LAMP INDICATES CONDITION When standard mode is selected, speed displays in miles per hour. Vehicle Speed When metric mode is selected, speed displays in kilometers per hour. The brake indicator illuminates when the park brake is engaged or when a brake system failure has occurred.
- Page 31 Check hoses for cracks, scuffs and worn spots. If you discover signs of wear or damage, do not operate the Brake system vehicle. Your authorized GEM dealer can provide service. WARNING Worn or damaged brake hoses can cause brake failure. Always have worn or damaged brake hoses replaced promptly.
- Page 32 Cold weather can have a drastic effect on all electric vehicles. The colder the ambient storage temperature, the slower the rate of charge and discharge of batteries. In the application of an electric vehicle like GEM, cold weather will drastically decrease the achieved range on a charge.
- Page 33 GEM is used in colder temperatures, as long as it is used periodically, and does not sit idle for an extended period.
- Page 34 If you are working on a MY16-18 core GEM vehicle, and suspect that the cab heater’s usage is not being accounted for in the state of charge, reference Team Tip L-18-04-02.
- Page 35 FEATURES AND CONTROLS INFORMATION DISPLAY MODE This area will display clock, odometer, trip meter, state of charge (SOC), range meter, efficiency rate (EFF) or any existing fault codes or warning messages. The display can be changed to show either standard or metric units of measurement for each of the following settings.
- Page 36 FEATURES AND CONTROLS 5. Repeat steps 3-4 twice to set the 10-minute and 1-minute segments. After completing the 1-minute segment, step 4 will save the new settings and exit the clock mode. 6. Turn the key to the OFF position. ODOMETER The odometer displays the distance traveled by the vehicle since manufacture.
- Page 37 FEATURES AND CONTROLS TIME The clock must be reset any time the batteries have been disconnected or fully discharged. To reset the clock, do the following: 1. Turn the key to the ON position. Use the MODE button to toggle to the clock display.
- Page 38 FEATURES AND CONTROLS TRIP METER The trip meter displays distance traveled since the last reset of the trip meter. To reset, toggle to the trip meter display. Press and hold the MODE button until the meter resets to zero. BATTERY STATE OF CHARGE This mode displays the remaining system voltage level in percentage format.
- Page 39 FEATURES AND CONTROLS MAIN POWER CONNECTOR When the main power connector is unplugged, the battery pack is disconnected from all electrical components, with the exception of the contactor. After servicing the vehicle, the main power connector should be the last connection to be made. DISCONNECTING POWER 1.
- Page 40 FEATURES AND CONTROLS WARNING Insulate any tools used within the battery area to prevent sparks or battery explosion caused by shorting the battery terminals or wiring. Remove the batteries, or cover the exposed terminals with an insulating material. RECONNECTING POWER 1.
- Page 41 FEATURES AND CONTROLS DISCONNECTING POWER 1. Position the vehicle on a dry, firm, level surface. 2. Set the park brake. 3. Turn the key off. 4. Remove the hood. See page 55. 5. Locate the main power connector at the lower left front of the vehicle, below the horn assembly.
- Page 42 FEATURES AND CONTROLS RECONNECTING POWER 1. Reconnect the negative cable to the traction batteries. Torque the nut to 8 lb- ft (10.8 Nm). 2. Reconnect the negative cable to the auxiliary 12-volt battery (if equipped). Torque the screw to 5.5 lb-ft (7.5 Nm). 3.
- Page 43 FEATURES AND CONTROLS BRAKE AND ACCELERATOR PEDALS BRAKE PEDAL The brake pedal is located on the floor to the left of the accelerator pedal. Push the brake pedal toward the floor to slow or stop the vehicle. Apply the brakes before turning the key on. WARNING Constant brake use (riding the brakes) can cause brakes to overheat and fail, which could lead to an accident resulting in serious injury or death.
- Page 44 FEATURES AND CONTROLS PARK BRAKE LEVER WARNING A rolling vehicle can cause serious injury. Always set the park brake when leaving the vehicle unattended. Remove the key from the ignition to prevent unauthorized use. Always apply the brakes before setting or releasing the park brake.
- Page 45 Each vehicle is programmed at the factory for a particular battery type. Switching battery types should be done only by an authorized service technician. Your authorized GEM dealer can provide battery-related service. To access the battery pack, remove any rear accessory back installed on the vehicle.
- Page 46 FEATURES AND CONTROLS ON-BOARD CHARGER The on-board battery charger is located under the hood. The state of charge of the batteries displays in the rider information center and a “C” displays when the vehicle is charging. When the vehicle will not be used for 10 or more days, connect the charger. The state of charge of the batteries will be monitored, and charging will automatically be initialized when the state of charge drops below 97% or when 28 days have passed since the last charge completed.
- Page 47 FEATURES AND CONTROLS BATTERY CHARGING Your vehicle is equipped with either a standard charge receptacle or a fast charge receptacle. The battery charge receptacle is located at the rear of the hood, just below the windshield. WARNING Using a non-recommended extension cord could result in fire, heat damage or charger failure, which could result in serious injury or death.
- Page 48 A GFI (Ground Fault Interrupt) receptacle is recommended. See your authorized GEM dealer if you do not have a GFI receptacle at your regular recharge site. • Make sure the charger uses a dedicated circuit to prevent overloading. If charging multiple vehicles, each vehicle should use a dedicated circuit.
- Page 49 FEATURES AND CONTROLS ALTERNATE BATTERY CHARGING METHOD NOTE The following only applies to Flooded or AGM Batteries. Do not attempt to charge Li Ion batteries with a charger other than the one on-board the vehicle. If the combined voltage of all batteries reaches 36 volts or less, a safety feature in the on- board charger will not allow the charger to activate.
- Page 50 FEATURES AND CONTROLS BATTERY HANDLING PRECAUTIONS WARNING Do not work in or near the battery compartment or on any other electrical component of the vehicle while charging the batteries. Before servicing the vehicle’s electrical system, always disconnect the main power connector first, then disconnect any electrical accessory connections, then disconnect the negative cable from the 12-volt battery (if equipped), then disconnect the negative terminal from the main battery pack.
- Page 51 FEATURES AND CONTROLS BRAMMO® LITHIUM-ION COLD BATTERY PERFORMANCE • The Brammo li-ion batteries in your vehicle will not accept a charge unless internal battery temperatures are at or above 41° F (5° C). • When ambient temperature is at or above -16° F (-27° C), the battery heaters will use battery pack energy to warm the batteries to an internal temperature of 41°...
- Page 52 FEATURES AND CONTROLS USB PORT The fuse for the USB port is located under the hood in the fuse block. Always use fuses with the same type and rating. NOTICE Do not plug in devices requiring power exceeding 25 watts. Damage to the vehicle electrical system may occur or an accessory fuse may blow.
- Page 53 FEATURES AND CONTROLS SEAT ADJUSTMENT Seats can be adjusted forward or rearward. The seat adjustment lever is directly under the front of the seat. 1. Move the adjustment lever to the left and slide the seat to the desired position. 2.
- Page 54 FEATURES AND CONTROLS SEAT BELT SAFETY TIPS • In a rear seat, you may have trouble tightening the lap/shoulder belt on the child restraint because the buckle or latch plate is too close to the belt path opening on the restraint. Disconnect the latch plate from the buckle and twist the short buckle-end belt several times to shorten it.
- Page 55 FEATURES AND CONTROLS SOLAR PANEL (OPTION) The optional solar panel is mounted on top of the vehicle. Refer to your solar panel user manual for details. WARNING Do not stack items on the solar panel. Never exceed the GVWR or GAWR. REAR ACCESSORY BACKS (OPTION) Rear accessory back options are available.
- Page 56 Never exceed the GVWR or the GAWR of the vehicle. See page 16. NOTICE Use only GEM-approved rear accessories. Others may cause damage to the locking system or vehicle, and will void warranty. GRAB HANDLE PACKAGE (STANDARD) Grab handles can be added at each seat position to assist riders in entering and exiting the vehicle.
- Page 57 Front bumpers are for appearance only and will protect the body panels only from minor dents and scratches. They will not provide protection to the vehicle in front-end collisions. NOTICE Never use your GEM vehicle for pushing. Damage to the vehicle may result.
- Page 58 FEATURES AND CONTROLS HEATER/FAN (OPTION) The heater unit can be used to provide heat inside the vehicle. The switch is located on the console. Move the switch to the HEAT position. Move the switch to the FAN position to operate air flow without heat. HEATED WINDSHIELD (OPTION) The heated windshield has heating elements within the glass to assist in defogging the windshield.
-
Page 59: Operation
OPERATION OPERATION PRE-RIDE INSPECTION WARNING Failure to operate the vehicle properly can result in a collision, loss of control, accident or overturn, which may result in serious injury or death. Read and understand all safety warnings outlined in the safety section of this owner’s manual. - Page 60 OPERATION ITEM REMARKS PAGE Latches (doors/seats/ Ensure all latches are secure accessory back) Batteries Ensure full charges, page 75 proper water levels, clean terminals Battery cables Inspect for proper cable page 75 routing, secure connections Wheels/fasteners Inspect, ensure page 70 fastener tightness...
- Page 61 OPERATION DRIVING PROCEDURE 1. Disconnect the charging cable. 2. Sit in the driver's seat and fasten the seat belt. Make sure passengers are seated with seat belts secured. 3. Adjust mirrors as needed. 4. Turn the key clockwise to the ON position. 5.
- Page 62 OPERATION DRIVING IN REVERSE Your vehicle comes with a reverse camera located on the rear-view mirror. Operation of the camera is automatic and is activated when the vehicle’s drive mode switch is in the reverse position. Follow these precautions when operating in reverse: 1.
- Page 63 OPERATION 4. Engage all-wheel drive before wheels begin to lose traction. NOTICE Severe damage to the drive train may occur if the AWD is engaged while the wheels are spinning. Always allow the wheels to stop spinning before engaging AWD. 5.
- Page 64 Always tie the frame of the GEM vehicle to the transporting unit securely with suitable straps. Always secure the straps to the front sub-frame and the rear frame of the GEM vehicle. Never place tie straps across any plastic body or floor panel components.
-
Page 65: Maintenance
Inspect, clean, lubricate, adjust and replace parts as necessary. When inspection reveals the need for replacement parts, genuine GEM parts are available from your authorized GEM dealer. Record maintenance and service in the Maintenance Log at the back of the book. - Page 66 MAINTENANCE MONTHLY MAINTENANCE Check for worn insulation or frayed page 76 wires Check battery hold-down bar to page 76 ensure batteries are tightly secured page 68 Check tires for correct air pressure and wear Check wheels for proper torque after page 72 first 100 miles driven, and after first 100 miles after any wheel if removed...
- Page 67 MAINTENANCE BRAKE FLUID Inspect the brake system routinely. Inspect the brake fluid level before each operation. If the level drops between fluid checks, add brake fluid as needed. Your authorized dealer can provide service. 1. Position the vehicle on a level surface. 2.
- Page 68 MAINTENANCE STEERING WHEEL INSPECTION Check the steering wheel for specified freeplay and smooth operation at the intervals outlined in the Periodic Maintenance Chart. 1. Position the vehicle on a level surface. 2. Lightly turn the steering wheel left and right. There should be 0.8-1.0 inch (20-25 mm) of freeplay at the outer rim of the steering wheel.
- Page 69 Locate and correct any short circuits that may have caused the blown fuse, then replace the fuse. If you suspect a relay or diode needs replacement, your authorized GEM dealer can assist. Open the hood to access the fuse box .
- Page 70 MAINTENANCE OPTIONAL 12V FUSES APPLICATION SIZE LOCATION Lithium-ion 5 amp Lithium-ion Harness Beacon Light 7.5 amp Beacon Harness Security Light 7.5 amp Security Light Harness Stereo 10 amp Stereo Harness 30 amp EPS Harness STANDARD 48V FUSES APPLICATION SIZE LOCATION 5 amp Motor Controller/ BMC 48V Fuse Center...
- Page 71 TIRE TREAD DEPTH Any accelerated wear of tires may be an indicator of improper alignment or poor driving habits. Your authorized GEM dealer can assist. Rotate wheels every 5,000 miles, or more frequently if needed. Always replace tires when tread depth...
- Page 72 MAINTENANCE WHEEL NUT TORQUE Inspect the following items occasionally for tightness, and if they've been loosened for maintenance service. Do not lubricate the stud, the lug nut, or the washers (washers equipped on vehicles with factory steel wheels). Check wheels for proper torque after first 100 miles driven and the first 100 miles after nay wheel is removed.
- Page 73 If you need access to the bottom of the vehicle, use automotive jack stands to support the vehicle on a firm, level surface. Your authorized GEM dealer can assist. 1. Position the vehicle on a dry, firm, level surface.
- Page 74 MAINTENANCE WHEEL INSTALLATION WARNING Improperly installed wheels can adversely affect tire wear and vehicle handling, which can result in serious injury or death. Always ensure that all nuts are torqued to specification. Do not service axle nuts that have a cotter pin installed.
- Page 75 MAINTENANCE HEADLIGHT REPLACEMENT If a headlight fails to work properly, an expired lamp may need replacement. Apply dielectric grease to the socket before installing the new lamp. 1. Hot components can cause burns to skin. Allow lamps to cool before servicing.
- Page 76 MAINTENANCE HEADLIGHT BEAM ADJUSTMENT 1. Place the vehicle on a level surface with the headlight approximately 25 ft. (7.6 m) from a wall 2. Measure the distance from the floor to the center of the headlight and make a mark on the wall at the same height. 3.
- Page 77 Your authorized GEM dealer can provide battery-related service. WARNING Battery posts, terminals and related components contain lead and lead compounds, chemicals known to cause cancer and reproductive harm.
- Page 78 Before accessing the batteries, make sure any wire or metal items remain clear of the battery compartment to avoid causing a short circuit to the electrical system. Several battery pack configurations exist for GEM vehicles. • Four 12-volt lead acid batteries • Eight 6-volt lead acid batteries •...
- Page 79 Using an insulated wrench, torque bolts to 8 lb-ft (10.8 Nm). CHECK BATTERY CABLES AND WIRING Check the battery compartment for any signs of worn insulation, frayed cables or damaged cable ends. If found, see your authorized GEM dealer or other qualified service person for service before operating. WARNING If battery cable ends are damaged or corroded, they should be replaced or cleaned as necessary.
- Page 80 Accessory watering systems are available for 12-volt and 6-volt flooded batteries. See your authorized GEM dealer for more information. NOTICE Never charge batteries if plates are exposed above the water level.
- Page 81 MAINTENANCE Maintain the fluid level between the battery plates and the bottom of the fill well. Do not overfill. CAUTION The fluid in an overfilled battery may boil over and cause electrolyte to spill. Inspect the fluid level of each battery. 1.
- Page 82 For neutralized spills, place residue in acid- resistant containers with absorbent material, sand or earth and dispose of in accordance with local, state and federal regulations for acid and lead compounds. Contact local and/or state environmental officials regarding disposal information. You can also contact GEM Customer Service for information.
- Page 83 These products scratch or destroy acrylic surfaces. CLEANING SEATS GEM Foaming All Surface Cleaner can be used to clean the seats. Rubbing seats with warm water and a clean, damp cloth will also remove dirt. Substances such as tar, asphalt and other soils will stain if not removed quickly. Use a clean cloth and solvent type vinyl cleaner, then wash the area thoroughly with a damp cloth and mild liquid detergent.
- Page 84 12-volt battery (if equipped), then disconnect the negative terminal from the main battery pack. See page 37. Cover the vehicle with a genuine GEM vehicle cover. Do not use plastic or coated materials. They do not allow enough ventilation to prevent...
-
Page 85: Specifications
SPECIFICATIONS SPECIFICATIONS GEM E2 GEM E4 DIMENSIONS Dry Weight 1200 lbs. (544 kg) 1350 lbs. (612 kg) Length 103 in. (262 cm) 135 in. (343 cm) 55.5 in. (141 cm) 55.5 in. (141 cm) Width Height 73.1 in. (186 cm) 73.1 in. - Page 86 14-inch Aluminum 4.5-inch ET11 165/70R14 Tires This tire should only be replaced by a 165/70R14 81T tire Tire pressure 35 psi (241 kPa) GEM E6 DIMENSIONS Dry Weight 1696 lbs. (769 kg) Length 167 in. (424 cm) 55.5 in. (141 cm)
- Page 87 SPECIFICATIONS PERFORMANCE Motor 6.5 kW AC electric Motor peak 18.5 kW Controller Sevcon 450A AC Controller Maximum speed 25 MPH (40 km/h) Range Varies with conditions Drive System 17.05:1 Single speed Standard 1 kW, 120/240V input (optional 3 kW or 6 On-board charger kW, SAE J1772) BRAKE SYSTEM...
-
Page 89: Warranty
This warranty is transferable to another consumer during the warranty period through a GEM dealer, but any such transfer will not extend the original term of either warranty. The duration of this warranty and/or the battery warranty may vary by international region based upon local laws and regulations. - Page 90 POLARIS Industries Inc. gives a FIVE-YEAR/30,000-MILE (48,300 km) LIMITED parts and labor warranty on the battery pack against defects in material or workmanship on your GEM vehicle. The FIVE-YEAR/30,000- MILE (48,300 km) term begins on the purchase date, is fully transferable and has no deductible.
- Page 91 WARRANTY LIMITATIONS OF WARRANTIES AND REMEDIES This Polaris limited warranty excludes any failures that are not caused by a defect in material or workmanship. THIS WARRANTY DOES NOT COVER CLAIMS OF DEFECTIVE DESIGN. This warranty also does not cover acts of God, accidental damage, normal wear and tear, abuse or improper handling.
- Page 92 CONTROLLING STATE LAW. HOW TO OBTAIN WARRANTY SERVICE If your vehicle requires warranty service, you must take it to a GEM Servicing Dealer. When requesting warranty service you must present your copy of the Warranty Registration From to the dealer. (THE COST OF TRANSPORTATION TO AND FROM THE DEALER MAY BE YOUR RESPONSIBILITY).
- Page 93 If you purchase from a private party: If you purchase a GEM vehicle from a private party, to be kept and used outside of the country in which the product was originally purchased, all warranty coverage will be denied.
- Page 94 WARRANTY EXPORTED PRODUCTS EXCEPT WHERE SPECIFICALLY REQUIRED BY LAW, THERE IS NO WARRANTY OR SERVICE BULLETIN COVERAGE ON THIS PRODUCT IF IT IS SOLD OUTSIDE THE COUNTRY OF THE SELLING DEALER’S AUTHORIZED LOCATION. This policy does not apply to products that have received authorization for export from POLARIS.
-
Page 95: Maintenance Log
MAINTENANCE LOG MAINTENANCE LOG MAINTENANCE LOG Use the following chart to record periodic maintenance. SERVICE MILES (KM) OR DATE TECHNICIAN PERFORMED / HOURS COMMENTS... - Page 96 MAINTENANCE LOG SERVICE MILES (KM) OR DATE TECHNICIAN PERFORMED / HOURS COMMENTS...
- Page 97 Check Fluid Levels ....81 Fuses and Relays ...... 67 Chrome Bumpers/Rugged Bumpers ........ 55 Clean the Exterior ...... 81 Cleaning and Storage ....81 GEM Customer Service ....3 Cleaning Seats ......81 General Warning ....7, 10 Cleaning the Interior ....81...
- Page 98 Glove Box ........ 24 Grab Handle Package ....54 Main Power Connector ....37 Gross Vehicle Weight Rating MAINTENANCE LOG....93 (GVWR) ......... 16 Miles/Kilometers Indicator ... 32 Mode Button......27 Headlight Beam Adjustment..74 Headlight Replacement....73 Noise and Vibration....17 Heated Windshield.....
- Page 99 Safety Labels and Locations ..9 Wheel Installation ...... 72 Seat Adjustment......51 Wheel Nut Torque...... 70 Wheel Removal......71 Seat Belt Inspection ....52 Windshield Washer ....56 Seat Belt Safety Tips ....52 Seat Belt Warning...... 13 Seat Belts ......18, 51 Solar Panel ......
- Page 101 For your nearest Polaris dealer, call 1-800-POLARIS (765-2747) or visit www.polaris.com Polaris Industries Inc. 2100 Highway 55 Medina, MN 55340 Part No. 9929174 Rev 02 Printed in USA...