
Related Manuals for DeLonghi DINAMICA PLUS ECAM37 95 Series


Summary of Contents for DeLonghi DINAMICA PLUS ECAM37 95 Series
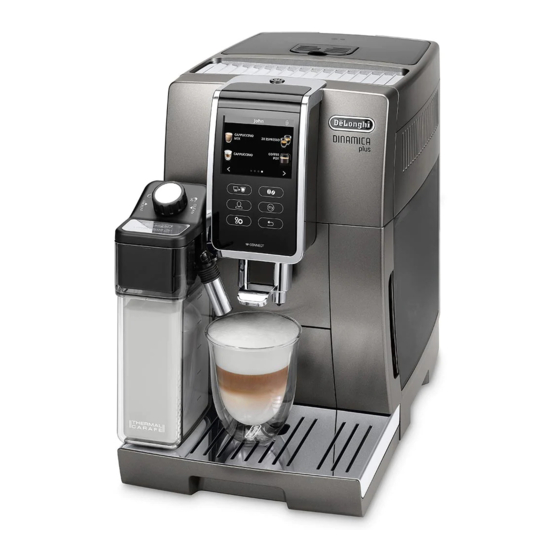
- Page 1 ECAM37X.95 BEAN TO CUP ESPRESSO AND CAPPUCCINO MACHINE Instructions for Use Instructions videos available at: http://dinamicaplus.delonghi.com...
- Page 2 A22*...
- Page 3 page 4 PROFILE 1 PROFILE 1 READY...
-
Page 4: Table Of Contents
CONTENTS Adjusting the amount of froth ....... 12 Making cappuccinos and milk-based beverages 1. INTRODUCTION ...........5 automatically ............12 Letters in brackets ............ 5 Cleaning the milk container after use ....12 Troubleshooting and repairs........5 Download the App! ..........5 10. -
Page 5: Introduction
: My beverages selection menu. Unless previ- Please note: ously programmed from the settings menu as described in Check compatible devices on "compatibledevices.delonghi. chapter "11. Customising the beverages ", the beverage is com". programmed directly the first time you use the appliance 2. -
Page 6: Description Of The Milk Container (Page 3 - E)
D5. Cleaning brush 4. Remove the water tank (A17) (fig. 2), fill to the MAX line D6. Hot water spout (marked on the tank) with fresh water (fig. 3), then put the D7. *Power cord (certain models only) tank back in the appliance (fig. 4); 2.5 Description of the milk container (page 3 - E) E1. -
Page 7: Turning The Appliance On
6. MENU SETTINGS 6.1 Access the settings menu 1. Press the " " button (C3) to enter the menu; 2. Scroll through the menu items by pressing until the required item is displayed; 3. Press the menu item you want to select. 6.2 Exit the menu When you have made the adjustments, press until... -
Page 8: Auto-Off (Standby)
6. ""DEFAULT VALUES SET": press 6.12 Beep The beverage has been reset to the default values. Proceed with This enables or disables the beep emitted by the machine each the other beverages or go back to the homepage by pressing time an icon is pressed or an accessory is inserted/removed. -
Page 9: Making Coffee
• While the machine is making coffee, delivery can be inter- rupted at any moment by pressing 7. MAKING COFFEE Once the coffee has been made, the appliance is ready to make 7.1 Making coffee using coffee beans the next beverage. Important! Please note! Do not use green, caramelised or candied coffee beans as they... -
Page 10: Making Coffee Using Pre-Ground Coffee
After delivering the beverage, the quantity setting is reset to the However, if after making the first few coffees you find that the coffee is either too weak and not creamy enough or delivery is value too slow (a drop at a time), this can be corrected by adjusting 7.4 Making coffee using pre-ground coffee the grinding adjustment dial (A5) (fig. -
Page 11: Coffee Pot
SAFETY WARNING: 8. COFFEE POT Based on espresso coffee, this beverage is light and balanced, After making the pot of coffee, leave the ap- with a fine layer of froth, ideal to share in company. pliance to cool for 5 minutes before making Optional accessory in certain models: another beverage. -
Page 12: Adjusting The Amount Of Froth
9.3 Making cappuccinos and milk-based beverages automatically 1. Fill the milk container (E3) and attach it as described above. 2. Select the required beverage: • CAPPUCCINO • LATTE MACCHIATO • HOT MILK • CAPPUCCINO+ • CAPPUCCINO MIX • CAFFELATTE • FLAT WHITE 4. -
Page 13: Delivering Hot Water
• You can also customise the beverages by connecting with 10. DELIVERING HOT WATER the DeLonghi Coffee Link App. 1. Make sure the hot water spout (D6) is attached correctly to • Press to exit programming. The values will not the hot water connection nozzle (A8);... -
Page 14: Memorising Your Own User Profile
"). • You can rename your personal profile by connecting with Please note! the DeLonghi Coffee Link App. After cleaning, it is normal for the grounds container (A11) to • To customise the profile icon, see section "6.14 Customise contain water. -
Page 15: Cleaning The Drip Tray And Condensate Tray
3. Check the condensate tray (A10) (red) and empty if necessary. 4. Put the drip tray complete with grille and grounds contain- er back in the appliance. Important! When removing the drip tray, the grounds container must be emptied, even if it contains few grounds. If this is not done, when you make the next coffees, the grounds container will fill up more than expected and clog the machine. -
Page 16: Cleaning The Infuser
13.9 Cleaning the infuser The infuser (A20) must be cleaned at least once a month. Important! The infuser cannot be extracted while the machine is on. 1. Make sure the machine is correctly turned off (see section "5. Turning the appliance off"); 2. -
Page 17: Cleaning The Hot Water Nozzle
appliance immediately, press and follow the op- erations from point 3. To descale the appliance later, press . The symbol (B7) appears on the display to remind you that the ap- pliance needs descaling. (The message appears each time you turn the appliance on). -
Page 18: Setting Water Hardness
Important! Danger of scalding 17. Hot water is delivered from the hot water/steam spout and Hot water containing acid flows from the hot water and coffee "Rinsing UNDERWAY" "PLEASE WAIT" is displayed; spouts. Take care to avoid contact with splashes of this solution. 18. -
Page 19: Water Softener Filter
4. "WATER HARDNESS" "CURRENT VALUE UNDERLINED": Press 4. "RUN WATER INTO FILTER HOLE" "UNTIL IT COMES OUT" (fig. the level measured previously as indicated in the following 38): To activate the filter, run tap water through the hole table: (Level 1 = soft water; Level 4 = very hard water); in the filter as shown in the figure until water comes out of the openings at the side for more than a minute. -
Page 20: Removing The Filter
Please note! After two months (see date indicator) or when the appliance has not been used for 3 weeks, you should replace the filter even if the message has not yet been displayed. 16.3 Removing the filter If you want to use the appliance without the filter (D6), you must remove it and notify the appliance of its removal. -
Page 21: Displayed Messages
18. DISPLAYED MESSAGES DISPLAYED MESSAGE POSSIBLE CAUSE REMEDY FILL TANK WITH FRESH Insufficient water in the tank (A17). Fill the tank with water and/or insert it correct- WATER ly, pushing it as far as it will go until it clicks into place. - Page 22 DISPLAYED MESSAGE POSSIBLE CAUSE REMEDY ADD GROUND COFFEE MAX. Preparation with pre-ground coffee has been Make sure the funnel (A4) is not blocked, then ONE MEASURE selected. add one level measure (D2) of pre-ground coffee, press “Next” on the display and follow the instructions in section "7.4 Making coffee using pre-ground coffee".
- Page 23 DISPLAYED MESSAGE POSSIBLE CAUSE REMEDY INSERT MILK CONTAINER The milk container (E) is missing or not correct- Insert the milk container, pushing it as far as ly in place. it will go. INSERT INFUSER ASSEMBLY The infuser (A20) has not been replaced after Insert the infuser as described in section "13.9 cleaning.
- Page 24 DISPLAYED MESSAGE POSSIBLE CAUSE REMEDY DESCALING INTERRUPTED Descaling has been interrupted or has not been Press NEXT to resume descaling. For more in- PRESS NEXT TO CONTINUE completed correctly. formation, see section "14. Descaling". TURN MILK FROTH Milk has been delivered recently and the tubes Turn the froth adjustment dial (E1) to CLEAN ADJUSTMENT DIAL TO CLEAN inside the milk container (E) must be cleaned.
- Page 25 DISPLAYED MESSAGE POSSIBLE CAUSE REMEDY REPLACE WATER FILTER The water softener filter (D6) is exhausted. Press the selector corresponding to "OK" to re- PRESS OK TO START place or remove the filter, or "ESC" to carry out the procedure later. Follow the instructions in section "16.
-
Page 26: Troubleshooting
19. TROUBLESHOOTING Below is a list of some of the possible malfunctions. If the problem cannot be resolved as described, contact customer services. PROBLEM POSSIBLE CAUSE REMEDY The appliance does not come on. It is not plugged into the mains socket. Plug into the mains socket (fig. 1). Models with removable power cord: Push the connector fully into the socket at the the connector of the power cord (D7*) - Page 27 PROBLEM POSSIBLE CAUSE REMEDY Coffee does not come out of one or The coffee spouts (A9) are blocked. Clean the spouts with a toothpick (fig. 24B). both spouts. The coffee delivered is watery. The funnel (A4) is clogged. Clean the funnel with the help of the brush (D5) as described in section “13.8 Cleaning the pre-ground coffee funnel”.
- Page 28 PROBLEM POSSIBLE CAUSE REMEDY The cup shelf (A12) is hot. A number of beverages have been pre- pared in rapid succession After cleaning, the drip tray (A15) can- The condensate tray(A10) is not in the Make sure the condensate tray is inserted correct position correctly not be put back in the machine...
- Page 32 De’Longhi Appliances via Seitz, 47 31100 Treviso Italia www.delonghi.com...