Table of Contents
Advertisement
Advertisement
Table of Contents

Related Manuals for Roland SPD-SX


Summary of Contents for Roland SPD-SX
- Page 3 Copyright © 2011 ROLAND CORPORATION All rights reserved. No part of this publication may be reproduced in any form without the written permission of ROLAND CORPORATION. Roland is a registered trademarks or trademarks of Roland Corporation in the United States and/or other countries.
-
Page 4: Introducing The Spd-Sx
Introducing the SPD-SX Things You Can Do with the SPD-SX The SPD-SX is a powerful sampling pad that lets you easily sample original sounds and phrases so you can play them immediately. Use with a drum set to expand your musical power! -
Page 5: Overview Of The Spd-Sx
A “kit” consists of all settings for the nine pads, four external pads, and two footswitches. You can customize a kit by assigning the desired wave to each pad, selecting the effect to be used in that kit and specifying how they will be played (p. 42). The SPD-SX contains 100 kits. KIT100 KIT001... -
Page 6: About The Effects
Introducing the SPD-SX About the Effects The SPD-SX includes a “MASTER EFFECT” processor (p. 22), which applies to all sounds being produced, and a “KIT FX” processor (p. 23), which can be used on a per-kit basis. Use these effects to modify and personalize the sounds as appropriate for the song or performance. -
Page 7: Sampling Workflow
SPD-SX p. 35 p. 36 p. 38 Perform p. 20 Now you can perform using the waves you sampled. MEMO You can import sounds from a USB flash drive or your computer into the SPD-SX and play them (p. 39). -
Page 8: Table Of Contents
Things You Can Do with the SPD-SX . . . . . . . . . . . . . . . . . - Page 9 MIDI Settings for Each Pad (MIDI) . . . . . . . . . . . . . . . . . . . 67 MIDI Settings for the Entire SPD-SX (MIDI) . . . . . . . . . . . 68 Appendix .
-
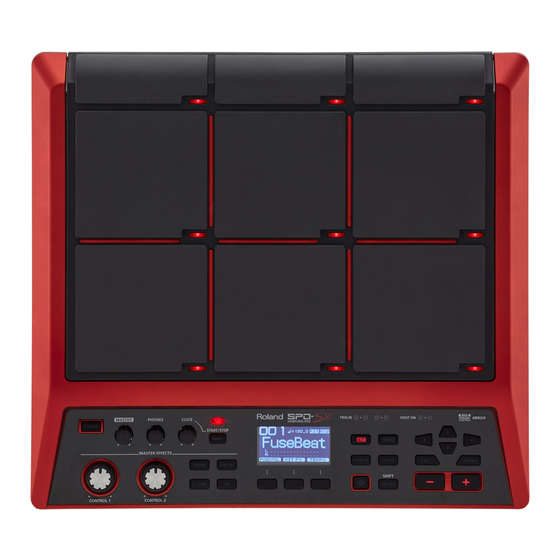
Page 10: Panel Descriptions
Panel Descriptions Top Panel... - Page 11 In this manual they are called, from left to right, the [F1], [F2], and [F3] buttons. [KIT] button Displays the top screen. p. 21 [MENU] button Accesses various functions, such as overall settings for the entire SPD-SX. p. 16 [SAMPLING] button Captures a sample. p. 28 [QUICK] button Accesses a quick menu (QUICK MENU) specific to each screen.
-
Page 12: Rear Panel (Connecting Your Equipment)
USB cable (p. 19). allows you to import audio files (p. The included software lets you MIDI connectors 39), or save SPD-SX waves and import audio files (p. 40) or settings to your USB flash drive (p. sample the sounds played by MIDI devices can be 66). - Page 13 The sound that’s input to these jacks will be output from the MASTER OUT jacks and the PHONES jack. * Use a monaural dynamic microphone. The SPD-SX does not support condenser microphones. * Howling could be produced depending SUB OUT jacks on the location of microphones relative to speakers.
-
Page 14: Getting Ready To Play
Getting Ready to Play Attaching to a Stand If you want to attach the SPD-SX to a stand, use an all-purpose clamp (APC-33; sold separately) or a pad stand (PDS-10; sold separately). NOTE! • You must use the screws on the bottom panel of the SPD-SX. Using any other screws may cause malfunction. -
Page 15: Turning The Power On
However, this is normal and does not indicate a malfunction. • With the factory settings, the SPD-SX’s power will automatically be switched off 4 hours after you stop playing or operating the unit. -
Page 16: Basic Editing Procedure
Getting Ready to Play Basic Editing Procedure Here’s the basic procedure for using the buttons and knobs to edit the SPD-SX’s settings. 2 3 4 Press the [MENU] button. The MENU screen will appear. MENU Explanation Page Make settings for an entire kit. -
Page 17: Using The Quick Menu
When you’ve finished making settings, press the [KIT] button to return to the top screen. The SPD-SX’s settings are saved when you turn off the power; you don’t need to take any action to save the settings. In this manual, the process of navigating from the MENU screen to select SYSTEM and then select CLICK is abbreviated as “MENU... -
Page 18: Using A Usb Flash Drive
Getting Ready to Play Using a USB Flash Drive If a USB flash drive (separately sold) is connected to the SPD-SX, you’ll be able to do the following things. • Import audio files from the USB flash drive (p. 39). -
Page 19: Connecting Your Computer Via Usb
You can use the “SPD-SX Wave Manager” on the included CD-ROM to import audio files from your computer (p. 40). USB Audio Sounds played by your computer can be sampled (p. 29), or sounds played by the SPD-SX can be recorded as audio on your computer. -
Page 20: Performing
The SPD-SX has nine onboard pads (pads 1–9). When you play a pad, the indicator of that pad will light. * Though you can play with your hands, the SPD-SX is designed to respond optimally when played with sticks. MEMO • Use the shoulder of the stick to play pads 1–3. -
Page 21: Selecting A Kit
Performing Selecting a Kit Now, try selecting a kit (p. 5) and playing it. Press the [KIT] button to access the top screen. Use the [-] [+] buttons to select a kit. Try selecting various kits and playing them. MEMO • By holding down the [SHIFT] button and using the cursor [ ] [ ] buttons, you can select kits in steps of 10. -
Page 22: Using The Master Effects
Performing Top screen quick menu In the top screen, pressing the [QUICK] button will display the following quick menu. Menu Explanation Page CHAIN ON/OFF Turn the kit chain function on/off. p. 56 KIT CHAIN Jump to the KIT CHAIN screen. p. -
Page 23: Controlling The Master Effect In Real Time
Performing Controlling the Master Effect in Real Time Use the [CONTROL 1] knob or [CONTROL 2] knob as follows. While you perform, turn the [CONTROL 1] knob or [CONTROL 2] knob. When you turn a knob, a change will occur depending on the master effect that’s selected. For example, if a filter is selected, turning a knob would change the frequency response or vary the effect’s depth. -
Page 24: Performing With A Click (Metronome)
Performing Performing with a Click (Metronome) Performing with a click sound ensures that you’re playing at the correct tempo. Press the [START/STOP] button. The [START/STOP] button will light. A click will sound at the tempo, and the TEMPO indicator will blink Turn the [CLICK] knob to adjust the volume of the click sound. -
Page 25: Changing The Tempo (Tempo)
Performing Changing the Tempo (TEMPO) Here’s how to adjust the tempo. The click will sound at the performance tempo you specify here. In the top screen, press the [F3] (TEMPO) button. Specify the tempo. Button Value Explanation [-] [+] button Specify the tempo. -
Page 26: Adjusting The Pad Volume (Pad Volume)
Performing Adjusting the Pad Volume (PAD VOLUME) You can adjust the volume of each pad. In the top screen, press the [F1] (PADVOL) button. Use the cursor [ ] buttons to select the pad whose volume you want to adjust, and use the [-] [+] buttons to adjust its volume. -
Page 27: Performing With External Pads And Footswitches
Performing Performing with External Pads and Footswitches You can assign waves to external pads (PD series; sold separately), acoustic drum triggers (RT series; sold separately), and footswitches (FS-5U, FS-6; sold separately), and perform using them. Some typical example connections are shown in the illustrations below. Connecting external pads or acoustic drum Connecting two external pads to one TRIG IN jack triggers... -
Page 28: Sampling
Record the sound of your SPD-SX performance. p. 38 Sampling time The SPD-SX allows you to sample approximately 180 minutes of stereo or approximately 360 minutes of monaural sound into internal memory (including the preload waves). MEMO • You can check the sampling time that remains (p. 66). -
Page 29: Sampling To A Single Pad (Basic Sampling)
SETUP OPTION USB MODE parameter to “AUDIO/MIDI.” Use a commercially available USB cable to connect the SPD-SX’s COMPUTER connector to your computer (p. 19). Set the input level appropriately for the device that’s connected. Set the [GAIN] knob on the rear panel to Digital audio player, etc. - Page 30 If you set AUTO START “OFF” in step 5 Sampling will begin when you press the [F2] (START) button. Produce sound on the device that’s connected to the SPD-SX. While sampling is taking place, the screen will indicate “NOW SAMPLING... ”...
- Page 31 Sampling Press the [F3] (STOP) button at the moment you want to stop sampling. The sampling result screen will appear. Saving the sampled waves Use the function buttons and the [-] [+] buttons to adjust the region of the wave that will be heard. Button Explanation [F1] (PREVIEW) button...
-
Page 32: Successively Sampling To Multiple Pads (Multi Pad)
Explanation Adjusts the volume at which sampling will occur. Produce sound on the device that’s connected to the SPD-SX, and adjust the volume until it’s as high as you can get it without causing the level overload indication to appear. - Page 33 Sampling Start sampling Example: Sampling to pad 7 and pad 9 8. Start sampling to 9. Stop sampling 7. Start sampling to pad 7 pad 9 6. Produce sound Pad 7 Pad 7 Pad 9 on your device Sample to pad 7 and pad 9 Produce sound on the connected device.
-
Page 34: Combining Two Waves Into One (Merge)
Sampling Combining Two Waves into One (MERGE) Here’s how two waves assigned to pads of the same kit can be combined into one wave. The combined waves will be saved in stereo. Preparations for sampling Press the [SAMPLING] button to access the SAMPLING screen. Use the cursor [ ] buttons to select “MERGE,”... -
Page 35: Resampling With Effects (With Fx)
Sampling Resampling with Effects (WITH FX) Here’s how to apply a kit effect and a master effect to a sample and resample the result. Preparations for sampling Press the [SAMPLING] button to access the SAMPLING screen. Use the cursor [ ] buttons to select “WITH FX,”... -
Page 36: Dividing A Wave (Chop)
Sampling Dividing a Wave (CHOP) Here’s how to create new waves by chopping (dividing) an existing wave. Preparations for sampling Press the [SAMPLING] button to access the SAMPLING screen. Use the cursor [ ] buttons to select “CHOP,” and press the [ENTER] button. The sampling setup screen will appear. - Page 37 Sampling To start sampling, play the first pad to which you want to sample. To begin sampling from partway through a wave, press the [F2] (START) button to start playback of the wave, then play a pad at the point where you want sampling to occur. Unassigned pad Pad is being sampled Pad for which sampling is complete...
-
Page 38: Recording The Sound Of An Spd-Sx Performance
Sampling Recording the Sound of an SPD-SX Performance (PERFORM & RECORD) The sound of your performance on the SPD-SX can be recorded and saved as a wave. Preparations for sampling Press the [SAMPLING] button to access the SAMPLING screen. Use the cursor [ ] buttons to select “RECORDING,”... -
Page 39: Importing Audio Files
• Loop points set in AIFF files are disabled. • If you try to import any WAV/AIFF file in a format that is not supported by the SPD-SX, an error message of “UNSUPPORTED FORMAT. ” is displayed as that file can not be imported. -
Page 40: Importing Audio Files From Your Computer
Indicates the remaining amount of internal memory and the remaining amount of time for sampling. Importing Audio Files from Your Computer By using “SPD-SX Wave Manager, ” provided on the included CD-ROM, audio files from your computer can be imported into the SPD-SX as waves. - Page 41 Select the SPD-SX drive. The “Select Storage” dialog box will appear. Using the drop-down list in the “Select Storage” dialog box, select the [SPD-SX] drive, and click [OK]. * The drive letter of the SPD-SX may differ depending on your computer operating environment.
-
Page 42: Customizing A Kit
Customizing a Kit Here’s how to customize a kit. For each pad, you can assign the desired wave and specify how it will sound. Settings for the Entire Kit (KIT) Here you can make overall settings for the entire kit, such as volume and output. For the procedure, refer to “Basic Editing Procedure”... -
Page 43: Output Assignments (Output)
Customizing a Kit Synchronizing a wave to the performance tempo By specifying a wave’s tempo (the Wave Tempo), you can make the wave play back in synchronization with the tempo of the performance. Play a pad to select the wave that you want to synchronize. In the KIT screen, choose QUICK MENU TEMPO MATCH. -
Page 44: Specifying How A Wave Will Sound (Kit Pad)
Customizing a Kit Specifying How a Wave Will Sound (KIT PAD) For each pad, you can specify how the wave will be sounded. The procedure is described in “Basic Editing Procedure” (p. 16). MEMO You can assign two waves (wave and sub wave) to a pad, and sound them simultaneously. Choose MENU KIT PAD. -
Page 45: Selecting The Wave Played By A Pad (Main)
Value Explanation Selects the wave played by the pad. MEMO • The SPD-SX contains preload waves. • The preload waves are also stored on the supplied CD-ROM. If you want to make use of WAVE 00001–10000 the preload waves that came with the unit when it left the factory, load waves from a USB flash drive or your personal computer (p. -
Page 46: Playing The Second Wave (Sub)
For details on the effect types and their parameters, refer to the Effect Guide. For the procedure, refer to “Basic Editing Procedure” (p. 16). MEMO The Effects Guide can be downloaded from the Roland website. Visit the following URL, choose “owner’s manuals, ” and search for the model name “SPD-SX. ” http://www.roland.com/support/en/... -
Page 47: Copying Parameter Settings To All Pads (Set All Pad)
Customizing a Kit Copying Parameter Settings to All Pads (SET ALL PAD) Here’s how to copy the value of the selected parameter to all pads of the same kit. In any of the KIT PAD screens, move the cursor to the parameter that you want to copy. Choose QUICK MENU SET ALL PAD. -
Page 48: Copying/Pasting Kits Or Pads
Customizing a Kit Copying/Pasting Kits or Pads Here’s how to copy the settings of a kit or pad. Copying/Pasting a Kit Here’s how to copy the settings of the currently selected kit, allowing you to paste them to a different kit. Select the copy-source kit (p. -
Page 49: Exchanging Pads (Pad Exchange)
Customizing a Kit Exchanging Pads (PAD EXCHANGE) This operation exchanges the settings of two pads. You can also exchange pads between different kits. In the KIT screen (or the top screen, etc.), choose QUICK MENU PAD EXCHANGE. The PAD EXCHANGE screen will appear. Play the first pad. -
Page 50: Editing A Wave
Editing a Wave You can edit a wave in various ways, such as normalizing Adjusting the Pitch of a Wave its volume or deleting unwanted portions. (WAVE PITCH) Specifying a Wave’s Start and End Here’s how to adjust the pitch of a wave. (WAVE START/END) By adjusting the pitch, you can obtain an effect that sounds as if the playback speed has been changed. -
Page 51: Creating A Wave That Plays In Reverse
Editing a Wave Select the save-destination wave. Creating a Wave That Plays in Button Explanation Reverse (WAVE REVERSE) [ENTER] button Save as a new wave. [F3] (OVER WRITE) Save by overwriting the original wave. This operation creates a wave that plays in reverse from button an existing wave. -
Page 52: Organizing The Waves (Renumber)
Editing a Wave Organizing the Waves Deleting a Wave (WAVE (RENUMBER) DELETE) If there are wave numbers that do not contain a wave, Here’s how to delete a wave. executing this operation will reassign the subsequent In the WAVE LIST screen, select the wave that you wave numbers so that they are consecutive. -
Page 53: Overall Settings For The Spd-Sx
Overall Settings for the SPD-SX These settings apply to the entire SPD-SX. Sound and Performance-related Settings (SYSTEM) These are sound and performance-related settings that apply to the entire SPD-SX. For details, refer to “Basic Editing Procedure” (p. 16). Choose MENU SYSTEM. -
Page 54: Click Sound Settings (Click)
Overall Settings for the SPD-SX Click Sound Settings (CLICK) Here you can select the type of click, and specify the jacks from which the click will be output. SETUP Parameter Value Explanation Select a group for the click sound. SOUND GROUP PRESET This group contains preset sounds. -
Page 55: Input/Output Settings (Audio In/Out)
SUB OUT VOLUME 0–100 Adjusts the volume of the output from the SUB OUT jacks. SYSTEM GAIN 0dB, 6dB, 12dB Adjusts the overall volume of the SPD-SX. OUTPUT Parameter Value Explanation Allows you to select the jack(s) from which the audio arriving at AUDIO IN jacks will be output. -
Page 56: Kit Chain
[-] [+] buttons, a footswitch or by hitting an external pad set to operate as a switch (p. 57). The SPD-SX lets you store eight sets of patch chains, called banks (A–H). Each bank can have 20 steps. Kit chain bank A... -
Page 57: Using A Pad Or Footswitch As A Switch
Visual Control is a function that lets you control images along with your performance. The SPD-SX lets you do the following when a video device supporting MIDI Visual Control or V-LINK is connected. • Switch kits in order to switch video materials. -
Page 58: Initializing The System (System Init)
Overall Settings for the SPD-SX Parameter Value Explanation VISUAL CTRL SW OFF, ON Turns Visual Control on/off. Choose the setting that's appropriate for the connected device. V CTRL MODE Choose this if connecting a video device that supports MIDI Visual Control. -
Page 59: Display And Pad Settings (Setup)
Overall Settings for the SPD-SX Display and Pad Settings (SETUP) Here you can make display, pad, and MIDI-related settings for the entire SPD-SX. For the procedure, refer to “Basic Editing Procedure” (p. 16). Choose MENU SETUP. Choose the item that you want to edit. -
Page 60: Pad Sensitivity Adjustment (Pad Sens)
Overall Settings for the SPD-SX Pad Sensitivity Adjustment (PAD SENS) Here you can adjust the pad sensitivity. Play a pad to specify the pad that you want to edit. You can also select a pad by using the cursor [ ] [ ] buttons. - Page 61 Overall Settings for the SPD-SX DETAIL Here you can edit the settings for external pads or acoustic drum triggers connected to the TRIG IN jacks (TRIG1–4). MEMO When you specify the TRIG1–4 TYPE (p. 62), these parameters are automatically set to the optimal values for the pad type you’ve specified, so you won’t normally need to edit them.
-
Page 62: External Pad Settings (Trig In)
KD-7, KD-8, KD-9, KD-85, KD-120, KD-140, PD-8, PDX-6, PDX-8, PD-85, PD-105, For each Pad, you can select the type of pad you’re using (the pad type) so the SPD-SX TRIG1–4 TYPE PD-105X, PD-125, PD-125X, will accurately receive the signal from the pad. -
Page 63: Footswitch Settings (Foot Sw)
NORMAL, INVERSE you expect. FS2 POLARITY MIDI Settings (MIDI) Here you can make MIDI settings for the entire SPD-SX. Refer to “MIDI Settings for the Entire SPD-SX (MIDI)” (p. 68). Other Settings (OPTION) Here you can make various other settings. Parameter... -
Page 64: Initializing The Setup Parameters (Setup Init)
The Setup settings will be initialized. Other Convenient Functions (UTILITY) Here you can view information about the waves and the SPD-SX itself, and transfer data using a USB flash drive. Viewing the Wave List (WAVE LIST) Here’s how to view the list of waves. -
Page 65: Importing An Audio File From A Usb Flash
The data will be loaded. Restoring All the Factory Default Settings If you want to return the SPD-SX to its factory-set state, save the factory settings file to your USB flash drive, and then execute “ALL. ” The factory settings file can be obtained from the Roland website. -
Page 66: Saving Data To A Usb Flash Drive
If you decide to cancel without executing, press the [EXIT] button. Press the [ENTER] button. The data will be saved. Viewing Information About the SPD-SX Itself (INFORMATION) Here you can view information about the SPD-SX itself, such as the remaining amount of internal memory. Choose MENU UTILITY INFORMATION. -
Page 67: Connecting An External Midi Device
Specifies how notes will be transmitted. A note-off will be transmitted immediately after a note-on is transmitted. Choose this setting if using the SPD-SX to play an external drum sound module. GATE A note-on and note-off will be transmitted alternately each time you play the pad. -
Page 68: Midi Settings For The Entire Spd-Sx (Midi)
Connecting an External MIDI Device MIDI Settings for the Entire SPD-SX (MIDI) Here you can make overall MIDI settings that apply to the entire SPD-SX. For details on the procedure, refer to “Basic Editing Procedure” (p. 16). Choose MENU SETUP MIDI. -
Page 69: Appendix
Is the input level low? Adjust the AUDIO IN VOLUME to an appropriate setting. p. 55 If LOCAL CONTROL is “OFF, ” playing the pads will not send performance data directly to the SPD-SX’s internal sound Could LOCAL CONTROL be "OFF"? p. 68 generator. -
Page 70: Error Message List
Make sure that the USB flash drive is correctly connected (p. 18). The USB flash drive is not working correctly. Make sure that you’re using a USB Flash Memory sold by Roland. A USB device that the SPD-SX cannot handle... -
Page 71: Specifications
Approx. 180 min. in stereo (360 min. in mono) Sampling Time * Since the internal memory included with the SPD-SX contains preload data, the available sampling time will be less (Total time for all wave data) than the time above. -
Page 72: Index
Index Symbol [-] [+] buttons . . . . . . . . . . . . . . . . . . . . . . . . . . . 11 Factory reset . - Page 73 WAVE REVERSE . . . . . . . . . . . . . . . . . . . . . . . . . . 51 SPD-SX Wave Manager . . . . . . . . . . . . . . 19, 40 WAVE START/END .
-
Page 74: Using The Unit Safely
AC adaptor from the outlet, and request servicing by your retailer, When using the unit with a stand the nearest Roland Service Center, or an recommended by Roland, the rack or authorized Roland distributor, as listed stand must be carefully placed so it is on the “Information”... -
Page 75: Important Notes
Never climb on top of, nor place heavy This (SPD-SX) for use only with Roland objects on the unit. stand PDS-10 or an all-purpose clamp APC-33. Use with other products is capable of resulting in instability causing possible injury. - Page 76 • This product contains eCROS integrated in the unit’s memory or USB flash drives once software platform of eSOL Co.,Ltd. eCROS is a it has been lost. Roland Corporation assumes trademark of eSOL Co., Ltd. in Japan. no liability concerning such loss of data.
- Page 77 5100 S. Eastern Avenue Los Angeles, CA 90040-2938 Telephone : (323) 890-3700 Roland Service Centers and Distributors Roland Service Centers and Distributors When you need repair service, access this URL and nd your nearest Roland Service Center or authorized Roland distributor in your country. https://roland.cm/service...
- Page 78 For EU Countries 有关产品中所含有害物质的说明 本资料就本公司产品中所含的特定有害物质及其安全性予以说明。 本资料适用于����年�月� 日以后本公司所制造的产品。 环保使用期限 此标志适用于在中国国内销售的电子信息产品, 表示环保使用期限的年数。 所谓环保使用 期限是指在自制造日起的规定期限内, 产品中所含的有害物质不致引起环境污染, 不会对 人身、 财产造成严重的不良影响。 环保使用期限仅在遵照产品使用说明书, 正确使用产品的条件下才有效。 不当的使用, 将会导致有害物质泄漏的危险。 产品中有害物质的名称及含量 有害物质 部件名称 六价铬 多溴联苯 多溴二苯醚 铅 (Pb) 汞 (Hg) 镉 (Cd) (Cr ( VI) ) (PBB) (PBDE) 外壳 (壳体) 电子部件...