Table of Contents
Advertisement
Quick Links
Advertisement
Table of Contents

Related Manuals for Zeiss EVO


Summary of Contents for Zeiss EVO
- Page 1 Instruction Manual ZEISS EVO Scanning Electron Microscope...
- Page 2 Effective from: 11/2021 © 2021 Without the prior written consent of ZEISS, this document or any part of it must neither be translated nor reproduced or transmitted in any form or by any means - including electronic or mechanic methods, by photocopying, recording or by any in- formation or filing system.
-
Page 3: Table Of Contents
Software Description................... 50 3.6.1 SmartSEM User Interface............... 50 3.6.2 Graphical Control Elements ..............51 3.6.3 User Access Levels and User Privileges........... 52 3.6.4 SmartSEM Program Suite ..............53 4 Installation..................55 Instruction Manual ZEISS EVO | en-US | Rev. 10 | 354706-0780-006... - Page 4 Safety During Cleaning and Maintenance............112 Maintenance Schedule ..................112 Maintenance Work .....................113 6.3.1 Change of Consumables and Chemicals ..........113 Care and Cleaning Work ..................113 6.4.1 Cleaning the Microscope............... 113 Instruction Manual ZEISS EVO | en-US | Rev. 10 | 354706-0780-006...
- Page 5 Applicable Standards and Regulations..............169 10 Parts and Tools ................1 71 10.1 Consumables ......................171 10.2 Spare Parts......................171 10.3 Tools and Accessories ..................171 Glossary ..................1 73 Index....................1 76 Instruction Manual ZEISS EVO | en-US | Rev. 10 | 354706-0780-006...
-
Page 6: General Information
ZEISS 1 General Information This Instruction Manual (further called "Manual") is considered to be part of the EVO workstation. Herein after referred to as Microscope System. This document contains basic steps and safety information that must be observed during opera- tion and maintenance. -
Page 7: Explanation Of Warning Messages And Additional Information
NOTICE indicates a potentially harmful situation which, if not avoided, may result in property damage. Info Provides additional information or explanations to help operator better understand the con- tents of this manual. Instruction Manual ZEISS EVO | en-US | Rev. 10 | 354706-0780-006... -
Page 8: Further Applicable Documents
ZEISS Sales & Service Partner. Accessories Also refer to the 3rd Party documentation of the manufacturer. 1.4 Contact If you have any questions or problems, please contact your local ZEISS Sales & Service Partner or one of the following addresses: Headquarters Phone:... -
Page 9: Safety
Not all products are available in every country. Contact your local ZEISS representative for more information. PC The Zeiss SEM PC is supplied “as is” and is untested with any third-part software. It is not recom- mended to install any third-part software on the Zeiss SEM PC as this might cause instabilities and/or break Carl Zeiss software installations. -
Page 10: General Safety Information
Training Authorized ZEISS personnel will provide basic training in operating the Microscope System. As well as information on equipment safety and maintenance work that can be conducted by the op- erator. The training will be documented by ZEISS and its completion is to be confirmed by the op- erator. -
Page 11: Prevention Of Hazards
If you open the chamber door while the stage is still on bias voltage, then contact may cause elec- Voltage trical shock. § Always switch off the beam deceleration before you open the chamber door. Instruction Manual ZEISS EVO | en-US | Rev. 10 | 354706-0780-006... -
Page 12: Hazards Generated By Materials And Substances
When disposing of waste that has been generated during a service operation (e.g. used rotary aggressive or toxic pump oil), comply with all national and local safety and environmental protection regulations. chemicals Instruction Manual ZEISS EVO | en-US | Rev. 10 | 354706-0780-006... -
Page 13: Hazards Generated By Radiation
The operation of these devices does not require a permit in Germany according to StrlSchG and StrlSchV. Every single device is subjected to a routine test at Carl Zeiss Microscopy GmbH in Oberkochen. A certificate of this test is enclosed with the device (test certificate). The routine test refers to the device in the delivered configuration. -
Page 14: Warning Labels
Appropriate safety labels on the microscope warn operators of hazards. Each safety label is af- fixed close to the point where a particular hazard exists. Several labels also provide legal informa- tion. Front Side of Microscope Rear Side of Microscope Instruction Manual ZEISS EVO | en-US | Rev. 10 | 354706-0780-006... - Page 15 CAUTION ber door before you move the stage. Risk of injury Reorder no. 347800-0033-000-02en Fingers could be trapped. Always close the chamber door before you move the stage. 347800-0033-000-02en Instruction Manual ZEISS EVO | en-US | Rev. 10 | 354706-0780-006...
- Page 16 Disconnect power before opening. Reorder no. 347800-0033-000-03en 347800-0033-000-03en Risk of electrical shock At the gun head Before opening the gun make sure mains power is disconnected from the microscope. Reorder no. 360400-0000-215 Instruction Manual ZEISS EVO | en-US | Rev. 10 | 354706-0780-006...
- Page 17 Residual voltage at the mains plug after unplug- ging. Wait at least 5 s after unplugging the mains plug before touching the pins of the mains plug. Reorder no. 344700-0033-000-11en Instruction Manual ZEISS EVO | en-US | Rev. 10 | 354706-0780-006...
-
Page 18: Safety Devices And Interlocks
System must be taken out of operation immediately and must be secured against uninten- tional use. To verifying the safety of the Microscope System, please contact your ZEISS service representative. Please keep the service logs and logbooks. 2.5.1 Protective Cover Panels Due to hazardous voltages and X-rays inside the microscope, the microscope is equipped with protective cover panels. -
Page 19: Main Disconnect Device
(including the first pre-vacuum pump and PC). The other circuit breaker (F11) disconnects mains power from the heaters and the second pre-vacuum pump. However, some other components will still be connected to mains power. Instruction Manual ZEISS EVO | en-US | Rev. 10 | 354706-0780-006... -
Page 20: Locking Devices
Several hardware and firmware measures ensure a safe operation of the beam deceleration kit. Before a stage bias potential can be applied, a vacuum switch is checked, the turbo pump signal is checked and the CAN bus communication is checked. Instruction Manual ZEISS EVO | en-US | Rev. 10 | 354706-0780-006... -
Page 21: Product And Functional Description
Pressure (EP) mode Refer to Hydrated Specimen [ 97] Faraday cup Refer to Measuring the Probe Current [ 81] Further options Additional chamberscope, stubscope, and external navigation camera Instruction Manual ZEISS EVO | en-US | Rev. 10 | 354706-0780-006... -
Page 22: Vacuum System
Refer to Control Panel Emergency Off Circuit Refer to Emergency Off (EMO) Option External Software add-ins and enhancements For full details about the available options and accessories, contact your local ZEISS service repre- sentative, or sales representative. 3.1 Vacuum System Purpose For operation of the microscope, the gun head, the column, and the specimen chamber have to be evacuated. -
Page 23: Variable Pressure Modes
The following table summarizes the hardware, applications and pressure ranges of the different vacuum modes: Mode Application Pressure-lim- Mid-col- Filament Min/Max iting aper- Pressure in umn aper- ture ture VP mode Charge com- 100 μm VP 750 μm 10–400 pensation LaB₆ 10–273* Instruction Manual ZEISS EVO | en-US | Rev. 10 | 354706-0780-006... - Page 24 VP mode and EasyVP mode allow partial pressures above 10 Pa to be set in the specimen cham- ber while maintaining high vacuum in the gun area. Fig. 7: Vacuum system in VP or EasyVP mode, high vacuum, variable pressure Instruction Manual ZEISS EVO | en-US | Rev. 10 | 354706-0780-006...
- Page 25 Optibeam modes can be used for imaging. It is possible to switch between HV mode and VP mode when using this configuration. The maximum pressure that can be achieved in the VP mode configuration is 400 Pa for EVO W systems, 273 Pa for EVO LaB₆ and EVO HD mi- croscopes.
- Page 26 100 μm EP aperture is mounted under the objective lens in combination with one of the beamsleeves apertures (500 μm or 1000 μm). For achievable pressure ranges, refer to Variable Pressure Modes [ 23]. Instruction Manual ZEISS EVO | en-US | Rev. 10 | 354706-0780-006...
-
Page 27: Electron Optical Column
3 Product and Functional Description | 3.2 Electron Optical Column 3.2 Electron Optical Column Purpose The EVO column is the area of the microscope, where electrons are emitted, accelerated, de- flected, focused, and scanned. Fig. 10: Schematics of the electron optics W or LaB₆... - Page 28 Signal Detection When the primary electron beam hits the specimen, certain interaction products are released, which can be recorded by specific detectors, e.g. the BSD detector . For more information refer to Principle of Signal Detection [ 30]. Instruction Manual ZEISS EVO | en-US | Rev. 10 | 354706-0780-006...
-
Page 29: Optibeam Modes
It also lists some characteristics of each de- tector type. For more information about any of the detectors, contact your local ZEISS service representative. Instruction Manual ZEISS EVO | en-US | Rev. 10 | 354706-0780-006... -
Page 30: Principle Of Signal Detection
Fig. 12: Interaction between primary electron beam and specimen Objective lens Interaction volume Specimen Fig. 13: Interaction between primary electron beam and specimen Primary electrons Auger electrons Secondary electrons Backscattered electrons Characteristic X-rays Continuum X-rays Instruction Manual ZEISS EVO | en-US | Rev. 10 | 354706-0780-006... - Page 31 Cathodoluminesce Electrons impacting on luminescent materials cause the emission of photons (Cathodolumines- cence, CL) which may have wavelengths in the visible spectrum and can be imaged by specialized detectors. Instruction Manual ZEISS EVO | en-US | Rev. 10 | 354706-0780-006...
-
Page 32: Detectors Overview
Materials elemental composi- detector (WDX) tion evaluation Energy dispersive X-ray de- X-ray Materials elemental composi- tector (EDX) tion evaluation For more details, refer to the document Product Specification of the microscope. Instruction Manual ZEISS EVO | en-US | Rev. 10 | 354706-0780-006... -
Page 33: Se Detector
Fig. 16: Comparison of SE detector images using positive and negative collector bias voltage: SE detector using +300 V collector bias: Good display of surface structures and topography (left), SE detector using –150 V collector bias: Extremely strong topography, including shadow generation (right) Instruction Manual ZEISS EVO | en-US | Rev. 10 | 354706-0780-006... - Page 34 4 mm should be used. Extreme signal loss is likely to occur if shorter work- ing distances than this are used. Conversely, the SE detector is very good when used for imaging Instruction Manual ZEISS EVO | en-US | Rev. 10 | 354706-0780-006...
- Page 35 The SE detector, therefore, provides good surface information. All other detectors (InLens SE and BSE) view the specimen from above, providing only limited infor- Instruction Manual ZEISS EVO | en-US | Rev. 10 | 354706-0780-006...
- Page 36 300 V Standard value of the collector voltage 0 V to 400 V Variation of the collector voltage at high magnifications to obtain the mixed signal −150 V to 0 V For pseudo-BSE images Instruction Manual ZEISS EVO | en-US | Rev. 10 | 354706-0780-006...
-
Page 37: Chamber Ccd Camera
If a diode detector is selected, then by de- fault the chamber CCD camera is disabled. The automatic selection of the illumination mode can be manually overwritten by the user. Instruction Manual ZEISS EVO | en-US | Rev. 10 | 354706-0780-006... -
Page 38: Specimen Stage
Movement to the left or right seen from the chamber door (horizontal movement in the image) Height Vertical movement (movement towards or away from the focal plane of the image) Instruction Manual ZEISS EVO | en-US | Rev. 10 | 354706-0780-006... -
Page 39: Optional Components And Accessories
Fig. 25: Schematics of the VPSE detector VPSE detector The images that are created with the VPSE detector are similar to images that are created with conventional SE detectors. Instruction Manual ZEISS EVO | en-US | Rev. 10 | 354706-0780-006... - Page 40 VPSE detector. Typical VPSE collector bias values are between 50 % and 80 %. If the collector bias is too low, the efficiency of the detector is reduced. Instruction Manual ZEISS EVO | en-US | Rev. 10 | 354706-0780-006...
- Page 41 Working distance 6 mm to 8 mm For low voltage applications (3 kV to 7 kV) 8 mm to 15 mm For standard applications (7 kV to 25 kV) Aperture Instruction Manual ZEISS EVO | en-US | Rev. 10 | 354706-0780-006...
- Page 42 The cations that result from the charge cascade neutralize any negative charge on the specimen that may have been created by the primary electron beam. Instruction Manual ZEISS EVO | en-US | Rev. 10 | 354706-0780-006...
- Page 43 The BSD detector has applications mainly in materials analysis and in the life sciences. Material analysis: § Metallurgical sections § Geological sections § Complex materials Instruction Manual ZEISS EVO | en-US | Rev. 10 | 354706-0780-006...
- Page 44 In comparison to segment based BSD detectors, the YAG BSD detector has a faster response time. Fig. 32: YAG BSD detector Instruction Manual ZEISS EVO | en-US | Rev. 10 | 354706-0780-006...
- Page 45 Fig. 34: Schematics of the STEM detector STEM specimen holder Bright-field STEM detector In variable pressure mode, the STEM detector enables you to explore the nanostructure of non- conducting specimens. Instruction Manual ZEISS EVO | en-US | Rev. 10 | 354706-0780-006...
- Page 46 The detector can be used during energy-dispersive X-ray spectrometer (EDX) measurements and wavelength-dispersive spectrometer (WDS) measurements at any valid magnification. Fig. 35: CL image of sandstone Instruction Manual ZEISS EVO | en-US | Rev. 10 | 354706-0780-006...
-
Page 47: Dual Joystick
At higher magnifications the stage movement is slower. The stage is moving with its maximum speed when viewing the specimen with the CCD (Charge Coupled De- vice) camera. The different axes can also be moved simultaneously. Instruction Manual ZEISS EVO | en-US | Rev. 10 | 354706-0780-006... -
Page 48: Control Panel
Brightness Adjusts the image acquisition chain offset for the currently selected detector. Each configured detector stores its own brightness. § Contrast Adjusts the gain of the currently selected detector. Instruction Manual ZEISS EVO | en-US | Rev. 10 | 354706-0780-006... - Page 49 Changes the focal point of the column by adjusting the magnitude of the objective lens. § Scan Speed +/− Increases (+) or decreases (−) the scan speed by doubling or halving the beam dwell time with each click step. Instruction Manual ZEISS EVO | en-US | Rev. 10 | 354706-0780-006...
-
Page 50: Software Description
Contains the controls to set up, record, and playback video sequences of scanned images. Toolbar Provides quick access to SmartSEM tools. Image Area with Data Zone Displays image information and acquisition parameters from the microscope. Thumbnails Panel Instruction Manual ZEISS EVO | en-US | Rev. 10 | 354706-0780-006... -
Page 51: Graphical Control Elements
Enables you to adjust a value by moving the scroll bar or pressing the arrow button until the desired value is set. Readout Displays the status of a system entity. Instruction Manual ZEISS EVO | en-US | Rev. 10 | 354706-0780-006... -
Page 52: User Access Levels And User Privileges
Change Toolbar Enables the user to change the toolbar. Change User Direc- Enables the user to change the location where all user specific param- tory eters and configurations are saved. Instruction Manual ZEISS EVO | en-US | Rev. 10 | 354706-0780-006... -
Page 53: Smartsem Program Suite
SmartSEM User Enables you to record important information during individual work- Accounting ing sessions, e.g. logon/logoff time, number of TIFF files exported etc. SmartSEM User In- Main software application terface Instruction Manual ZEISS EVO | en-US | Rev. 10 | 354706-0780-006... - Page 54 SmartBackup Tool Service activities, for ZEISS service representatives only Stage Administra- Service activities, for ZEISS service representatives only Upgrade Server Service activities, for ZEISS service representatives only Database Instruction Manual ZEISS EVO | en-US | Rev. 10 | 354706-0780-006...
-
Page 55: Installation
4 Installation 4 Installation Installation and commissioning are carried out by authorized ZEISS service representative. The in- stallation requirements are to be observed and adhered to. After installation or retrofitting, thor- oughly check that the Microscope System is in a safe operational state, making sure in particular that all protective covers (e.g. -
Page 56: First Operating Steps
Ensure that there is an appropriate exhaust gas line to remove the waste gas of the pre- vacuum pump and to transmit it to the outside. Wear lint-free gloves when touching the inner parts of the specimen chamber or the speci- men. Instruction Manual ZEISS EVO | en-US | Rev. 10 | 354706-0780-006... - Page 57 Procedure 1. Verify that the main shut-off valves for nitrogen at the facility installation are operable. à Otherwise unlock and open the main shut-off valves. Instruction Manual ZEISS EVO | en-US | Rev. 10 | 354706-0780-006...
-
Page 58: Starting The Microscope
Refer to Baking out the Gun Head [ 120]. To start the microscope, you need to use the buttons at the front of the plinth and follow a de- fined procedure. Instruction Manual ZEISS EVO | en-US | Rev. 10 | 354706-0780-006... -
Page 59: Starting The Software
5.3 Starting the Software Procedure 1. Power up the computer and log in. 2. Start the SmartSEM user interface via the ZEISS SmartSEM icon on the desktop. Alternatively, select Windows start menu > SmartSEM > SmartSEM User Interface. à The EM Server opens while loading various drivers. The EM Server implements the inter- nal communication between software and hardware of the microscope. - Page 60 Switches to Annotation and inserts Point to Point Marker <CTRL + ALT + M> Enable/Disable the Movable Crosshairs Marker <CTRL + ALT + F> Enable/Disable Mouse Following for Movable Crosshairs Marker Instruction Manual ZEISS EVO | en-US | Rev. 10 | 354706-0780-006...
-
Page 61: Acquiring An Image
5.4.1 Preparing the Specimen Holder Hex key, 1.5 mm Parts and Tools Stub (delivered with microscope) Conducting tape: carbon tape, conductive carbon, adhesive metal tape, or similar Tweezers Instruction Manual ZEISS EVO | en-US | Rev. 10 | 354706-0780-006... - Page 62 Biological substances may pose a threat to the health of humans and other living organisms. Keep a logbook of the biological substances loaded into the microscope and show it to the ZEISS service representatives before they perform any work on the microscope. WARNING Aggressive or toxic chemicals Aggressive or toxic chemicals can cause chemical burns.
-
Page 63: Loading The Specimen Chamber
1. To activate the navigation camera, activate the Stage Navigation Bar checkbox from Menu Bar > View > Toolbars and navigate to the Camera tab. à The inside of the specimen chamber is visible in the Stage Navigation Bar. Instruction Manual ZEISS EVO | en-US | Rev. 10 | 354706-0780-006... - Page 64 3. To start venting, click Yes. INFO: If the Stage is not initialized system message is displayed, refer to Initializing the Stage [ 115]. à The specimen chamber is purged with gaseous nitrogen. Instruction Manual ZEISS EVO | en-US | Rev. 10 | 354706-0780-006...
- Page 65 Manually lower the stage before you open the chamber door. Alternatively, activate the Z move on Vent checkbox in the Stage tab of the SEM Controls panel. Instruction Manual ZEISS EVO | en-US | Rev. 10 | 354706-0780-006...
- Page 66 A change macro is also available which automates the specimen change proce- dure and prompts the user to carry out specific actions. The final steps of the macro runs up the electron beam ready for the user to start imaging. Instruction Manual ZEISS EVO | en-US | Rev. 10 | 354706-0780-006...
-
Page 67: Locating The Specimen
After loading the specimen, there is the possibility to use the Sample Type Selec- tion Function to automatically set a number of key parameters. Refer to Using the Sam- ple Type Selection Function [ 92]. Instruction Manual ZEISS EVO | en-US | Rev. 10 | 354706-0780-006... -
Page 68: Switching On The Gun | Lab₆ Filament
9. In the right part of the Status Bar, click à The pop-up menu for vacuum, gun and EHT activation is displayed. 10. Click EHT On. à The EHT runs up to the set voltage. Instruction Manual ZEISS EVO | en-US | Rev. 10 | 354706-0780-006... -
Page 69: Choosing The Lab₆ Mode
Procedure 1. Toggle the Long Fil. Life checkbox to switch between the two modes. INFO: This applies to both LaB₆ variants (1 mm and 1.5 mm Wehnelt bore diameter). Instruction Manual ZEISS EVO | en-US | Rev. 10 | 354706-0780-006... -
Page 70: Setting Up The Lab₆ Source
13. Go to the Apertures tab and click Emission. Fig. 39: Emission image when LaB₆ is un- dersaturated at 1.539 A 14. Adjust the Contrast until the emission can clearly be seen. Instruction Manual ZEISS EVO | en-US | Rev. 10 | 354706-0780-006... -
Page 71: Parts And Tools
(use only the Auto Aperture Align from now on). 24. Start imaging different specimens and if necessary change/adjust the EHT, I Probe, WD and repeat with the Mag, Focus, and Stigmation adjustments. Instruction Manual ZEISS EVO | en-US | Rev. 10 | 354706-0780-006... -
Page 72: Switching On The Gun And Eht | Tungsten Filament
The gun is switched on and the EHT runs up to the set voltage. à In the right part of the Status Bar, the vacuum, gun and EHT status buttons merge to Instruction Manual ZEISS EVO | en-US | Rev. 10 | 354706-0780-006... -
Page 73: Acquiring An Image
2. From the Optibeam drop-down list, select Optibeam = Resolution. à The Optibeam mode is set. 3. Click Select Aperture and select the EasyVP Aperture. à The pressure-limiting aperture is set. Instruction Manual ZEISS EVO | en-US | Rev. 10 | 354706-0780-006... - Page 74 Signal A drop-down list. INFO: We recommend using the SE detector to obtain the first image. This detector provides a good signal-to-noise ratio even at long working distances. Instruction Manual ZEISS EVO | en-US | Rev. 10 | 354706-0780-006...
- Page 75 5.4.9.7 Adjusting Brightness and Contrast Procedure 1. In the SEM Controls panel, select the Detectors tab. 2. In the Signal Adjust section, use the scroll bars to adjust brightness and contrast. Instruction Manual ZEISS EVO | en-US | Rev. 10 | 354706-0780-006...
-
Page 76: Optimizing The Image
Fine and Coarse mode, in the Status Bar, click 2. To adjust the magnification and the focus, hold down the left mouse button or the mouse wheel, respectively, and drag the mouse within the Image Area. Instruction Manual ZEISS EVO | en-US | Rev. 10 | 354706-0780-006... - Page 77 à The Focus Wobble window is displayed. 3. To adjust the wobble intensity, use the Wobble Amplitude scroll bar. Set a value between 60 % and 70 %. Instruction Manual ZEISS EVO | en-US | Rev. 10 | 354706-0780-006...
- Page 78 Ensure that the selected detail is in the raster. You can move the stage or shift the beam for this purpose. 3. In the SEM Controls panel, select the Apertures tab. 4. Click Stigmation. Instruction Manual ZEISS EVO | en-US | Rev. 10 | 354706-0780-006...
-
Page 79: Saving The Image
Automatic gun align is used to automatically align the shift and/or the tilt of the beam, to the cen- ter of the column. Two automatic gun align functions are available: Instruction Manual ZEISS EVO | en-US | Rev. 10 | 354706-0780-006... -
Page 80: Using The Auto Aperture Alignment Function
3. Click Auto Aperture Align button. à The software starts aligning the beam and the progress bar is displayed on the panel. A full size image is displayed when the alignment is completed. Instruction Manual ZEISS EVO | en-US | Rev. 10 | 354706-0780-006... -
Page 81: Setting The Probe Current
The measured probe current is displayed in the Specimen I readout. 5.5.5 Selecting the Optibeam Operation Mode EVO can be operated in different Optibeam operation modes, depending on the type of applica- tion. Based on the requirements for probe current, working distance, etc., Optibeam determines the optimum lens settings to achieve the best performance from the column. -
Page 82: Finding Appropriate Detector Settings
In addition to the standard SE detector, several optional detectors are available. Detector Pressure mode C2DX VP, EP HV, VP YAG BSD HV, VP STEM HV, VP HV, VP Instruction Manual ZEISS EVO | en-US | Rev. 10 | 354706-0780-006... -
Page 83: Setting Up The Se Detector
2. Use the Collector Bias scroll bar to adjust the collector bias. INFO: The default value is 300 V. 5.6.3 Setting up the C2D Detector Fig. 40: C2D image of radiolaria Instruction Manual ZEISS EVO | en-US | Rev. 10 | 354706-0780-006... -
Page 84: Setting Up The C2Dx Detector
If the BSD detector is mounted on the lens, then ensure that the C2DX can be inserted without touching the BSD. This is best done with the chamber vented so that it can be ob- served directly. Instruction Manual ZEISS EVO | en-US | Rev. 10 | 354706-0780-006... -
Page 85: Setting Up The Bsd Detector
Chamber door is open. ü Procedure 1. Check that the lens-mounted BSD detector is fitted. 2. If it is in the parked position, remove the BSD detector from the parked position. Instruction Manual ZEISS EVO | en-US | Rev. 10 | 354706-0780-006... - Page 86 The topography mode has a default setting that can be changed by the user. To change the default setting, select the desired segment combination and click BSD: Set Topo. Instruction Manual ZEISS EVO | en-US | Rev. 10 | 354706-0780-006...
-
Page 87: Setting Up The Yag Bsd Detector
5. After use, retract the detector. INFO: Because of the detector’s weight, there is only little risk for it to accidentally slide in. Therefore, you do not have to fix the silver knob. Instruction Manual ZEISS EVO | en-US | Rev. 10 | 354706-0780-006... -
Page 88: Using The Variable Stage Bias
Navigation Bar via Stage > Navigation. à The Stage Navigation Settings dialog is displayed. 2. Activate the Safe Navigation checkbox. 3. In the Stage Navigation Settings dialog, click Sample Holder Gallery. Instruction Manual ZEISS EVO | en-US | Rev. 10 | 354706-0780-006... - Page 89 If you open the chamber door while the stage is still on bias voltage, then contact may cause electrical shock. Always switch off the beam deceleration before you open the chamber door. Instruction Manual ZEISS EVO | en-US | Rev. 10 | 354706-0780-006...
- Page 90 10. Activate the Stage bias low voltage check- box. 11. Use the Stage bias Low Volts scroll bar to adjust the voltage until you are satisfied with the result. Instruction Manual ZEISS EVO | en-US | Rev. 10 | 354706-0780-006...
-
Page 91: Working With Specific Specimen Types
8.5 mm for a 35° 5 mm take off (elevation) angle § § § Filament Long Fil. Life Fil I set to first Long Fil. Life activated peak for qualita- deactivated tive analysis Instruction Manual ZEISS EVO | en-US | Rev. 10 | 354706-0780-006... - Page 92 3. Enter the relevant parameters. à When the information regarding the specimen status is provided, the software runs macros that are assigned to the different specimen types, with predefined parameters and vacuum settings. Instruction Manual ZEISS EVO | en-US | Rev. 10 | 354706-0780-006...
-
Page 93: Non-Conductive Specimen
Refer to Installing and Deinstalling the VP or EasyVP Apertures [ 93]. EasyVP Mode EasyVP is the recommended configuration for EVO series systems. EasyVP enables the use of all (optional) Optibeam modes and switching between the HV and VP conditions, allowing a maximum cham- ber pressure of 133 Pa. - Page 94 2. To vent the specimen chamber, click Vent. 3. If a lens-mounted BSD is fitted, remove the BSD and place it in the parked position. 4. Retract all retractable detectors. Instruction Manual ZEISS EVO | en-US | Rev. 10 | 354706-0780-006...
- Page 95 12. In the Apertures tab, match the aperture size from the Aperture Size drop-down list to the selected aperture. 13. In the Vacuum tab, click Go To VP. 14. To adjust the working pressure, use the VP Target scroll bar. Instruction Manual ZEISS EVO | en-US | Rev. 10 | 354706-0780-006...
- Page 96 4. To carry out a C1/C2/C3 lens hysteresis removal, press <Shift + F2>. 5. To create an emission image, select Beam > Gun Align from the Menu Bar. à The Gun Alignment window is displayed. Instruction Manual ZEISS EVO | en-US | Rev. 10 | 354706-0780-006...
-
Page 97: Hydrated Specimen
5.7.3 Hydrated Specimen Observation of hydrated (moist) specimen at low kV (start at 1 kV) slows down the dehydration of moist specimens that leads to structural collapse. Optimum imaging of moist specimens, requires an EVO microscope with the options Peltier cool- stage Extended Pressure (EP) mode. - Page 98 Beamsleave aperture 500 μm (lower aperture assembly, 354720-0266-000), recommended Beamsleave aperture 1000 μm (lower aperture assembly, 354720-0267-000), alternatively Aperture removal tool (350700-0692-000) Upper aperture tool (354720-9310-009) Lower aperture tool (354720-9297-009) Instruction Manual ZEISS EVO | en-US | Rev. 10 | 354706-0780-006...
- Page 99 2. To vent the specimen chamber, click Vent. 3. If a lens-installed BSD is fitted, remove the BSD and place it in the parked position. 4. Retract all retractable detectors. Instruction Manual ZEISS EVO | en-US | Rev. 10 | 354706-0780-006...
- Page 100 11. Turn the knob of the mid-column aperture changer, to select the 750 μm aperture (posi- tion 3). à In the Apertures tab, the 100 μm EP aperture is automatically selected. Instruction Manual ZEISS EVO | en-US | Rev. 10 | 354706-0780-006...
- Page 101 1. Use a hex key 3 mm to remove the round right hand blanking plate from the chamber door. 2. To detach the Peltier-coolstage assembly from its holder plate, undo the cable ties. Instruction Manual ZEISS EVO | en-US | Rev. 10 | 354706-0780-006...
- Page 102 5. To ensure the Peltier cable is not too bent, twisted, or strained, adjust the stage via stage rotation to a suitable position. Instruction Manual ZEISS EVO | en-US | Rev. 10 | 354706-0780-006...
- Page 103 6. Use a hex key 2.5 mm to attach the Peltier- coolstage holder to the microscope stage. 7. Use a hex key 3 mm to fix the Peltier vacuum flange to the chamber door. Instruction Manual ZEISS EVO | en-US | Rev. 10 | 354706-0780-006...
- Page 104 9. Use a hex key 1.5 mm to carefully tighten the clamp screw. 10. Re-fit the BSD if required. 11. Carefully close the chamber door without trap- ping the pipe work of the Peltier coolstage. Instruction Manual ZEISS EVO | en-US | Rev. 10 | 354706-0780-006...
- Page 105 10. Close the Stage Navigation Settings dialog. 11. Select Tools > Administrator and log in with your username and password. 12. Select Other and activate the Peltier Fitted checkbox. Instruction Manual ZEISS EVO | en-US | Rev. 10 | 354706-0780-006...
- Page 106 4. Switch on the beam. 5. Use the stage navigation to position the specimen under the beam. INFO: Use the Stage Navigation Bar or the chamberscope to monitor stage movement. Instruction Manual ZEISS EVO | en-US | Rev. 10 | 354706-0780-006...
- Page 107 19. If necessary, reduce the WD. INFO: This increases the signal strength but reduces the field of view, which means that a montage of specimen images may be required. Instruction Manual ZEISS EVO | en-US | Rev. 10 | 354706-0780-006...
-
Page 108: Switching Off The Microscope System
If the microscope is not in operation, then always switch off the EHT and gun to preserve the filament. Prerequisite The microscope is in ON mode. ü Instruction Manual ZEISS EVO | en-US | Rev. 10 | 354706-0780-006... -
Page 109: Closing The Smartsem User Interface
1. From the Menu Bar, select File > Exit. à A system message is displayed. 2. Click Yes. 3. Close the EM Server. à A system message is displayed. 4. Click Yes. Instruction Manual ZEISS EVO | en-US | Rev. 10 | 354706-0780-006... -
Page 110: Energizing The Microscope
CEE FEMALE RECEPTACLE of the mains supply. 4. If the EMO circuit is installed, switch the Main Switch to its position. The microscope is completely cut off from the electrical main supply. Instruction Manual ZEISS EVO | en-US | Rev. 10 | 354706-0780-006... -
Page 111: Performing An Emergency Shutdown
CEE connector from the CEE FEMALE RECEPTACLE of the mains supply. 2. If the EMO circuit is installed, press the button on the top of the plinth. Instruction Manual ZEISS EVO | en-US | Rev. 10 | 354706-0780-006... -
Page 112: Safety During Cleaning And Maintenance
§ 8 hours, 5 days a week: annually Info Keep track of maintenance work and contact the ZEISS service representative in time. A list of ZEISS locations and authorized service partners can be found at: http://www.zeiss.com/microscopy Instruction Manual ZEISS EVO | en-US | Rev. 10 | 354706-0780-006... -
Page 113: Maintenance Work
All optional detectors Tab. 5: Schedule for the change of consumables 6.4 Care and Cleaning Work All care and cleaning work not described here must only be performed by an authorized ZEISS ser- vice representative. NOTICE Functional impairment due to dirt and moisture Dirt, dust and moisture can impair the Microscope System’s functionality and can cause short-... - Page 114 SE image is noisy Scintillator is used up Contact your local ZEISS service representa- tive to have the scintillator replaced Instruction Manual ZEISS EVO | en-US | Rev. 10 | 354706-0780-006...
-
Page 115: Chamber
The specimen chamber has been evacuated, refer to Loading the Specimen Chamber [ 63]. Requires the Stage Initialise privilege. ü If there are any large specimens inside the chamber, remove them before initializing. ü Instruction Manual ZEISS EVO | en-US | Rev. 10 | 354706-0780-006... -
Page 116: Defining The Post Initialization Position Of The Stage
Always close the chamber door before moving the specimen stage. To remove parts fallen into or near to the stage use a tool (e.g. tweezers) instead of your fingers. Instruction Manual ZEISS EVO | en-US | Rev. 10 | 354706-0780-006... -
Page 117: Resetting The Touch Alarm
Bad chamber vacuum This procedure consists of the following steps: 1. Venting the Specimen Chamber [ 64] 2. Replacing the O-ring [ 118] 3. Evacuating the Specimen Chamber [ 66] Instruction Manual ZEISS EVO | en-US | Rev. 10 | 354706-0780-006... - Page 118 O-ring. 3. Inspect the groove that holds the O-ring and remove any contamination. 4. Insert the new chamber door O-ring. 5. Close the chamber door. Instruction Manual ZEISS EVO | en-US | Rev. 10 | 354706-0780-006...
-
Page 119: Adjusting The Isolation Mounts
7. Check that the column is able to move freely. If the column is not able to move freely, then repeat steps 3 to 7 until the column is able to move freely. Instruction Manual ZEISS EVO | en-US | Rev. 10 | 354706-0780-006... -
Page 120: Column
The pop-up menu for vacuum, gun, and EHT activation is displayed. 2. Click Shutdown Gun. 3. Wait until the gun has ramped down. à This may take up to 5 minutes. Instruction Manual ZEISS EVO | en-US | Rev. 10 | 354706-0780-006... -
Page 121: Replacing Filaments
To display the operating hours of the filament, select View > SEM Status > Select > Fila- ment Age. Info ZEISS encourages all customers to keep a record on the filament exchanges. Such a record simplifies maintenance. Instruction Manual ZEISS EVO | en-US | Rev. 10 | 354706-0780-006... - Page 122 7 Troubleshooting | 7.2 Column ZEISS With the EVO microscope, you can use the following types of filaments: § Tungsten filaments (pre-aligned) § Tungsten filaments (not pre-aligned) § LaB₆ filaments The procedure for replacing the filament is similar for all types of filaments. For details and differ- ences, refer to the lists for the different types of filaments after the overview figure.
- Page 123 142] 13. Reinstalling the Gun to the Microscope [ 143] 14. Starting up the LaB₆ Filament for the First Time [ 144] 15. Aligning the Emission Image [ 145] Instruction Manual ZEISS EVO | en-US | Rev. 10 | 354706-0780-006...
- Page 124 The Vent Gun window is displayed. 3. Click Yes to completely vent the system. 4. In the Gun tab, select the correct Filament Type. 5. Activate the New Filament checkbox. Instruction Manual ZEISS EVO | en-US | Rev. 10 | 354706-0780-006...
- Page 125 CEE FEMALE RECEPTACLE of the mains supply. 4. If the EMO circuit is installed, switch the Main Switch to its position. The microscope is completely cut off from the electrical main supply. Instruction Manual ZEISS EVO | en-US | Rev. 10 | 354706-0780-006...
- Page 126 The system is completely vented. The microscope is powered down. ü Procedure 1. Remove the top cover. 2. Wait at least fifteen minutes for the firing unit to cool down. Instruction Manual ZEISS EVO | en-US | Rev. 10 | 354706-0780-006...
- Page 127 2. Carefully remove the firing unit. 3. Put the firing unit onto a clean surface. 4. Insert the adjust key into the slots in the brass retaining washer. Instruction Manual ZEISS EVO | en-US | Rev. 10 | 354706-0780-006...
- Page 128 Contamination by dust particles or fingerprints Dust particles or skin grease can cause contaminations, which lead to flashovers or to bad vac- uum. Wear lint-free gloves throughout the whole procedure of replacing the filament. Instruction Manual ZEISS EVO | en-US | Rev. 10 | 354706-0780-006...
- Page 129 Scratched apertures introduce astigma- tism. 6. Turn the firing unit upside down and use the toothpick to clean the other side of the aper- ture. Instruction Manual ZEISS EVO | en-US | Rev. 10 | 354706-0780-006...
- Page 130 Pieces of cotton Hex Key, 3.0 mm Stereo light microscope or a magnifying glass Long reach flexible tweezers Silicon-free metal polish, e.g., Wenol Instruction Manual ZEISS EVO | en-US | Rev. 10 | 354706-0780-006...
- Page 131 3. Close the gun lid to prevent ingress of dust. 4. Put a small amount of polish on a piece of printing paper. Instruction Manual ZEISS EVO | en-US | Rev. 10 | 354706-0780-006...
- Page 132 When you unpack a new filament holder, you need to use compressed air to clean it from any dust particles. Lint-free gloves Parts and Tools Tungsten filament cartridge (stainless steel): Pack of 10 pre-centered filaments cartridges (354720-9919-000) Can of compressed air Instruction Manual ZEISS EVO | en-US | Rev. 10 | 354706-0780-006...
- Page 133 Adjust key (350061-1904-000) Prerequisite ü The firing unit is disassembled. Procedure 1. Use a hex key 1.5 mm to remove the four screws. INFO: These screws have rounded ends. Instruction Manual ZEISS EVO | en-US | Rev. 10 | 354706-0780-006...
- Page 134 Tungsten filament (not pre-aligned): Pack of 10 filaments (350010-2079-000) Parts and Tools Lint-free gloves Adjust key (350061-1904-000) Procedure 1. Open the box that contains the not pre-aligned tungsten filaments. Instruction Manual ZEISS EVO | en-US | Rev. 10 | 354706-0780-006...
- Page 135 Wear lint-free gloves throughout the whole procedure of replacing the filament. LaB₆ filament (350010-2180-000) Parts and Tools Lint-free gloves Filament tweezers Procedure 1. To unpack the new LaB₆ filament, unscrew the plastic cover. Instruction Manual ZEISS EVO | en-US | Rev. 10 | 354706-0780-006...
- Page 136 Hex key, 1.5 mm Adjust key (350061-1904-000) Procedure 1. Use the adjust key to insert the new filament into the top section of the filament holder. Instruction Manual ZEISS EVO | en-US | Rev. 10 | 354706-0780-006...
- Page 137 Without further ado, you cannot install a firing unit for LaB₆ filaments to a microscope that is designed for tungsten filaments. This can only be achieved by an upgrade of the microscope at the factory. At the customer’s location, this upgrade cannot be performed. Instruction Manual ZEISS EVO | en-US | Rev. 10 | 354706-0780-006...
- Page 138 Dust particles or skin grease can cause contaminations, which lead to flashovers or to bad vac- uum. Wear lint-free gloves throughout the whole procedure of replacing the filament. EVO firing unit for tungsten filaments (350071-2832-000) including a Wehnelt assembly and a Parts and Tools ...
- Page 139 Info If the filament is not accurately centered or if the filament distance is not correctly adjusted, then this may negatively affect the filament lifetime and the performance. Instruction Manual ZEISS EVO | en-US | Rev. 10 | 354706-0780-006...
- Page 140 6. Once the filament is flush with the top of the firing unit, turn the brass retaining washer in anticlockwise direction. Choose the number of turns according to the table above. The filament distance is correctly adjusted. Instruction Manual ZEISS EVO | en-US | Rev. 10 | 354706-0780-006...
- Page 141 1. Insert the brass retaining washer. 2. Use the adjust key to gradually tighten the brass retaining washer until the filament is flush with the top of the firing unit. Instruction Manual ZEISS EVO | en-US | Rev. 10 | 354706-0780-006...
- Page 142 Procedure 1. Align the slot at the side of the firing unit with the pin inside the firing unit holder. 2. Carefully insert the firing unit into the gun. Instruction Manual ZEISS EVO | en-US | Rev. 10 | 354706-0780-006...
- Page 143 O-ring. 3. If your microscope is equipped with a column safety switch, check that the safety switch is correctly lined up when you close the gun. Instruction Manual ZEISS EVO | en-US | Rev. 10 | 354706-0780-006...
- Page 144 4. In the Gun tab of the SEM Controls panel, deactivate Long Fil. Life. 5. Switch on the electron beam. 6. Set the following values: EHT = 10.00 kV Spot Size = 500 Fil I Target = 1950 mA Instruction Manual ZEISS EVO | en-US | Rev. 10 | 354706-0780-006...
- Page 145 ü The filament is started up. Procedure 1. Switch on the crosshairs via Menu Bar > View > Crosshairs. 2. In the SEM Controls panel, select the Gun tab. Instruction Manual ZEISS EVO | en-US | Rev. 10 | 354706-0780-006...
- Page 146 You can refer to Using the Automatic Gun Alignment Functions [ 79] to help you with these tasks. 7. To enable SEM imaging, click Normal. The microscope is ready for imaging. Instruction Manual ZEISS EVO | en-US | Rev. 10 | 354706-0780-006...
-
Page 147: Power Circuit
5. Erase the original log files in the LOG folders. 6. Check that Windows updates are applied and that service packs are applied. INFO: Each service pack includes all the patches since the last major release. Instruction Manual ZEISS EVO | en-US | Rev. 10 | 354706-0780-006... -
Page 148: Decommissioning
Biological substances may pose a threat to the health of humans and other living organisms. Keep a logbook of the biological substances loaded into the microscope and show it to the ZEISS service representatives before they perform any work on the microscope. WARNING High leakage current High leakage currents are present in the microscope. -
Page 149: Transport And Storage
Maintain a safe distance. Do not walk or place your hands or feet under the load while it is being lowered. Wear safety shoes and gloves. Instruction Manual ZEISS EVO | en-US | Rev. 10 | 354706-0780-006... - Page 150 784 × 1015 × 1780 mm³ (W × D × H, depth is 1215 mm with PSU on transit clamp fitted to the rear of plinth), appr. 650 kg Check that none of the items has been damaged during shipment. Instruction Manual ZEISS EVO | en-US | Rev. 10 | 354706-0780-006...
-
Page 151: Disposal
European Union that ensures suitable reuse according to the EU Directives mentioned. The customer is responsible for decontamination. Info Detailed information on disposal and recycling is available from your ZEISS Sales & Service Part- ner. 8.4 Decontamination A decontamination statement must be submitted before returning any used objects to the ZEISS location. -
Page 152: Layout And Connections
Pre-vacuum pump 2 (optional) power sockets, max. 13 A Pressure reducer (nitrogen) Computer workplace Main shut-off valve Emergency Off (EMO) box (optional) Nitrogen supply Emergency Off (EMO) button (optional) Exhaust line (optional) Instruction Manual ZEISS EVO | en-US | Rev. 10 | 354706-0780-006... -
Page 153: System Layout
The protective earth connection must not be im- paired by the use of extension cables. Info Your ZEISS Sales & Service Partner will provide you with the detailed installation requirements. Weight and Sizes Main Components... - Page 154 9 Technical Data and Conformity | 9.3 Performance Data and Specifications | EVO 10 ZEISS Air Conditioning Parameter Value and Quality Temperature range for operation with indi- 20–30 °C cated performance (24 h per day, regardless It is recommended that for operator comfort...
- Page 155 ZEISS 9 Technical Data and Conformity | 9.3 Performance Data and Specifications | EVO 10 Parameter Value 8 mm) which is directly connected to the PE of the FEMALE RECEPTACLE as short as possi- ble. This grounding connection must not be com- mon to other electrical equipment.
- Page 156 9 Technical Data and Conformity | 9.3 Performance Data and Specifications | EVO 10 ZEISS Nitrogen Gaseous dry nitrogen is used to vent the specimen chamber during specimen exchange. The nitro- gen can be taken either from a gas cylinder or from an in-house supply system.
- Page 157 ZEISS 9 Technical Data and Conformity | 9.3 Performance Data and Specifications | EVO 10 Parameter Description Electron source Filament: W or LaB₆ § Field of View Maximum 6 mm diameter at the analytical working distance (AWD) of 8.5 mm § Maximum 20 mm diameter...
- Page 158 9 Technical Data and Conformity | 9.3 Performance Data and Specifications | EVO 10 ZEISS Parameter Description Specimen current monitor with integrated Touch Alarm (audible touch alarm warning with on-screen message) Specimen mounts: One 9x specimen holder for 13 mm diameter...
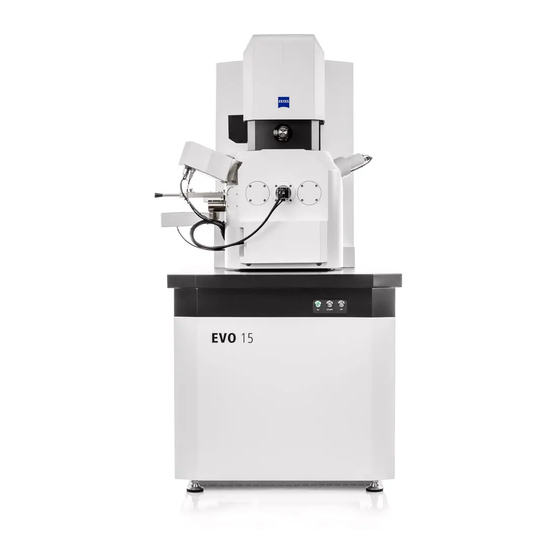
-
Page 159: Performance Data And Specifications | Evo 15
ZEISS 9 Technical Data and Conformity | 9.4 Performance Data and Specifications | EVO 15 9.4 Performance Data and Specifications | EVO 15 The Microscope System must only be operated in closed rooms. It is recommended to install the Microscope System in a dark room where artificial illumination, sunlight or other light sources cannot interfere with image acquisition. - Page 160 9 Technical Data and Conformity | 9.4 Performance Data and Specifications | EVO 15 ZEISS Parameter Value CEE MALE PLUG 2P3W 4 h 20 A (yellow) or for 230 V a CEE MALE PLUG 2P3W 6 h 16 A (blue). The building installation should provide the...
- Page 161 ZEISS 9 Technical Data and Conformity | 9.4 Performance Data and Specifications | EVO 15 Parameter Value Ampere interrupting capacity (AIC) Min. 10,000 A Location Parameter Requirement Requirements Installation site Exclusively inside buildings Recommended Min. 3.6 m × 4.0 m × 2.3 m room size Service area Min.
- Page 162 9 Technical Data and Conformity | 9.4 Performance Data and Specifications | EVO 15 ZEISS Parameter Requirement Less than 42 dB for frequencies from 200 up to 300 Hz Less than 50 dB for frequencies higher than 300 Hz Electron Optics Parameter Description SEM resolution EVO column at optimum working distance: SE detector, W or LaB₆...
- Page 163 ZEISS 9 Technical Data and Conformity | 9.4 Performance Data and Specifications | EVO 15 Parameter Description § Z = 50 mm § T = −10° to 90° § R = 360° continuous INFO: The movements may be reduced by specimen size, operating conditions, and accessories attached.
-
Page 164: Performance Data And Specifications | Evo 25
9 Technical Data and Conformity | 9.5 Performance Data and Specifications | EVO 25 ZEISS Parameter Description HDBSD detector (optional): BSE imaging at low kV of metals, polymers, minerals, etc. both in HV and VP modes. YAG BSD detector (optional): Robust, fully retractable, YAG-crystal-based BSE scintillator detector with rise time ~200 ns. - Page 165 ZEISS 9 Technical Data and Conformity | 9.5 Performance Data and Specifications | EVO 25 Parameter Value Relative humidity < 65 % Altitude ≤ 2000 m above sea level to guarantee an undisturbed operation Pollution degree Mains Connection Parameter Value Nominal AC voltage 120 V...
- Page 166 9 Technical Data and Conformity | 9.5 Performance Data and Specifications | EVO 25 ZEISS Parameter Value A grounding wire AWG10 (≥ 5 m) is delivered with the microscope. It serves as connection between the grounding screw terminal (Ø 8 mm) and the microscope (Ø 6 mm).
- Page 167 ZEISS 9 Technical Data and Conformity | 9.5 Performance Data and Specifications | EVO 25 Parameter Requirement Flow rate Approx. 3 l/min for ventilation of specimen chamber with chamber door open Pressure 0.2–3.3 bar Quality 4.6 with nitrogen content > 99.996 % Connection hose 4 mm inside diameter.
- Page 168 9 Technical Data and Conformity | 9.5 Performance Data and Specifications | EVO 25 ZEISS Parameter Description X-ray analysis 8.5 mm AWD and 35° take-off angle Optibeam modes Resolution, Depth, Analysis, Field, Fisheye Image framestore 32768 × 24576 pixel, signal acquisition by pixel, line and frame inte-...
-
Page 169: Applicable Standards And Regulations
For more details refer to the document Product Specification. 9.6 Applicable Standards and Regulations Observe all general and country-specific safety regulations as well as applicable environmental protection laws and regulations. Instruction Manual ZEISS EVO | en-US | Rev. 10 | 354706-0780-006... - Page 170 로합니다. European and International Directives / Standards: For more information on ISO, CSA, SEMI certifi- cates or CE Declarations of Conformity, contact your ZEISS Sales & Service Partner. ZEISS works according to a certified Environment Management System according to ISO 14001.
-
Page 171: Consumables
10 Parts and Tools NOTICE Spare parts and consumables Using spare parts or consumables that are not provided by ZEISS can lead to property damage. Only genuine spare parts and consumables supplied by ZEISS are to be used in servicing the microscope. - Page 172 10 Parts and Tools | 10.3 Tools and Accessories ZEISS Required Parts/Tools Part Number Toolbox including VP apertures and removal 350600-0926-000 tools Instruction Manual ZEISS EVO | en-US | Rev. 10 | 354706-0780-006...
- Page 173 C2DX A server that implements the internal Extended Cascade Current Detector communication between control soft- ware and microscope hardware. Controller Area Network Emergency Off Charge-Coupled Device Extended Pressure Cathodoluminescence Instruction Manual ZEISS EVO | en-US | Rev. 10 | 354706-0780-006...
- Page 174 A pump for generating a pre-vacuum. User Primary electron beam Person examining a sample under the mi- Narrowly bundled beam of accelerated croscope. electrons that hit the specimen surface. Instruction Manual ZEISS EVO | en-US | Rev. 10 | 354706-0780-006...
- Page 175 ZEISS Sales & Service Partner The Sales & Service Partner is generally in the field for customer support in a re- gional area and / or a clearly defined cus- tomer group. Instruction Manual ZEISS EVO | en-US | Rev. 10 | 354706-0780-006...
- Page 176 29 Generated by radiation 13 Detection System 158, 163, 169 Mechanical hazard 11 Detector 32, 82 Radiation hazard 13 Thermal hazard 13 Hazards 11 Prevention 11 HD BSD 43 Instruction Manual ZEISS EVO | en-US | Rev. 10 | 354706-0780-006...
- Page 177 153, 159, 164 Pressure-limiting aperture 23 Primary electron 31 Probe current 81 Temperature 117 Tool 172 Touch alarm, reset 117 Training 10 Replacing the chamber door seal 117 Transmitted electron 31 Instruction Manual ZEISS EVO | en-US | Rev. 10 | 354706-0780-006...
- Page 178 23 VP mode 23 VPSE detector 39 Warning labels 13 lights 13 Weight and Sizes 153, 159, 164 YAG BSD detector 44, 87 ZEISS Portal 8 Service agreements 112 Instruction Manual ZEISS EVO | en-US | Rev. 10 | 354706-0780-006...
- Page 180 Carl Zeiss Microscopy GmbH Carl-Zeiss-Promenade 10 phone: +49 1803 33 63 34 07745 Jena fax: +49 3641 64 3439 Germany info.microscopy.de@zeiss.com www.zeiss.com/microscopy...