Table of Contents
Advertisement
Quick Links
Advertisement
Table of Contents

Related Manuals for AEG 948 905 160


Summary of Contents for AEG 948 905 160
- Page 1 CGB6130ACM User Manual Cooker USER MANUAL...
-
Page 2: Table Of Contents
14. ENERGY EFFICIENCY..................... 28 FOR PERFECT RESULTS Thank you for choosing this AEG product. We have created it to give you impeccable performance for many years, with innovative technologies that help make life simpler features you might not find on ordinary appliances. Please spend a few minutes reading to get the very best from it. - Page 3 ENGLISH manufacturer is not responsible for any injuries or damages that are the result of incorrect installation or usage. Always keep the instructions in a safe and accessible location for future reference. 1.1 Children and vulnerable people safety WARNING! Risk of suffocation, injury or permanent disability.
- Page 4 This appliance is not intended to be used on ships, • boats or vessels. Do not install the appliance behind a decorative door • in order to avoid overheating. Do not install the appliance on a platform. • Do not operate the appliance by means of an external •...
-
Page 5: Safety Instructions
ENGLISH Service Centre or similarly qualified persons to avoid an electrical hazard. To remove the shelf supports first pull the front of the • shelf support and then the rear end away from the side walls. Install the shelf supports in the opposite sequence. - Page 6 Make sure that there is • Deactivate the appliance after each access to the mains plug after the use. installation. • Be careful when you open the • If the mains socket is loose, do not appliance door while the appliance is connect the mains plug.
- Page 7 ENGLISH • Use a deep pan for moist cakes. Fruit • Fat and food remaining in the juices cause stains that can be appliance can cause fire. permanent. • Clean regularly the appliance to • Do not keep hot cookware on the prevent the deterioration of the control panel.
-
Page 8: Product Description
• Before replacing the lamp, disconnect • Contact your municipal authority for the appliance from the power supply. information on how to discard the • Only use lamps with the same appliance correctly. specifications. • Disconnect the appliance from the mains supply. -
Page 9: Before First Use
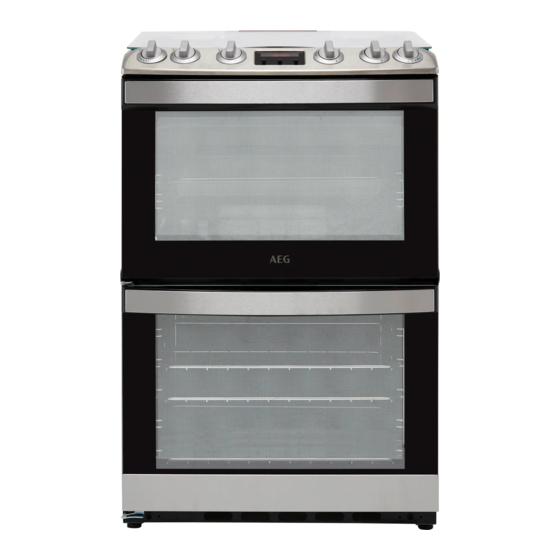
ENGLISH 3.3 Cooker control panel Knob for the top oven Knobs for the hob Display Knob for the main oven 3.4 Accessories • Trivet For roasting and grilling. • Wire shelf Use the trivet only with For cookware, cake tins, roasts. the Grill- / roasting pan. - Page 10 5.1 Ignition of the hob burners If after some tries the burner does not light, check if the Always light the burner crown and its cap are in the before you put on the correct position. cookware. In the absence of electricity...
-
Page 11: Hob - Hints And Tips
ENGLISH A. Burner cap B. Burner crown C. Slots D. Thermocouple E. Ignition candle F. Burner body G. Hole for the ignition candle 5.3 Replacing burner parts WARNING! Always turn the flame down 1. Put carefully the burner crown on the or switch it off before you burner body. -
Page 12: Hob - Care And Cleaning
CAUTION! Burner Diameter of cook- Make sure that pot handles ware (mm) are not above the front edge of the cooktop. Multi Crown 180 - 240 / 260 CAUTION! Semi-rapid 120 - 220 / 240 Make sure that the pots are... -
Page 13: Oven - Daily Use
ENGLISH 8. OVEN - DAILY USE WARNING! Refer to Safety chapters. 8.1 Top Oven Functions Oven function Application Off position The oven is off. Full Grill To grill flat food and to toast bread. When the func- tion is active, the lamp turns on. Heat settings Heat settings for Conventional Cooking. - Page 14 WARNING! to operate until the oven cools down. Do not push the knob for more than 15 seconds. If the If there is a defect in the oven burner does not light...
-
Page 15: Oven - Clock Functions
ENGLISH 8.8 Trivet and Grill- / Roasting 2. Put the deep pan into the oven on the necessary shelf position. You can use the trivet to grill flat dishes in large quantities and to toast. WARNING! Be careful when you remove 1. -
Page 16: Oven - Hints And Tips
9.3 Setting the MINUTE 9.4 Cancelling the clock MINDER functions 1. Press again and again until 1. Press the again and again until starts to flash. the necessary function indicator starts to flash. 2. Press to set the necessary time. - Page 17 ENGLISH Baking results Possible cause Remedy The cake sinks and be- The oven temperature is Next time set slightly lower oven comes soggy or streaky. too high. temperature. The baking time is too Next time set a longer baking short. time and lower oven temperature.
- Page 18 Food Preheating Heat setting Time (min) Shelf posi- Accessories time (min) tion Victoria 25 - 35 2 round tins Sandwich on wire shelf Flapjack 25 - 35 Tin on wire shelf Flaky Pastry 30 - 40 Tin on wire...
- Page 19 ENGLISH Food Preheating Heat setting Time (min) Shelf posi- Accessories time (min) tion Convenience Follow the manufacturer's instruction Foods Baked Pota- 60 - 90 Tray on wire toes shelf Rice pudding 15 55 - 70 Tray on wire shelf Large York- 25 - 40 Tray on wire shire Pud-...
- Page 20 Food Preheating Heat setting Time (min) Shelf posi- Accessories time (min) tion Turkey / 150 - 180 Trivet in Goose Grill-/Roast- ing pan Duck 120 - 130 Trivet in Grill-/Roast- ing pan Pheasant 65 - 75 Trivet in Grill-/Roast-...
- Page 21 ENGLISH Food Preheating Grilling Shelf po- Accessories time (min) time (min) sition Kebabs 20 - 30 Trivet in Grill-/ Roasting pan Kidneys - Lamb / Pig 10 - 20 Trivet in Grill-/ Roasting pan Liver - Lamb / Pig 15 - 25 Trivet in Grill-/ Roasting pan Sausages...
-
Page 22: Oven - Care And Cleaning
11. OVEN - CARE AND CLEANING WARNING! Spots or discolouration of Refer to Safety chapters. the catalytic surface have no effect on catalytic properties. 11.1 Notes on cleaning Clean the front of the oven with a soft WARNING! cloth with warm water and a mild Keep children away when cleaning agent. - Page 23 ENGLISH 2. Pull the rear end of the shelf support away from the side wall and remove 3. Pull the door trim to the front to remove it. 4. Remove the glass panels. To install the panels, do the same steps in reverse.
-
Page 24: Troubleshooting
3. Put a cloth on the bottom of the To replace the glass panels, cavity. do the same steps in The back lamp reverse. Before you lower the trim, attach the A trim The lamp glass cover is at part to the door. -
Page 25: Installation
ENGLISH Problem Possible cause Remedy The oven does not heat up. The necessary settings are Make sure that the settings not set. are correct. The lamp does not operate. The lamp is defective. Replace the lamp. The display shows "12.00". There was a power cut. - Page 26 1. Measure down 180 mm from the appliance top surface, then measure Dimension right 30 mm. 2. Mark the position of the wall and this gives anchor point for the stability chain. less than 400 13.3 Levelling of the appliance...
- Page 27 ENGLISH 13.7 Gas Connection Use a flexible pipe in compliance with the regulation in force. Make sure they do not come in touch with mobile parts and are not squeezed. WARNING! Only a qualified and competent person can do the gas installation. Before you connect te gas, disconnect the appliance from the electricity supply or...
-
Page 28: Energy Efficiency
13.12 Electrical installation 4. Light one of the hob burners. To light the hob burner refer to the "Ignition of the hob burners". WARNING! Check if the flame is regular. The manufacturer is not Check each of the burners. - Page 29 ENGLISH • When you heat up water, use only the • Put the cookware directly over the amount you need. burner and in the centre of it. • If it is possible, always put the lids on • When the liquid starts to boil, turn the cookware.
- Page 30 Keep breaks between baking as short as Keep food warm possible when you prepare few dishes at Choose the lowest possible temperature one time. setting to use residual heat and keep a meal warm. 15. ENVIRONMENTAL CONCERNS appliances marked with the symbol Recycle materials with the symbol with the household waste.
- Page 31 ENGLISH...
- Page 32 www.aeg.com/shop...