Table of Contents
Advertisement
Advertisement
Table of Contents

Related Manuals for AEG 49002VMN


Summary of Contents for AEG 49002VMN
- Page 1 49002VMN EN COOKER USER MANUAL...
- Page 2 Please spend a few minutes reading to get the very best from it. ACCESSORIES AND CONSUMABLES In the AEG webshop, you’ll find everything you need to keep all your AEG appliances looking spotless and working perfectly. Along with a wide range of accessories...
-
Page 3: Table Of Contents
Contents CONTENTS 4 Safety information 7 Product description 8 Before first use 9 Hob - Daily Use 12 Hob - Helpful hints and tips 13 Hob - Care and Cleaning 14 Oven - Control panel 15 Oven - Daily Use 17 Oven - Clock functions 18 Oven - Additional functions 19 Oven - Using the accessories... -
Page 4: Safety Information
Safety information SAFETY INFORMATION Before the installation and use, read this manual carefully: • For your own safety and the safety of your property • For the protection of the environment • For the correct operation of the appliance. Always keep these instructions with the appliance also if you move or sell it. The manufacturer is not responsible if incorrect installation or use results in damage. -
Page 5: Electrical Connection
Safety information Electrical connection • Only an approved electrician can install and connect the appliance. Contact an approved service centre. This is to prevent the risks of structural damage or physical injury. • The appliance must be earthed. • Make sure that the electrical data on the rating plate agree with your domestic power supply. -
Page 6: Care And Cleaning
Safety information • Do not put flammable products or items that are wet with flammable products, and/or fusible objects (made of plastic or aluminium) in, near or on the appliance. There is a risk of explosion or fire. • Set the cooking zones to "off" after each use. •... -
Page 7: Product Description
Product description • Do not clean the glass door with abrasive cleaning agents or metal scraper. Heat resist- ant surface of the inner glass can break and shatter. • When the door glass panels are damaged they become weak and can break. You must replace them. -
Page 8: Before First Use
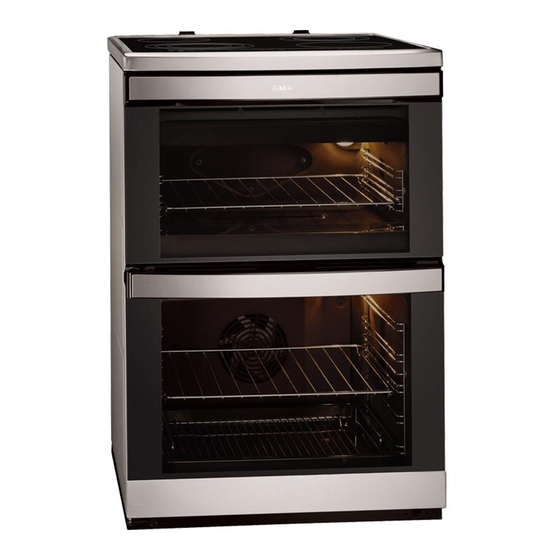
Before first use Grill Oven lamp Shelf support Bottom heat Fan and heating element Shelf positions Cooking surface layout Cooking zone 1200 W 120/180 Steam outlet Cooking zone 700/1700 W Cooking zone 1800 W 120/175/210 Oven control panel Hob control panel Cooking zone 800/1600/2300 W Accessories •... -
Page 9: Hob - Daily Use
Hob - Daily Use Setting the time The oven only operates after time set. When you connect the appliance to the electrical supply or in case of a power cut, the Time function indicator flashes automatically. To set the current time use button. - Page 10 Hob - Daily Use Use the sensor fields to operate the appliance. Indicators, displays and sounds tell which functions operate. sensor field function starts and stops the hob locks/unlocks the control panel a heat setting display shows the heat setting cooking zones' indicators of timer show for which zone you set the time the timer display...
-
Page 11: Residual Heat Indicator
Hob - Daily Use Timer Use the timer to set how long the cooking zone operates for one cooking session. Set the timer after the selection of the cooking zone. You can set the heat setting before or after you set the timer. •... -
Page 12: Hob - Helpful Hints And Tips
Hob - Helpful hints and tips The child safety device This function prevents an accidental operation of the hob and oven. Starting the child safety device . Do not set the heat settings. • Start the hob with • Touch for 4 seconds. -
Page 13: Hob - Care And Cleaning
Hob - Care and Cleaning Energy saving • If it is possible, always put the lids on the cookware. • Put cookware on a cooking zone before you start it. • Stop the cooking zones before the end of the cooking time to use residual heat. •... -
Page 14: Oven - Control Panel
Oven - Control panel To remove the dirt: – Remove immediately:melted plastic, plastic foil, and food with sugar. If not, the dirt can cause damage to the appliance. Use a special scraper for the glass . Put the scraper on the glass surface at an acute angle and move the blade on the surface . –... -
Page 15: Oven - Daily Use
Oven - Daily Use Number Name Description Top/Main oven indicator Shows which oven operates. Oven function indicator Shows the function. Lamp/Defrost indicator Shows the Lamp/Defrost function is active. Heat indicator Shows the heat setting. Temperature/Clock indi- Shows the temperature and the time in minutes. cator Keep warm indicator Shows that keep warm function is active. - Page 16 Oven - Daily Use Oven function Application Conventional To bake and roast on one oven level. Pizza Setting To bake on one oven level with a more intensive browning and a crispy base. Set the oven tempera- tures 20-40 °C lower than when using Conventional. Low temperature cook- To prepare very lean, tender roasted food.
-
Page 17: Oven - Clock Functions
Oven - Clock functions Heat- up indicator If you switch on an oven function, the bars on the display come on one by one. The bars show that the oven temperature increases. Residual heat indicator When you switch off the oven, the bars on the display show the residual heat. OVEN - CLOCK FUNCTIONS Clock functions Time of day... -
Page 18: Oven - Additional Functions
Oven - Additional functions You can hear an acoustic signal for 2 minutes when the time is completed, “00.00” and the related function indicator flash. The appliance switches off. Use any button to switch off the acoustic signal. With Minute Minder the oven must be switched on to set the clock function. -
Page 19: Oven - Using The Accessories
Oven - Using the accessories Oven temperature Switch-off time 250 °C -maximum °C 3.0 h. After an automatic cut-out, switch off the oven fully. Then you can switch it on again. If you set the clock function Duration or End , the automatic cut-out switches off. -
Page 20: Oven - Helpful Hints And Tips
Oven - Helpful hints and tips To roast larger pieces of meat or poultry on one level: Put the roasting pan grid in the deep roasting pan. The supports of the roast- ing pan grid must point up. Put the deep roasting pan in the appli- ance, on the necessary shelf level. -
Page 21: Main Oven
Oven - Helpful hints and tips Main oven The main oven is particularly suitable for cooking larger quantities of food. Baking General instructions • Your new oven may bake or roast differently to the appliance you had before. Adapt your usual settings (temperature, cooking times) and shelf levels to the values in the tables. - Page 22 Oven - Helpful hints and tips Baking results Possible cause Remedy Cake does not cook in Temperature too low Use a slightly higher oven temperature the baking time set setting Top oven Conventional Baking Type of baking Shelf Temperature °C Time in minutes Bread rolls 200-225...
- Page 23 Oven - Helpful hints and tips Type of baking Shelf Temperature °C Time in minutes with oven turned - heating Biscuits 160-180 6-15 Choux pastry 170-190 30-45 Swiss rolls 190-210 10-12 pre-baking, roll Fruit tarts, short crust pastry 175-200 10-15 Fruit tarts, short crust pastry finishing 35-45 Fruit tarts, crumble pastry...
- Page 24 Oven - Helpful hints and tips Type of baking Shelf Temperature °C Time in minutes Sponge cakes/Madeira 150-160 50-60 cakes Meringues 90-120 Meringue bases 90-120 - heating with oven turned off Biscuits 150-160 10-20 Choux pastry 155-165 30-40 Fruit tarts, short crust pre-baking, bases 150-160 pastry...
- Page 25 Oven - Helpful hints and tips Type of baking Shelf Temperature °C Time in minutes Längder/ Kransar 180-200 25-35 Pepparkakor 220-225 8-12 Formkage 170-180 35-45 Sponge cakes/Madeira cakes 170-180 40-50 Sandwich cake, roll 200-225 8-12 Meringues 90-120 Meringue bases 90-120 with oven turned - heating Biscuits...
-
Page 26: Top Oven
Oven - Helpful hints and tips Type of food Shelf Temperature °C Time in minutes Tarts, home made 215-225 35-45 finishing Tarts, frozen 15-25 1) pre-heat the oven Roasting Roasting dishes • Use heat-resistant ovenware to roast (please read the instructions of the manufacturer). •... - Page 27 Oven - Helpful hints and tips Pork Time in minutes per kg Type of meat Shelf Temperature °C meat 60-70 Roast pork Pork loin Neck fillets 90-120 60-100 Poultry Time in minutes per kg Type of meat Shelf Temperature °C meat Chicken, parted 55-65...
- Page 28 Oven - Helpful hints and tips Pork Time in minutes per kg Type of meat Shelf Temperature °C meat 60-70 Roast pork Pork loin Neck fillets 90-120 60-100 Poultry Time in minutes per kg Type of meat Shelf Temperature °C meat Chicken, parted 55-65...
- Page 29 Oven - Helpful hints and tips Pork Time in minutes per kg Type of meat Shelf Temperature °C meat 60-70 Roast pork Pork loin Neck fillets 90-120 60-100 Poultry Time in minutes per kg Type of meat Shelf Temperature °C meat Chicken, parted 55-65...
- Page 30 Oven - Helpful hints and tips Pork Time in minutes per Type of meat Shelf Temperature °C kg meat 60-70 Roast pork Pork Loin Neck fillets 90-120 60-100 Poultry Time in minutes per Type of meat Shelf Temperature °C kg meat Chicken 55-65 55-65...
- Page 31 Oven - Helpful hints and tips Preparation time total (mins) Type of meat Weight g Setting Shelf Red (rare) Pink (medium) Shoulder of 3,5 cm high 150°C 70-80 beef, boneless Tenderloin of 600-1000 120°C 65-75 90-110 beef, whole Tenderloin of 2,5 cm high 120°C 20-25...
- Page 32 Oven - Helpful hints and tips Time in mins / Side Time in mins / Side Food types for grilling Shelf Toast 2–3 Main oven Time in mins / Time in mins / Food types for grilling Shelf Temperature °C Side 1 Side 2 Pork chops...
-
Page 33: Oven - Care And Cleaning
Oven - Care and Cleaning Time in mi- Final defrosting Type of food Shelf Comments nutes mins Place the chicken on an upturned Chicken, 1000 g 120-140 20-30 saucer on a larger plate. Turn half way through. Meat, 1000g 100-140 20-30 Turn half way through. -
Page 34: Shelf Support Rails
Oven - Care and Cleaning To support this self-cleaning process heat the oven without any food regularly: • Turn the oven light on. • Remove accessories from the oven. • Select an oven function. • Set the oven temperature to 250 °C and let oven operate for 1 hour. •... -
Page 35: Oven Door And Glass Panels
Oven - Care and Cleaning Top oven Cleaning the oven door Remove the door before you clean it. CAUTION! Be careful when you remove the door. The door is heavy! Removing the oven door 1. Open the oven door about one-third of the way (parking position). -
Page 36: Oven Lamp
Oven - Care and Cleaning Pull the door trim to the front to re- move it. Hold the door glass panels on their top edge one by one and pull them upwards out of the guide Clean the door glass panels. To install panels follow the procedure in reverse. -
Page 37: What To Do If
What to do if… Clean the glass cover. Replace the oven lamp with applicable 300°C heat-resistant oven lamp. Use the same oven lamp type. Install the glass cover. WHAT TO DO IF… WARNING! Refer to "Safety information" chapter. Problem Possible cause Remedy The appliance does not operate The fuse in the fuse box is re-... -
Page 38: Installation
Installation Problem Possible cause Remedy The fuses are blown Control the fuses The hob display shows No cookware on the cooking Put cookware on the cooking The hob display shows zone zone Incorrect cookware Use the correct cookware The hob display shows The diameter of the bottom of Use cookware with larger di- The hob display shows... - Page 39 Installation Location of the appliance You can install your freestanding appliance with cabinets on one or two sides and in the corner. Minimum distances Dimension Levelling Use small feet on the bottom of appliance to set same level of cooker top surface with other surfa- The anti-tilt protection CAUTION! You must install the anti-tilt protection (A+B).
-
Page 40: Environment Concerns
Environment concerns The anti-tilt protection has two parts (A+B). You 50 mm can find the anti-tilt protection (B) on the right 60 mm 60 mm or left side of the rear wall of the appliance (See 50 mm fig. 1). You must install the anti-tilt protection (A) on the wall. - Page 44 892933936-C-092011...