Table of Contents
Advertisement
Advertisement
Table of Contents

Related Manuals for AEG 49106IU-MN


Summary of Contents for AEG 49106IU-MN
- Page 1 EN User manual 49106IU-MN...
-
Page 2: Table Of Contents
15. EUROPEAN GUARANTEE ........... . 36 FOR PERFECT RESULTS Thank you for choosing this AEG product. We have created it to give you impeccable performance for many years, with innovative technologies that help make life simpler –... -
Page 3: Safety Information
ENGLISH 1. SAFETY INFORMATION Before the installation and use of the appliance, careful- ly read the supplied instructions. The manufacturer is not responsible if an incorrect installation and use cau- ses injuries and damages. Always keep the instructions with the appliance for future reference. 1.1 Children and vulnerable people safety WARNING! Risk of suffocation, injury or permanent disability. -
Page 4: Safety Instructions
• Never try to extinguish a fire with water, but switch off the appliance and then cover flame e.g. with a lid or a fire blanket. • Do not store items on the cooking surfaces. • Do not use a steam cleaner to clean the appliance. -
Page 5: Electrical Connection
ENGLISH • Make sure that the appliance is instal- • Do not pull the mains cable to discon- led below and adjacent safe struc- nect the appliance. Always pull the tures. mains plug. • The sides of the appliance must stay •... -
Page 6: Care And Cleaning
• Do not use the appliance as a work • Discoloration of the enamel has no ef- surface or as a storage surface. fect on the performance of the appli- ance. It is not a defect in the sense of •... -
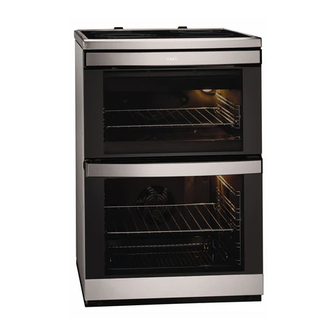
Page 7: Product Description
ENGLISH • Do not clean the catalytic enamel (if • Only use lamps with the same specifi- applicable) with any kind of detergent. cations. 2.4 Internal light 2.5 Disposal • The type of light bulb or halogen lamp WARNING! used for this appliance, is only for Risk of injury or suffocation. -
Page 8: Before First Use
3.2 Cooking surface layout Induction cooking zone 1400 W, with the Power function 2500 W 145 mm 180 mm Steam outlet Induction cooking zone 1800 W, with the Power function 2800 W Induction cooking zone 1800 W, with 180 mm... -
Page 9: Hob - Daily Use
ENGLISH When you connect the appliance to the Set the function and the maxi- electrical supply or after a power cut, the mum temperature. indicator for the Time function flashes. Let the appliance operate for one Press the + or - button to set the correct hour. -
Page 10: Heat Setting
10 www.aeg.com Sensor field Function The timer display To show the time in minutes. To increase or decrease the heat set- ting. To activate the Power function. To increase or decrease the time. To select the cooking zone. To activate and deactivate the STOP +GO function. -
Page 11: Power Function
ENGLISH The indicator of the cooking zone flashes slowly. The timer starts to count down. To see the remaining time, touch again and again until the indicator for the necessary cooking zone flash- es quickly. The display shows the re- maining time. -
Page 12: Hob - Helpful Hints And Tips
12 www.aeg.com 5.12 Residual heat indicator To deactivate this function, touch . The display shows the heat setting The residual heat indicator comes on that you set before. when a cooking zone is hot. When you deactivate the appli- WARNING! ance, the function is deactivated. -
Page 13: Cookware For Induction
ENGLISH 6.1 Cookware for induction Cooking zone Minimum cook- cooking zones ware diameter [mm] In induction cooking, a powerful electromagnetic field almost in- Left rear — stantly generates heat inside the 145 mm cookware. Left front — 210 mm Cookware material •... -
Page 14: Hob - Care And Cleaning
14 www.aeg.com Heat Use to: Time Hints set- ting Simmer rice and milkbased 25-50 Add at least twice as much dishes, heating up ready- liquid as rice, stir milk dishes cooked meals part way through Steam vegetables, fish, meat 20-45... -
Page 15: Control Panel
ENGLISH 8.1 Control panel Num- Button Function Description – Display Shows current settings of the oven. Setting but- To set the value for the temperature and tons time. Selection/ Clock function To set a clock function. button Rapid heat-up To activate the rapid heat-up function Oven function To set an oven function or programme. - Page 16 16 www.aeg.com Number Name Description Lamp/Defrost indi- Shows the Lamp/Defrost function is active. cator Heat indicator Shows the heat setting. Temperature/Clock Shows the temperature and the time in mi- indicator nutes. Keep warm indica- Shows that keep warm function is active.
- Page 17 ENGLISH Oven function Application Thermal Grill To roast larger joints of meat or poultry on one shelf position. To brown. Dual Circuit Grill To grill flat food in large quantities. To toast bread. Keep Warm To keep food warm. Drying To dry food.
-
Page 18: The Child Safety Device
18 www.aeg.com Set an oven function. • if you do not change the oven temper- ature. Use the Rapid heat-up button Oven tempera- Switch-off time When the oven has the set tempera- ture ture, the bars of the heat indicator come up and an acoustic signal 30 - 120 °C... -
Page 19: Oven - Clock Functions
ENGLISH 8.14 Grilling set You can use the roasting pan grid in two positions: turned up or down. The grilling set includes the roasting pan grid and the deep roasting pan. To roast larger pieces of meat or poul- try on one level: Put the roasting pan grid in the deep roasting pan. -
Page 20: Oven - Helpful Hints And Tips
20 www.aeg.com Activating Heat+Hold to set the necessary time. Set the time with the clock functions Duration and/or End When the time is completed, an acoustic signal sounds for 2 minutes, Use Selection again and again and “00.00” and the related function until the display shows the symbol indicator flash. - Page 21 ENGLISH • Cakes and pastries at different heights perature setting. The differences do not always brown equally at first. If equalize during the baking procedure. this occurs, do not change the tem- Tips on baking Baking results Possible cause Remedy The cake is not Incorrect oven level Put the cake on a lower oven level...
- Page 22 22 www.aeg.com Approx Cook Temperature Food Shelf Position Time [°C] (mins) Cakes: Rich Fruit 140 - 150 120 - 150 Cakes: Ginger- 140 - 150 80 - 90 bread Cakes: Meringues 90 - 100 150 - 180 Cakes: Flapjack 160 - 170...
- Page 23 ENGLISH Approx Cook Temperature Food Shelf Position Time [°C] (mins) Vegetables: Roast 180 - 190 60 - 90 Potatos Yorkshire Pudding 220 - 210 25 - 40 Large Yorkshire Pudding 210 - 220 15 - 25 Individual Roasting Meat, See roasting chart Poultry 10.6 Main oven 10.7 Conventional Baking...
- Page 24 24 www.aeg.com Approx Cook Temperature Food Shelf Position Time [°C] (mins) Roasting: Meat, see Roastinh 170 - 190 Poultry Chart 10.8 Thermaflow Baking Shelf Positions are not critical but ensure that oven shelves are evenly spaced when more than one is used (e.g. shelf positions 1...
- Page 25 ENGLISH 10.9 Pizza Setting Food Shelf Position Temperature Approx. Cook Time (min) Apple Pie 160 - 180 50 - 60 Plate Tart 180 - 200 25 - 50 Pizza, frozen Follow manufacturer`s instructions Pizza, home made 200 - 230 15 - 25 Quiches/Tarts 180 - 200 30 - 50...
- Page 26 26 www.aeg.com 10.13 Grilling Always pre-heat the empty oven with the grill functions for 5 mi- Always use the grilling function with nutes. maximum temperature setting • Set the shelf in the shelf level as recommended in the grill- Always grill with the oven door ing table.
- Page 27 ENGLISH 10.17 Thermal Grilling Roasting Food Temperature Shelf Position Quantity [kg] Time (min) [°C] Beef: Pot 180 - 230 150 - 180 roast Beef: Topside per cm of beef or filler - 190 - 200 5 - 6 thickness rare Beef: Topside per cm of beef or filler -...
-
Page 28: Oven - Care And Cleaning
28 www.aeg.com 10.18 Defrosting • Do not cover with a plate or bowl. This can extend the time to defrost very • Put the food out of the packaging and much. set it on a plate on the oven shelf. - Page 29 ENGLISH • Set the oven temperature to 250 °C Discolouration of the catalytic and let the oven operate for 1 hour. surface has no effect on the cata- lytic properties. • Clean the oven cavity with a soft and damp sponge. 11.2 Shelf supports WARNING! Do not attempt to clean the cata-...
-
Page 30: Cleaning The Door Glass
30 www.aeg.com Removing the glass: Open the door. Push the door trim at both sides to release the clips. Refer to the pic- ture. Pull the door trim to the front to re- move it. Remove the glass panels. To install panels, do the above 11.4 Main oven... -
Page 31: What To Do If
ENGLISH • Remove the fuses in the fuse box or Clean the glass cover. deactivate the circuit breaker. Replace the oven lamp with an ap- plicable 300 °C heat-resistant oven Put a cloth on the bottom of the lamp. oven to prevent damage to the oven light and glass cover. -
Page 32: Installation
32 www.aeg.com Problem Possible cause Remedy The display shows an er- There is an electronic • Deactivate the appli- ror code that is not in fault ance with the house this list fuse or the safety switch in the fuse box and activate it again •... - Page 33 ENGLISH Dimensions Minimum distances Depth 600 mm Dimen- sion Top oven capaci- 40 l Main oven ca- 74 l pacity 13.3 Levelling 13.2 Location of the appliance Use small feet on the bottom of appli- You can install your freestanding appli- ance to set the appliance top surface ance with cabinets on one or two sides level with other surfaces.
-
Page 34: Anti-Tilt Protection
34 www.aeg.com 13.4 The anti-tilt protection WARNING! You must install the anti-tilt pro- tection (A+B). If you do not install it, the appliance can tilt. Before you install the anti-tilt protection, adjust the appliance to the correct height. The anti-tilt protection has two compo- nents (A+B). -
Page 35: Great Britain & Ireland - Guarantee/Customer Service
ENGLISH Make sure that the cover is securely fas- To open the cover of terminal tened. board obey the procedure in op- posite sequence. 13.7 Terminal board Make sure that the links are fitted as shown. Do not remove blanking plates. GREAT BRITAIN &... -
Page 36: European Guarantee
36 www.aeg.com date. Please note a valid purchase re- Custom- Tel: (Calls may be recor- ceipt or guarantee documentation is re- er Care ded for training purpo- quired for in guarantee service calls. Depart- ses) ment, Customer Care.Please contact our Cus-... - Page 37 ENGLISH Belgique/België/Bel- +32 2 7162444 Raketstraat 40, 1130 Brussel/ gien Bruxelles Česká Republika +420 261 302 261 Budějovická 3, Praha 4, 140 21 Danmark +45 70 11 74 00 Strevelinsvej 38-40, 7000 Frederi- Deutschland +49 180 32 26 622 Fürther Str. 246, 90429 Nürnberg Eesti +37 2 66 50 030 Pärnu mnt.
-
Page 38: Environment Concerns
38 www.aeg.com Slovenija +38 61 24 25 731 Gerbičeva ulica 110, 1000 Ljubl‐ jana Slovensko +421 2 32 14 13 Electrolux Slovakia s.r.o., Elec‐ 34-5 trolux Domáce spotrebiče SK, Galvaniho 17/B, 821 04 Bratisla‐ Suomi 030 600 5200 Lankapuhelinverkosta 0,0828€/puhelu+0,032€/min Matkapuhelinver- kosta 0,192€/min... - Page 39 ENGLISH...
- Page 40 www.aeg.com/shop...