Table of Contents
Advertisement
Advertisement
Table of Contents

Related Manuals for Canon iR1510


Summary of Contents for Canon iR1510
- Page 1 Reference Guide...
- Page 3 Copyright Copyright ©2004 by Canon, Inc. All rights reserved. No part of this publication may be reproduced, transmitted, transcribed, stored in a retrieval system, or translated into any language or computer language in any form or by any means, electronic, mechanical, magnetic, optical, chemical, manual, or otherwise, without the prior written permission of Canon, Inc.
- Page 4 Laser Safety Information Laser radiation could be hazardous to the human body. For this reason, laser radiation emitted inside this unit is hermetically sealed within the protective housing and external cover. No radiation can leak from the machine in the normal operation of the product by the user.
-
Page 5: Table Of Contents
Contents Chapter 1: Introduction Special Features ............. 4-6 Collate Copy ............4-6 Customer Support ........... 1-1 2 on 1 Copy ............4-8 Important Safety Instructions........1-1 Reserve Copy............ 4-10 Main Components of the Machine......1-4 Two-Sided Copy ..........4-12 Control Panel............1-6 Standby Display ............ - Page 6 → Printer Guide Refer to the Printer Guide for details on the topic of the previous sentence. machine The word “machine” refers to the iR1510/iR1530/iR1570F models. default A setting that remains in effect unless you change it. document or fax* The original sheet(s) of paper you copy, send or receive with the machine.
- Page 7 Legal Limitation on Usage of Your Product and the Use of Images Using your product to scan, print or otherwise reproduce certain documents, and the use of such images as scanned, printed or otherwise reproduced by your product, may be prohibited by law and may result in criminal and/or civil liability. A non- exhaustive list of these documents is set forth below.
-
Page 9: Chapter 1: Introduction Customer Support
Chapter 6. If you cannot solve the problem or if you think your machine needs servicing, contact your local authorised Canon dealer or the Canon help desk. Important Safety Instructions Read these safety instructions thoroughly before using your machine, and keep them handy in case you need to refer to them later. - Page 10 • Keep the machine away from direct sunlight. • Do not use or store the machine outdoors. • Do not install the machine near devices that contain magnets or generate magnetic fields, such as speakers. • Make sure the machine is approximately 10 cm away from walls and other equipment for proper ventilation. n n n n Power Supply •...
- Page 11 n n n n Handling • Do not drop paper clips, staples, or other metal objects inside the machine. Also do not spill water, liquid or inflammable substances inside the machine. If these items come into contact with high-voltage parts inside of the machine, it may result in a fire or electrical shock.
-
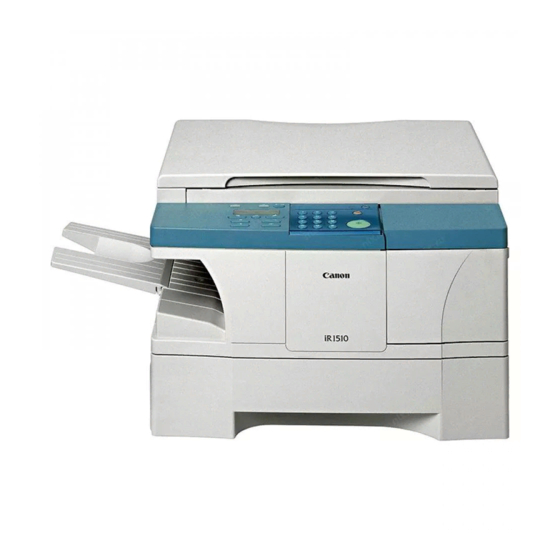
Page 12: Main Components Of The Machine
OUTPUT TRAY Controls the machine. Outputs printed pages. PAPER DRAWER Holds plain paper. n n n n iR1510 PLATEN UNIT LEVER Use it to release and slide the platen unit. PLATEN GLASS COVER PLATEN UNIT Open to place a document on the platen glass. - Page 13 Inside View PLATE Use it when you replace the drum unit.. DRUM CARTRIDGE COVER Open it when you install the drum cartridge, or remove jammed paper. DRUM CARTRIDGE STACK BYPASS When copying on plain paper and other print media, pull out the paper tray and load paper in the stack bypass.
- Page 14 Operation Panel This section describes keys used when making copies and setting the additional functions. n n n n iR1570F FAX Key Switches standby display to Fax Mode. Displays messages and prompts during operation. Also displays selections, text and numbers when specifying settings.
- Page 15 iR1510/iR1530...
-
Page 16: Standby Display
Standby Display The standby display differs depending on whitch mode is selected. The standby display in Copy mode is as follows: Copy Ratio Paper Size 7(;7 Exposure Image Quality Copy Quantity • When the machine is plugged in, the LCD displays for a while, then the standby display appears. -
Page 17: Chapter 2: Paper Handling Print Media Requirements
Print Media Requirements For high-quality copies, we recommend using paper and transparencies recommended by Canon. Some types of paper available at office supply stores may not be suitable for this machine. If you have any questions about paper and transparencies, consult your dealer or Canon Customer Relations. -
Page 18: Printable Areas
Please note that the term “printing area” represents both the recommended area for optimum print quality and the entire area where the machine can technically print. Printing area (light shade): Canon recommends that you print within this area. n n n n Paper 5 mm 4.5 mm... -
Page 19: Loading Paper
Loading Paper n n n n Loading Paper in the Paper Drawer This section describes how to load paper in the paper drawer. • When loading paper, take care not to cut your hands on the edges of the paper. Grip the paper drawer handle, and draw it out towards you until the paper drawer comes to a stop. - Page 20 Closing the paper drawer When closing the paper drawer, make sure to push it in completely as far as it will go. If copying is performed when the paper drawer is not pushed in completely, it will cause a paper jam. If copy paper is sticking out of the paper drawer Sometimes, when you pull out the paper drawer, paper may stick out as shown in the illustration below.
-
Page 21: Loading Paper In The Stack Bypass
• Make sure that the paper stack does not exceed the paper limit guide. • Some types of paper may not feed properly into the stack bypass. For high-quality copies, be sure to use the paper and transparencies recommended by Canon. (→ p. 2-1) • Load transparencies one by one. -
Page 22: Loading Envelopes In The Stack Bypass
n n n n Loading Envelopes in the Stack Bypass • The recommended envelopes are US COMMERCIAL 10, MONARCH, EUROPEAN DL, ISO-B5, ISO-C5, YOGATA #4 or YOGATA #2 envelopes. Using other envelopes may affect the quality of the copy image. Arrange the stack of envelopes on a firm, clean surface, and press down firmly on the edges to make the folds crisp. -
Page 23: Chapter 3: Document Handling Documents You Can Copy
Chapter 3 Document Handling Documents You Can Copy The documents placed on the platen glass or loaded into the ADF must meet the requirements shown in the table below. Platen Glass Type of document – Plain paper Multiple page documents of the same size, –... -
Page 24: Scanned Area Of A Document
Problem Documents • Make sure any glue, ink, or correction fluid on the document is completely dry before placing it on the platen glass or loading it into the ADF. • Remove all fasteners (staples, paper clips, etc.) before loading the document into the ADF. •... -
Page 25: Setting Up Documents
Setting Up Documents For scanning, place your documents on the platen glass or load them into the ADF. Where you set up your documents depends on the size and type of documents you have. (→ p. 3-1) n n n n Placing a Document on the Platen Glass Open the ADF or platen glass cover. -
Page 26: Loading Documents In The Adf (Only For The Ir1530/Ir1570F Models)
n n n n Loading Documents in the ADF (only for the iR1530/iR1570F models) Make sure there is no document on the platen glass. Fan the edges that will feed into the machine first, then tap the edge of multiple page documents on a flat surface to even the stack. Adjust the slide guides to the width of the document. -
Page 27: The Paper Path Of The Automatic Document Feeder
n n n n The Paper Path of the Automatic Document Feeder The machine scans documents from the last page. Scanning unit • When documents are set in the ADF, the scanning unit moves to the position shown in the figure above and it is fixed there. When a document is placed on the platen glass, the scanning unit moves to scan it. -
Page 29: Chapter 4: Making Copies Documents You Can Copy
Chapter 4 Making Copies Documents You Can Copy For information on the types of documents you can copy, their requirements, and details on setting up documents, → Chapter 3. Copying Documents Press COPY to set to Copy Mode. 1 0 0 % T E X T •... -
Page 30: Basic Copying Functions
n n n n After scanning documents Press Stop/Reset. C A N C E L C O P Y I N G ? < Y E S N O > Press O (s). • If you do not want to cancel the copy job, press P (r) for •... - Page 31 n n n n Specifying the Paper Size (Stack Bypass) At the factory the paper size has already been set to . Normally, you can make copies in this setting. However, F R E E S I Z E when the copy images or the back of the paper is dirty, you can prevent the paper from getting dirty by specifying the paper size according to the following.
-
Page 32: Setting Enlarging/Reducing
n n n n Setting Enlarging/Reducing You can enlarge or reduce the copy size using preset copy ratios or using custom copy ratios. • When the is set to , the shadow of the ADF M A X . S C A N L E N G T H 3 5 6 m m C O P Y S E T T I N G S A D D I T I O N A L F U N C T I O N S... -
Page 33: Setting The Image Quality
n n n n Setting the Image Quality You can adjust image quality to the appropriate level best suited for a document with text or photos. Three modes are available for adjusting image quality. Press Image Quality to select the image quality. 1 0 0 % Each time Image Quality is pressed, the image quality mode changes as follows: T E X T / P H O T O... -
Page 34: Special Features
Special Features The machine has the following SPECIAL COPY features. These features allow you to sort copies in page order, and create special copies easily. - Collate Copy Sorts copies in page order. - 2 on 1 Reduces 2 A4-size documents to fit on a single A4-size paper. - Reserve Copy Reserves the next job while the machine is printing. - Page 35 n n n n When Placing a Document on the Platen Glass Place the last page of a document on the platen glass. • If a document is set from the first page, the printing will be performed in reverse order.
-
Page 36: On 1 Copy
n n n n 2 on 1 Copy Use 2 on 1 to reduce 2 sheets to fit on one sheet. Two A4-size documents are automatically reduced to fit on a A4 size page. • The 2 on 1 copy function is not available with an enlarging or reducing function. •... - Page 37 n n n n When Placing a Document on the Platen Glass Press 2 on 1. 2 O N 1 • appears in the LCD. 2 O N 1 T E X T Use the numeric keys to set the copy quantity. (→ p. 4-2) Place the last page of a document on the platen glass.
-
Page 38: Reserve Copy
n n n n Reserve Copy This feature allows you to reserve the next job while the machine is printing out a current job. n n n n Reserving the Next Copy Job Press Stop/Reset twice while the machine is printing. 1 0 0 % →... - Page 39 n n n n Deleting the Copy Job You Reserved Press Stop/Reset while the machine is printing. S E L E C T J O B T O C A N C E L 0 0 4 4 1 6 : 2 0 0 2 ×...
-
Page 40: Two-Sided Copy
n n n n Two-Sided Copy Using the stack bypass, you can copy 2 documents on opposite sides of a single sheet. n n n n When Loading Documents in the ADF (only for the iR1530/iR1570F models) Load the first page of the document face down in the ADF, then press Start to begin copying. - Page 41 n n n n When Placing a Document on the Platen Glass Place the first page of the document face down on the platen glass, then press Start to begin copying. • Make sure to open the stack bypass and pull out the paper tray. (R p. 2-5) Place the next page of the document on the platen glass.
- Page 42 4-14...
-
Page 43: Chapter 5: Maintenance Periodic Cleaning
Chapter 5 Maintenance Periodic Cleaning Your machine requires little periodic maintenance. This section describes the necessary cleaning procedures for your machine. • When cleaning the machine’s exterior or the platen glass, be sure to disconnect the power cord before cleaning the machine. •... - Page 44 n n n n Cleaning the Read Area of the Platen Glass Black lines may appear in copies as shown in the illustration below when the ADF is used to feed documents. This is caused by paste, ink, correction fluid, or other foreign matter in the read area (Between ) of the platen glass.
- Page 45 n n n n Cleaning the ADF Roller (only for the iR1530/iR1570F models) If the ADF roller is dirty, the documents will be dirty after you feed them into the ADF. In this case, you can clean the ADF roller using the Additional Functions. •...
-
Page 46: Replacing The Toner Cartridge
Replacing the Toner Cartridge This section describes how to remove the used toner cartridge and replace it with a new one. When appears in the LCD, replace the toner cartridge. T O N E R L E V E L L O W T O N E R E M P T Y Open the toner supply cover. - Page 47 Holding the toner cartridge lever, keep the toner cartridge level and insert it slowly as far as it goes into the machine. Holding the toner cartridge lever with one hand, firmly and slowly pull the sealing tape tab with the other hand to remove the sealing tape completely. Throw the tape away.
-
Page 48: Replacing The Drum Unit
Replacing the Drum Unit This section describes how to remove the drum cartridge and replace the drum unit with a new one. When appears in the LCD, replace the drum unit. W A S T E T O N E R F U L L The drum unit to be replaced is installed in the right side of this machine together with the developing assembly unit. - Page 49 Separate the top protective packaging from the bottom one and place both Top protective top and bottom protective packaging as shown below. packaging • Place the top protective packaging so that the marks are on the left and right respectively, and confirm that the depressions of the bottom protective packaging are facing you.
- Page 50 Lift the platen unit lever a and slide the platen unit to the left b unitil the mark appears c. Open the drum cartridge cover a and remove the plate b. (This will be used Plate in step 9.) Hold the handle of the drum cartridge and remove the drum cartridge form the machine slowly c.
- Page 51 Turn the drum cartridge around to align the marks on the drum cartridge you removed with the marks on the top protective packaging respectively. • Do not stand the drum cartridge on end or turn it upside down. While lifting the wire clamp from position “1” to “2”, fit the holes of the plate Wire clamp you removed in step 7 into the projections of the developing assembly unit.
- Page 52 Lift the tabs and lower the lock levers on both sides of the used drum unit. Groove Shaft Lock lever Lift up the developing assembly unit to separate it from the used drum unit. Used drum unit Developing assembly unit •...
- Page 53 Raise the lock levers on both sides of the new drum unit and click the tabs into place to attach the drum unit to the developing assembly unit. When attaching the lock levers, make sure that the shafts catch in the grooves on the drum unit.
- Page 54 Grip the white tab of the protective sheet a. Slightly lift the drum cartridge with one hand and slowly pull the tab of the protective sheet horizontally with the other hand to break the white connectors b and remove the sheet c. •...
-
Page 55: Repacking And Transporting
Repacking and Transporting Be sure to unplug the power cord before transporting the machine. If the machine is likely to be subjected to vibration (e.g., when transporting over long distances), the following precautions should be taken. If you do not follow these precautions, the machine may be damaged or the quality of your copy images may be adversely affected. - Page 56 Carrying the Machine by the Sides Remove the output tray and close the stack bypass. Grip the handles on the sides of the machine and lift up the machine, as shown in the illustration above. • When carrying this machine, be sure to hold it in the designated places as shown in the illustration. Dropping the machine can cause personal injury.
-
Page 57: Chapter 6: Troubleshooting Clearing Jams
Chapter 6 Troubleshooting Clearing Jams This section describes how to remove jammed paper from the main unit, paper drawer, ADF, and stack bypass. Removing Jammed Paper from Inside the Main Unit When print media jams inside the main unit, the LCD displays R E C . - Page 58 Flip the transfer guide. Gently remove any jammed paper from inside the main unit. • Be sure to remove jammed paper from inside the main unit even when the jammed paper has been partially output. Open the right cover. Gently remove any jammed paper from inside the main unit, then close the right cover.
- Page 59 Removing Jammed Paper from the ADF (only for the iR1530/iR1570F models) When print media jams in the ADF, the LCD displays C H E C K D O C U M E N T O P E N T H E A D F Gently remove the jammed paper from the document output slot of the ADF.
-
Page 60: Lcd Messages
LCD Messages The following messages are displayed in the LCD when the machine performs a function or if it encounters an error. This section describes the general messages and those related to copy functions. For the messages related to fax functions, → Fax Guide. - Page 61 Message Cause Action The platen unit or toner supply is not Slide the platen unit to the original position, or close P L A T E N / C O V E R I S O P E N closed correctly. the toner supply cover.
-
Page 62: Paper Feeding Problems
• Make sure they are loaded properly (→ p. 2-5). The transparencies should be loaded one by one in the stack bypass. Transparencies for colour copiers may be loaded in the stack bypass. • Do not use any transparencies for colour copiers. They will cause a paper jam. Please use transparencies recommended by Canon. -
Page 63: Copying Problems
z z z z Repeated paper jams occur. The paper you are using may be causing the jams. • Be sure to fan the paper stack before loading it in the paper drawer or stack bypass. This keeps the sheets of paper from sticking together. -
Page 64: Print Quality Problems
z z z z If the documents have black streaks or appear dirty after you feed them in the ADF. The ADF roller is dirty. • Clean the ADF roller. (→ p. 5-3) • For additional troubleshooting, → Print Quality Problems. Print Quality Problems z z z z The print quality is not what you expect;... - Page 65 z z z z The copy images are partly missing or shaded when you make copies on thick paper. may not be set B Y P A S S P A P E R T Y P E C O P Y P O W E R L E V E L C O M M O N S E T T I N G S A D D I T I O N A L F U N C T I O N S correctly.
-
Page 66: Printing Problems
Printing Problems z z z z The Alarm indicator flashes. The machine may have a paper jam. • Clear the paper jam. (→ pp. 6-1 to 6-3) • If the machine has no paper jam, unplug the machine from the power supply and wait 10 minutes, then plug it in again. If the problem is fixed, the Alarm indicator will turn off, and the LCD will return to standby mode. -
Page 67: If You Cannot Solve The Problem
• Attempting to repair the machine yourself may void the limited warranty. If you need to call your service representative, make sure you have the following information: • Product name iR1510/iR1530/iR1570F • Serial number The serial number is on the label located at the back of the machine. - Page 68 6-12...
-
Page 69: Chapter 7: Setting The Additional Functions Understanding The "Additional Functions
Chapter 7 Setting the Additional Functions Understanding the “Additional Functions” The menus of the Additional Functions can allow you to specify or register various settings. Available menus differ depending on the machine type. n n n n Accessing the Additional Functions Press Additional Functions. -
Page 70: Menu Descriptions
n n n n Menu Descriptions COMMON SETTINGS Name Descriptions Selects the size of paper in the stack bypass. S T A C K B Y P A S S S I Z E Select when you set to O F F F R E E S I Z E S E T O N L O A D I N G Free size... - Page 71 COPY SETTINGS Name Descriptions Select the document type. S T D . I M A G E Q U A L I T Y : Character mode T E X T O R I G I N A L * : Text/photo mode T E X T / P H O T O * : Photo mode P H O T O...
- Page 72 • For the iR1570F model, is also displayed. (R Fax Guide) S P E E D D I A L L I S T COUNT CHECK You can check the count information. (For details, contact your local authorised Canon dealer.)
-
Page 73: Appendix: Specifications
Features are subject to change without notice due to product improvements. For high-quality copies, we recommend using paper and transparencies recommended by Canon. Some types of paper available at office supply stores may not be suitable for this copier. If you have any questions about paper and transparencies, consult your... -
Page 75: Index
Index Index O (–) key................1-6 COPY POWER LEVEL message........7-2 P (+) key................1-6 COPY SETTINGS ............7-3 2 on 1 Copying copy ................4-8 adjusting the copy exposure........4-5 key ................1-6 document requirements..........3-1 paper requirements............. 2-1 problems..............6-7 Additional Functions setting enlarging/reducing.......... - Page 76 Exposure MIX TONER message ........... 7-4 automatically ..............4-5 Multiple copies............... 4-2 key ................1-6 manually ..............4-5 Numeric keys ..............1-6 FAX key .................1-6 Feeder cover ............1-5, 6-3 OK key ................1-6 Output tray ..............1-4 Guide slide ..............1-5, 3-4 Paper drawer ................
- Page 77 Stop/Reset key............1-6, 4-1 Quality SUPPLY REC. PAPER message ........6-5 print problems.............6-8 SYSTEM ERROR message ........... 6-5 Quantity document ..............3-1 setting .................4-2 TIMER SETTINGS ............7-4 TONER LEVEL LOW message ........6-5 Toner sypply cover............1-4 Read area ................5-2 Toner cartridge ............... 5-4 REC.