Table of Contents
Advertisement
Quick Links
Advertisement
Table of Contents

Related Manuals for ESI ESCTP5-RF


Summary of Contents for ESI ESCTP5-RF
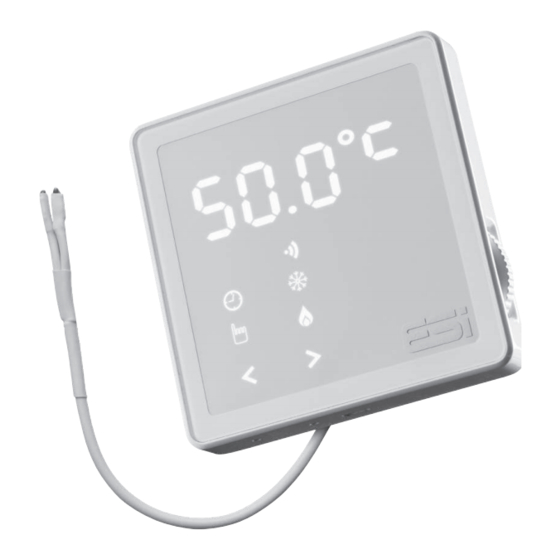
- Page 1 ESCTP5-RF and ESCTP5-W Programmable Cylinder Thermostat User instructions...
- Page 2 Thank you for choosing ESi Controls. All our products are tested in the UK so we are confident this product will reach you in perfect condition and give you many years of service. However, for additional peace of mind, we recommend you register your product online at www.esicontrols.co.uk/warranty for your...
-
Page 3: Table Of Contents
Contents User instructions 1. Quick operating guide Display and button functions 2. Setting the time and date (tInE) 3. Operation modes Auto Manual 4. Extra operation modes Boost Advance (ADV) Holiday mode (HOLI) 5. Main menu Time and date (tinE) Set temperature (tEnP) Number of programs (NOP) Program (PrOG) - Page 4 6. Program settings Factory pre-set programme Default program settings: 5/2 day 6.1.1 Program settings: 7 day 6.1.2 Program settings: 24 hours 6.1.3 Setting the operation mode (5/2 day, 7 day, 24hr) (ProG) Setting the programme (ProG) 5/2 day 6.3.1 7 day 6.3.2 24 hour...
-
Page 5: User Instructions
User instructions... -
Page 6: Quick Operating Guide
1. Quick operating guide Display and button functions Temperature, time and data display WiFi working status (for ESCTP5-W WiFi model only) RF working status (for ESCTP5-RF model only) Auto operation mode Off mode Manual operation mode Flame symbol when system calling for heat... -
Page 7: Setting The Time And Date (Tine)
2. Setting the time and date (tInE) N.B. Please note, when first powered or in the event of a power loss the time will be flashing and the time and date will need to be set. Follow steps 2-6 to set the time on first setup. -
Page 8: Operation Modes
3. Operation modes Operation Modes: AUTO , MAN , OFF Press and hold in home screen to change operation mode. AUTO In Auto mode, the thermostat will work as per the user’s programming setting. See section 6 for details. Permanent manual override of set temperature. 1. -
Page 9: Extra Operation Modes
4. Extra operation modes Boost Temporary override of set temperature. 1. When in AUTO or OFF mode, in the home screen, press to make display show bOSt. 2. Press to select bOSt. 3. Turn the dial to select the number of hours, press to confirm. -
Page 10: Advance (Adv)
Advance (ADV) The Advance function allows the user to move to the next ON/OFF programme for a “one off” event, without having to change the programme or use the Manual mode. 1. When in AUTO mode, in the home screen, press select ADV. - Page 11 Press in the home screen to exit Holiday mode and return to previous mode. Holiday mode days setting range: 1-99 days. Default: 1 day. Set temperature range: 25°C-65°C. Default: 25°C. N.B: The Days (Holiday) will numerically countdown. Once the countdown has finished normal operation will resume. It may be advisable to set the Holiday mode 1 day less, so the cylinder is back up to temperature for your return.
-
Page 12: Main Menu
5. Main menu In the home screen, press and hold until the displays shows tInE then release to enter main menu. Use the dial to choose between TIME, HYST, TEMP, STER, PROG, LIGH, RF, NOP, LOC, SMAR and RESE. Press to enter desired setting. -
Page 13: Hysteresis (Hyst)
Hysteresis (HYSt) This function allows the hysteresis to be set, the thermostat will keep the temperature between set temperature +/- hysteresis value. 1. Press and hold until the display shows tInE. Turn the dial until display shows HYSt then press . 2. -
Page 14: Display Illumination (Ligh)
RF pairing (rF) This function is only available in the ESCTP5-RF. The ESCTP5-RF model can communicate wirelessly with some ESi Controls room thermostats or receivers, which can potentially grant access and control of the cylinder thermostat via the ESi Controls Centro APP. -
Page 15: Lock (Loc)
5. Press and hold until the display shows tInE. Turn the dial until display shows WIFI then press . 6. The display will be showing ---- and the Wi-Fi symbol will be flashing, this means it has entered pairing mode. 7. -
Page 16: Firmware Version (Vers)
Firmware version (vErS) 5.11 This function will show the firmware version installed in the unit. 1. Press and hold until the display shows tInE. Turn the dial until display shows vErS then press . 2. The display will show the firmware version. Press to return to previous menu. - Page 17 6. Program settings Factory pre-set programme This unit has been designed to be a simple to use thermostat, requiring minimal user intervention with a pre-programmed heating profile. The pre-set heating times and temperatures will suit most people (See table below). Operation setting range: 5/2 day, 7 day, 24 Hour.
- Page 18 Setting the Operation Mode (5/2 day, 7 day, 24hr) (ProG) 1. Press and hold until the display shows tInE. Turn the dial until display shows PrOG then press . 2. Use the dial to select between 5-2d, 7 day or 24hr operation then press to confirm.
- Page 19 8. Repeat steps 3-6 until all desired days have been programmed then press to return to previous menu or leave for 1 minute to automatically return to home screen. 7 Day 6.3.2 1. Choose 7 day operation (See section 6.2 for details). Then press .
- Page 20 4. Turn the dial to adjust the ending time (10 minutes increments). Then press to confirm and enter the next program (P2-P3). 5. Repeat the steps 2-4. To set P2 and P3 programs, then press to return to previous menu or leave for 1 minute to automatically return to home screen.
- Page 22 We are continuously developing our products to bring you the very latest in energy saving technology and simplicity. However, should you have any questions setting up your controls please email us at sales@esicontrols.co.uk or for technical queries call us on our dedicated technical helpline 01280 816868.
- Page 23 WARNING: Interference with sealed parts renders the guarantee void. In the interests of continuous product improvement we reserve the right to alter designs, specifications and materials without prior notice and cannot accept liability for errors.
- Page 24 Version 1.001 © ESi Controls Ltd 2021...