Table of Contents
Advertisement
Quick Links
SMART Board®
6000S and 6000S Pro series
interactive displays
USER GUIDE
SBID-6265S-V3
|
SBID-6275S-V3
SBID-6265S-V3-P
|
SBID-6275S-V3-P
SBID-6065S-V3
|
SBID-6075S-V3
SBID-6065S-V3-P
|
SBID-6075S-V3-P
SBID-6465S-V3-P
|
SBID-6475S-V3-P
SBID-6265S-C
|
SBID-6275S-C
SBID-6065S-C
|
SBID-6075S-C
SBID-6265S
|
SBID-6275S
|
SBID-6286S
SBID-6065S
|
SBID-6075S
|
SBID-6086S
IDS665-3
|
IDS675-3
|
IDS686-3
IDS665-1
|
IDS675-1
|
IDS686-1
Was this document helpful?
smarttech.com/docfeedback/171415
|
SBID-6286S-V3
|
SBID-6265S-V3-PW
|
SBID-6286S-V3-P
|
SBID-6086S-V3
|
SBID-6065S-V3-PW
|
SBID-6086S-V3-P
|
SBID-6486S-V3-P
|
SBID-6286S-C
|
SBID-6265S-CPW
|
SBID-6086S-C
|
SBID-6065S-CPW
|
SBID-6265S-PW
|
SBID-6275S-PW
|
SBID-6065S-PW
|
SBID-6075S-PW
|
SBID-6275S-V3-PW
|
SBID-6286S-V3-PW
|
SBID-6075S-V3-PW
|
SBID-6086S-V3-PW
|
SBID-6275S-CPW
|
SBID-6286S-CPW
|
SBID-6075S-CPW
|
SBID-6086S-CPW
|
SBID-6286S-PW
|
SBID-6086S-PW
Advertisement
Table of Contents

Related Manuals for Smart Technologies SMART Board 6000S


Summary of Contents for Smart Technologies SMART Board 6000S
- Page 1 SMART Board® 6000S and 6000S Pro series interactive displays USER GUIDE SBID-6265S-V3 SBID-6275S-V3 SBID-6286S-V3 SBID-6265S-V3-PW SBID-6275S-V3-PW SBID-6286S-V3-PW SBID-6265S-V3-P SBID-6275S-V3-P SBID-6286S-V3-P SBID-6065S-V3 SBID-6075S-V3 SBID-6086S-V3 SBID-6065S-V3-PW SBID-6075S-V3-PW SBID-6086S-V3-PW SBID-6065S-V3-P SBID-6075S-V3-P SBID-6086S-V3-P SBID-6465S-V3-P SBID-6475S-V3-P SBID-6486S-V3-P SBID-6265S-C SBID-6275S-C SBID-6286S-C SBID-6265S-CPW SBID-6275S-CPW SBID-6286S-CPW SBID-6065S-C SBID-6075S-C SBID-6086S-C SBID-6065S-CPW SBID-6075S-CPW SBID-6086S-CPW SBID-6265S SBID-6275S SBID-6286S SBID-6265S-PW...
- Page 2 SMART Board, SMART Notebook, SMART TeamWorks, SMART Meeting Pro, Pen ID, HyPr Touch, Object Awareness, Silktouch, Tool Explorer, smarttech, the SMART logo and all SMART taglines are trademarks or registered trademarks of SMART Technologies ULC in the U.S. and/or other countries. The Bluetooth word mark is owned by the Bluetooth SIG, Inc.
-
Page 3: Important Information
IDS675-1, IDS686-1 The power cable or plug is damaged Responsible Party – U.S. Contact Information Liquid is spilled into the display SMART Technologies Inc. Objects fall into the display 2401 4th Ave, 3rd Floor The display is dropped Seattle, WA 98121 Structural damage, such as cracking, occurs compliance@smarttech.com... - Page 4 Important information NOTE (iii) the maximum antenna gain permitted for devices in the band 5725-5825 MHz shall comply with the e.i.r.p. limits This equipment has been tested and found to comply with the specified for point-to-point and non point-to-point operation as limits for a Class A digital device, pursuant to part 15 of the appropriate.
- Page 5 EU Declaration of Conformity only to models certified for sale in Japan Hereby, SMART Technologies ULC declares that the radio こ の装 置は、 ク ラ スA情 報技 術装 置です。 こ の装 置を家 庭 環 境で equipment type Interactive Display IDS665-3, IDS675-3, 使用...
- Page 6 Important information Regulatory models IDS686-1 REGISTERED No: ER81697/20 DEALER No: DA0076339/11 smarttech.com/kb/171415...
-
Page 7: Table Of Contents
Contents Important information Chapter 1: Welcome About this guide About the display Identifying your specific model Accessories More information Chapter 2: Using basic features Waking up the display and putting it back in to an energy saving mode Using the Home button Using the convenience panel Using the remote control Using touch... - Page 8 Contents Connecting a SMART OPS PC module Connecting USB drives, peripherals, and other devices Chapter 5: Troubleshooting The display isn’t turning on The display is turning on when it shouldn’t The screen is blank or there’s a problem with the image on the screen There’s no sound or there’s a problem with the sound Touch isn’t working as expected The pens and erasers aren’t working as expected...
-
Page 9: Chapter 1: Welcome
Chapter 1 Welcome About this guide About the display Touch Writing, drawing and erasing Support for additional pens and tools iQ experience Display Audio Network connectivity Room computers and guest laptops Accessory slot Convenience panel Proximity sensor Ambient light sensor Remote control and IR sensor Temperature and humidity sensors Microphone array... -
Page 10: About The Display
This guide is for people who use SMART Board interactive displays. Documentation and resources for those who install and maintain displays is also available (see More information on page 19). About the display The SMART Board 6000S or 6000S Pro series interactive display with iQ is the hub of your classroom or meeting room. NOTE The following features are available on the SMART Board 6000S (V3) models. -
Page 11: Writing, Drawing And Erasing
For more information, see Using the pens and erasers on page 28. Support for additional pens and tools The SMART Board 6000S features the Tool Explorer™ platform, which enables you to use other SMART- authorized pens and tools in addition to those supplied with the display. The Tool Explorer platform lets teachers and students manipulate real-world objects to interact intuitively with on-screen objects and digital content, increasing engagement and knowledge retention. -
Page 12: Display
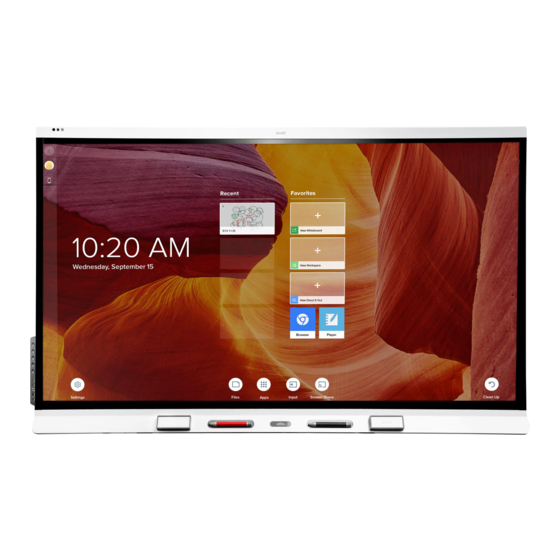
Chapter 1 Welcome Press the Home button on the display (pictured) or the remote control to open the Home screen. From the Home screen, you can open the iQ apps, switch inputs, and adjust settings. For more information about the Home button and the Home screen, see Using the Home button on page 21. -
Page 13: Room Computers And Guest Laptops
For more information on SMART OPS PC modules, see SMART OPS PC module on page 19. NOTE Unlike previous SMART Board interactive displays, the SMART Board 6000S and 6000S Pro series interactive displays don’t require an iQ appliance in the accessory slot. The iQ experience is built into these interactive displays (see iQ experience on page 11). -
Page 14: Ambient Light Sensor
The ambient light sensor detects the room’s brightness and adjusts the brightness of the screen accordingly. You can enable, disable, and adjust this feature. Refer to the SMART Board 6000S and 6000S Pro series interactive displays installation and maintenance guide (smarttech.com/kb/171414) for more information. -
Page 15: Temperature And Humidity Sensors
Temperature and humidity sensors are available only when iQ is enabled. For more information, see Using the SMART Sensors app on page 41. Microphone array This feature is available only on the SMART Board 6000S (V3) and SMART Board 6000S (V3) Pro models. NOTE The SBID-64xxS (V3) Pro models do not feature a microphone array. -
Page 16: Identifying Your Specific Model
Chapter 1 Welcome Identifying your specific model SMART offers a variety of models of the SMART Board 6000S and 6000S Pro series interactive display: Model/SKUs Frame style Screen size iQ embedded Microphone array (approximate) computing 6000S (V3) SBID-6265S-V3 White 65" SBID-6275S-V3 White 75"... - Page 17 Chapter 1 Welcome Model/SKUs Frame style Screen size iQ embedded Microphone array (approximate) computing SBID-6275S-C White 75" SBID-6286S-C White 86" SBID-6065S-C White 65" SBID-6075S-C White 75" SBID-6086S-C White 86" 6000S (C) Pro SBID-6265S-CPW White 65" SBID-6275S-CPW White 75" SBID-6286S-CPW White 86"...
-
Page 18: Accessories
Chapter 1 Welcome Model/SKUs Frame style Screen size iQ embedded Microphone array (approximate) computing SBID-6075S-P Black 75" SBID-6086S-P Black 86" Refer to the specifications for detailed technical information for these models, including product dimensions and weights (see More information on the next page). Accessories Accessories for the display include: Pen accessory kit... -
Page 19: More Information
Chapter 1 Welcome SMART OPS PC module SMART Open Pluggable Specification (OPS) PC modules provide a hassle-free Windows Pro installation based on Intel® Core™ processors and are designed specifically to work with a SMART display. All OPS PC modules are WHQL certified and fully licensed with Windows Pro. -
Page 20: Chapter 2: Using Basic Features
Chapter 2 Using basic features Waking up the display and putting it back in to an energy saving mode Using the Home button Using the convenience panel Using the remote control Using touch Using the pens and erasers Writing and drawing in digital ink Using the SMART Ink dynamic (floating) toolbar Changing a pen’s default color, thickness, and other properties Erasing digital ink... -
Page 21: Using The Home Button
Connect a video cable from a computer to a video input receptacle on the display. The display also turns on when it receives a video signal. The SMART Board 6000S (V3) model returns to Ready mode and 6000S and 6000S (C) models return to an energy saving mode when one of the following occurs: The sensor detects no motion in the room for the length of time configured in the display’s settings. - Page 22 Chapter 2 Using basic features To show the Home screen or the Input screen Tap the Home button below the screen. Press the Home button on the remote control. smarttech.com/kb/171415...
-
Page 23: Using The Convenience Panel
The convenience panel contains buttons for turning the display on and off, controlling the volume, freezing and unfreezing the screen, and showing and hiding a screen shade. It also includes connectors for USB peripherals and a computer or other input source. SMART Board 6000S SMART Board 6000S (C) and 6000S (V3) Name Procedure Power... -
Page 24: Using The Remote Control
Chapter 2 Using basic features Name Procedure HDMI 3 input Connect a computer or other input source to use with the display connectors (see page 48). USB Type-C Connect a computer or mobile device, with a single connection for connector touch, video, and audio. Also connect any USB Type-C peripheral (such as memory sticks, keyboard, mice, etc.) to use with the display (see page 48). - Page 25 Chapter 2 Using basic features Name Procedure Press to wake the display or put it back in to an energy saving mode Power (see Waking up the display and putting it back in to an energy saving mode on page 20). Home Open the Home screen or the Input screen (see Using the Home button on page 21).
-
Page 26: Using Touch
You can use a variety of gestures within applications, including panning, scaling, rotating, and zooming in and out. SMART Board 6000S (V3) models support up to 40 simultaneous interaction points. The 6000S and 6000S (C) models support up to 20 simultaneous interaction points, enabling you and others to interact with objects on the screen at the same time. - Page 27 Chapter 2 Using basic features Pan (one finger) Pan (two fingers) / scroll Pinch to zoom in / scale (enlarge) Pinch to zoom out / scale (reduce) Rotate Flick smarttech.com/kb/171415...
-
Page 28: Using The Pens And Erasers
Chapter 2 Using basic features Erase with palm Erase with fist Using the pens and erasers The display comes with a black pen, a red pen, and two erasers. You can use the pens to write and draw in digital ink on the display, and you can use the erasers—or your palm or fist—to erase digital ink. The display has magnetic holders for the pens and erasers at the bottom of the display’s frame. -
Page 29: Using The Smart Ink Dynamic (Floating) Toolbar
Chapter 2 Using basic features To learn how to change a pen’s default behavior, see Changing a pen’s default color, thickness, and other properties below. Before writing or drawing over a video, an animation, or other moving images, freeze the screen (see Freezing the screen on page 32). -
Page 30: Adjusting The Volume
Chapter 2 Using basic features You can erase digital ink from the screen using an eraser or your palm or fist: Move a pen’s eraser over digital ink to erase. Move the eraser over digital ink to erase. Move your palm or fist over digital ink to erase. Adjusting the volume Use the buttons on the convenience panel or the remote control to increase, decrease, or mute the display’s volume. -
Page 31: Using The Microphone Array
Using the microphone array This feature is available only on the SMART Board 6000S (V3) and SMART Board 6000S (V3) Pro models. You can use the microphone array to capture audio while using a conferencing app on your display. You can also connect a room computer or guest laptop to the display and use the display's built-in microphone array in place of the connected computer's. -
Page 32: Freezing Or Hiding The Screen
Chapter 2 Using basic features Using the microphone array with a connected computer 1. Connect the computer to the display and select it as the display's input. (see Viewing a connected computer’s input on page 49). 2. Open the sound controls on the connected computer. Windows computer: Select Start >... -
Page 33: Showing And Hiding The Screen Shade
Chapter 2 Using basic features NOTE Freezing the screen does not pause applications that are running on the connected computer. It simply freezes the display of those applications. You can write or draw over the screen while it is frozen (see Writing and drawing in digital ink on page 28). -
Page 34: Using Additional Tools And Manipulatives
Using basic features Using additional tools and manipulatives The SMART Board 6000S or 6000S Pro series interactive display’s Tool Explorer platform enables you to use a range of different pens, objects, and manipulatives that are automatically recognized the moment they contact the display’s screen. -
Page 35: System Requirements And Smart Software Compatibility
Chapter 2 Using basic features System requirements and SMART software compatibility This table shows the version of iQ system software or SMART software required for each Tool Explorer tool. Tool iQ system software version SMART Product Drivers SMART Notebook Tool Explorer multicolor 4-pen bundle 3.6 or later 20.0 or later 12.16 or later... - Page 36 Chapter 2 Using basic features To use the magic pen to spotlight or magnify screen content 1. Pick up the magic pen. 2. Use the gesture end of the pen to draw a circle or rectangle around the portion of the screen you want to spotlight or magnify.
-
Page 37: Using The Highlighter Pen
Chapter 2 Using basic features Using the highlighter pen Use the highlighter pen to emphasize text in supported applications, such as the iQ whiteboard, SMART Notebook Player, and SMART Notebook desktop. NOTE For information about the iQ system software or SMART software version required for each Tool Explorer tool, see System requirements and SMART software compatibility on page 35. - Page 38 Chapter 2 Using basic features To insert an object using a Tool Explore cube 1. Pick up a cube. 2. Tap the cube face that features the image you want on the display’s screen. The image is inserted as an object. The inserted object can be made smaller by tapping a portion or corner of a cube's face on the screen.
-
Page 39: Using Tool Explorer Stamps
Chapter 2 Using basic features To delete an object 1. Tap the object. A selection rectangle appears around the object. 2. Press the object’s menu arrow, and then select Delete. Using Tool Explorer stamps Tool Explorer stamps feature a single shape, number, image, and more, that is inserted as an object when you tap the stamp's face on the display’s screen. - Page 40 Chapter 2 Using basic features To move, resize, rotate, or delete an object See To move, resize, and rotate an object on page 38 and To delete an object on the previous page. smarttech.com/kb/171415...
-
Page 41: Chapter 3: Using The Iq Apps
Chapter 3 Using the iQ apps The display comes with the following iQ apps: SMART Whiteboard Browser Input Screen Share kapp Whiteboard You can use these apps along with the Files Library and Apps Library to deliver lessons in a classroom or coordinate meetings and other collaborative activities. -
Page 42: Using The Files Library
Using Screen Share This feature is available only on the SMART Board 6000S, SMART Board 6000S Pro, SMART Board 6000S (C), and SMART Board 6000S (C) Pro models. You can share the screens from computers and mobile devices on the display wirelessly using Screen Share. -
Page 43: Using Smart Mirror
To learn how to use the other features of Screen Share, see Sharing your device’s screen to the display. Using SMART Mirror This feature is available only on the SMART Board 6000S (V3) and SMART Board 6000S (V3) Pro models. Information is coming soon. Using Input You can use the connectors the display to connect a room computer, guest laptops, and other input sources. -
Page 44: Installing Third-Party Apps
Using kapp Whiteboard This feature is available only on the SMART Board 6000S, SMART Board 6000S Pro, SMART Board 6000S (C), and SMART Board 6000S (C) Pro models. Use the kapp Whiteboard to write and erase notes on the display just as you do on a traditional dry erase board. -
Page 45: Chapter 4: Connecting Computers And Other Devices
Chapter 4 Connecting computers and other devices Installing and using SMART software Downloading and installing SMART software Using SMART software Connecting room computers and guest laptops Viewing a connected computer’s input Setting a connected computer’s resolution and refresh rate Using recommended cables Connecting USB drives, peripherals, and other devices Troubleshooting connected computers Connecting a SMART OPS PC module... - Page 46 Chapter 4 Connecting computers and other devices Software Description Notes SMART Product Drivers Software that enables the computer to detect Included with input from the display. SMART Learning Suite, SMART TeamWorks, and SMART Meeting Pro software SMART Ink Software that enables you to write and draw in Included with digital ink over applications, files, folders, SMART Learning Suite,...
- Page 47 Chapter 4 Connecting computers and other devices SMART Product Drivers and Ink are installed and used on the computer input of the display to enable touch and digital inking features. This supporting software is included with SMART’s software products, such as SMART Notebook, SMART Meeting Pro, and SMART TeamWorks, or is available for free download on...
-
Page 48: Connecting Room Computers And Guest Laptops
You can connect room computers and guest laptops to the display to view and interact with them. Connector panel Convenience panel SMART Board 6000S (C) and 6000S (V3) SMART Board 6000S (V3) SMART Board 6000S SMART Board 6000S and 6000S (C) - Page 49 You can charge devices connected to the USB Type-C receptacles. SMART Board 6000S (V3) models can provide up to 65 W to connected devices (the USB Type-C receptacle labeled USB-C 2 on the rear connector panel provides 30 W when an OPS PC module is installed).
- Page 50 Chapter 4 Connecting computers and other devices Input source Resolution Refresh rate HDMI 2 3840 × 2160 60 Hz HDMI 3 3840 × 2160 60 Hz 1920 × 1080 60 Hz USB Type-C 3840 × 2160 60 Hz If possible, set connected computers to these resolutions and refresh rates. See the computers’ operating system documentation for instructions.
-
Page 51: Connecting A Smart Ops Pc Module
USB 3.0 Type-A receptacles on the convenience panel (see images below). The SMART Board 6000S (V3) models also include a USB Type-C receptacle on the connector panel. All models include one USB 3.0 Type-A receptacle on the connector panel. - Page 52 You can connect USB drives, peripherals (such as keyboards), and other devices to these connectors and use the devices with the iQ experience, connected computers, and devices installed in the accessory slot, such as the SMART OPS PC. SMART Board 6000S (V3) SMART Board 6000S (C) SMART Board 6000S...
-
Page 53: Chapter 5: Troubleshooting
Chapter 5 Troubleshooting The display isn’t turning on The display is turning on when it shouldn’t The screen is blank or there’s a problem with the image on the screen There’s no sound or there’s a problem with the sound Touch isn’t working as expected The pens and erasers aren’t working as expected iQ apps aren’t working as expected... -
Page 54: The Display Is Turning On When It Shouldn't
Chapter 5 Troubleshooting The display is turning on when it shouldn’t Symptom Troubleshooting steps The display turns on or enters Ready Check for and, if possible, move the display away from the following: mode when it shouldn’t. Direct sunlight Bright lights Forced air ducts Plasma displays Infrared audio systems and other infrared sources... - Page 55 Make sure a replacement cable meets the required specifications. See Using recommended cables on page 50. (For SMART Board 6000S (V3) and Make sure that the computer supports Display Port Alternate Mode video via USB 6000S (C) models) Type-C.
-
Page 56: There's No Sound Or There's A Problem With The Sound
Chapter 5 Troubleshooting There’s no sound or there’s a problem with the sound Symptom Troubleshooting steps There’s no sound. If you’re using an external audio system, make sure it is turned on. Make sure the cables connecting the display to the computer are securely fastened. There is sound, but the volume is low. -
Page 57: Touch Isn't Working As Expected
Make sure SMART Product Drivers are installed and running on connected computers. (SMART Board 6000S (V3) models displays require SMART Product Drivers 12.18 later, and SMART Board 6000S (C) and 6000S model displays require SMART Product Drivers 12.14 or later). -
Page 58: Iq Apps Aren't Working As Expected
Chapter 5 Troubleshooting Symptom Troubleshooting steps The display responds to touch but not Reinstall or update SMART Product Drivers and SMART Ink on any connected to writing with a pen. computers. NOTE Some Tool Explorer pens and tools may work only in the iQ system's whiteboard, not on input from an external computer. -
Page 59: The Smart Ops Pc Module Isn't Working As Expected
Chapter 5 Troubleshooting Symptom Troubleshooting steps Lumio by SMART isn’t working as Troubleshooting common issues in Lumio by SMART. expected. SMART Ink isn’t working as expected. Troubleshooting SMART Ink. SMART Product Drivers isn’t working Troubleshooting SMART Product Drivers. as expected. The SMART OPS PC module isn’t working as expected Symptom Troubleshooting steps... - Page 60 Chapter 5 Troubleshooting The label features the display’s base model number (for example, SBID-6065-V3). Please note this number is different from the actual model/SKU number (for example SBID-6265-V3). You can also find the serial number in the iQ settings. Refer to the SMART Board 6000S and 6000S Pro series interactive displays installation and maintenance guide (smarttech.com/kb/171414) for more information.
- Page 61 SMART TECHNOLOGIES smarttech.com/support smarttech.com/contactsupport smarttech.com/kb/171415...