Table of Contents
Advertisement
Advertisement
Table of Contents

Related Manuals for HTC VIVE Pro 2


Summary of Contents for HTC VIVE Pro 2
- Page 1 VIVE Pro 2 User guide...
-
Page 2: Table Of Contents
System requirements Setting up VIVE Pro 2 for the first time What's the highest resolution on VIVE Pro 2, and how do I enable it? Can I mix versions of base stations, link boxes, or cables? Headset and link box Headset VIVE Link Box (2.0) - Page 3 Contents Settings Audio settings System Dashboard settings SteamVR VIVE Console Trademarks and copyrights Index...
- Page 4 About this guide About this guide We use the following symbols to indicate useful and important information: This is a note. It provides detailed information for setup, common questions, and what to do in specific situations. This is a tip. It will give you an alternative way to do a particular step or procedure that you may find helpful.
-
Page 5: Getting Started
Windows 10 system § Make sure to use VIVE Link Box (2.0) and VIVE Headset Cable (2.0) included with VIVE Pro 2. § NVIDIA GeForce RTX 20 series (Turing), AMD Radeon 5000 (Navi) series, or better and support for Display Stream Compression (DSC) are required to run the headset at full resolution. -
Page 6: Setting Up Vive Pro 2 For The First Time
SteamVR software, setting up the hardware, and defining your play area. Make sure to use VIVE Link Box (2.0) and VIVE Headset Cable (2.0) included with VIVE Pro 2. Download the setup file on your computer from www.vive.com/setup. Run the setup file. -
Page 7: What's The Highest Resolution On Vive Pro 2, And How Do I Enable It
5 for the graphics card requirements. § You use VIVE Link Box (2.0) and VIVE Headset Cable (2.0) that came with VIVE Pro 2. By default, the VIVE Console app automatically sets the headset display settings based on the capabilities of your graphics card. - Page 8 Getting started Use only the same version of base stations together. Different base station versions are not interchangeable.
-
Page 9: Headset And Link Box
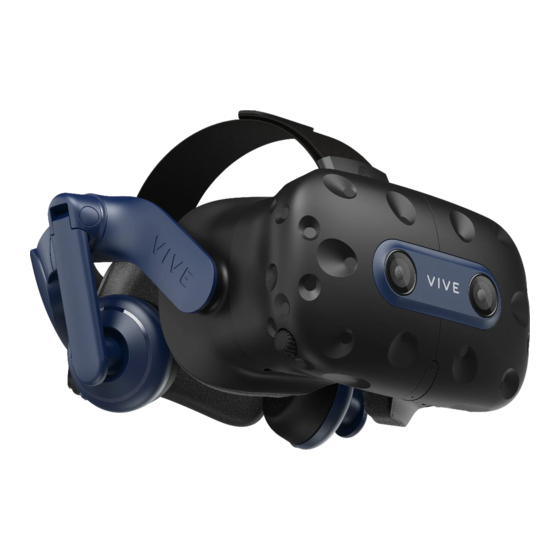
Headset and link box Headset and link box Headset About the VIVE Pro 2 headset The headset is your window to the VR environment. It has sensors that are tracked by the base stations. The sensors on the headset are sensitive. Do not cover or scratch the sensor lenses, including the proximity sensor. - Page 10 Headset and link box Back Headset cable clip Headset cable Volume button Adjustment dial Head pad Mic mute button Bottom and inner Nose rest Lens distance button Interpupillary distance (IPD) knob Face cushion Proximity sensor Lenses...
- Page 11 Headset and link box Putting on the VIVE Pro 2 headset Before putting on the headset, make sure to remove the protective film or paper cover from the lenses. Keep it in a safe place so you can protect your headset during storage or shipping.
- Page 12 Headset and link box Rotate the adjustment dial clockwise until the headset fits snugly, and then reattach the velcro fastener on the top band.
- Page 13 Headset and link box Adjust the earphones to a comfortable position over your ear, and then press the earphones towards your ears until they're properly in place. Make sure that the headset cable passes through the cable clip at the back of the headset, and is positioned straight down your back.
- Page 14 Use a ruler and a mirror. See below for detailed instructions. § Through experimentation. See below for detailed instructions. § § Using third-party apps or websites. Third-party apps or websites may collect personal data. HTC cannot guarantee accuracy of third-party apps or websites in measuring IPD.
- Page 15 Headset and link box Estimating your IPD in a mirror You can estimate your IPD with a ruler and mirror. This method requires a millimeter ruler. Stand directly in front of a mirror, and then hold the ruler up to your eyes. Make sure that the ruler is level.
- Page 16 If the image in one eye is clearer than the other, adjust the headset position. Repeat until images are clear for both eyes. Can I wear my prescription glasses while using VIVE Pro 2? Most glasses fit inside the headset. If you wear large prescription glasses, adjust the lens distance to increase the space in the headset.
- Page 17 Headset and link box Replacing the face cushion You can remove the face cushion to clean it. For more information, see Cleaning the face cushion on page 30. To remove the face cushion, peel off starting from both ends of the face cushion until it detaches from the headset.
- Page 18 Headset and link box Connecting a USB device to the VIVE Pro 2 headset You can connect a USB Type-C compatible third-party device to VIVE Pro 2 headset using a USB cable. Remove the face cushion from the headset visor by peeling it off from both ends.
- Page 19 Headset and link box Insert the cable connector of the device to the USB Type-C port on the headset. Align and push the tabs of the compartment cover onto their corresponding holes. Replace the face cushion by inserting its tab into the slot on the headset, and then aligning the hook and loop strips.
- Page 20 Headset and link box Removing the headset earphones If you need to, you can remove the headset earphones. Peel off the side cushions on the strap near the earphones. Use a Phillips-head screwdriver (PH00) to detach the earphone from the strap.
- Page 21 Headset and link box Gently pull each earphone until it detaches from the strap and then set it aside. Replace the cap with the screw you removed earlier. After detaching the earphones, make sure to put them in a safe place. Do not squeeze or press down the earphones.
- Page 22 ® You can use your own USB Type-C compatible earphones with the VIVE Pro 2 headset. If you want to use compatible 3.5mm earphones, you'll need a USB Type-C to 3.5mm audio adapter. Remove the headset earphones first, otherwise audio will still come out from them. For...
- Page 23 Headset and link box Carefully pull the flap on the left side of the headset visor to remove the compartment cover and access the headset cable ports. Insert the cable connector of your earphones on the USB Type-C port.
- Page 24 Headset and link box Align and push the tabs of the compartment cover onto their corresponding holes. Replace the face cushion by inserting its tab into the slot on the headset, and then aligning the hook and loop strips. Reattaching the head pad on the headset strap Always make sure that the head pad is attached to the headset.
- Page 25 Headset and link box Press the tabs on the head pad's right side into the slots on the headset strap to lock the tabs in place. Gently bend the base of the head pad's left side to align its tabs with the slots on the headset strap.
-
Page 26: Vive Link Box (2.0)
Activating the dual camera on page 76. VIVE Link Box (2.0) About VIVE Link Box (2.0) Use VIVE Link Box (2.0) and VIVE Headset Cable (2.0) to connect VIVE Pro 2 to your computer. Headset cable port Power button Power port... - Page 27 USB 3.0 port Connecting the headset to your computer Make sure to use VIVE Link Box (2.0) and VIVE Headset Cable (2.0) included with VIVE Pro 2. Connect the USB 3.0 cable, DisplayPort cable, and power adapter cable on their corresponding slots on the link box.
- Page 28 Headset and link box Can I use my laptop with VIVE Pro 2? Yes, as long as your laptop meets the system requirements for VIVE Pro 2. If your laptop does not have a DisplayPort port but has a Mini DisplayPort port instead, use the Mini DisplayPort-to-DisplayPort adapter that came with VIVE Pro 2.
-
Page 29: Product Care And Repair
VIVE Link Box (2.0) and VIVE Headset Cable (2.0). VIVE Link Box (2.0) and VIVE Headset Cable (2.0) come in the box when you purchase VIVE Pro 2. Check their labels. Make sure they match the image below. - Page 30 § When storing the headset, it is recommended to cover the lenses with the protective film or paper cover to help prevent accidental scratches. Cleaning the face cushion Before cleaning the face cushion, remove it first from the VIVE Pro 2 headset. For details, Replacing the face cushion on page 17.
- Page 31 Headset and link box Cleaning the headset lenses Use the cleaning cloth provided in the box to wipe the headset lenses. Make sure the cloth is dry before using it to clean the lenses. Wipe in a circular motion from the center to the outer edges of the lenses. While cleaning the lenses, do not scratch the lenses nor disassemble other parts of the headset.
- Page 32 Headset and link box How do I prepare the headset if I'm returning it for repair? Before sending in the headset for repair, remove the following accessories and store them for safekeeping: Face cushion Compartment cover Headset cable Follow these steps to properly detach the accessories from the headset: Remove the face cushion from the headset visor by peeling it off from both ends.
- Page 33 Headset and link box § Unplug the headset cable. After removing the accessories, the headset you'll send for return should look like the following:...
- Page 34 Headset and link box How do I reassemble the headset after repair? After receiving your repaired headset, properly attach the accessories before using your headset again. § Reconnect the headset cable. 1. Press and hold the lens distance button on the headset, and then pull out the visor to its farthest point.
- Page 35 Headset and link box 5. Loop the cable around the band of the strap next to it. The stopper on the headset cable should be positioned before the ridge. Make sure that the headset cable passes through the ridge and the cable clip at the back of the headset. Replace the compartment cover.
-
Page 36: Common Solutions
Common solutions How do I fix issues such as the display turning black or showing static? If you're experiencing display problems on VIVE Pro 2, try the following: § If the display turns black after you hot plug or unplug a cable but VIVE Console and SteamVR don't show any errors, try restarting VIVE Console. - Page 37 Headset and link box Option Description Restart the link For details, see Restarting the link box on page 28. For more information, you may refer to this SteamVR Troubleshooting article.
- Page 38 Headset and link box What can I do when the status light on the headset indicates an error? If you see that the status light is red, try these methods to resolve the issue: § Disconnect and reconnect the headset cable on the link box. §...
- Page 39 2. Open the SteamVR app, and then click Create System Report. 3. Make sure that VIVE Pro 2 devices connect via a USB xHCI port rather than to a port from a specific manufacturer, which might have a compatibility issue with VIVE Pro 2.
- Page 40 Is there a way to also hear from the computer what's in VR? You can duplicate the audio from VIVE Pro 2 to your computer. You can use another pair of headphones or speakers. From your computer, open the SteamVR app.
- Page 41 Under Universal Serial Bus controllers, find and right-click Generic SuperSpeed USB Hub RI, and then select Properties. To make sure that this is the VIVE Pro 2 device, click the Details tab, and then confirm that the VID/PID value contains the string 0BB4/0343.
-
Page 42: Base Stations
Base stations Base stations Base Station 2.0 About SteamVR Base Station 2.0 This hardware is included with the full kit, but not with the headset-only package. You can purchase them separately if you don't have the full kit. To order, go to the Accessories section on www.vive.com/product/. - Page 43 Base stations § Do not attempt to pry open the base stations as doing so could injure you or damage the product. § If the front panel is cracked or damaged, stop using the base stations and contact HTC Support.
- Page 44 Base stations Installing SteamVR Base Station 2.0 This hardware is included with the full kit, but not with the headset-only package. You can purchase them separately if you don't have the full kit. To order, go to the Accessories section on www.vive.com/product/.
- Page 45 Base stations Depending on the variant of your hardware, the status lights should be white or green. Once turned on, do not move or adjust the angles of the base stations as it could disrupt the tracking process. Otherwise, you will need to set up the play area again.
- Page 46 Base stations Tips for setting up SteamVR Base Station 2.0 This hardware is included with the full kit, but not with the headset-only package. You can purchase them separately if you don't have the full kit. To order, go to the Accessories section on www.vive.com/product/.
- Page 47 Base stations How many SteamVR Base Stations 2.0 can I use in a single setup? You can use up to four base stations in a single room covering 10 m x 10 m (32 ft 10 in x 32 ft 10 in).
- Page 48 Base stations Setting up additional base stations You can add more SteamVR Base Stations 2.0 to the standard setup. Follow these procedures in the order below to complete the process: Installing SteamVR Base Station 2.0 on page 44. § Configuring the base station channels on page 49.
- Page 49 Base stations What are the minimum and maximum play area when using more than two SteamVR Base Stations 2.0? The minimum play area remains to be at 2 m x 1.5 m (6 ft 6 in x 5 ft) , and could support sitting/ standing setup with four base stations in a row.
- Page 50 Base stations Under Base Station 2.0, click Configure Base Station Channels. SteamVR will scan for base stations in the play area. Once complete, you'll see a list of base stations. If you have base stations that have not been detected, click Scan For More. To change its channel, click on a base station link.
- Page 51 For best results, install SteamVR Base Station 2.0 using a mounting kit, which is provided as an in-box item in VIVE Pro 2 full kit. If you bought more SteamVR Base Station 2.0 units, you can separately purchase a similar mounting kit from a third-party supplier.
- Page 52 Base stations To adjust the angle of the base station, loosen the clamping ring while carefully holding the base station to prevent it from falling. Tilt the base station toward the play area. To fix the angle of the base station, tighten the clamping ring back in.
-
Page 53: Base Station 1.0
Base Station 1.0 About VIVE Base Station 1.0 If you have Base Station 1.0, you can still use them with VIVE Pro 2. § The base stations beam signals to the headset and controllers. Do not cover the front panel with any material. - Page 54 Base stations Installing Base Station 1.0 Before installing the base stations, decide first whether you want to set up a room-scale or seated/standing-only play area. See Planning your play area on page 69. During unboxing, remove the thin film that covers the front panel of the base stations. Mount the base stations diagonally at opposite corners of your space.
- Page 55 Base stations Once turned on, do not move or adjust the angles of the base stations as it could disrupt the tracking process. Otherwise, you will need to set up the play area again.
- Page 56 Base stations Tips for setting up Base Station 1.0 You may set up the base stations in a way that's suitable for your place. For best results, you may follow these recommendations: Mount the base stations diagonally and above head height, ideally more than 2 m (6 §...
- Page 57 Base stations Tighten the wingnut to the base station to secure it in place. To adjust the angle of the base station, loosen the clamping ring while carefully holding the base station to prevent it from falling. Tilt the base station toward the play area. Make sure it has an unobstructed view of the other base station.
-
Page 58: Base Station 1.0 And 2.0 Faqs
Base stations While pressing the Channel button at the back of the base station, plug in the base station’s power adapter. Once the base station is detected by the SteamVR app, the firmware update will start automatically. Do not unplug the micro-USB cable or power cable before the firmware update is complete. Doing so could result in a firmware error. - Page 59 Base stations What does the status light on the base stations mean? Depending on the type of base stations you're using and their status, their LED may show the following: Base Station 2.0 Base Station 1.0 § Depending on the variant of your §...
-
Page 60: Controllers
Controllers Controllers About VIVE Controllers (2018) This hardware is included with the full kit, but not with the headset-only package. You can purchase them separately if you don't have the full kit. To order, go to the Accessories section on www.vive.com/product/. Product availability may vary; please contact customer care with questions. -
Page 61: Charging The Controllers
Tracking sensor Trigger Grip button First-generation VIVE controllers work with VIVE Pro 2 and Base Station 1.0. They use the same ports and hardware controls as VIVE Controllers (2018). Charging the controllers This hardware is included with the full kit, but not with the headset-only package. You can purchase them separately if you don't have the full kit. -
Page 62: Attaching The Lanyards To The Controllers
Controllers Click Devices. Click Pair Controller. Follow the instructions to complete the process. The status light shows as blinking blue while the pairing is in progress. The status light turns solid green when the controllers are paired with the headset. Attaching the lanyards to the controllers This hardware is included with the full kit, but not with the headset-only package. -
Page 63: Updating Controller Firmware
Controllers Updating controller firmware This hardware is included with the full kit, but not with the headset-only package. You can purchase them separately if you don't have the full kit. To order, go to the Accessories section on www.vive.com/product/. Product availability may vary; please contact customer care with questions. -
Page 64: What Does The Status Light On The Controllers Mean
Controllers What does the status light on the controllers mean? This hardware is included with the full kit, but not with the headset-only package. You can purchase them separately if you don't have the full kit. To order, go to the Accessories section on www.vive.com/product/. -
Page 65: What Can I Do If The Controller Trackpad Is Oversensitive
Controllers Hover your cursor on the icon of the controller that's not tracked. Click Identify controller. The status light on the controller rapidly flashes white. For more information, you may refer to the SteamVR Troubleshooting page. What can I do if the controller trackpad is oversensitive? This hardware is included with the full kit, but not with the headset-only package. -
Page 66: What Should I Do If My Controller Won't Turn On
Controllers What should I do if my controller won't turn on? This hardware is included with the full kit, but not with the headset-only package. You can purchase them separately if you don't have the full kit. To order, go to the Accessories section on www.vive.com/product/. -
Page 67: How Do I Recover My Controller After An Interrupted Update
Controllers How do I recover my controller after an interrupted update? This hardware is included with the full kit, but not with the headset-only package. You can purchase them separately if you don't have the full kit. To order, go to the Accessories section on www.vive.com/product/. -
Page 68: Play Area
The play area sets the virtual boundaries of VIVE Pro 2. Your interaction with VR objects happens within the play area. VIVE Pro 2 is designed for room-scale setup, but you can also use it for standing and seated experiences. -
Page 69: Planning Your Play Area
Play area Planning your play area Plan the size of your play area based on the available space you have. Room-scale setup needs a minimum play area of 2 m x 1.5 m (6 ft 6 in x 5 ft). Examples of room- scale setup: Base Station 2.0 Base Station 1.0... -
Page 70: Setting Up A Standing-Only Play Area
Play area Base Station 1.0 Setting up a standing-only play area Choose this option if you only want to experience VR in a seated or standing position. From your computer, open the SteamVR app. Click , and then select Room Setup Standing only. Review the prompts and follow the on-screen instructions to complete the process. -
Page 71: Setting Up A Room-Scale Play Area
Play area Setting up a room-scale play area Choose to set up a room-scale play area to enjoy moving around and fully engage with the VR experience. From your computer, open the SteamVR app. Click , and then select Room Setup Room-scale. Review the prompts and follow the on-screen instructions to complete the process. -
Page 72: Verifying Your Setup
After setting up, how do I turn the VIVE system on? Make sure you've followed these steps to get your VIVE Pro 2 system ready for use. From your computer, open the SteamVR app. Make sure your base stations are powered. -
Page 73: What Is The Recommended Space For The Play Area
Play area What is the recommended space for the play area? Space requirements for the play area vary, depending on the type of base stations you're using. § For Base Station 2.0, room-scale setup requires a minimum play area of 2 m x 1.5 m (6 ft 6 in x 5 ft). -
Page 74: Audio Settings
Settings Settings Audio settings Choosing whether to hear ambient sound Choose whether you want to hear sounds from the real world while you're in VR. While in VR, press the System button on either controller to open the System Dashboard. Select VIVE to go to the VIVE Dashboard. -
Page 75: System Dashboard Settings
§ Change settings, such as style of the collision bounds in Chaperone or the in-headset background § Turn the VIVE Pro 2 system off To bring up the dashboard, press the System button on either controller. Changing the Chaperone settings The Chaperone shows a grid whenever you're close to the bounds of your play area. -
Page 76: Steamvr
You can also change the background in the SteamVR app. SteamVR Activating the dual camera You need to enable the settings for the dual camera of VIVE Pro 2 before you can use it in VR. From your computer, open the SteamVR app. Click , and then select Settings Camera. - Page 77 Settings Click , and then select Settings Camera. Turn on the options you want. § Show Camera on Controller A screen appears beside the controller to show your actual surroundings. § Show Camera at Room Edge Shows your actual surroundings when you get close to your play area boundaries.
- Page 78 Settings How can I capture screenshots in VR? While in VR, press the System button and the trigger at the same time. You'll see a notification when the screenshot is saved. You can access screenshots directly from the Steam client by clicking View Screenshots. To find screenshots from apps downloaded in VIVEPORT, navigate to the Steam installation folder.
-
Page 79: Vive Console
Settings Turn off and then turn on the link box. Restart the SteamVR app. For more information, you may refer to the SteamVR Troubleshooting page. How can I opt-in to SteamVR Beta? From your computer, open the Steam app. On the left panel, click the drop-down menu and select Tools. Right-click SteamVR, and then and select Properties. - Page 80 § The VIVE Wireless Adapter supports a maximum resolution of 3264 x 1632 at a 90 Hz refresh rate when used with VIVE Pro 2. § When using VIVE Pro 2 with the VIVE Wireless Adapter, make sure to use the 21-watt QC 3.0 power bank (model 148DUT). Avoid using third-party power banks.
- Page 81 Check that the progress is complete. Reinstalling USB drivers If you're experiencing issues with VIVE Pro 2, one way that may help to resolve them is to uninstall and reinstall the USB drivers used by the headset. From your computer, open the VIVE Console app.
- Page 82 Settings Joining the VIVE Pro 2 beta program Opting in to the VIVE Pro 2 beta program lets you receive preview builds and give feedback. Beta software may be unstable and not work as intended. From your computer, open the VIVE Console app.
- Page 83 Settings Error Issue Steps to resolve issue code DisplayPort cable is 1. Make sure the DisplayPort cable is plugged in to the link disconnected or no box and computer. video stream detected. 2. On your computer, go to Control Panel System and Security System.
- Page 84 Settings Error Issue Steps to resolve issue code No audio coming from 1. In the Windows audio settings, adjust the volume level the headset. and make sure the volume is not muted. 2. If the issue persists, in the Windows task tray, right-click the volume icon Sounds.
- Page 85 Settings Error Issue Steps to resolve issue code Calibration data is lost. Contact Customer Care. For assistance on how to fix this, contact Customer Care. Oops! This should not Reinstall the VIVE software. 203, 205, happen. Reinstall VIVE 206, 207 software to fix this.
- Page 86 Allow apps to access your camera is enabled. Then, another application. restart VIVE Console. 2. If the issue persists, check if the VIVE Pro 2 camera is occupied by another Windows application. If yes, close the application using the camera, and then restart VIVE Console.
- Page 87 Settings Error Issue Steps to resolve issue code You've exceeded the There's a limit to the number of monitors you can connect maximum number of to your graphics card. Depending on the selected headset monitors. display resolution, do the following: §...
-
Page 88: Trademarks And Copyrights
© 2021 HTC Corporation. All Rights Reserved. VIVE, the VIVE logo, VIVEPORT, the VIVEPORT logo, HTC, the HTC logo, and all other HTC product and service names are trademarks and/or registered trademarks of HTC Corporation and its affiliates in the U.S. and other countries. -
Page 89: Index
Index Index - putting on - replacing the face cushion Audio mode Link box Base stations - about 42, 53 - about - connecting the headset - channel configuration - cleaning 44, 54 - installing 51, 56 - mounting with the kit Motion compensation - multiple setup 47, 48... - Page 90 Index VIVE Console - beta program - Firmware update - motion compensation - reinstall USB drivers Vive system - turning on...