Table of Contents
Advertisement
Quick Links
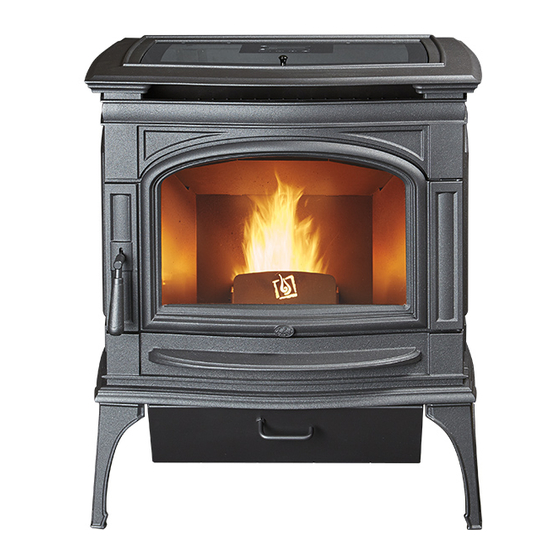
Deerfield
Pellet Stove
-- Please read this entire manual before
installation and use of this pellet fuel-
burning room heater. Failure to follow
these instructions could result in
property damage, bodily injury, or even
death.
-- Contact local building or fire officials
about restrictions and installation
inspection requirements in your area.
-- Save these instructions.
Installer: After installation give this manual to the home-
owner and explain the operation of this heater.
Consumer: Retain this manual for future reference.
$10.00
Part # 100-01550
Copyright 2020, T.I.
12/18/20
Horizontal or Vertical Vent
•
•
Freestanding Stove
•
Mobile Home Approved
•
Class A Chimney Retrofit
•
Hearth Stove into Existing
Masonry Chimney, Masonry
Fireplace, or Z.C. Fireplace
Tested and Listed by:
ASTM E1509-12 ULC-S627
www.travisproducts.com
12521 Harbour Reach Drive SW
Mukilteo, WA 98275
Advertisement
Table of Contents

Related Manuals for Lopi Deerfield


Summary of Contents for Lopi Deerfield
- Page 1 Deerfield Pellet Stove Horizontal or Vertical Vent • • Freestanding Stove • Mobile Home Approved • Class A Chimney Retrofit • Hearth Stove into Existing Masonry Chimney, Masonry Fireplace, or Z.C. Fireplace -- Please read this entire manual before Tested and Listed by: installation and use of this pellet fuel- burning room heater.
-
Page 2: Introduction
Introduction Introduction We welcome you as a new owner of a Deerfield pellet stove. In purchasing a pellet stove you have joined the growing ranks of concerned individuals whose selection of an energy system reflects both a concern for the environment and aesthetics. The Deerfield pellet stove is one of the finest home heaters the world over. -
Page 3: Table Of Contents
Monthly Maintenance (while appliance is in use) ... 48 #99200139) .............. 13 Door Parts ............... 53 Alcove Installation Requirements ......14 Wiring Diagram ............55 Restrictor Adjustment ........... 14 © Travis Industries 12/18/20 - 1550 Deerfield Stove... - Page 4 This heater is designed and approved to prevent the possibility of a house for pelletized wood fuel only. fire. The instructions must be strictly adhered to. Do not use makeshift methods or compromise in the installation. © Travis Industries 12/18/20 - 1550 Deerfield Stove...
- Page 5 INSTALLED IN THE BEDROOM accumulation of soot, creosote, and (per H.U.D. requirements). Check ash, and smoke spillage or fire in with local building officials. your home. © Travis Industries 12/18/20 - 1550 Deerfield Stove...
- Page 6 This wood heater has a manufacturer-set minimum low burn rate that must not be altered. It is against federal regulations to alter this setting otherwise operate this wood heater in a manner inconsistent with operating instructions in this Manual. U.S. and Foreign Patents Pending. © Travis Industries 12/18/20 - 1550 Deerfield Stove...
-
Page 7: Heating Specifications
10,916 to 35,777 BTU/hr. net output, and emission value of 1.23g/h. Efficiency This model was tested for efficiency using method B415.1-10 and was determined to have a weighted average Higher heating value (HHV) Overall Heating Efficiency (OHE) of 77%. © Travis Industries 12/18/20 - 1550 Deerfield Stove... -
Page 8: Before You Begin
Residential or Mobile Home (see the section "Mobile Home Requirements") Alcove Compatible (see the section "Alcove Installation") Horizontal or Vertical Vent Outside Air Compatible Vent with L-Vent, L-Vent Fireplace Liner, or Type “A” Chimney (with adapter) © Travis Industries 12/18/20 - 1550 Deerfield Stove... -
Page 9: Planning The Installation
WARNING: Connection to reverse polarity or un-grounded circuit may damage your heater’s circuit board. This may cause a safety hazard, improper operation, and void your warranty. Do not route the electrical cord underneath, in front of, or over the heater. © Travis Industries 12/18/20 - 1550 Deerfield Stove... -
Page 10: Clearances
"Tee" and add the vent clearance. ** The floor protection must extend 2” (51mm) beyond the pipe – all vent clearances must be met. © Travis Industries 12/18/20 - 1550 Deerfield Stove... -
Page 11: Venting The Pellet Stove
20 Feet section “Restrictor Adjustments” for details. 15 Feet Note: To achieve optimum performance, we recommend keeping the vent as short as possible 10 Feet (horizontal run especially). 5 Feet 0 Feet © Travis Industries 12/18/20 - 1550 Deerfield Stove... -
Page 12: Pellet Vent Type
Minimum 3' (915mm) clearance from any forced air intake of any other appliance Minimum 2' (610mm) clearance below eaves or overhangs Minimum 1' (458mm) clearance horizontally from combustible wall Must be a minimum of 2' (610mm) above the roof © Travis Industries 12/18/20 - 1550 Deerfield Stove... -
Page 13: Mobile Home Requirements
3” Air Duct Air may be drawn from a ventilated crawl space. Outside air entrance must be placed so it IDB1266 does not become blocked by snow or debris. © Travis Industries 12/18/20 - 1550 Deerfield Stove... -
Page 14: Alcove Installation Requirements
Another symptom of too much air is the heater “blowing the fire out” – a condition in which the pellets burn faster than they are Less Air fed (this is most common on low heat settings). © Travis Industries 12/18/20 - 1550 Deerfield Stove... -
Page 15: External Thermostat Installation
Connect the leads from the thermostat to the two quick-connect tabs on the back of the heater. Once the external thermostat is installed, you will need to configure the heater to disable the internal thermostat. See the instructions on page 32. © Travis Industries 12/18/20 - 1550 Deerfield Stove... -
Page 16: Installation Examples
Minimum Floor Protection NOTE: Travis Industries recommends a minimum vertical vent of 5’ to ensure adequate draft during a power outage. Install the vent at the clearance specified by the vent manufacturer. © Travis Industries 12/18/20 - 1550 Deerfield Stove... - Page 17 "T" prior to installation to verify 2" Min. 2” Min. it fits. Floor Protection Outside air may be drawn from a ventilated crawl space. Install vent at clearance specified by the vent manufacturer. © Travis Industries 12/18/20 - 1550 Deerfield Stove...
- Page 18 "L" Vent Vent Clearance* 2" Min. Floor Protection Outside air may be drawn from a ventilated crawl space. Install vent at clearance specified by the vent manufacturer. © Travis Industries 12/18/20 - 1550 Deerfield Stove...
- Page 19 Lintel 6" Min. Outside air may be drawn from the ash cleanout. NOTE: you may need a short horizontal section here to clear the lintel and allow the hopper lid to open. © Travis Industries 12/18/20 - 1550 Deerfield Stove...
- Page 20 "L" Vent Flex Section Allow room for the hopper lid to open 6" Min. NOTE: you may need a short horizontal section here to clear the lintel and allow the hopper lid to open. © Travis Industries 12/18/20 - 1550 Deerfield Stove...
- Page 21 Cover Plate (non-combustible) Storm Collar Seal the cover plate with silicone. "L" Vent Flex Section "L" Vent Sections Vent Clearance* 6" Min. Clean-Out Access Install vent at clearance specified by the vent manufacturer. © Travis Industries 12/18/20 - 1550 Deerfield Stove...
-
Page 22: Safety Notice
DO NOT USE CHEMICALS OR FLAMMABLE FLUIDS TO START THIS HEATER. Touch Screen Controls The touch screen is located on the hopper lid. Fan Setting Slider Digital Display Heat Setting Slider On/Off Menu Thermostat Auto-Fan Button Button Button Button © Travis Industries 12/18/20 - 1550 Deerfield Stove... -
Page 23: Loading Pellets
The door gasket contacts the painted surface on the front of the heater. To prevent the paint from bonding to the door gasket, you must burn the heater for approximately 1 hour, then open and close the door to break any bonding. © Travis Industries 12/18/20 - 1550 Deerfield Stove... -
Page 24: Simple Mode Vs Advance Mode
Simple Mode but it additionally allows you to manually control the heat output of the stove (non-thermostat operation). NOTE: See the section “Advanced Mode - Operation” for an explanation of user-controlled options. © Travis Industries 12/18/20 - 1550 Deerfield Stove... -
Page 25: Simple Mode -Options
If the stove is cycling often, reduce the heat output. Screen Lock Use the Screen Lock feature to disable unwanted touch-screen input. This is typically done to prevent children or pets from inadvertently adjusting the heater. © Travis Industries 12/18/20 - 1550 Deerfield Stove... -
Page 26: Simple Mode - Operation
TIP: If the stove turns on and off repeatedly, you may wish to turn the heat output to a lower setting. This provides a more consistent heat output, eliminating the need for the thermostat to turn the heater on and © Travis Industries 12/18/20 - 1550 Deerfield Stove... - Page 27 45 minutes. During this time, the screen will display “Cooling…” and will show the temperature that the thermostat is set to, as well as the room temperature (see right). © Travis Industries 12/18/20 - 1550 Deerfield Stove...
-
Page 28: Fan Setting
Heat Setting. If the heater is on high, the fan will be on high. If the heater is on low, the fan will be on low. When on, the Auto-Fan Button will display a blue LED light. NOTE: the fan slider will “mirror” the heat slider when the heat slider is adjusted. © Travis Industries 12/18/20 - 1550 Deerfield Stove... -
Page 29: Dealer Service Mode
The stove has an area that is intended for dealers and service people. This area contains tools and settings to assist a trained professional in troubleshooting. This area is passcode protected to prevent accidental changes to these settings. © Travis Industries 12/18/20 - 1550 Deerfield Stove... -
Page 30: Advanced Mode -Options
Screen Lock Use the Screen Lock feature to disable unwanted touch-screen input. This is typically done to prevent children or pets from inadvertently adjusting the heater. © Travis Industries 12/18/20 - 1550 Deerfield Stove... -
Page 31: Advance Mode - Operation
20 minutes. takes approximately 45 minutes. The On/Off Button will transition to GREEN. The On/Off Button will transition to RED. Manual Mode - Adjusting the Heat Setting Use the Heat Setting slider to adjust the heat Heat Setting output. © Travis Industries 12/18/20 - 1550 Deerfield Stove... - Page 32 To Shut Down Press the On/Off Button on the touch screen. The heater will begin the shut-down process, which takes approximately 45 minutes. © Travis Industries 12/18/20 - 1550 Deerfield Stove...
-
Page 33: Thermostat Programs
The burn rate decreases to Level 1 (low) and remains at this level until there is a call for heat by the thermostat (the thermostat is closed), then resumes corresponding with the setting on the control panel. © Travis Industries 12/18/20 - 1550 Deerfield Stove... -
Page 34: Fan Setting
Heat Setting. If the heater is on high, the fan will be on high. If the heater is on low, the fan will be on low. When on, the Auto-Fan Button will display a blue LED light. NOTE: the fan slider will “mirror” the heat slider when the heat slider is adjusted. © Travis Industries 12/18/20 - 1550 Deerfield Stove... -
Page 35: Heater Status
NOTE: If the T-Stat Source is set for external this setting will not appear. T-Stat Idle Mode Use the Heat Setting slider on the touch screen to set the Thermostat Idle Mode (see page 25). © Travis Industries 12/18/20 - 1550 Deerfield Stove... -
Page 36: Screen Lock
The stove has an area that is intended for dealers and service people. This area contains tools and settings to assist trained professionals in troubleshooting. This area is passcode protected to prevent accidental changes to these settings. © Travis Industries 12/18/20 - 1550 Deerfield Stove... -
Page 37: Menu Flow Chart
Operation Menu Flow Chart © Travis Industries 12/18/20 - 1550 Deerfield Stove... -
Page 38: Power Outages
Occasionally you may hear a "click" as a pellet is sheared. Metering Auger Motor You will hear this motor turning intermittently as it feeds pellets. You may also hear the pellets drop into the feed tube. © Travis Industries 12/18/20 - 1550 Deerfield Stove... -
Page 39: Stove Maintenance
If the ashes are disposed of by burial in soil or otherwise locally dispersed, they should be retained in the closed container until all cinders have been thoroughly cooled. © Travis Industries 12/18/20 - 1550 Deerfield Stove... - Page 40 Opening the Door MAKE SURE THE HEATER HAS FULLY COOLED (APPROXIMATELY 45 MINUTES) BEFORE OPENING THE DOOR AND CONDUCTING SERVICE. Lift the handle and pull to open the door as shown below. © Travis Industries 12/18/20 - 1550 Deerfield Stove...
- Page 41 When in place, make sure the visual deflector is pressed down fully on both sides. If it is not fully seated, airflow to the burn platform may be displaced and the appliance may burn poorly. © Travis Industries 12/18/20 - 1550 Deerfield Stove...
- Page 42 Remove the wedge that locks the burn platform in place. If the wedge is difficult to dislodge, use the cleaning tool to rock the wedge left to right. NOTE: An extra wedge is included with the heater in case the original is misplaced. © Travis Industries 12/18/20 - 1550 Deerfield Stove...
- Page 43 Maintenance Remove the burn platform from the platform holder. Clean the inside of the platform holder. © Travis Industries 12/18/20 - 1550 Deerfield Stove...
- Page 44 3. Lift up on one of the side panels to release the (2) tabs on the bottom of the panel from the notches in the firebox. Guide the bottom of the panel forward until it can be lowered into the ashpan area. © Travis Industries 12/18/20 - 1550 Deerfield Stove...
- Page 45 Lift the rear fireback straight up until the legs of the fireback can clear the mounting studs. Tilt it forward and guide it out of the firebox. 7. The back of the firebox is now visible © Travis Industries 12/18/20 - 1550 Deerfield Stove...
- Page 46 Open the doors and clean the glass with a non-abrasive glass cleaner and rag. NOTE: do not allow glass cleaner (or other liquid) to soak into the gasket – this may compromise the gasket cement. © Travis Industries 12/18/20 - 1550 Deerfield Stove...
- Page 47 3. Remove the ashpan from the appliance and properly dispose of the ashes (see “ Ashes ” on page 39 for details). You may wish to clean the area below the firebox. © Travis Industries 12/18/20 - 1550 Deerfield Stove...
-
Page 48: Monthly Maintenance (While Appliance Is In Use)
Open the ashpan access door and inspect the gasket around the door. Re-attach or replace the gasket if necessary. NOTE: Ask your authorized Travis dealer to demonstrate how to check a door seal. © Travis Industries 12/18/20 - 1550 Deerfield Stove... - Page 49 Pull the left side of the plate forward and slide the plate out of the unit. 2. Clean the exhaust channel with the bottle brush or vacuum. Do not vacuum the pressure switch nipple. © Travis Industries 12/18/20 - 1550 Deerfield Stove...
- Page 50 Lift up on the panel using the handle on the top edge to disengage the bottom of the panel from the floor of the stove. Blowers Impellers are accessible for maintenance without removing blower. © Travis Industries 12/18/20 - 1550 Deerfield Stove...
- Page 51 2. Remove the ash pan and the exhaust cover plate. Locate the pressure switch nipple and make sure there is no debris in the opening (use a brush to clean – do not use a vacuum cleaner). Return the stove to its proper configuration. Exhaust outlet Pressure Switch Nipple © Travis Industries 12/18/20 - 1550 Deerfield Stove...
- Page 52 “HIGH”. The hopper lid switch will need to be held in the closed position (AGP appliances) or the hopper lid will need to be closed and you can look through the glass lid (Deerfield & Foxfire stoves) for the feed system to turn.
-
Page 53: Door Parts
NOTE: Do not stretch the gasket. You may need to open and close the door repeatedly to get the gasket to seat fully. Replacing the Door Handle See the illustration above for a component list (see page 48 for details on adjusting the door). © Travis Industries 12/18/20 - 1550 Deerfield Stove... - Page 54 NOTE: It will be helpful to have another person hold the door in place while removing the screws. To remove the door, open the door, then remove the four hex screws securing the hinges and remove the door and hinges as one assembly. Screw locations © Travis Industries 12/18/20 - 1550 Deerfield Stove...
-
Page 55: Wiring Diagram
Maintenance Wiring Diagram FOXFIRE / DEERFIELD WIRING POWER BRANCH Line White Neutral Ground PIN 1 Gray Green Chassis PIN 5 White Fuse - 5 Amp PIN 3 Gray PIN 2 Orange Comb. Blower PIN 7 Yellow Igniter PIN 4 Blue Conv. - Page 56 Safety Label © Travis Industries 12/18/20 - 1550 Deerfield Stove...
- Page 57 17. This 7-year warranty is the only warranty supplied by Travis Industries, Inc., the manufacturer of the appliance. All other warranties, whether express or implied, are hereby expressly disclaimed and the purchaser’s recourse is expressly limited to the warranties set forth herein. © Travis Industries 12/18/20 - 1550 Deerfield Stove...
- Page 58 Check with your dealer in advance for any costs to you when arranging a warranty call. Mileage or service charges are not covered by this warranty. This charge can vary from store to store. © Travis Industries 12/18/20 - 1550 Deerfield Stove...
- Page 59 Limited 7 Year Warranty © Travis Industries 12/18/20 - 1550 Deerfield Stove...
- Page 60 Fireplace Hearth Stove ....... 20 Want to know more? Scan this code with a QR reader on your cell phone or use the URL below to watch a video of how to use the Deerfield/Foxfire stove. https://vimeo.com/243169488 © Travis Industries 12/18/20 - 1550...
- Page 61 Limited 7 Year Warranty © Travis Industries 12/18/20 - 1550 Deerfield Stove...