Juniper SRX320 Quick Start Manual
Services gateway
Hide thumbs
Also See for SRX320:
- Hardware manual (154 pages) ,
- Quick start manual (14 pages) ,
- Setup (8 pages)
Table of Contents
Advertisement
Quick Start Guide
SRX320 Services Gateway
IN THIS GUIDE
Plug and Play | 11
Next Steps | 12
Reference | 12
SRX320 Services Gateway Overview
The SRX320 Services Gateway consolidates security, routing, switching, and WAN interfaces for small distributed
enterprises. With advanced threat mitigation capabilities, the services gateway provides cost-effective and secure
connectivity across distributed enterprises.
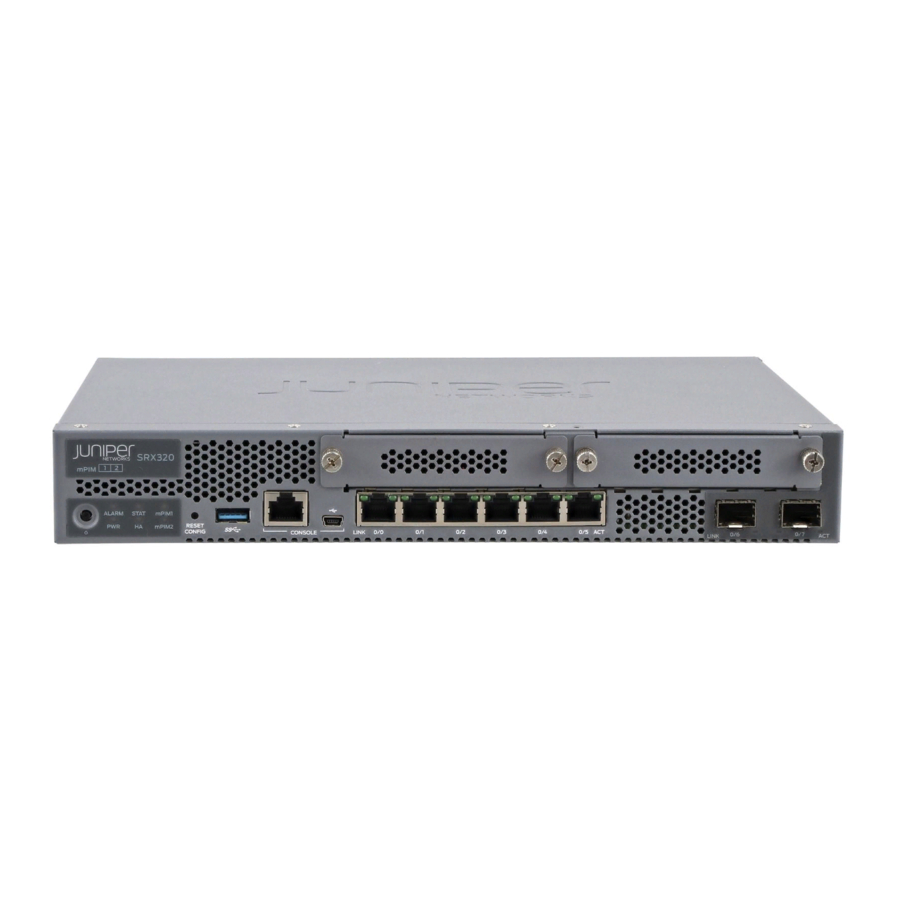
With a desktop form-factor chassis, the SRX320 Services Gateway has six 1-Gigabit Ethernet ports, two 1-Gigabit Ethernet
SFP ports, 4 GB of DRAM memory, and 8 GB of flash memory. The SRX320 Services Gateway is available with or without
Power over Ethernet (PoE) capability. In the PoE model, the six Ethernet ports are PoE capable.
Package Contents
The SRX320 Services Gateway is shipped with the following parts:
Advertisement
Table of Contents

Related Manuals for Juniper SRX320


Summary of Contents for Juniper SRX320
-
Page 1: Table Of Contents
With a desktop form-factor chassis, the SRX320 Services Gateway has six 1-Gigabit Ethernet ports, two 1-Gigabit Ethernet SFP ports, 4 GB of DRAM memory, and 8 GB of flash memory. The SRX320 Services Gateway is available with or without Power over Ethernet (PoE) capability. In the PoE model, the six Ethernet ports are PoE capable. -
Page 2: Srx320 Front Panel And Rear Panel
Register product serial numbers on the Juniper Networks website and update the installation base data if there is any addition or change to the installation base or if the installation base is moved. Juniper Networks will not be held accountable for not meeting the hardware replacement service-level agreement for products that do not have registered serial numbers or accurate installation base data. -
Page 3: Factory-Default Settings
Average heat dissipation 157 BTU/hr 755 BTU/hr Relative humidity 5% to 90%, noncondensing 5% to 90%, noncondensing Factory-Default Settings The SRX320 device is shipped with the following factory-default settings: Table 1: Security Policies Source Zone Destination Zone Policy Action trust trust... -
Page 4: Install The Device In A Rack
Warnings. You can install the SRX320 on a desktop, on a wall, or in a rack. This procedure shows you how to install it in a rack. You’ll need to order a rack mount kit that is appropriate for your installation (see... - Page 5 NOTE: The mounting kits are not shipped with the device and must be ordered separately. Table 6: Rack Mount Kits for the SRX320 Rack Mount Kit With Power Supply Rack Mount Kit Without Power Model Adapter Tray Supply Adapter Tray...
- Page 6 2. Place the power supply adapter in the tray. 3. Lift the SRX320 and position it in the rack. Line up the bottom hole in the mounting brackets with a hole in each rack rail, making sure the SRX320 is level.
-
Page 7: Connect The Grounding Cable (Optional)
Figure 5: Securing the Chassis to the Rack 5. Check that the mounting brackets on each side of the rack are lined up with each other. The SRX320 Services Gateway can also be mounted on a desk or a wall. For details, see the SRX320 Services Gateway Hardware Guide. -
Page 8: Power On The Device
Figure 6: Connecting the Grounding Cable Grounding point on the chassis Grounding lug Grounding screw Power On the Device NOTE: Before connecting the device to the power supply, attach an ESD strap to an ESD point and place the other end of the strap around your bare wrist. 1. -
Page 9: Configure Root Authentication
Table 7: LED States State ALARM Solid amber (noncritical alarm). Solid red (critical alarm). Off (no alarms). STAT Solid green (operating normally). Solid red (error detected). Solid green (receiving power). Solid red (power failure). Off (no power). Solid green (all HA links are available). Solid amber (some HA links are unavailable). - Page 10 RJ-45 cable Ethernet port The SRX320 functions as a DHCP server and automatically assigns an IP address to the laptop. 3. Ensure that the management device acquires an IP address on the 192.168.1.0/24 network from the device. If an IP address is not assigned to the management device, manually configure an IP address in the 192.168.1.0/24 network.
-
Page 11: Plug And Play
Plug and Play The SRX320 already has factory-default settings configured to make it a plug and play device. So all you have to do to get the SRX320 up and running is connect it to your LAN and WAN networks. -
Page 12: Next Steps
Cluster (HA)—Set up the SRX320 in chassis cluster mode. Passive—Set up the SRX320 in Tap mode. Tap mode enables the SRX320 to passively monitor traffic flows across a network. Next Steps For information on configuring features on your services gateway, refer to the following:...