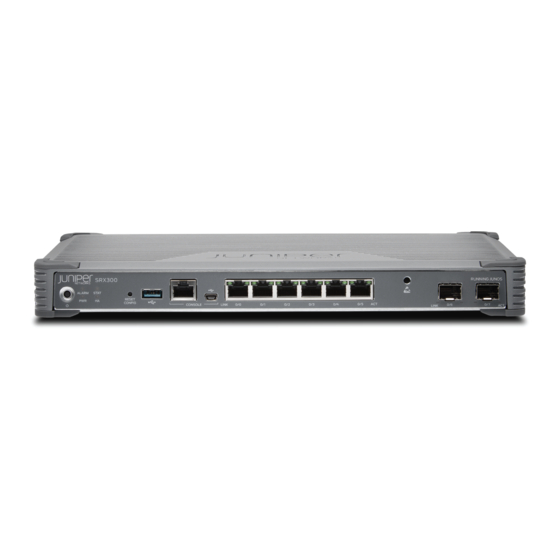
Juniper SRX300 How To Set Up
Services gateway
Hide thumbs
Also See for SRX300:
- Reference manual (142 pages) ,
- Hardware manual (134 pages) ,
- User manual (128 pages)
Advertisement
How to Set Up Your SRX300 Services Gateway
The SRX300 Services Gateway consolidates security, routing, switching,
and WAN interfaces for small retail offices. With advanced threat mitigation
capabilities, the services gateway provides cost-effective and secure
connectivity.
With a desktop form-factor chassis, the SRX300 Services Gateway has six
1 G Ethernet ports, two 1 G SFP ports, 4 GB of DRAM memory, and 8 GB of
flash memory.
Package Contents
SR X3 00
SRX300
RJ45 cable
• End-User License Agreement
• Safety Guide
• Quick Start Guide
DB9 adapter
USB cable
Power cable
Warranty and Registration
Power supply
Information
adapter
Front Panel
Reset Config
Serial Console
button
port
Power
LEDs
USB
Mini-USB
button
port
Console port
Back Panel
Grounding
Lock
point
Specification
Dimensions (H x W x D)
Chassis weight
Average power consumption
Average heat dissipation
Relative humidity
Noise level
1G
1G SFP
Ethernet ports
ports
ESD
point
Cable tie
DC input
holder
Value
7.52 in. x 12.63 in. x 1.37 in.
4.38 lb
15.4 W
85 BTU/hr
5% to 90%, noncondensing
0 dB (fanless)
1
Advertisement
Table of Contents

Summary of Contents for Juniper SRX300
-
Page 1: Front Panel
Ethernet ports ports connectivity. With a desktop form-factor chassis, the SRX300 Services Gateway has six 1 G Ethernet ports, two 1 G SFP ports, 4 GB of DRAM memory, and 8 GB of flash memory. Package Contents Power... -
Page 2: Factory Default Settings
Remote client IP pool range Source NAT Configure Verify the Log in Using Guided/ Settings to J-Web Default Setup Internal zones for which source NAT has been added IP address or hostname How to Set Up Your SRX300 Services Gateway... -
Page 3: Power On The Device
2. Plug the AC adapter end of the power cable into an AC power outlet. 3. Turn on the power to the AC power receptacle. 4. Note the following LED indications. Wait until the STATUS LED is solid green before proceeding to the next step. How to Set Up Your SRX300 Services Gateway... - Page 4 To use the USB console port, you must download a USB driver to the management device from http://www.juniper.net/support/downloads/group/?f=junos. Ethernet port SRX 300 RJ-45 cable Ethernet port How to Set Up Your SRX300 Services Gateway...
- Page 5 The initial configuration requires only the device name and root configuration password. You can skip all the other steps and go directly to the Confirm & Apply page to apply the configuration. Internal destination NAT Not allowed Allowed configuration How to Set Up Your SRX300 Services Gateway...
- Page 6 Series device. You might lose connectivity to the SRX Series device if you have changed the management zone IP. Click the URL for reconnection instructions on the Confirm & Apply page to reconnect, if required. 8. Click Done to complete the setup. How to Set Up Your SRX300 Services Gateway...
- Page 7 NOTE: With this step, you have successfully completed the initial configuration, and your SRX300 Services Gateway is ready for use. 4. Review the settings and click Apply Settings. Click Done to complete the setup.
-
Page 8: Reset The Configuration
Copyright © 2016, Juniper Networks, Inc. All rights reserved. Juniper Networks, Junos, Steel-Belted Radius, NetScreen, and ScreenOS are registered trademarks of Juniper Networks, Inc. in the United States and other countries. The Juniper Networks Logo, the Junos logo, and JunosE are trademarks of Juniper Networks, Inc.


