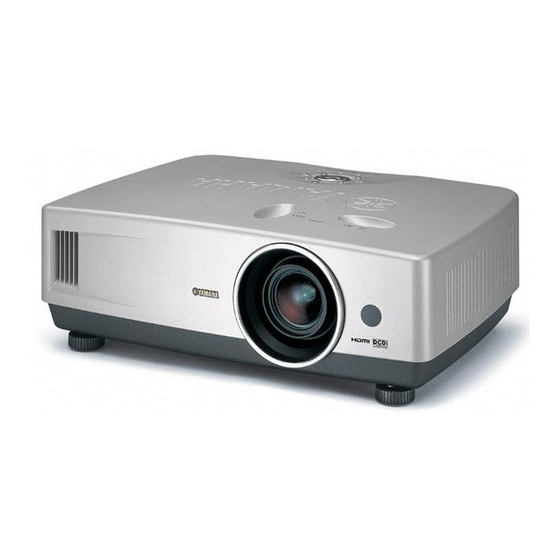
Yamaha LPX-510 Owner's Manual
Home cinema projector
Hide thumbs
Also See for LPX-510:
- Product catalog (44 pages) ,
- Supplementary manual (40 pages) ,
- Brochure & specs (8 pages)
Table of Contents
Advertisement
Advertisement
Table of Contents

Related Manuals for Yamaha LPX-510


Summary of Contents for Yamaha LPX-510
- Page 1 U R T G LPX-510 Home Cinema Projector ENGLISH OWNER'S MANUAL...
-
Page 2: Important Safety Instructions
IMPORTANT SAFETY INSTRUCTIONS CAUTION RISK OF ELECTRIC SHOCK DO NOT OPEN CAUTION: TO REDUCE THE RISK OF ELECTRIC SHOCK, DO NOT REMOVE COVER (OR BACK). NO USER-SERVICEABLE PARTS INSIDE. REFER SERVICING TO QUALIFIED SERVICE PERSONNEL. • • • • Explanation of Graphical Symbols The lightning flash with arrowhead symbol, within an equilateral triangle, is intended to alert you to the presence of... - Page 3 — and, most importantly, without affecting your sensitive hearing. Since hearing damage from loud sounds is often undetectable until it is too late, YAMAHA and the Electronic Industries Association’s Consumer Electronics Group recommend you to avoid prolonged exposure from excessive volume levels.
- Page 4 Using this unit with a higher voltage than specified is dangerous and may cause fire, damage to this unit, and/ or personal injury. YAMAHA will not be held responsible for any damage resulting from use of this unit with a voltage other than that specified.
- Page 5 OBSERVERA Apparaten kopplas inte bort från växelströmskällan (nätet) så länge som den är ansluten till vägguttaget, även om själva apparaten har stängts av. ADVARSEL Netspæendingen til dette apparat er IKKE afbrudt, sålæenge netledningen siddr i en stikkontakt, som er t endt – også selvom der or slukket på apparatets afbryder.
-
Page 6: Table Of Contents
Contents Notes on Handling and Storage ...2 Accessories ...3 Features of the Projector ...4 Basic Operations Turning On the Projector...6 Connecting the Power Cord ... 6 Turning On the Power and Projecting Images... 7 Turning Off the Projector...9 Adjusting the Screen Image ...11 Adjusting the Image Size (Zoom adjustment)... -
Page 7: Notes On Handling And Storage
These are normal characteristics of mercury lamps. You should always have a spare lamp ready in case it is needed. • YAMAHA takes no responsibility for loss or damage caused by damage to the projector or operating failures outside normal service warranty conditions. -
Page 8: Accessories
Lens cap When not using the projector, always be sure to attach the lens cap in order to protect the lens. Setup guide LPX-510 Before Using the Inserting the batteries and replacement period Remote Control Using the remote control and remote operating range... -
Page 9: Features Of The Projector
Features of the Projector Image appearance can be selected to match the projection environment (Picture Mode) The projector is equipped with a unique CB (color balance) filter that enhances the color reproduction of images. It is ideal for use in providing the optimum image effects for the projection environment when viewing images such as games, sporting competitions and movies. -
Page 10: Basic Operations
Basic Operations This chapter describes basic operations such as turning the projector on and off and adjusting the projected images. Turning On the Projector ... 6 • • • • Connecting the Power Cord ...6 • • • • Turning On the Power and Projecting Images ...7 Turning Off the Projector ... -
Page 11: Turning On The Projector
Turning On the Projector This section describes the procedure from turning on the power to projecting images. Be sure to read the Safety Instructions in this manual for details on safe handling when using the projector. Connecting the Power Cord PATTERN Check that the power is turned off for all components connected to the... -
Page 12: Turning On The Power And Projecting Images
Turning On the Power and Projecting Images Lights green STANDBY/ON ESCAPE MENU PATTERN ASPECT INPUT Projector The buttons on the remote control and the projector's control panel cannot be operated while the If more than one signal source has been connected or the images are not being projected, use the remote control or control panel buttons to select the signal source. - Page 13 Turning On the Projector • • • • If only one signal source has been connected, the signals from that source will be projected without needing to press one of the above buttons. • • • • If video signals are being input to several input ports simultaneously, interference between the various signals may occur, and this may cause interference in the projected images.
-
Page 14: Turning Off The Projector
Turning Off the Projector Follow the procedure below to turn off the power of the projector. Power OFF? Press STANDBY/ON Press any other button STANDBY/ON ESCAPE MENU PATTERN ASPECT INPUT Projector Do not disconnect the power cord while the projector is projecting or while cool-down is in progress. - Page 15 Turning Off the Projector Retract Retract the front adjustable foot if it is extended. Turn the front adjustable foot to retract it. Retract Attach the lens cap. Attach the lens cap to the lens when not using the projector, in order to stop the lens from getting dusty or dirty.
-
Page 16: Adjusting The Screen Image
Adjusting the Screen Image You can adjust the screen image in order to obtain the best possible picture. Adjusting the Image Size (Zoom adjustment) The size of the projected image is basically determined by the distance from the projector to the screen. (Refer to the Setup Guide.) The following procedures explain how to adjust the screen image once the projector itself has been set up. -
Page 17: Projection Image Position Adjustment (Lens Shift)
Adjusting the Screen Image Projection image position adjustment (Lens shift) The lens shift function can be used to adjust the position of projected images when the projector has been set up in places such as the following. • • • • When the projector is suspended from a ceiling •... -
Page 18: Correcting Keystone Distortion (Keystone)
Correcting Keystone Distortion (Keystone) When you wish to adjust the projection above or below the range of lens shift adjustment set the projector at an angle. When the projector is angled, the projected image may distort into a trapezoid. Keystone distortion can be corrected within a maximum vertical angle of approximately 15°. Approx. -
Page 19: Displaying A Test Pattern
Adjusting the Screen Image Displaying a Test Pattern You can project a test pattern at times such as when setting up the projector in order to correct keystone correction and to make line menu adjustments. • • • • Crosshatch •... - Page 20 STANDBY/ON IRIS ESCAPE ESCAPE MENU PATTERN SETTING ASPECT ASPECT INPUT LIGHT Remote control Projector The full menu cannot be displayed while a test pattern is being projected. If setting is required, press the button on the projector's control panel or the remote control to display the line menu, and then make the setting.
-
Page 21: Adjusting The Image Quality
Adjusting the Image Quality The quality of the screen images can be adjusted as follows. Focus adjustment ESCAPE PATTERN ASPECT Projector ESCAPE PATTERN ASPECT Projector ESCAPE PATTERN ASPECT Projector Press the [SETTING] button on the STANDBY/ON projector's control panel or the button on the remote control. -
Page 22: Brightness Adjustment (Iris Adjustment)
Brightness adjustment (Iris adjustment) The brightness of the images can be adjusted. When projecting in dark rooms or onto small screens and the images appear too bright, decrease the setting. STANDBY/ON ESCAPE MENU PATTERN ASPECT INPUT Projector STANDBY/ON ESCAPE MENU PATTERN ASPECT INPUT... -
Page 23: Selecting The Picture Mode
Adjusting the Image Quality Selecting the picture mode The following six picture modes have been preset for use with images with varying characteristics. Use the select menu to select a picture mode that best suits the images. Mode name Dynamic Bright Standard Cinema... -
Page 24: Selecting The Image Aspect Ratio
Selecting the Image Aspect Ratio This selects the ratio between the height and width of the projected images. If the input signal includes aspect ratio information, the projector's automatic mode will detect this information and use it to automatically change the aspect ratio to the optimum ratio. -
Page 25: Normal Mode
Adjusting the Image Quality Details of each aspect ratio are as follows. Normal mode 4:3 image HDTV images Squeeze mode When projecting 4:3 TV images recorded in squeeze mode 4:3 image Zoom mode Letterbox images The aspect ratio of the images being input is maintained, and the images are projected into a 16:9 screen area. -
Page 26: Smart Zoom Mode
Smart Zoom mode 4:3 image Through mode Squeeze Through mode Adjusting the Image Quality Images in 4:3 format such as normal TV broadcasts are extended horizontally, with less elongation in the middle and more elongation at the edges. This is useful for when 4:3 images are projected onto a wide screen. -
Page 27: Advanced Operations
Advanced Operations This chapter describes functions for enhancing the projection of images, and how to use the menus. Functions for Enhancing Projection ... 24 • • • • Description of Functions ...24 • White Level Adjustment ...24 • Black Level Adjustment ...24 •... -
Page 28: Functions For Enhancing Projection
Functions for Enhancing Projection This section explains how to use the functions for adjusting the picture quality to the optimum quality. Description of Functions White Level Adjustment Adjusts the brightness of bright shades without changing the black level. Use the "Image" - "Picture Quality" - "Input Adjustment" - "White Level/Black Level" - "White Level" menu item to change the setting. -
Page 29: Absolute Color Temperature And Flesh Tone Adjustment
Absolute Color Temperature and Flesh Tone Adjustment The absolute color temperature adjusts the tint of the whole image. Flesh tone adjustment adjusts the color of flesh tones to the desired color. Use the "Image" - "Color Adjustment" - "Abs. Color Temp." and "Flesh Tone" menu items to change the settings. -
Page 30: Saving And Retrieving Image Quality Settings (Memory Save)
Functions for Enhancing Projection Saving and Retrieving Image Quality Settings (Memory Save) Once the "Picture Quality" and "Color Adjustment" menu commands have been used to adjust the projected images, the adjustment values can then be stored. In addition, the saved data can be retrieved easily, so that you can enjoy viewing images with the adjusted settings at any time. -
Page 31: Retrieving Saved Image Quality Settings
Image Setup Info Reset Picture Quality Color Adjustment Picture Mode Dynamic Memory Save Reset :Return :Select :Enter STANDBY/ON IRIS ESCAPE ESCAPE MENU PATTERN SETTING ASPECT ASPECT INPUT LIGHT Projector Remote control [Memory] Memory1 Memory2 Memory3 Memory4 Memory5 Memory6 :Return :Select :Setting Retrieving Saved Image Quality Settings S VIDEO... -
Page 32: Using The Menu Functions
Using the Menu Functions The menus can be used to make adjustments and settings for items such as the screen, image quality and input signal. The following two types of menu are available. • • • • Full menu This lets you check all menu items while making settings. - Page 33 Signal Progressive p.32 Motion Detection Noise Reduction Overscan When component video signals or RGB video signals are being input to the HDMI port: Setup Level DVI-Video Level Screen Position p.33 Zoom Caption Keystone Projection Operation Sleep Mode p.34 Lamp Power Standby Mode Trigger Out User's Logo...
-
Page 34: Image" Menu
Using the Menu Functions "Image" Menu The image quality adjustment items are determined by the input port (image signal) that is selected. • • • • INPUT A, B (Component), INPUT A, B (RGB TV), HDMI, VIDEO, S-VIDEO Image Setup Info Picture Quality Color Adjustment... -
Page 35: Color Adjustment
Color Adjustment If the picture mode is set to "PC", "Color Adjustment" cannot be selected. Main menu • • • • Abs. Color Abs. Color Temp. : This adjusts the overall tints of the images in accordance with the Temp. * images being projected. -
Page 36: Setup" Menu
Using the Menu Functions "Setup" Menu Image Setup Info Signal Screen Operation User's Logo On-Screen Display Input Signal Language English Reset -,+:Select :Enter Signal Main menu Progressive * (Setting is only possible when composite video , S-Video , component video 480i and 576i RGB video signals are being input.) •... -
Page 37: Screen
Main menu Setup Level * (Setting is only possible when composite video or S-Video signals in NTSC format are being input or component video has been set. Setting is not possible when signals are being input from the HDMI port.) If using products designed for destinations such as the United States or South Korea that have different black level (setup level) settings, use this function to obtain correct images. -
Page 38: Operation
Using the Menu Functions Operation Main menu Sleep Mode The projector is equipped with a power-saving function that causes the power to turn off automatically and the projector to switch to standby if no signal is input to the projector for a continuous length of time. -
Page 39: User's Logo
User’s Logo You can record your favorite image as a user's logo. A user's logo can be stored for projecting when the projector starts up and when projecting the hide screen. When a user's logo is recorded, the previous user's logo will be erased. Follow the instructions on the screen to record a user ’s logo. -
Page 40: Using The Menus
Using the Menu Functions Input Signal Main menu Video Signal Sets the signal format in accordance with the video equipment that is connected to the VIDEO or S VIDEO port. If set to "Auto", the video signal format is set automatically. If there is a lot of interference in the image, or if a problem such as no image being projected occurs even though "Auto"... -
Page 41: Using The Menus
Using the Menus Displaying and Operating Full Menus Menus can be operated using the projector's control panel and also by using the remote control. STANDBY/ON ESCAPE MENU PATTERN ASPECT INPUT Projector Image Setup Info Signal Screen Operation User's Logo On-Screen Display Input Signal Language Reset... -
Page 42: Displaying And Operating Line Menus
Using the Menu Functions Image Signal Screen Operation User's Logo On-Screen Display Input Signal Language Reset -,+:Select ESCAPE PATTERN ASPECT Projector Displaying and Operating Line Menus ESCAPE PATTERN ASPECT Projector Picture Quality Color Adjustment Picture Mode :Select Change the setting. Setup Info Reset... - Page 43 STANDBY/ON IRIS ESCAPE ESCAPE MENU PATTERN SETTING ASPECT ASPECT INPUT LIGHT Projector Remote control STANDBY/ON IRIS ESCAPE ESCAPE MENU PATTERN SETTING ASPECT ASPECT INPUT LIGHT Projector Remote control STANDBY/ON IRIS ESCAPE ESCAPE ESCAPE MENU PATTERN SETTING ASPECT ASPECT INPUT LIGHT Projector Remote control Using the Menu Functions...
-
Page 44: Troubleshooting
Troubleshooting This chapter describes troubleshooting procedures for the projector. When Having Some Trouble ... 42 When the Indicators Provide No Help ... 44 • • • • Problems relating to images ... 44 • • • • Problems when projection starts ... 48 •... -
Page 45: When Having Some Trouble
When Having Some Trouble The projector is provided with the following three indicators which notify you of the operating status of the projector. The following tables show what the indicators mean and how to remedy the problems that they indicate. *If the indicator does not light when the power is turned on, the power cord may not be connected correctly... - Page 46 Indicator status Projector status Standby condition (No abnormality) Orange If you press the [STANDBY/ON] button on the projector's LAMP/COVER TEMP/FAN control panel or the projection will start after the warm-up is complete. Warm-up in progress (No abnormality) Green The warm-up period is approximately 30 seconds. Wait for short LAMP/COVER TEMP/FAN while.
-
Page 47: When The Indicators Provide No Help
When the Indicators Provide No Help If any of the following problems occur and the indicators do not offer a solution, refer to the pages given for each problem. Probable relating to images No images appear Projection does not start, the projection area is completely black, the projection area is completely blue, etc. - Page 48 The message "Not Supported." is displayed Are the image signal format settings correct? Does the mode match the frequency and resolution of the image signals? Only when projecting computer images The message "No Signal." is displayed Are the cables connected correctly? Has the correct video input port been selected? Is the power for the connected...
-
Page 49: Interference Or Distortion Appear In Images
When the Indicators Provide No Help Interference or distortion appear in images Are the image signal format settings correct? Are the cables connected correctly? Is an extension cable being used? Have the "Sync. " and "Tracking " settings been adjusted correctly? Only when projecting computer images Has the correct resolution been... -
Page 50: Image Colors Are Not Right
Image colors are not right Are the image signal format settings correct? Are the cables connected correctly? Has the image Contrast been adjusted correctly? Has the color been adjusted correctly? Have the color intensity and tint been adjusted correctly? Only when projecting images from a video source Images appear dark... -
Page 51: Problems When Projection Starts
When the Indicators Provide No Help Problems when projection starts Power does not turn on Have you pressed the [Power] button? Is "Key Lock" set to "ON"? Is the indicator lit orange? Do the indicators turn off and on when the power cord is touched? Problems with the remote control The remote control does not work... -
Page 52: Appendices
Appendices This chapter provides information on maintenance procedures to ensure the best level of performance for the projector for a long time. Maintenance... 50 • • • • Cleaning...50 • Cleaning the Projector Case ...50 • Cleaning the Lens...50 • Cleaning the Air Filter...51 •... -
Page 53: Maintenance
Maintenance This section describes maintenance tasks such as cleaning the projector and replacing consumable parts. Cleaning You should clean the projector if it becomes dirty or if the quality of projected images starts to deteriorate. Be sure to read the Safety Instructions in this manual for details on safe handling of the projector during cleaning. -
Page 54: Cleaning The Air Filter
Cleaning the Air Filter • • • • If the air filter becomes clogged with dust, it can result in overheating which may cause operating problems or reduce the operating life of the optical parts. It is recommended that you clean the air filter about once every three months. -
Page 55: Replacing Consumables
Maintenance Replacing Consumables This section explains how to replace the lamp. Lamp Replacement Period It is time to replace the lamp when: • • • • The message "Lamp Replace" appears on the screen when projection starts. • • • • The LAMP/COVER indicator flashes orange or lights red. -
Page 56: Replacing The Lamp
• • • • The lamp replacement warning message is set to appear after approximately 1600 hours of lamp use in order to maintain the brightness and quality of the projected images. The time taken for the message to be displayed will vary depending on factors such as the lamp power setting and the picture mode setting. - Page 57 Maintenance • • • • Install the lamp securely. For safety, the lamp will turn off automatically when the lamp cover is opened. Moreover, the lamp will not turn on if the lamp or the lamp cover is not installed correctly. •...
-
Page 58: Resetting The Lamp Operating Time
Resetting the Lamp Operating Time The lamp operating time must always be reset after the lamp has been replaced with a new one.The projector has a built-in lamp operating time counter. A replacement message is displayed when the counter reaches a certain amount. Do not reset the lamp operating time except after the lamp has been replaced, otherwise the lamp replacement period will not be indicated correctly. -
Page 59: If Vertical Stripe Interference Appears In The Projected Images
Maintenance If vertical stripe interference appears in the projected images Vertical stripe interference may appear in the projected images at times. If this vertical stripe interference impairs image viewing, the images can be adjusted by carrying out the following procedure. Example Image with vertical stripe interference Note the following points when carrying out the procedure below. - Page 60 Dark portions [Vertical Stripe Adjustment R] Apply Bright Color Dark Color :Return :Select -,+ :Adjust STANDBY/ON IRIS ESCAPE ESCAPE MENU PATTERN SETTING ASPECT ASPECT INPUT LIGHT Projector Remote control While checking the tone adjustment Bright portions screen, adjust the settings starting from the one where the vertical stripe interference is most noticeable.
-
Page 61: Optional Accessories
Optional Accessories The following options are available for using with the projector. The availability of these options is subject to change without prior notice. Lamp cartridge Use as a replacement for spent lamps. Ceiling mount bracket (for low ceilings) * Use when installing the projector to a low ceiling. -
Page 62: List Of Supported Signal Resolutions
List of Supported Signal Resolutions Depending on the "Overscan"settings, the values given below will change slightly. Component Video/RGB Video Signal Resolution SDTV 640 × 480 (480i, 60Hz) (640 × 360) (D1) (for zoom) SDTV 768 × 576 (576i, 50Hz) (768 × 432) (for zoom) SDTV (480p) 640 ×... -
Page 63: Analog-Rgb Signals/Signals Input To The Hdmi Port
List of Supported Signal Resolutions Analog-RGB signals/signals input to the HDMI port Signal Resolution 60 , 640 × 480 SDTV (640 × 360) (480p) (for zoom) VESA 640 × 480 72/75/85 (640 × 360) (for zoom) SVGA 56/60/ 800 × 600 72/75 (800 ×... -
Page 64: Specifications
Specifications Product name LPX-510 Home cinema projector Dimensions 440 (W) x 137 (H) x 321 (D) mm (17.3 (W) x 5.39 (H) x 12.6 (D) inches) (not including protruding parts) Panel size 17.8mm (0.7 inches) Display method Polysilicon TFT active matrix... -
Page 65: Appearance
Appearance Center of projector Surface Center of lens of lens 19.5 19.7 87.5 *Center of lens = Default lens shift position Units: mm... -
Page 66: Part Names And Functions
Part Names and Functions Front/Top Air exhaust vent Lamp cover (p.53) Open this cover when replacing the lamp inside. Control panel (p.64) Vertical lens adjustment dial (p.12) Moves the lens vertically. Horizontal lens adjustment dial (p.12) Moves the lens horizontally. Remote control light-receiving area ( Setup Guide) Receives signals from the remote control. -
Page 67: Control Panel
Part Names and Functions Control Panel [STANDBY/ON] button (p.7, 9) Press to turn the projector's power on and off. [ESCAPE] button (p.11, 16, 17, 38, 39) When pressed while a menu or selection menu is being displayed, the screen changes to the previously-displayed menu. -
Page 68: Rear
Rear D4 VIDEO port ( Setup Guide) Connects to the component video ports or D port of other video equipment. (Japan only) INPUT A/INPUT B ports ( Setup Guide) Connects to the component video ports or RGB ports of other video equipment or to a computer's video output port. - Page 69 Part Names and Functions Remote Control Indicator Illuminates when remote control signals are being output. [Zoom] button (p.11) Press to adjust the size of projected images. [IRIS] button (p.17) Press to adjust the brightness of images using the lens aperture. [ESCAPE] button (p.38, 39) When pressed while a menu or selection menu is being displayed, the screen changes to the...
- Page 70 Glossary Following is an explanation of some of the terms used in this guide which may be unfamiliar or which were not explained in the manual itself. Further information can be obtained by referring to other commercially- available publications. Component Video signals which have the video brightness signals and color signals separated, in order to provide better image quality.
- Page 71 Glossary Sync. The signals output from computers have a specific frequency. If the projector frequency does not match this frequency, the resulting images will not be of a good quality. The process of matching the (Synchroni- phases of these signals (the relative position of the crests and troughs in the signal) is called zation) "synchronization".
- Page 72 Neither YAMAHA CORPORATION nor its affiliates shall be liable to the purchaser of this product or third parties for damages, losses, costs, or expenses incurred by purchaser or third parties as a result of: accident, misuse, or abuse of this product or unauthorized modifications, repairs, or alterations to this product, or (excluding the U.S.) failure to strictly comply with YAMAHA CORPORATION’s...
- Page 73 YAMAHA ELECTRONICS (UK) LTD. YAMAHA HOUSE, 200 RICKMANSWORTH ROAD WATFORD, HERTS WD18 7GQ, ENGLAND YAMAHA SCANDINAVIA A.B. J A WETTERGRENS GATA 1, BOX 30053, 400 43 VÄSTRA FRÖLUNDA, SWEDEN YAMAHA MUSIC AUSTRALIA PTY, LTD. 17-33 MARKET ST., SOUTH MELBOURNE, 3205 VIC., AUSTRALIA...
-
Page 74: Remote Control
Before Using the Remote Control Connecting to a home theater system Connecting to a Computer LPX-510 ENGLISH Inserting the batteries and replacement period Using the remote control and remote operating range Screen Size and Setting-up Distance Setting-up Methods... - Page 75 Inserting the batteries and replacement period The batteries are not inserted into the remote control at the time of purchase. You will first need to insert the accessory batteries into the remote control. Battery Replacement Period If the remote control becomes slow in responding or if it stops working, the batteries may be spent.
-
Page 76: Remote Operating Range
Using the remote control and remote operating range [LIGHT] (illumination) switch [LIGHT] switch Use the remote control within the ranges indicated below. If the distance or angle between the remote control and the remote control light-receiving area is outside the normal operating range, the remote control may not work. -
Page 77: Lens Shift Setting
Screen Size and Setting-up Distance The projection size will vary depending on the projection distance from the projector's lens to the screen. Refer to the table below to the projector so that the images are projected onto the screen at the optimum size. 16:9 screen size 30 "... - Page 78 Setting-up Methods The projector supports the following 4 projection methods, allowing you to choose the best method for displaying your images. After setting up the projector, refer to the OWNER'S MANUAL for details on turning on the power and adjusting settings such as the screen size.
- Page 79 OPTICAL AV amplifier Component HDMI Component HDMI cable video cable (commercially- available) (commercially -available) <LPX-510> G / Y B / P R/ P HD/SYNC INPUT A INPUT B G / Y B / P R/ P HD/SYNC VHS VCR, DVD player, game console, etc.
- Page 80 Turn off the power for both the projector and the computer before connecting them. If the power for either device is on at the time of connection, damage may result. Check the shapes of the cable connectors and the device ports before making the connections.
- Page 81 D4 VIDEO *Push the connectors in as far as they will go. ©2004 All Rights Reserved. Computer Computer cable (commercially- available) HDMI cable (commercially- adapter connector (commercially- available) * Attach the adapter connector to the computer cable and then connect it to the projector.
- Page 82 ENGLISH Please make the following change in your owner’s manual. Selecting the picture mode Incorrect The default settings for each mode are given below. Mode name CB Filter Dynamic Correct The default settings for each mode are given below. Mode name CB Filter Dynamic Veuillez effectuer les modification suivantes dans votre mode d’emploi.
- Page 83 ESPAÑOL Haga los cambio siguientes en su manual del propietario. Seleccionando el modo imagen Incorrecto Los ajustes predeterminados para cada modo se indican abajo. Nombre de Filtro CB modo Dinámico Correcto Los ajustes predeterminados para cada modo se indican abajo. Nombre de Filtro CB modo...