Yamaha YSP-1100 Owner's Manual
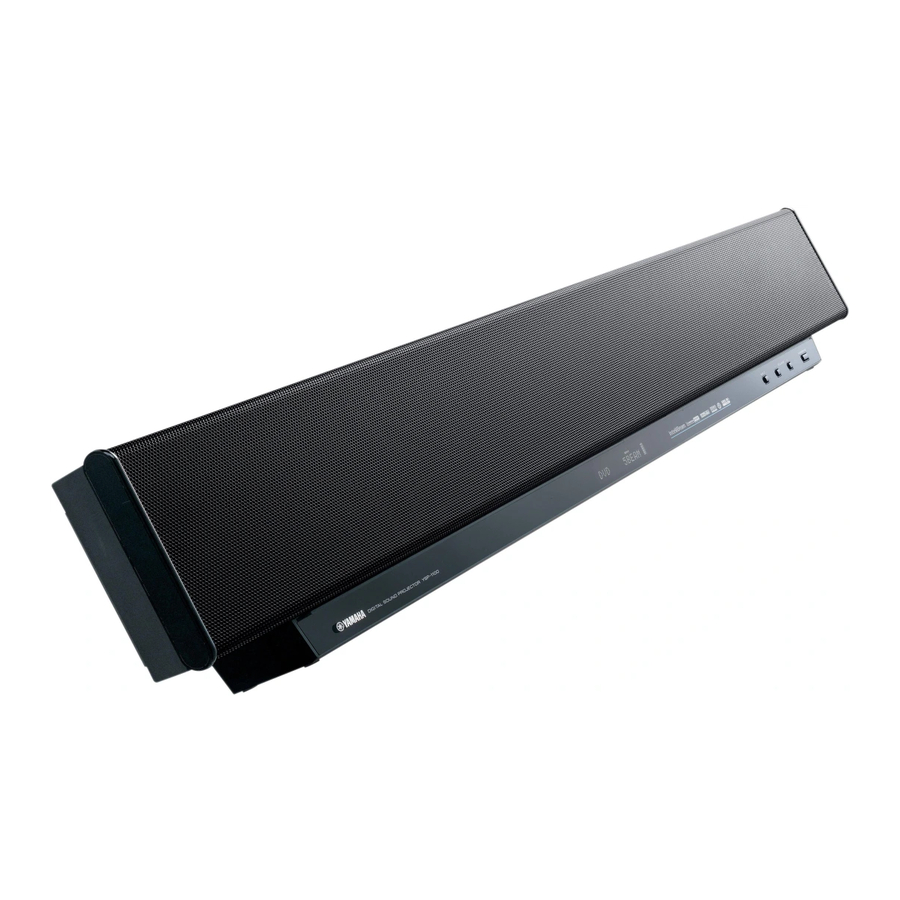
Digital sound projector
Hide thumbs
Also See for YSP-1100:
- Owner's manual (562 pages) ,
- Features (5 pages) ,
- Quick reference manual (2 pages)
Table of Contents
Advertisement
Available languages
Available languages
Quick Links
Advertisement
Chapters
Table of Contents

Related Manuals for Yamaha YSP-1100


Summary of Contents for Yamaha YSP-1100
- Page 1 YSP-1100 Digital Sound Projector OWNER’S MANUAL MANUAL DE INSTRUCCIONES 使用说明书...
- Page 2 12 Only voltage specified on this unit must be used. Using this unit with a higher voltage than specified is dangerous and may cause fire, damage to this unit, and/or personal injury. YAMAHA will not be held responsible for any damage resulting from use of this unit with a voltage other than specified.
-
Page 3: Table Of Contents
CONTENTS Stereo plus 3 beam........... 43 INTRODUCTION 3 beam..............43 Enjoying 2-channel sources OVERVIEW ............2 in surround sound ..........45 FEATURES............. 3 Adjusting surround mode parameters...... 46 USING THIS MANUAL ........4 ENJOYING STEREO SOUND ......47 SUPPLIED ACCESSORIES ......... 5 Stereo playback............ -
Page 4: Overview
The YSP-1100 projects sound beams containing surround sound information for the front right (R), front left (L), surround right (SR) and surround left (SL) speaker positions, which are reflected off the walls of your listening room before reaching the actual listening position. -
Page 5: Features
This unit employs the Cinema DSP Digital technology Dolby Pro Logic developed by YAMAHA Electronics Corp. so that you can This sophisticated, matrix decoding technology up-converts experience movies at home with all the dramatic sound any 2 channel source audio to a 5.1 channel full bandwidth... -
Page 6: Using This Manual
USING THIS MANUAL USING THIS MANUAL Notes • This manual describes how to connect and operate this unit. For details regarding the operation of external components, refer to the supplied owner’s manual for the component. • Some operations can be performed by using either the buttons on the main unit or on the remote control. In such cases, the operation is described using remote control operation. -
Page 7: Supplied Accessories
SUPPLIED ACCESSORIES SUPPLIED ACCESSORIES Check that you have received all of the following parts. Remote control (×1) Batteries (×2) Optical cable (×1) (AA, R6, UM-3) STANDBY/ON POWER POWER INPUT1 INPUT2 MACRO AUTO OSD video pin cable (×1) Digital audio pin cable (×1) VOL MODE SETUP INPUTMODE SLEEP... -
Page 8: Controls And Functions
CONTROLS AND FUNCTIONS CONTROLS AND FUNCTIONS Front panel INPUT VOLUME STANDBY/ON 1 OPTIMIZER MIC jack 6 STANDBY/ON Use to connect the supplied optimizer microphone to be Turns on the power of this unit or sets it to the standby used to run AUTO SETUP (see page 30). mode (see page 25). -
Page 9: Front Panel Display
CONTROLS AND FUNCTIONS Front panel display NIGHT SLEEP DIGITAL 1 NIGHT indicator 4 Volume level indicator Lights up when one of the night listening modes is Shows the current volume level (see page 41). selected (see page 55). 5 Multi-information display 2 SLEEP indicator Shows information when you adjust the parameters of this Lights up when the sleep timer is turned on (see page 58). -
Page 10: Rear Panel
CONTROLS AND FUNCTIONS Rear panel COMPONENT COMPONENT COMPONENT TV/STB COAXIAL OPTICAL TV/STB DVD/AUX DIGITAL IN AUDIO IN VIDEO IN VIDEO OUT RS-232C REMOTE IN SUBWOOFER 1 RS-232C/REMOTE IN terminals 0 DVD/AUX COMPONENT VIDEO IN jacks These are control expansion terminals for factory use only Use to connect a DVD player/recorder or an external (see page 23). -
Page 11: Remote Control
CONTROLS AND FUNCTIONS Remote control 1 Infrared window The functions of some buttons change depending on the position of the operation mode selector (S). This section Outputs infrared control signals. Aim this window at the basically describes the functions of the remote control component you want to operate. - Page 12 CONTROLS AND FUNCTIONS H TV POWER Turns on the power of the TV or sets it to the standby mode (see page 82). I AV POWER Turns on the power of the selected component or sets it to the standby mode (see pages 82 and 83). J INPUT1/INPUT2 Selects the input source of the TV (see page 82).
-
Page 13: Installation
INSTALLATION INSTALLATION This section describes a suitable installation location to install the unit using a metal wall bracket, a rack or a stand. Before installing this unit Installing this unit This unit creates surround sound by reflecting projected Install this unit where there are no obstacles such as sound beams off the walls of your listening room. -
Page 14: Installation Examples
INSTALLATION Installation examples Example 1 Install this unit as close to the exact center of the wall as possible. Example 2 Install this unit so that the sound beams can be reflected off the walls. Example 3 Install this unit as close to the exact front of your normal listening position. - Page 15 INSTALLATION Using a metal wall bracket Using a TV stand You can use the optional metal wall bracket to mount this You can use the optional TV stand to install this unit. For unit on the wall in your listening room. detailed information on installing this unit using a TV stand, refer to the installation manual supplied with the Metal wall bracket...
- Page 16 INSTALLATION Affixing this unit Peel off the film from each of the four supplied fasteners and then secure them to the bottom four corners of this unit and the top of the rack, etc. This unit Peel off the pad on the bottom Peel off...
-
Page 17: Connections
CONNECTIONS CONNECTIONS This unit is equipped with the following types of audio/video input/output jacks: For audio input For video input • 2 optical digital input jacks • 3 composite analog input jacks • 1 coaxial digital input jack • 2 sets of component analog input jacks •... -
Page 18: Connecting A Tv
CONNECTIONS Connecting a TV Connect a TV to this unit and display the OSD for easy viewing when you adjust the system parameters in SET MENU. Audio connections Video connections Connect the analog audio output jacks of your TV to the Connect the video input jacks of your TV to the VIDEO TV/STB AUDIO IN jacks of this unit. -
Page 19: Connecting A Dvd Player/Recorder
CONNECTIONS Connecting a DVD player/recorder Connect a DVD player/recorder and enjoy DVDs. Audio connections Video connections Connect the optical digital output jack of your DVD Connect the video output jack of your DVD player/ player/recorder to the DVD COAXIAL DIGITAL IN jack recorder to the DVD/AUX VIDEO IN jack of this unit. -
Page 20: Connecting A Vcr
CONNECTIONS Connecting a VCR Connect a VCR and enjoy video cassette tapes. Audio connections Video connections Connect the analog audio output jacks of your VCR to the Connect the video output jack of your VCR to the VCR VCR AUDIO IN jacks of this unit. VIDEO IN jack of this unit. -
Page 21: Connecting A Digital Satellite Tuner Or A Cable Tv Tuner
CONNECTIONS Connecting a digital satellite tuner or a cable TV tuner Connect a digital satellite tuner or a cable TV tuner and enjoy digital satellite broadcasting or cable TV broadcasting. Audio connections Video connections Connect the optical digital output jack of your digital Connect the video output jack of your digital satellite satellite tuner or cable TV tuner to the TV/STB OPTICAL tuner or cable TV tuner to the STB VIDEO IN jack of this... -
Page 22: Connecting A Digital Airwave Tuner
CONNECTIONS Connecting a digital airwave tuner If your digital airwave tuner does not support analog broadcasting, make audio/video connections as shown below. Audio connections Video connections Connect the optical digital output jack of your digital Connect the video output jack of your digital airwave airwave tuner to the TV/STB OPTICAL DIGITAL IN jack tuner to the STB VIDEO IN jack of this unit. -
Page 23: Connecting Other External Components
CONNECTIONS Connecting other external components To connect other external components, connect the optical digital output jack of an external component to the AUX OPTICAL DIGITAL IN jack of this unit. Use this connection method to connect an external component that supports an optical digital connection or to connect a DVD player/recorder via an optical digital connection. -
Page 24: Connecting A Subwoofer
CONNECTIONS Connecting a subwoofer To connect a subwoofer, connect the monaural input jack of your subwoofer to the SUBWOOFER jack of this unit. If a subwoofer is connected to this unit, turn on the power of your subwoofer and then run AUTO SETUP (see page 29) or select SWFR for BASS OUT in SUBWOOFER SET (see page 67). -
Page 25: Connecting The Power Supply Cable
CONNECTIONS Connecting the power supply cable Once all other connections are complete, plug one end of the power supply cable into the AC IN terminal of this unit and then plug the other end into the AC wall outlet. To the AC outlet About the RS-232C/REMOTE IN/IR-OUT terminals The RS-232C, REMOTE IN and IR-OUT terminals do not support normal external component connections. -
Page 26: Getting Started
GETTING STARTED GETTING STARTED Installing batteries in the remote Remove the transparent sheet before using the remote control. control Press Operation range of the remote control The remote control transmits a directional infrared beam. Use the remote control within 6 m of this unit and point it toward the remote control sensor on this unit during operation. -
Page 27: Using The Remote Control
GETTING STARTED Using the remote control Turning on the power This section describes how to control this unit using the supplied remote control. The functions of the remote control change depending on the position of the operation mode selector. Set the operation mode selector to YSP to switch to the operation mode of this unit. -
Page 28: Using Set Menu
USING SET MENU USING SET MENU Displaying the OSD This section simply describes how to display the OSD (on-screen display) of this unit on your TV screen and set the parameters for your listening room. Once this is complete, you can enjoy real surround sound while watching TV in the comfort of your own home. -
Page 29: The Flow Chart Of Set Menu
USING SET MENU The flow chart of SET MENU The following diagram illustrates the overall flow of the setup procedure. Run LANGUAGE SETUP. See “CHANGING OSD LANGUAGE” on page 28. Run AUTO SETUP (IntelliBeam). See “AUTO SETUP (IntelliBeam)” on page 29. If an error occurs Look for a remedy. -
Page 30: Changing Osd Language
CHANGING OSD LANGUAGE CHANGING OSD LANGUAGE This feature allows you to select the language of your choice that appears in the SET MENU of this unit. Set the operation mode selector to YSP to Press to select the language and switch to the operation mode of this unit. -
Page 31: Auto Setup (Intellibeam)
AUTO SETUP (INTELLIBEAM) AUTO SETUP (IntelliBeam) This unit creates a sound field by reflecting sound beams on the walls of your listening room and broadening the cohesion of all the channels. Just as you would arrange the speaker position of other audio systems, you need to set the beam angle to enjoy the best possible sound from this unit. -
Page 32: Installing The Optimizer Microphone
AUTO SETUP (IntelliBeam) Installing the optimizer microphone The supplied optimizer microphone collects and analyzes the sound that this unit produces in your actual listening environment. Follow the procedure below to connect the optimizer microphone to this unit and make sure that the optimizer microphone is placed in a proper location and that there are no large obstacles between the optimizer microphone and the walls in your listening room. -
Page 33: Using Auto Setup (Intellibeam)
AUTO SETUP (IntelliBeam) Using AUTO SETUP (IntelliBeam) Once the optimizer microphone is firmly connected to this unit and properly placed in your listening room, follow the procedure below to start the AUTO SETUP procedure. You can also enter the AUTO SETUP procedure simply by pressing and holding AUTO SETUP on the remote control more than 2 seconds. - Page 34 AUTO SETUP (IntelliBeam) Notes Press MENU on the remote control. The SET MENU screen appears on your TV. • Make sure that your listening room is as quiet as possible while this unit is performing the AUTO SETUP procedure. • To achieve the best results possible, evacuate yourself from SET ENU your listening room until the AUTO SETUP procedure is E ORY...
- Page 35 AUTO SETUP (IntelliBeam) Press to select BEAM+SOUND Check the following points once again before OPTIMZ, BEAM OPTIMZ only or SOUND starting the AUTO SETUP procedure. OPTIMZ only and then press ENTER. • Is the optimizer microphone firmly connected to this unit? The following screen appears on your TV.
- Page 36 AUTO SETUP (IntelliBeam) Check that the following screen is displayed Disconnect the optimizer microphone from on your TV. the OPTIMIZER MIC jack on the front panel. The results of the AUTO SETUP procedure are displayed on your TV. Side view Example 1 SHOW RESULT EASURE ENT CO PLETE...
-
Page 37: Error Messages For Auto Setup
If the position/connection and re-try. problem persists, contact the nearest YAMAHA service center for assistance. ERROR E-7 An internal system error occurred. Repeat the AUTO SETUP procedure. —... -
Page 38: Using The System Memory
USING THE SYSTEM MEMORY USING THE SYSTEM MEMORY Convenient usage of the system Press to select MEMORY and then memory press ENTER. The following screen appears on your TV. You can save the current settings adjusted in SET MENU in the system memory of this unit. It is handy to save certain settings according to the varying conditions of your listening environment. -
Page 39: Loading Settings
USING THE SYSTEM MEMORY Loading settings Press to select MEMORY1, MEMORY2 or MEMORY3 and then press ENTER. You can recall the settings saved in “Saving settings” on The following screen appears on your TV. page 36 according to the varying conditions of your listening environment. - Page 40 USING THE SYSTEM MEMORY Press to select LOAD and then press Press ENTER again. ENTER. The new parameters are saved as MEMORY1, MEMORY2 or MEMORY3. Once the parameters are The following screen appears on your TV. saved, the display returns to the SET MENU screen. 1)MEMORY LOAD ENTER ENTER...
-
Page 41: Playback
PLAYBACK PLAYBACK Front panel operations Selecting the input source Press INPUT on the front panel repeatedly to You can play back sound from the components connected toggle between TV, DVD, VCR and AUX. to this unit simply by pressing INPUT on the front panel The name of the corresponding input source and the type repeatedly or pressing one of the input selector buttons of the current input mode are shown in the front panel... -
Page 42: Playing Back Sources
PLAYBACK Set the operation mode selector to YSP to switch Playing back sources to the operation mode of this unit and then press VCR on the remote control to play back a video Once an input source is selected (see page 39), you can tape. -
Page 43: Adjusting The Volume
PLAYBACK Adjusting the volume Muting the sound VOLUME TV VOL MUTE TV INPUT TV MUTE CODE SET Press MUTE on the remote control to mute the sound. AUDIO MUTE ON appears in the front panel INPUT VOLUME STANDBY/ON display, and the volume level indicator flashes. MUTE VOLUME TV VOL... -
Page 44: Enjoying Surround Sound
ENJOYING SURROUND SOUND ENJOYING SURROUND SOUND You can enjoy multi channel surround sound by changing the beam mode using the beam mode buttons on the remote control. Select 3 beam, 5 beam and stereo plus 3 beam for multi channel playback. Note When ANGLE TO WALL OR CORNER is set in MANUAL SETUP (see page 62), 5 beam and 3 beam cannot be selected. -
Page 45: Stereo Plus 3 Beam
ENJOYING SURROUND SOUND Stereo plus 3 beam 3 beam Outputs normal sound from the front left and right Outputs sound beams from the front left and right and channels and sound beams from the center and surround center channels. This mode is ideal for enjoying movies left and right channles. - Page 46 ENJOYING SURROUND SOUND Decoder indicators Surround modes and recommended Depending on the input source and the selected surround sources mode, the indicators in the front panel display light up as Recommended follows: Surround mode source Status Indicator Dolby Pro Logic –...
-
Page 47: Enjoying 2-Channel Sources In Surround Sound
ENJOYING SURROUND SOUND Enjoying 2-channel sources Press SURROUND on the remote control in surround sound repeatedly (or press SURROUND and then press ) to switch between surround This unit can decode 2-channel sources for 5.1 channel modes. playback so that you can enjoy a variety of surround sound effects by switching the surround mode. -
Page 48: Adjusting Surround Mode Parameters
ENJOYING SURROUND SOUND When Dolby Pro Logic II Music is Adjusting surround mode selected parameters PANORAMA Gives front left and right channel sound a wraparound You can configure the parameters for Dolby Pro Logic II effect, distributed throughout the entire surround Music and DTS Neo:6 Music to fine-tune the surround sound field to give you an expansive feeling. -
Page 49: Enjoying Stereo Sound
ENJOYING STEREO SOUND ENJOYING STEREO SOUND Stereo playback Notes • When you play back multi-channel sources, all signals except You can enjoy 2-channel stereo playback by changing the those for the front left and right channels are mixed down and beam mode to the stereo playback using the beam mode output from the front left and right channels. -
Page 50: Playing Back Sound Clearly (My Beam)
PLAYING BACK SOUND CLEARLY (MY BEAM) PLAYING BACK SOUND CLEARLY (My beam) You can improve listenability in a noisy environment by changing the beam mode to the my beam, outputs sound beams directly to the listening position in a single channel. In addition, the my beam is also ideal if you do not want the sound beams to be reflected on the walls in your listening room or if you do not disturb others asleep while enjoying music or movies at night. -
Page 51: Using Manual-Adjust Function
PLAYING BACK SOUND CLEARLY (My beam) Using manual-adjust function You can adjust the beam angle manually while playing back an input source. This function is also ideal if the listening position is out of the operation guarantee range of the auto-adjust function. Set the operation mode selector to YSP to switch to the operation mode of this unit. -
Page 52: Using Sound Field Programs
This unit is equipped with a variety of precise digital decoders that allow you to enjoy multi-channel playback from stereo or multi-channel sources. This unit is also equipped with a YAMAHA CINEMA DSP (digital sound field processing) chip containing several sound field programs which you can use to enhance your playback experience. Most of the sound field programs are precise digital recreations of actual acoustic environments found in famous concert halls, music venues and movie theaters. -
Page 53: Sound Field Program Descriptions
USING SOUND FIELD PROGRAMS Sound field program descriptions You can select from the following sound field programs based on your listening preference when you play music, movie or sports sources. For details on how to switch between the available sound field programs, see page 52. Note There is only one sports sound field program available. -
Page 54: Turning On Cinema Dsp Programs
USING SOUND FIELD PROGRAMS Turning on CINEMA DSP programs Check that MUSIC is displayed in the front panel display and then press MUSIC on the You can select from three different sound field programs remote control repeatedly (or press (MUSIC, MOVIE and SPORTS) depending on the type of the remote control) to switch between the sources you want to enjoy. - Page 55 USING SOUND FIELD PROGRAMS Check that MOVIE is displayed in the front panel display and then press MOVIE on the remote control repeatedly (or press the remote control) to switch between the music sound field programs. MOVIE ENTER Sci-Fi Spectacle Adventure For detailed descriptions of each sound field program, see “Sound field program descriptions”...
-
Page 56: Turning Off Cinema Dsp Programs
USING SOUND FIELD PROGRAMS Turning off CINEMA DSP programs Adjusting CINEMA DSP effect levels Turn off the CINEMA DSP programs if you want to enjoy You can enjoy good quality sound with the factory preset the original sound without the sound field program effect. parameters. -
Page 57: Using The Volume Mode (Night Listening Mode/Tv Volume Equal Mode)
USING THE VOLUME MODE (NIGHT LISTENING MODE/TV VOLUME EQUAL MODE) USING THE VOLUME MODE (Night listening mode/TV volume equal mode) The night listening modes are designed to improve listenability at lower volumes or at night. In addition, you can limit the volume level of the TV so that it will not vary suddenly to a great extent whenever the contents being broadcast change (i.e. - Page 58 USING THE VOLUME MODE (Night listening mode/TV volume equal mode) Press on the remote control to adjust the effect level of compression while NIGHT:CINEMA, NIGHT:MUSIC or TV EQUAL VOL is displayed. ENTER Effect.Lvl:MIN Effect.Lvl:MID Effect.Lvl:MAX • Select Effect.Lvl:MIN for minimum compression. •...
-
Page 59: Using Bass Sound Enhancer (Trubass)
USING BASS SOUND ENHANCER (TRUBASS) USING BASS SOUND ENHANCER (TruBass) This unit can produce the perception of an improved low frequency performance with the aid of the SRS TruBass technology, which improves bass even without a subwoofer and provides deeper, richer bass in the presence of a subwoofer. -
Page 60: Using The Sleep Timer
USING THE SLEEP TIMER USING THE SLEEP TIMER Use this feature to automatically set this unit to the standby mode after a specified time period. The sleep timer is useful if you are going to sleep after a certain amount of time while this unit is still playing back a source. Each time you press SLEEP on the remote control, Setting the sleep timer the front panel display changes as shown below. -
Page 61: Canceling The Sleep Timer
USING THE SLEEP TIMER Canceling the sleep timer Set the operation mode selector to YSP to switch to the operation mode of this unit. TV/AV Press SLEEP on the remote control repeatedly so that SLEEP OFF appears in the front panel display. SLEEP SLEEP Wait for a few seconds without operating this... -
Page 62: Manual Setup
MANUAL SETUP MANUAL SETUP To achieve the best quality surround sound, you can use MANUAL SETUP to fine-tune the listening environment parameters, as well as to make advanced settings for sound signals, sound beams, digital input and the OSD. Change the initial settings (indicated in bold under each parameter) to reflect the needs of your own listening environment. -
Page 63: Using Manual Setup
MANUAL SETUP Using MANUAL SETUP Press to select MANUAL SETUP and then press ENTER. Use the remote control to access and adjust each The following screen appears on your TV. parameter. 5BEAM ST+3BEAM 3BEAM STEREO MY BEAM SURROUND ENTER ENTER MUSIC MOVIE SPORTS... -
Page 64: Beam Menu
MANUAL SETUP • Select FLAT TO WALL if this unit is installed in BEAM MENU parallel with the wall in your listening room. Adjust the width and length of your listening room as well as the Use to manually adjust various parameters related to the distance of the listening position from this unit and the sound beam output. - Page 65 MANUAL SETUP • Select ANGLE TO WALL OR CORNER if this unit is INSTALLED HEIGHT (Installed height of this unit) installed in the corner in your listening room. Adjust Use to adjust the installed height of this unit. the width and length of your listening room as well as Control range: 0.0 m to 3.0 m the distance of the listening position from this unit.
- Page 66 MANUAL SETUP HORIZONTAL ANGLE (Horizontal angle) BEAM TRAVEL LENGTH (Beam travel length) Use to adjust the horizontal angle of beams for each A certain amount of delay must be applied to the sound channel. By adjusting the horizontal angle of the beams, from each channel so that all sound will arrive at the you can optimize the sound beam paths.
- Page 67 MANUAL SETUP FOCAL LENGTH (Focal length) TREBLE GAIN (Treble gain) Use to set the distance from the front of this unit to the Use to adjust the high frequency output level of each focal point of output for each channel and adjust an channel.
-
Page 68: Sound Menu
MANUAL SETUP IMAGE LOCATION (Image location) SOUND MENU Use to adjust the direction from which the front left and right channel sound is heard so that the each sound can be Use to manually adjust various parameters related to the heard closer to the center channel. - Page 69 MANUAL SETUP SUBWOOFER SET (Subwoofer set) MUTE LEVEL (Muting level) Use to manually adjust various subwoofer settings. Use to adjust how much the mute function reduces the volume level. Choices: MUTE, –20 dB B)SUBWOOFER SET • Select MUTE to completely halt all sound output. BASS OUT;;;;;FRONT •...
-
Page 70: Input Menu
MANUAL SETUP DD/DTS Dynamic Range INPUT MENU (Dynamic range of Dolby Digital and DTS signals) Use to manually adjust various parameters related to the Use to select the amount of dynamic range compression. audio and video input. This setting is effective only when the unit is decoding SET MENU →... - Page 71 MANUAL SETUP • Select COMPONENT (1) to assign components to the INPUT TRIM (Input trim) STB COMPONENT VIDEO IN jacks of this unit. Use to adjust the input level of the input source. Choices: TV, VCR • Select COMPONENT (2) to assign components to the C)INPU RIM DVD/AUX COMPONENT VIDEO IN jacks of this ANALOG...
-
Page 72: Display Menu
MANUAL SETUP INPUT RENAME (Input rename) DISPLAY MENU Use to change the name of the input source in the OSD and the front panel display. Press an input selector button Use to manually adjust various parameters related to the (TV, STB, DVD, VCR, or AUX) to select the component display. - Page 73 MANUAL SETUP OSD SET (OSD settings) Use to adjust the display position and the background color of the OSD. B) SD SHIFT BACK C L R BLUE [ ]/[ ]:Up/Down [ ]/[ ]:Sel [ENTER]:Return OSD SHIFT (OSD shift) Use to adjust the vertical position of the OSD. Adjust towards the –...
-
Page 74: Adjusting The Audio Balance
ADJUSTING THE AUDIO BALANCE ADJUSTING THE AUDIO BALANCE You can adjust the sound beam output level of each channel by using the test tone or the audio output being played back in each beam mode to achieve a more true-to-life surround sound experience. Using the test tone Press to select the channel you want... -
Page 75: Using The Audio Output Being Player Back
ADJUSTING THE AUDIO BALANCE Using the audio output being Press TEST when you have completed all player back your adjustments. You can also manually adjust the channel levels while TEST playing back an input source such as a DVD. Notes CH LEVEL MENU •... - Page 76 ADJUSTING THE AUDIO BALANCE Note SWFR is only available when a subwoofer is connected to this unit and SWFR is selected for BASS OUT in SOUND MENU (see page 66). Press to adjust channel volumes. ENTER Control range: –10 dB to +10 dB Wait for a few seconds without operating this unit when you have completed your adjustment.
-
Page 77: Selecting The Input Mode
SELECTING THE INPUT MODE SELECTING THE INPUT MODE You can select the type of audio input signals of the selected input source according to your preference or the conditions of the input source. We recommend setting the input mode to AUTO in most cases. Notes •... -
Page 78: Adjusting System Parameters
ADJUSTING SYSTEM PARAMETERS ADJUSTING SYSTEM PARAMETERS This unit has additional menus that are displayed in the front panel display. These menus offer additional operations to adjust and customize the way this unit operates. Using the system parameters Release INPUT on the front panel. Follow the procedure below to enter the system parameters. -
Page 79: Setting The Max Volume
ADJUSTING SYSTEM PARAMETERS Press to switch between PROTECT: ON Press on the remote control so that and PROTECT: OFF. MAX VOLUME SET is shown in the front panel display. ENTER ENTER PROTECT: ON MAX VOLUME SET Press ENTER. PROTECT: OFF •... -
Page 80: Setting The Turn On Volume
ADJUSTING SYSTEM PARAMETERS Setting the TURN ON VOLUME Press STANDBY/ON on the front panel to set this unit to the standby mode. You can set the initial volume level when the power of this unit is turned on. STANDBY/ON Repeat steps 1 to 3 in “Using the system parameters”... -
Page 81: Setting The Factory Preset
ADJUSTING SYSTEM PARAMETERS Setting the FACTORY PRESET Press to switch between DEMO: ON and DEMO: OFF. You can reset all of the parameters of this unit to the factory presets. This procedure completely resets ALL the parameters in SET MENU. Note ENTER After performing the following procedure you must run the... - Page 82 ADJUSTING SYSTEM PARAMETERS Press to switch between PRESET: RESET and PRESET: CANCEL. ENTER PRESET: RESET PRESET: CANCEL • Select PRESET: RESET to reset all of the current settings. • Select PRESET: CANCEL to cancel the resetting procedure. Press STANDBY/ON on the front panel to set this unit to the standby mode.
-
Page 83: Remote Control Features
REMOTE CONTROL FEATURES REMOTE CONTROL FEATURES In addition to controlling this unit, the remote control can also operate other A/V components made by YAMAHA and other manufacturers. To control other components, you must set up the remote control with the appropriate remote control codes and set the operation mode selector to TV/AV to change the control area. -
Page 84: Controlling Other Components
REMOTE CONTROL FEATURES Controlling other components Operating your TV Operating your DVD player Set the operation mode selector to TV/AV and Set the operation mode selector to TV/AV and then then press TV to select TV as the input source. press DVD to select DVD as the input source. - Page 85 REMOTE CONTROL FEATURES Operating your VCR Operating your STB (CATV/Satellite tuner) Set the operation mode selector to TV/AV and Set the operation mode selector to TV/AV and then press VCR to select VCR as the input then press STB to select STB as the input source.
-
Page 86: Using The Tv Macro
REMOTE CONTROL FEATURES Setting macros for the TV with the Using the TV macro tuning capability The TV macro feature makes it possible to perform a Press and hold CODE SET on the remote series of operations with the press of a single button. For control and then press one of the input example, when you want to play a DVD, you would selector buttons to select the input source... - Page 87 REMOTE CONTROL FEATURES Setting macros for the TV without the Operating macros tuning capability Set the operation mode selector to YSP to Press and hold CODE SET on the remote switch to the operation mode of this unit. control and then press one of the input selector buttons to select the input source TV/AV you want to set macros for.
-
Page 88: Troubleshooting
Refer to the chart below when this unit does not function properly. If the problem you are experiencing is not listed below or if the instruction below does not help, set this unit to the standby mode, disconnect the power supply cable and contact the nearest authorized YAMAHA dealer or service center. General... - Page 89 TROUBLESHOOTING Problem Cause Remedy page Distorted or too little bass sound. CROSS OVER in SUBWOOFER SET is Set CROSS OVER correctly. set incorrectly. One of the night listening modes is Turn off the night listening modes. currently selected. Too much bass sound. TruBass is currently turned on.
- Page 90 TROUBLESHOOTING Remote control Problem Cause Remedy page The remote control does not work Wrong distance or angle. The remote control will function within a and/or function properly. maximum range of 6 m and no more than 30 degrees off-axis from the front panel. Direct sunlight or lighting (from an Reposition this unit.
-
Page 91: Glossary
GLOSSARY GLOSSARY DTS (Digital Theater Systems) Audio formats Digital Surround DTS digital surround was developed to replace the analog Dolby Digital soundtracks of movies with a 6-channel digital sound Dolby Digital is a digital surround sound system that gives track, and is now rapidly gaining popularity in movie you completely independent multi-channel audio. -
Page 92: Index
INDEX INDEX AUTO SETUP (IntelliBeam) ......... 29 On-screen display (OSD)..........26 Optimizer microphone ............ 30 Beam mode............42, 47, 48 PCM ................89 Power supply cable ............23 Cable clamp ..............15 Cardboard microphone stand.......... 31 Remote control............9, 24, 25 Remote control code ............ -
Page 93: Specifications
SPECIFICATIONS SPECIFICATIONS AMP SECTION GENERAL • Maximum Output Power (EIAJ) • Power supply ..........2 W (1 kHz, 10% THD, 4 Ω) × 40 [U.S.A. and Canada models] ......AC 120 V, 60 Hz 20 W (100 Hz, 10% THD, 3 Ω) × 2 [Australia model] .......... - Page 94 YAMAHA no se hará responsable de ningún daño debido al uso de este aparato con una tensión diferente de la especificada.
- Page 95 ÍNDICE DISFRUTE DEL SONIDO SURROUND ..42 INTRODUCCIÓN 5 haces ..............42 Estéreo más 3 haces ..........43 IDEA GENERAL ..........2 3 haces ..............43 CARACTERÍSTICAS .......... 3 Disfrute de fuentes de 2 canales con sonido surround ..45 USO DE ESTE MANUAL ........4 Ajuste de parámetros del modo surround ....
-
Page 96: Idea General
El proyector de sonido digital YSP-1100 de YAMAHA pone en entredicho la idea preconcebida de que la instalación complicada de los altavoces y las molestas conexiones resultan necesarias para disfrutar del sonido surround multicanal. -
Page 97: Características
Esta unidad emplea la tecnología Cinema DSP Digital Esta sofisticada tecnología de decodificación de matriz convierte el desarrollada por YAMAHA Electronics Corp. para que audio de cualquier fuente de 2 canales en 5.1 canales de reprodución usted pueda disfrutar de películas en casa con todo el de ancho de banda completo, mejorando el sonido surround. -
Page 98: Uso De Este Manual
USO DE ESTE MANUAL USO DE ESTE MANUAL Notas • Este manual describe cómo conectar y utilizar esta unidad. Para conocer detalles de la utilización de componentes externos, consulte los manuales del propietario suministrados con esos componentes. • Algunas operaciones se pueden llevar a cabo con los botones de la unidad principal o del mando a distancia. En tales casos, el funcionamiento se describe utilizando el mando a distancia. -
Page 99: Accesorios Suministrados
ACCESORIOS SUMINISTRADOS ACCESORIOS SUMINISTRADOS Verifique que ha recibido todos los componentes siguientes. Mando a distancia (×1) Pilas (×2) Cable óptico (×1) (AA, R6, UM-3) STANDBY/ON POWER POWER INPUT1 INPUT2 MACRO AUTO Cable de vídeo OSD con clavijas (×1) Cable de audio digital con clavijas (×1) VOL MODE SETUP INPUTMODE SLEEP... -
Page 100: Controles Y Funciones
CONTROLES Y FUNCIONES CONTROLES Y FUNCIONES Panel delantero INPUT VOLUME STANDBY/ON 1 Jack OPTIMIZER MIC 6 STANDBY/ON Se utiliza para conectar el micrófono optimizador Conecta la alimentación de esta unidad o la pone en el suministrado que va a ser usado para ejecutar AUTO modo de espera (vea la página 25). -
Page 101: Visualizador Del Panel Delantero
CONTROLES Y FUNCIONES Visualizador del panel delantero NIGHT SLEEP DIGITAL 1 Indicador NIGHT 4 Indicador del nivel del sonido Se enciende cuando se selecciona uno de los modos de Muestra el nivel del sonido actual (vea la página 41). escucha (vea la página 55). 5 Visualizador de información múltiple 2 Indicador SLEEP Muestra información cuando usted ajusta los parámetros... -
Page 102: Panel Trasero
CONTROLES Y FUNCIONES Panel trasero COMPONENT COMPONENT COMPONENT TV/STB COAXIAL OPTICAL TV/STB DVD/AUX DIGITAL IN AUDIO IN VIDEO IN VIDEO OUT RS-232C REMOTE IN SUBWOOFER 1 Terminales RS-232C/REMOTE IN 0 Jacks DVD/AUX COMPONENT VIDEO IN Éstos son terminales de expansión de control para usar en Se usa para conectar un reproductor/grabadora DVD o un la fábrica solamente (vea la página 23). -
Page 103: Mando A Distancia
CONTROLES Y FUNCIONES Mando a distancia 3 Indicador de transmisión Las funciones de algunos botones cambian dependiendo de la posición del selector del modo de operación (S). Se enciende cuando se emiten señales de control infrarrojas. Esta sección describe básicamente las funciones del 4 Botones selectores de entrada mando a distancia utilizado para controlar esta unidad. - Page 104 CONTROLES Y FUNCIONES H TV POWER U TV VOL +/– Conecta la alimentación del TV o la pone en el modo de Ajusta el nivel de sonido del TV (vea la página 82). espera (vea la página 82). V CH +/– I AV POWER Cambia entre canales del TV o la videograbadora (vea las Conecta la alimentación del componente seleccionado o la...
-
Page 105: Instalación
INSTALACIÓN INSTALACIÓN Esta sección describe un lugar de instalación adecuado para poner la unidad usando una ménsula metálica para pared, una estantería o un soporte. Antes de instalar esta unidad Instalación de esta unidad Esta unidad crea sonido surround reflejando en las paredes Instale esta unidad donde no haya obstáculos como, por de su habitación de escucha los haces sonoros ejemplo, muebles obstruyendo la trayectoria de los haces... - Page 106 INSTALACIÓN Ejemplos de instalación Ejemplo 1 Instale esta unidad tan cerca del centro exacto de la pared como sea posible. Ejemplo 2 Instale esta unidad para que los haces de sonido puedan ser reflejados por las paredes. Ejemplo 3 Instale esta unidad tan cerca de la parte delantera exacta de su posición de escucha normal como sea posible...
- Page 107 INSTALACIÓN Utilizando una ménsula metálica para Utilizando un soporte de TV pared Para instalar esta unidad puede usar el soporte de TV opcional. Para conocer una información detallada de la Puede usar la ménsula metálica para pared opcional para instalación de esta unidad utilizando un soporte de TV, montar esta unidad en la pared de su habitación de consulte el manual de instalación suministrado con el escucha.
- Page 108 INSTALACIÓN Fijación de esta unidad Pele la película de cada uno de los cuatro fiadores suministrados y luego asegúrelos en las cuatro esquinas inferiores de esta unidd y en la parte superior de la estantería, etc. Esta unidad Pele la almohadilla de la parte inferior...
-
Page 109: Conexiones
CONEXIONES CONEXIONES Esta unidad está equipada con los tipos siguientes de jacks de entrada/salida de audio/vídeo: Para entrada de audio Para entrada de vídeo • 2 jacks de entrada digital óptica • 3 jacks de entrada analógica compuesta • 1 jack de entrada digital coaxial •... -
Page 110: Conexión De Un Tv
CONEXIONES Conexión de un TV Conecte un TV a esta unidad y visualice la OSD para ver fácilmente cuando usted ajuste los parámetros del sistema en SET MENU. Conexiones de audio Conexiones de vídeo Conecte los jacks de salida de audio analógico de su TV a Conecte los jacks de entrada de vídeo de su TV a los jacks los jacks TV/STB AUDIO IN de esta unidad. -
Page 111: Conexión De Un Reproductor/Grabadora Dvd
CONEXIONES Conexión de un reproductor/grabadora DVD Conecte un reproductor/grabadora DVD y disfrute de los DVDs. Conexiones de audio Conexiones de vídeo Conecte el jack de salida digital óptica de su reproductor/ Conecte el jack de salida de vídeo de su reproductor/ grabadora DVD al jack DVD COAXIAL DIGITAL IN de grabadora DVD al jack DVD/AUX VIDEO IN de esta esta unidad. -
Page 112: Conexión De Una Videograbadora
CONEXIONES Conexión de una videograbadora Conecte una videograbadora y disfrute de cintas de casete. Conexiones de audio Conexiones de vídeo Conecte los jacks de salida de audio analógico de su Conecte el jack de salida de vídeo de su videograbadora al videograbadora a los jacks VCR AUDIO IN de esta unidad. -
Page 113: Conexión De Un Sintonizador De Satélite Digital O Un Sintonizador De Tv Por Cable
CONEXIONES Conexión de un sintonizador de satélite digital o un sintonizador de TV por cable Conecte un sintonizador de satélite digital o un sintonizador de TV por cable y disfrute de las emisiones de satélite digital o de TV por cable. Conexiones de audio Conexiones de vídeo Conecte el jack de salida digital óptica de su sintonizador... -
Page 114: Conexión De Un Sintonizador Digital De Ondas Del Aire
CONEXIONES Conexión de un sintonizador digital de ondas del aire Si su sintonizador digital de ondas del aire no soporta las emisiones analógicas, haga las conexiones de audio y vídeo como se muestra más abajo. Conexiones de audio Conexiones de vídeo Conecte el jack de salida digital óptica de su sintonizador Conecte el jack de salida de vídeo de su sintonizador digital de ondas del aire al jack TV/STB OPTICAL... -
Page 115: Conexión De Otros Componentes Externos
CONEXIONES Conexión de otros componentes externos Para conectar otros componentes externos, conecte el jack de salida digital óptica del componente externo al jack AUX OPTICAL DIGITAL IN de esta unidad. Use este método de conexión para conectar un componente externo que soporte una conexión digital óptica o para conectar un reproductor/grabadora DVD mediante una conexion digital óptica. -
Page 116: Conexión De Un Altavoz De Subgraves
CONEXIONES Conexión de un altavoz de subgraves Para conectar un altavoz de subgraves, conecte el jack de entrada monofónica de su altavoz de subgraves al jack SUBWOOFER de esta unidad. Si hay un altavoz de subgraves conectado a esta unidad, encienda dicho altavoz y luego ejecute AUTO SETUP (vea la página 29) o seleccione SWFR para BASS OUT en SUBWOOFER SET (vea la página 67). -
Page 117: Conexión Del Cable De Alimentación
CONEXIONES Conexión del cable de alimentación Una vez terminadas todas las demás conexiones, enchufe un extremo del cable de alimentación en el terminal AC IN de esta unidad y luego enchufe el otro extremo en la toma de CA. A la toma de CA Acerca de los terminales RS-232C/REMOTE IN/IR-OUT Los terminales RS-232C, REMOTE IN y IR-OUT no soportan las conexiones de componentes externos normales. -
Page 118: Preparativos
PREPARATIVOS PREPARATIVOS Instalación de las pilas en el Quite la hoja transparente antes de usar el mando a distancia. mando a distancia Pulse Alcance de funcionamiento del mando a distancia El mando a distancia transmite una rayo infrarrojo direccional. Utilice el mando a distancia a menos de 6 m de esta unidad y apúntelo hacia el sensor de mando a distancia de esta unidad durante la utilización. -
Page 119: Utilización Del Mando A Distancia
PREPARATIVOS Utilización del mando a distancia Encendido de esta unidad Esta sección describe cómo controlar esta unidad utilizando el mando a distancia suministrado. Las funciones del mando a distancia cambian dependiendo de la posición del selector de modo de operación. Ponga el selector de modo de operación en YSP para cambiar al modo de operación de esta unidad. -
Page 120: Utilización Set Menu
UTILIZACIÓN SET MENU UTILIZACIÓN SET MENU Visualización de la OSD Esta sección describe cómo visualizar la OSD (visualización en pantalla) de esta unidad en su pantalla de TV y cómo poner los parámetros para su habitación de escucha. Una vez completado esto podrá disfrutar de un sonido surround real mientras ve la TV en la comodidad de su propia casa. -
Page 121: El Organigrama De Set Menu
UTILIZACIÓN SET MENU El organigrama de SET MENU El diagrama siguiente ilustra las operaciones del procedimiento de preparación. Ejecute LANGUAGE SETUP. Vea “CAMBIO DEL IDIOMA DE LA OSD” en la página 28. Ejecute AUTO SETUP (IntelliBeam). Vea “AUTO SETUP (IntelliBeam)” en la página 29. Si ocurre un error Busque un remedio. -
Page 122: Cambio Del Idioma De La Osd
CAMBIO DEL IDIOMA DE LA OSD CAMBIO DEL IDIOMA DE LA OSD Esta función le permite seleccionar el idioma de su elección que aparece en el SET MENU de esta unidad. Ponga el selector de modo de operación en Pulse para seleccionar el idioma y YSP para cambiar al modo de operación de luego pulse ENTER. -
Page 123: Auto Setup (Intellibeam)
AUTO SETUP (INTELLIBEAM) AUTO SETUP (IntelliBeam) Esta unidad crea un campo sonoro reflejando haces sonoros en las paredes de su habitación de escucha y ampliando la cohesión entre todos los canales. Al igual que con la disposición de otros sistemas de audio, usted necesita ajustar el ángulo del haz para disfrutar del mejor sonido posible procedente de esta unidad. -
Page 124: Instalación Del Micrófono Optimizador
AUTO SETUP (IntelliBeam) Instalación del micrófono optimizador El micrófono optimizador suministrado recoge y analiza el sonido que produce esta unidad en su ambiente de escucha real. Siga el procedimiento de abajo para conectar el micrófono optimizador a esta unidad y asegurarse de que esté situado en un lugar apropiado y que no haya obstáculos grandes entre él y las paredes de su habitación de escucha. -
Page 125: Usando Auto Setup (Intellibeam)
AUTO SETUP (IntelliBeam) Usando AUTO SETUP (IntelliBeam) Una vez que el micrófono optimizador esté firmemente conectado a esta unidad y colocado en su habitación de escucha, siga el procedimiento de abajo para empezar el procedimiento AUTO SETUP. También puede introducir el procedimiento AUTO SETUP simplemente manteniendo pulsado AUTO SETUP en el mando a distancia durante más de 2 segundos. - Page 126 AUTO SETUP (IntelliBeam) Notas Pulse MENU en el mando a distancia. La pantalla SET MENU aparece en su TV. • Asegúrese de que su habitación de escucha esté lo más silenciosa posible mientras hace el procedimiento AUTO SETUP. SET ENU •...
- Page 127 AUTO SETUP (IntelliBeam) Nota Pulse para seleccionar BEAM+SOUND OPTIMZ, BEAM OPTIMZ only Tendrá que optimizar el ángulo del haz en el procedimiento o SOUND OPTIMZ only y luego pulse ENTER. BEAM OPTIMZ only antes de empezar el procedimiento SOUND OPTIMZ only. La pantalla siguiente aparece en su TV.
- Page 128 AUTO SETUP (IntelliBeam) Si ‘‘ENVIRONMENT CHECK [FAILED]’’ se visualiza en el paso 8, después de pulsar ENTER se visualiza la Compruebe que la pantalla siguiente se pantalla siguiente. En este caso, vea ERROR E-1 en visualice en su TV. “Mensajes de error para AUTO SETUP” en la página 35. Los resultados del procedimiento AUTO SETUP se Pulse ENTER para salir de AUTO SETUP y luego vuelva visualizan en su TV.
- Page 129 Si el problema persiste, contacte con el centro de servicio YAMAHA más cercano para solicitar su asistencia. ERROR E-7 Se ha producido un error en el interior Repita el procedimietno AUTO SETUP.
-
Page 130: Uso De La Memoria Del Sistema
USO DE LA MEMORIA DEL SISTEMA USO DE LA MEMORIA DEL SISTEMA Uso conveniente de la memoria Pulse para seleccionar MEMORY y del sistema luego pulse ENTER. La pantalla siguiente aparece en su TV. En la memoria del sistema de esta unidad puede guardar los ajustes actuales realizados en SET MENU. -
Page 131: Carga De Ajustes
USO DE LA MEMORIA DEL SISTEMA Carga de ajustes Pulse para seleccionar MEMORY1, MEMORY2 o MEMORY3 y luego pulse Puede recuperar los ajustes guardados en “Para guardar ENTER. ajustes” en la página 36 según las condiciones cambiantes La pantalla siguiente aparece en su TV. de su habitación de escucha. - Page 132 USO DE LA MEMORIA DEL SISTEMA Pulse para seleccionar LOAD y luego Pulse de nuevo ENTER. pulse ENTER. Los nuevos parámetros se guardan como MEMORY1, MEMORY2 o MEMORY3. Una vez La pantalla siguiente aparece en su TV. guardados los parámetros, la visualización vuelve a la pantalla siguiente SET MENU.
-
Page 133: Reproducción
REPRODUCCIÓN REPRODUCCIÓN Operaciones en el panel delantero Selección de la fuente de entrada Pulse repetidamente INPUT en el panel delantero Puede reproducir sonido de los componentes conectados a para cambiar entre TV, DVD, VCR y AUX. esta unidad pulsando simplemente INPUT en el panel El nombre de la fuente de entrada correspondiente y el delantero de forma repetida o pulsando uno de los botones tipo del modo de entrada actual se muestran en el... -
Page 134: Reproducción De Fuentes
REPRODUCCIÓN Ponga el selector del modo de operación en YSP Reproducción de fuentes para cambiar al modo de operación de esta unidad y luego pulse VCR en el mando a Una vez seleccionada una fuente de entrada (vea la página 39), distancia para reproducir una cinta de vídeo. -
Page 135: Ajuste Del Volumen
REPRODUCCIÓN Ajuste del volumen Silenciamiento del sonido VOLUME TV VOL MUTE TV INPUT TV MUTE CODE SET Pulse MUTE en el mando a distancia para silenciar el sonido. AUDIO MUTE ON aparece en el visualizador del INPUT VOLUME STANDBY/ON panel delantero y el indicador del nivel del sonido parpadea. -
Page 136: Disfrute Del Sonido Surround
DISFRUTE DEL SONIDO SURROUND DISFRUTE DEL SONIDO SURROUND Cambiando el modo de haces con los botones del modo de haces del mando a distancia, usted puede disfrutar del sonido surround de múltiples canales. Seleccione 3 haces, 5 haces y estéreo más 3 haces para la reproducción multicanal. Nota Cuando ANGLE TO WALL OR CORNER se ponga en MANUAL SETUP (vea la página 62), no se puede seleccionar 5 haces ni 3 haces. -
Page 137: Estéreo Más 3 Haces
DISFRUTE DEL SONIDO SURROUND Estéreo más 3 haces 3 haces Da salida a sonido normal de los canales delanteros Da salida a los haces sonoros de los canales delanteros izquierdo y derecho, y a los haces de sonido de los canales izquierdo y derecho y central. - Page 138 DISFRUTE DEL SONIDO SURROUND Indicadores de decodificador Modos de sonido surround y fuentes recomendados Dependiendo de la fuente de entrada y el modo de sonido surround seleccionado, los indicadores del visualizador Fuente del panel delantero se encienden de la forma siguiente. Modo de sonido surround recomendada Estado...
-
Page 139: Disfrute De Fuentes De 2 Canales Con Sonido Surround
DISFRUTE DEL SONIDO SURROUND Disfrute de fuentes de 2 canales Pulse repetidamente SURROUND en el con sonido surround mando a distancia (o pulse SURROUND y luego pulse / ) para cambiar entre modos Esta unidad puede decodificar fuentes de 2 canales para surround. -
Page 140: Ajuste De Parámetros Del Modo Surround
DISFRUTE DEL SONIDO SURROUND Cuando se selecciona Dolby Pro Logic II Ajuste de parámetros del modo Music surround PANORAMA Da al sonido de los canales izquierdo y derecho un Puede configurar los parámetros para Dolby Pro Logic II efecto envolvente, distribuido por todo el campo de Music y DTS Neo:6 Music y ajustar con exactitud los sonido surround, que proporciona una sensación de efectos de sonido surround. -
Page 141: Disfrute Del Sonido Estéreo
DISFRUTE DEL SONIDO ESTÉREO DISFRUTE DEL SONIDO ESTÉREO Reproducción estéreo Notas • Cuando reproduzca fuentes de múltiples canales, todas las Cambiando el modo de haces a reproducción estéreo con señales, excepto las de los canales delanteros izquierdo y los botones del modo de haces del mando a distancia, derecho, se mezclarán y saldrán por los canales delanteros usted puede disfrutar de la reproducción estereo de 2 izquierdo y derecho. -
Page 142: Reproducción Clara Del Sonido (Mi Haz)
REPRODUCCIÓN CLARA DEL SONIDO (MI HAZ) REPRODUCCIÓN CLARA DEL SONIDO (Mi haz) Cambiando el modo de haces a mi haz puede mejorar la capacidad de oír la reproducción en ambientes ruidosos; los haces de sonido salen directamente a la posición de escucha en un solo canal. Además, mi haz resulta ideal si no quiere que los haces sonoros se reflejen en las paredes de su habitación de escucha o si no quiere molestar a personas que duermen mientras usted disfruta de películas durante la noche. -
Page 143: Usando La Función De Ajuste Manual
REPRODUCCIÓN CLARA DEL SONIDO (Mi haz) Usando la función de ajuste manual Puede ajustar el ángulo del haz manualmente mientras reproduce una fuente de entrada. Esta función también resulta ideal si la posición de escucha está fuera del margen de garantía de operación de la función de ajuste automático. -
Page 144: Uso De Programas De Campo Sonoro
La mayoría de los programas de campos sonoros son recreaciones digitales exactas de ambientes acústicos reales encontrados en famosas salas de conciertos, lugares de conciertos musicales y cines. Los modos CINEMA DSP de YAMAHA son compatibles con todas las fuentes Dolby Digital, DTS y Dolby Surround. Nota Elija un programa de campo sonoro basado en sus preferencias y no confíe en el nombre del propio programa de campo sonoro. -
Page 145: Descripciones De Programas De Campos Sonoros
USO DE PROGRAMAS DE CAMPO SONORO Descripciones de programas de campos sonoros Cuando reproduzca música, películas o deportes, usted podrá seleccionar los programas de campos sonoros siguientes basándose en sus preferencias. Para conocer detalles de cómo cambiar entre los programas de campos sonoros disponibles, vea la página 52. -
Page 146: Encendido De Programas Cinema Dsp
USO DE PROGRAMAS DE CAMPO SONORO Encendido de programas CINEMA Compruebe que MUSIC se visualice en el visualizador del panel delantero y luego pulse repetidamente MUSIC en el mando a Puede seleccionar entre tres programas de campos sonoros distancia (o pulse en el mando a diferentes (MUSIC, MOVIE y SPORTS) dependiendo del distancia) para cambiar entre los programas... - Page 147 USO DE PROGRAMAS DE CAMPO SONORO Compruebe que MOVIE se visualice en el Pulse SPORTS en el mando a distancia para visualizador del panel delantero y luego seleccionar el programa de campo sonoro de pulse repetidamente MOVIE en el mando a deportes.
-
Page 148: Apagado De Cinema Dsp Programas
USO DE PROGRAMAS DE CAMPO SONORO Apagado de CINEMA DSP Ajuste de niveles de efecto CINEMA programas Apague los programas CINEMA DSP si quiere disfrutar Con los parámetros ajustados en fábrica puede disfrutar de del sonido original sin efecto de programas de campo sonido de buena calidad. -
Page 149: Utilización Del Modo De Volumen
UTILIZACIÓN DEL MODO DE VOLUMEN (MODO DE ESCUCHA NOCTURNA/MODO DE IGUALACIó N DEL VOLUMEN DEL TV) UTILIZACIÓN DEL MODO DE VOLUMEN (Modo de escucha nocturna/Modo de igualación del volumen del TV) Los modos de escucha nocturna han sido diseñados para facilitar la escucha a volúmenes bajo durante la noche. Además, usted puede limitar el nivel del volumen del TV para que éste no cambie excesivamente de forma repentina siempre que cambie la emisión (debido a anuncios comerciales, etc.). - Page 150 UTILIZACIÓN DEL MODO DE VOLUMEN (Modo de escucha nocturna/Modo de igualación del volumen del TV) Pulse en el mando a distancia para ajustar el nivel de efecto de compresión mientras se visualiza NIGHT:CINEMA, NIGHT:MUSIC o TV EQUAL VOL. ENTER Effect.Lvl:MIN Effect.Lvl:MID Effect.Lvl:MAX •...
-
Page 151: Uso Del Realzador De Graves (Trubass)
USO DEL REALZADOR DE GRAVES (TRUBASS) USO DEL REALZADOR DE GRAVES (TruBass) Esta unidad puede producir la percepción de un rendimiento de frecuencias bajas mejorado con la ayuda de la tecnología SRS TruBass, la cual mejora los graves hasta sin altavoz de subgraves y proporciona graves más profundos y ricos cuando se emplea un altavoz de subgraves. -
Page 152: Uso Del Temporizador Para Dormir
USO DEL TEMPORIZADOR PARA DORMIR USO DEL TEMPORIZADOR PARA DORMIR Utilice esta función para poner automáticamente esta unidad en el modo de espera después de pasar un tiempo especificado. El temporizador para dormir es util si usted va a dormirse después de pasar cierto tiempo mientras esta unidad aún está... -
Page 153: Cancelación Del Temporizador Para Dormir
USO DEL TEMPORIZADOR PARA DORMIR Cancelación del temporizador para dormir Ponga el selector del modo de operación en YSP para cambiar al modo de operación de esta unidad. TV/AV Pulse repetidamente SLEEP en el mando a distancia para que aparezca SLEEP OFF en el visualizador del panel delantero. -
Page 154: Manual Setup
MANUAL SETUP MANUAL SETUP Para lograr el sonido surround de mejor calidad, usted puede utilizar MANUAL SETUP para ajustar con precisión los parámetros del ambiente de escucha, y también para hacer ajustes avanzados para señales de sonido, haces sonoros, entrada digital y OSD. Cambie los ajustes iniciales (en negrita debajo de cada parámetro) para reflejar las necesidades de su ambiente de escucha. -
Page 155: Utilización Manual Setup
MANUAL SETUP Utilización MANUAL SETUP Pulse para seleccionar MANUAL SETUP y luego pulse ENTER. Utilice el mando a distancia para acceder a cada parámetro La pantalla siguiente aparece en su TV. y ajustarlo. 5BEAM ST+3BEAM 3BEAM STEREO MY BEAM SURROUND ENTER ENTER MUSIC... -
Page 156: Beam Menu
MANUAL SETUP • Seleccione FLAT TO WALL si esta unidad está BEAM MENU instalada en paralelo con una pared en su habitación de escucha. Ajuste la anchura y longitud de su habitación Se usa para ajustar manualmente varios parámetros de escucha, y también las distancias de esta unidad a la relacionados con la salida del haz sonoro. - Page 157 MANUAL SETUP • Seleccione ANGLE TO WALL OR CORNER si esta INSTALLED HEIGHT (Altura de instalación de unidad está instalada en una esquina de su habitación esta unidad) de escucha. Ajuste la anchura y la longitud de su Se utiliza para ajustar la altura de instalación de esta habitación de escucha así...
- Page 158 MANUAL SETUP HORIZONTAL ANGLE (Ángulo horizontal) BEAM TRAVEL LENGTH (Longitud de recorrido del haz) Se utiliza para ajustar el ángulo horizontal de los haces para cada canal. Ajustando el ángulo horizontal de los Deberá aplicarse cierto retardo al sonido procedente de haces usted puede optimizar los caminos de los haces cada canal para que todos los sonidos lleguen a la posición sonoros.
- Page 159 MANUAL SETUP FOCAL LENGTH (Distancia focal) TREBLE GAIN (Ganancia de agudos) Se utiliza para establecer la distancia de la parte delantera Se usa para ajustar el nivel de salida de alta frecuencia de de esta unidad al punto focal de salida para cada canal y cada canal.
-
Page 160: Sound Menu
MANUAL SETUP IMAGE LOCATION (Ubicación de SOUND MENU imagen) Se usa para ajustar la dirección desde la que se oye el Se usa para ajustar manualmente varios parámetros sonido de los canales delanteros izquierdo y derecho, para relacionados con la salida de sonido. que cada canal pueda ser oído próximo al canal central. - Page 161 MANUAL SETUP SUBWOOFER SET (Ajuste de altavoz de MUTE LEVEL (Nivel de silenciamiento) subgraves) Para ajustar cuánto va a reducir la función de silenciamiento el nivel del sonido. Se utiliza para ajustar manualmente varios ajustes del Opciones: MUTE, –20 dB altavoz de subgraves.
-
Page 162: Input Menu
MANUAL SETUP DD/DTS Dynamic Range INPUT MENU (Gama dinámica de señales Dolby Digital y DTS) Se usa para ajustar manualmente varios parámetros Para seleccionar la compresión de gama dinámica. Este relacionados con la entrada de audio y vídeo. ajuste sólo es eficaz cuando la unidad decodifica señales SET MENU →... - Page 163 MANUAL SETUP • Seleccione COMPONENT (1) para asignar INPUT TRIM (Recorte de entrada) componentes a los jacks STB COMPONENT VIDEO Se usa para ajustar el nivel de entrada de la fuente de IN de esta unidad. entrada. Opciones: TV, VCR •...
-
Page 164: Display Menu
MANUAL SETUP INPUT RENAME (Cambio de nombre de entrada) DISPLAY MENU Se usa para cambiar el nombre de la fuente de entrada en el OSD y en el visualizador del panel delantero. Pulse un Se usa para ajustar manualmente varios parámetros botón selector de entrada (TV, STB, DVD, VCR o AUX) relacionados con la visualización. - Page 165 MANUAL SETUP OSD SET (Ajustes de la OSD) Se usa para ajustar la posición de visualización y el color del fondo de la OSD. B) SD SHIFT BACK C L R BLUE [ ]/[ ]:Up/Down [ ]/[ ]:Sel [ENTER]:Return OSD SHIFT (Cambio de la OSD) Se utiliza para ajustar la posición vertical de la OSD.
-
Page 166: Ajuste Del Balance De Audio
AJUSTE DEL BALANCE DE AUDIO AJUSTE DEL BALANCE DE AUDIO Puede ajustar el nivel de salida del haz sonoro de cada canal usando el tono de prueba o la salida de audio reproducida en cada modo de haz para lograr un sonido surround más real. Utilizando el tono de prueba Pulse para seleccionar el canal que... -
Page 167: Uso De La Salida De Audio Que Está Siendo Reproducida
AJUSTE DEL BALANCE DE AUDIO Uso de la salida de audio que está Pulse TEST cuando haya completado todos siendo reproducida sus ajustes. También puede ajustar manualmente los niveles de los TEST canales mientras reproduce una fuente de entrada como, por ejemplo, un DVD. - Page 168 AJUSTE DEL BALANCE DE AUDIO Nota SWFR sólo está disponible cuando hay un altavoz de subgraves conectado a esta unidad y SWFR está seleccionado para BASS OUT en SOUND MENU (vea la página 66). Pulse para ajustar los volúmenes de los canales.
-
Page 169: Selección Del Modo De Entrada
SELECCIÓN DEL MODO DE ENTRADA SELECCIÓN DEL MODO DE ENTRADA Puede seleccionar el tipo de señal de entrada de audio de la fuente de entrada seleccionada según sus preferencias o las condiciones de la fuente de entrada. Le recomendamos ajustar el modo de entrada en AUTO en la mayoría de los casos. Notas •... -
Page 170: Ajuste De Parámetros Del Sistema
AJUSTE DE PARÁMETROS DEL SISTEMA AJUSTE DE PARÁMETROS DEL SISTEMA Esta unidad tiene menús adicionales que se visualizan en el visualizador del panel delantero. Estos menús ofrecen operaciones adicionales para ajustar y personalizar la forma en que funciona esta unidad. Utilización de los parámetros del Suelte INPUT en el panel delantero. -
Page 171: Ajuste Max Volume
AJUSTE DE PARÁMETROS DEL SISTEMA Pulse para cambiar entre PROTECT: ON y PROTECT: OFF. ENTER ENTER MAX VOLUME SET PROTECT: ON Pulse ENTER. ENTER PROTECT: OFF • Seleccione PROTECT: ON para activar la función de protección. • Seleccione PROTECT: OFF para desactivar la Pulse para ajustar el nivel de sonido función de protección. -
Page 172: Ajuste Turn On Volume
AJUSTE DE PARÁMETROS DEL SISTEMA Ajuste TURN ON VOLUME Pulse STANDBY/ON en el panel delantero para poner esta unidad en el modo de Puede ajustar el nivel de sonido inicial para cuando se espera. conecta la alimentación de esta unidad. STANDBY/ON Repita los pasos 1 a 3 en “Utilización de los parámetros del sistema”... -
Page 173: Ajuste Factory Preset
AJUSTE DE PARÁMETROS DEL SISTEMA Ajuste FACTORY PRESET Pulse para cambiar entre DEMO: ON y DEMO: OFF. Puede reponer todos los parámetros de esta unidad a sus valores de fábrica. Este procedimiento repone completamente TODOS los parámetros en SET MENU. Nota ENTER Después de realizar el procedimiento siguiente tendrá... - Page 174 AJUSTE DE PARÁMETROS DEL SISTEMA Pulse para cambiar entre PRESET: RESET y PRESET: CANCEL. ENTER PRESET: RESET PRESET: CANCEL • Seleccione PRESET: RESET para reponer todos los ajustes actuales. • Seleccione PRESET: CANCEL para cancelar el procedimiento de reposición. Pulse STANDBY/ON en el panel delantero para poner esta unidad en el modo de espera.
-
Page 175: Funciones Del Mando A Distancia
Además de controlar esta unidad, el mando a distancia también puede controlar otros componentes A/V hechos por YAMAHA y otros fabricantes. Para controlar otros componentes deberá preparar el mando a distancia con los códigos de mando a distancia apropiados y poner el selector del modo de operación en TV/AV para cambiar el área de control. -
Page 176: Control De Otros Componentes
FUNCIONES DEL MANDO A DISTANCIA Control de otros componentes Utilización de su TV Utilización de su reproductor DVD Ponga el selector del modo de operación en TV/AV y luego Ponga el selector del modo de operación en TV/AV y luego pulse TV para seleccionar TV como fuente de entrada. - Page 177 FUNCIONES DEL MANDO A DISTANCIA Utilización de su videograbadora Utilización de su STB (Sintonizador CATV/Satélite) Ponga el selector del modo de operación en TV/ Ponga el selector del modo de operación en TV/ AV y luego pulse VCR para seleccionar VCR AV y luego pulse STB para seleccionar STB como fuente de entrada.
-
Page 178: Utilización Del Macro De Tv
FUNCIONES DEL MANDO A DISTANCIA Ajuste de macros para TV con Utilización del macro de TV capacidad de sintonización La función macro de TV permite realizar una serie de Mantenga pulsado CODE SET en el mando a operaciones pulsando un solo botón. Por ejemplo, cuando distancia y luego pulse uno de los botones quiere reproducir un DVD, normalmente tiene que selectores de entrada para seleccionar la fuente... - Page 179 FUNCIONES DEL MANDO A DISTANCIA Ajuste de macros para TV sin capacidad Utilización de macros de sintonización Ponga el selector de modo de operación en Mantenga pulsado CODE SET en el mando a YSP para cambiar al modo de operación de distancia y luego pulse uno de los botones esta unidad.
-
Page 180: Solución De Problemas
Consulte la tabla de abajo cuando esta unidad no funcione correctamente. Si el problema que usted tiene no está en la lista de abajo o las instrucciones de abajo no sirven de ayuda, ponga esta unidad en el modo de espera, desconecte el cable de alimentación y póngase en contacto con el centro de servicio o concesionario YAMAHA autorizado. Generalidades... - Page 181 SOLUCIÓN DE PROBLEMAS Vea la Problema Causa Remedio página Sonido grave distorsionado o CROSS OVER en SUBWOOFER SET Ajuste CROSS OVER correctamente. demasiado bajo. está mal ajustado. Está seleccionado uno de los modos de Desactive los modos de escucha escucha nocturna. nocturna.
- Page 182 SOLUCIÓN DE PROBLEMAS Mando a distancia Vea la Problema Causa Remedio página El mando a distancia no funciona Distancia o ángulo equivocados. El mando a distancia funcionará dentro o funciona mal. de una distancia de 6 m y sin exceder un ángulo de 30 grados a partir del eje central del panel delantero.
-
Page 183: Glosario
GLOSARIO GLOSARIO DTS (Digital Theater Systems) Digital Formatos de audio Surround DTS digital surround fue desarrollado para reemplazar las Dolby Digital pistas de sonido analógico de las peliculas por pistas de Dolby Digital es un sistema de sonido surround digital que sonido digital de 6 canales, y actualmente está... -
Page 184: Índice Alfabético
ÍNDICE ALFABÉTICO ÍNDICE ALFABÉTICO Abrazadera de cable ............15 PCM ................89 AUTO SETUP (IntelliBeam) ......... 29 Programa de campo sonoro..........50 Cable de alimentación ............ 23 SET MENU ..............26 Código de mando a distancia ......... 81 Soporte de cartón para micrófono........31 Dolby Digital .............. - Page 185 ESPECIFICACIONES ESPECIFICACIONES SECCIÓN DE AMPLIFICADOR GENERALIDADES • Potencia de salida máxima (EIAJ) • Alimentación ..........2 W (1 kHz, 10% THD, 4 Ω) × 40 [Modelos de EE.UU. y Canadá] ......CA 120 V, 60 Hz 20 W (100 Hz, 10% THD, 3 Ω) × 2 [Modelo de Australia] ........
- Page 186 作都有可能引起有害的辐射暴露。 插座。 请勿上下倒置操作本机。 它可能过热,并极有可 能导致损坏。 请勿在开关,旋钮或导线上用力。 10 当将电源线从墙上插座断开时,请抓住插头;请 勿拖拉导线。 11 请勿使用化学溶剂清洁本机;这可能损坏机壳涂 层。 请使用洁净的干布。 12 只能使用本机规定的电压。 在本机上使用比规定 值高的电压是危险的并可能导致火灾,损坏本机 或造成人体伤害。YAMAHA 将不对由于在本机上使 用非规定电压而造成的任何损害负责。 13 为了防止闪电造成的损害,在闪电打雷时,请将 插头从墙上的电源插座或本机拔出。 14 请勿尝试修改或修理本机。 当需要任何维修时请 联系专业 YAMAHA 维修人员。 不能以任何理由打开 机壳。 15 当准备长时间 (例如休假)不使用本机时,请将 AC 电源线从墙上插座断开。 16 对通常的操作错误,在断定本机出故障之前,请 务必先阅读 “故障排除”一节。...
- Page 187 目录 立体声加 3 声束 ......43 前言 3 声束 ......... 43 以环绕声方式享受 2 声道音源 ..... 45 概述 ........2 调节环绕声模式参数 ..... 46 特性 ........3 享受立体声音响 ......47 使用本说明书 ......4 立体声播放 ......47 提供的配件 ......5 清晰播放声音 ( 专用声束 ) ....48 控制按钮和功能...
- Page 188 概述 概述 普遍认为,为了在家里可以充分享受到环绕声的优越性,就必须忍受多个扬声器的接线和装配的麻烦,因为只 有这样,才能期望在您的听音室能够体验到与在电影院体验到的完全相同的环绕声音响。 YAMAHA YSP-1100 数码音响投影机要挑战这种偏见,既摒弃复杂的扬声器设置和麻烦的相关接线,而充分享受 多声道环绕声音响。 这一苗条的装置,废除了复杂的接线和装配的麻烦,不但易于设置,而且能够再现强有力的的环绕声音响,这 主要得益于其内置的 2 个低音扬声器和 40 个全范围小扬声器。 您可以细调本机的参数来独立控制各个声束的时间延迟,从而使得从各个方向到达收听位置的音响具有高取向 性。 YSP-1100 投射的声束信息包含前方右 (R) ,前方左 (L) ,环绕声右 (SR)和环绕声左 (SL)扬声器位置, 通过听音室墙壁的反射,然后到达实际的听音位置。 再加上中央 (C) 声束,本数码音响投影机创造出逼真的 5.1 声道环绕声,使您感觉到就像是在房间里实际上有多个扬声器一样。 休息一会儿,享受一下这个简便易行的真实的音响体验,但却是充满时尚的数码音响投影机吧。 虚拟前方右扬声器 虚拟环绕声右扬声器 虚拟前方左扬声器 收听位置 虚拟中央扬声器 虚拟环绕声左扬声器...
- Page 189 从而产生取向性的、更逼真的效果。 清晰的声音。 使用附带的遥控器,您可以手动或自动 DTS (Digital Theater Systems) 调节声束角度。 这是用于 DVD 和其他纯数码媒体的音频信号格式。 该环 绕声技术提供最多 5.1 离散声道的高质量数字音频,从 电影 DSP 数码 而产生取向性的、更逼真的效果。 本机使用 YAMAHA 电子公司开发的电影 DSP 数码技术, Dolby Pro Logic 所以您可以在家里体验电影导演期望传达的那种生动 该高尖端矩阵解码技术将任何 2 声道音源音频向上转变 的音响效果。 为 5.1 声道全带宽播放,产生环绕声体验。 Dolby Pro Logic II 多用遥控器...
-
Page 190: 使用本说明书
使用本说明书 使用本说明书 注 • 本说明书介绍如何连接和操作本机。 关于外部装置操作的详细说明,请参考装置附带的说明书。 • 有些操作能通过使用主机或遥控器上的按钮来执行。 在这种情况下,这些操作将使用遥控器操作来介绍。 • y 指示有关您的操作的提示。 • 本说明书是在产品生产之前印刷的。 由于改进等原因,设计和规格可能会有部分变更。如果说明书和产品存在不同,以产 品为准。 在您的听音室安装本机。 请参阅第 11 页上的 “安装” 。 连接本机到您的电视机和其他外部装置。 请参阅第 15 页上的 “连接” 。 准备好遥控器并打开本机的电源。 请参阅第 24 页上的 “开始” 。 启动 AUTO SETUP。 请参阅第 29 页上的 “AUTO SETUP (IntelliBeam)” 。 播放音源。... -
Page 191: 提供的配件
提供的配件 提供的配件 请检查您收到了下列所有的部件。 遥控器 (x1) 电池 (x2) 光学缆线 (x1) (AA, R06, UM-3) STANDBY/ON POWER POWER INPUT1 INPUT2 MACRO OSD 视频针形缆线 (x1) 数码音频针形缆线 (x1) AUTO VOL MODE SETUP INPUTMODE SLEEP 5BEAM ST+3BEAM 3BEAM STEREO MY BEAM SURROUND MUSIC MOVIE SPORTS (橘黄色) (黄色)... -
Page 192: 控制按钮和功能
控制按钮和功能 控制按钮和功能 前部面板 INPUT VOLUME STANDBY/ON 1 OPTIMIZER MIC 插孔 6 STANDBY/ON 用于连接附带的被用于启动 AUTO SETUP 的优化器麦 打开本机的电源或将其设置为待机模式 (请参阅第 克风 (请参阅第 30 页) 。 25 页) 。 2 前部面板显示器 注 显示本机的操作状态信息。 • 当您打开本机的电源时,你将会听到卡塔声而且在音响出 3 遥控器传感器 现之前将有 4 到 5 秒钟的延迟。 • 在待机模式,本机消耗少量电力,以接收来自遥控器的红 接收来自遥控器的红外线信号。... -
Page 193: 前部面板显示器
控制按钮和功能 前部面板显示器 NIGHT SLEEP DIGITAL 1 NIGHT 指示器 4 音量水平指示器 当夜间收听模式之一被选择时点亮 (请参阅第 55 页) 。 显示现在的音量水平 (请参阅第 41 页) 。 2 SLEEP 指示器 5 多信息显示 当睡眠定时器开启时点亮 (请参阅第 58 页) 。 当您调节本机的参数时显示信息。 3 解码器指示器 使用 MANUAL SETUP 的 DISPLAY MENU 参数,您可以调节前部 当操作与本机相应的解码器时点亮... -
Page 194: 后部面板
控制按钮和功能 后部面板 COMPONENT COMPONENT COMPONENT TV/STB COAXIAL OPTICAL TV/STB DVD/AUX DIGITAL IN AUDIO IN VIDEO IN VIDEO OUT RS-232C REMOTE IN SUBWOOFER 1 RS-232C/REMOTE IN 端子 0 DVD/AUX COMPONENT VIDEO IN 插孔 这些是仅限于工厂使用的控制扩展端子 (请参阅第 用于通过分量模拟视频方式连接 DVD 播放机 / 录像机 23 页) 。 或外部装置... -
Page 195: 遥控器
控制按钮和功能 遥控器 根据操作模式选择开关的位置不同,有些按钮的功能 1 红外线窗口 也许不同 ( ) 。 本节基本说明用来控制本系统的遥 输出红外线控制信号。 将此窗口对准您想要操作的装 控器的功能。 置。 2 STANDBY/ON 一旦您设置了相应的遥控器代码,您就可以使用这个遥控器来操作 将本系统设置为待机模式 (请参阅第 25 页) 。 其他装置。 有关详情,请参见第 82 页上的 “控制其它装置” 。 3 传送指示器 当红外线控制信号被输出时点亮。 4 输入选择器按钮 用于选择输入音源 (STB,VCR,DVD,AUX 或 TV) 。 STANDBY/ON POWER POWER 用于改变遥控器的操作区域。... - Page 196 控制按钮和功能 H TV POWER 打开电视机的电源或将其设置为待机模式 (请参阅第 82 页) 。 I AV POWER 打开选择的装置的电源或将其设置为待机模式 (请参阅第 82 页和 83) 。 J INPUT1/INPUT2 用于选择电视机的输入源 ( 请参阅第 82 页 )。 K MACRO 用于设置电视机宏 (请参阅第 84 页) 。 L SLEEP 设置睡眠定时器 ( 请参阅第 58 页 )。 M INPUTMODE 用于切换输入模式...
-
Page 197: 在安装本机之前
安装 安装 本章介绍在适当的安装场所用金属挂壁托架,小台架或支架来安装本机。 在安装本机之前 安装本机 本机创造的环绕声是由声束反射到您的听音室的墙上 在摆放的东西例如家具等不会遮断声束的通道的地方 而发出的。 当本机被安装到以下场所时,由本机产生 安装本机。 否则,将无法达到您期望的环绕声效果。 的环绕声效果可能不够充足。 您可以与墙平行或在墙角来安装本机。 房间的墙面不能充分反射声束 平行安装 • 房间的墙面吸收声音 测量从左面墙角和右面墙角到本机的距离,以确保本 • 机安装在一面墙的中央位置。 房间的尺寸超过了以下范围:宽 (3 到 7 米)X 高 • (2 到 3.5 米)X 长 (3 到 7 米) 从听音位置到扬声器位置不到 1.8 米的房间 • 房间摆放的东西,例如家具等有可能遮断声束的通道... - Page 198 安装 安装例 例 1 尽可能在靠近墙壁的正中央位置安装本机。 例 2 在声束能从墙壁反射的地方安装本机。 例 3 尽可能在靠近您的正常听音位置的正前方安装本机。...
- Page 199 安装 使用金属挂壁托架安装 使用电视机支架 您可以使用备用的金属挂壁托架将本机安装在您的听 您可以使用备用的电视机支架安装本机。 有关使用电 音室的墙上。 视机支架安装本机的详情,请参阅附带的备用电视机 支架的安装说明书。 金属挂壁托架 本机 关于如何将金属挂壁托架安装到墙上或将本机安装到金属挂 壁托架上,详细情况请参见附带的金属挂壁托架说明书。 使用支架安装 您可以把您的电视机放在支架上,再使用市面销售的 小台架放置本机,并将其放置在电视机下面。 支架 本机 使用小台架安装 您可以使用市面销售的小台架将本机安装在您的电视 机的上面或下面。 当把本机安装在您的电视机的上面时 本机 关于如何安装支架或如何安装本机和支架上的电视机,详细 情况请参见附带的支架说明书。 当把本机安装在您的电视机的下面时 注 请确保小台架的大小足够在本机四周能有充分的通风空间 (请参阅第 11 页)以及小台架的强度足够支撑本机和电视 机两者的重量。...
- Page 200 安装 粘贴本机 依次撕开附带的 4 个粘贴片的薄膜,然后将本机底部 的 4 角与小台架顶部的相应部位等粘贴。 本机 撕开底部 的衬垫 撕开薄膜 粘贴片 注 • 不要在倾斜表面的顶部安装本机。 本机可能会落下并导致 伤害。 • 在粘贴粘贴片之前,请擦拭小台架的表面。 在粘贴粘贴片 时,表面的肮脏和潮湿将会削弱粘贴片的粘贴强度,它有 可能导致本机落下。...
- Page 201 连接 连接 本机装备有以下类型的音频 / 视频输入 / 输出插孔: 用于音频输入 用于视频输入 2 个光学数码输入插孔 3 个组合模拟输入插孔 • • 1 个同轴数码输入插孔 2 套分量模拟输入插孔 • • 2 套模拟输入插孔 • 用于视频输出 1 个组合模拟输出插孔 • 1 套分量模拟输出插孔 • 使用这些音频 / 视频输入 / 输出插孔连接外部装置如电视机,DVD 播放机,VCR,数码卫星调谐器,有线电视 调谐器和游戏机。 此外,本机联接有超低音扬声器,您可以享受到加强的低音。 关于如何连接各种类型的外 部装置到本机,详细情况请参见请参阅第...
-
Page 202: 连接 Tv
连接 连接 TV 当您在 SET MENU 调节系统参数时,将电视机连接到本机并显示 OSD 以便于察看。 音频连接 视频连接 将电视机的模拟音频输出插孔连接到本机的 TV/STB 将电视机的视频输入插孔连接到本机的 VIDEO OUT 插 AUDIO IN 插孔。 如果您的电视机具有光学数码输出 孔。 如果您的电视机具有分量视频输入插孔,除了组 插孔,除了模拟音频连接以外,将电视机的光学数码 合视频连接以外,将电视机的分量视频输入插孔连接 输出插孔连接到本机的 TV/STB OPTICAL DIGITAL IN 到本机的 COMPONENT VIDEO OUT 插孔。 一旦进行了分 插孔。 一旦进行了数码音频连接,在进行数码广播 量视频连接,您就可以分辨率更高的声像。 时,数码音频信号可以被输入到本机。 •... -
Page 203: 连接 Dvd 播放机 / 录像机
连接 连接 DVD 播放机 / 录像机 连接 DVD 播放机 / 录像机,欣赏 DVD。 音频连接 视频连接 将 DVD 播放机 / 录像机的光学数码输出插孔连接到本 将 DVD 播放机 / 录像机的视频输出插孔连接到本机的 机的 DVD COAXIAL DIGITAL IN 插孔。 如果您将本机 DVD/AUX VIDEO IN 插孔。 如果您的 DVD 播放机 / 连接到 DVD/VCR 播放机 / 录像机组合,那么,除了光 录像机具有分量视频输出插孔,将... -
Page 204: 连接 Vcr
连接 连接 VCR 连接 VCR ,欣赏录像带。 音频连接 视频连接 将 VCR 的模拟音频输出插孔连接到本机的 VCR AUDIO 将 VCR 的视频输出插孔连接到本机的 VCR VIDEO IN IN 插孔。 插孔。 注 确认 VCR 的左和右输出插孔与本机的左和右输入插孔相匹配。 模拟音频输出 视频输出 右 左 本机的后部面板 COMPONENT COMPONENT COMPONENT TV/STB COAXIAL OPTICAL TV/STB DVD/AUX REMOTE IN DIGITAL IN AUDIO IN SUBWOOFER... -
Page 205: 连接数码卫星调谐器或有线电视调谐器
连接 连接数码卫星调谐器或有线电视调谐器 连接数码卫星调谐器或有线电视调谐器,欣赏数码卫星广播或有线电视广播。 音频连接 视频连接 将您的数码卫星调谐器或有线电视调谐器的光学数码 将您的数码卫星调谐器或有线电视调谐器的视频输出 输出端子连接到本机的 TV/STB OPTICAL DIGITAL IN 端子连接到本机的 STB VIDEO IN 端子。 如果您的数 端子。 除了光学数码音频连接以外,将您的数码卫星 码卫星调谐器或有线电视调谐器具有分量视频输出插 调谐器或有线电视调谐器的模拟音频输出端子连接到 孔,将您的数码卫星调谐器或有线电视调谐器的分量 本机的 TV/STB AUDIO IN 端子。 视频输出插孔连接到本机的 STB COMPONENT VIDEO IN 插孔。 一旦进行了分量视频连接,您就可以分辨率更 高的声像。 要防止光学缆线脱落,用附带的缆线夹子夹紧光学缆线 (请参阅第 15 页) 。 数码卫星调谐器或... -
Page 206: 连接数码广播调谐器
连接 连接数码广播调谐器 如果您的数码广播调谐器不支持模拟广播,如下所示进行音频 / 视频连接。 音频连接 视频连接 将数码广播调谐器的光学数码输出插孔连接到本机的 将数码广播调谐器的视频输出插孔连接到本机的 STB TV/STB OPTICAL DIGITAL IN 插孔。 在您的数码广播 VIDEO IN 插孔。 如果您的数码广播调谐器具有分量 调谐器和本机之间的光学数码音频连接之外,将本机 视频输出插孔,将数码广播调谐器的分量视频输出插 的 TV/STB AUDIO IN 插孔连接到电视机的模拟音频输 孔连接到本机的 STB COMPONENT VIDEO IN 插孔。 一 出插孔。 旦进行了分量视频连接,您就可以分辨率更高的声 像。 要防止光学缆线脱落,用附带的缆线夹子夹紧光学缆线 (请参阅第 15 页) 。 数码广播调谐器... -
Page 207: 连接其他外部装置
连接 连接其他外部装置 要连接其他外部装置,将外部装置的光学数码输出插孔连接到本机的 AUX OPTICAL DIGITAL IN 插孔。 使用该 连接方式来连接支持光学数码连接的外部装置,或通过光学数码连接方式来连接 DVD 播放机 / 录像机。 要防止光学缆线脱落,用附带的缆线夹子夹紧光学缆线 (请参阅第 15 页) 。 注 如果您通过同轴数码方式连接 DVD 播放机 / 录像机,请调节 INPUT ASSIGNMENT 的设置 (请参阅第 68 页) 。 CD 播放机等 光学数码输出 本机的后部面板 COMPONENT COMPONENT COMPONENT TV/STB COAXIAL OPTICAL TV/STB... -
Page 208: 连接超低音扬声器
连接 连接超低音扬声器 要连接超低音扬声器,将超低音扬声器的单声道输入插孔连接到本机的 SUBWOOFER 插孔。 如果超低音扬声器连接到本机,请打开超低音扬声器的电源,然后进行 AUTO SETUP (请参阅第 29 页)或对于 BASS OUT 在 SUBWOOFER SET 选择 SWFR (请参阅第 67 页) 。 超低音扬声器 单声道输入 本机的后部面板 COMPONENT COMPONENT COMPONENT TV/STB COAXIAL TV/STB OPTICAL DVD/AUX REMOTE IN DIGITAL IN AUDIO IN SUBWOOFER VIDEO IN VIDEO OUT RS-232C... -
Page 209: 连接电源线
连接 连接电源线 一旦完成所有其他连接,将电源缆线的一端插入本机的 AC IN 端子,另一端则插入墙壁上的电源插座。 到 AC 插座 关于 RS-232C/REMOTE IN/IR-OUT 端子 RS-232C, REMOTE IN 和 IR-OUT 端子不支持普通外部装置连接。 这些是仅限于工厂使用的控制扩展端子。 IR-OUT 端子 RS-232C 端子 REMOTE IN 端子 TV/STB COAXIAL TV/STB OPTICAL REMOTE IN DIGITAL INPUT AUDIO RS-232C... -
Page 210: 安装遥控器电池
开始 开始 安装遥控器电池 在使用遥控器之前去掉透明薄膜。 按下 遥控器的操作范围 遥控器发射一道有方向性的红外线光束。 在本机的 6 米以内使用遥控器,操作时将遥控器指向遥控器传感 器。 按住电池盒盖上的 标记,滑开盒盖。 在电池盒中放入两节附带的电池 (AA, R6, UM-3) 。 请确认电池的正负极与电池盒中的极性标记一致 (+/-) 。 大约 6 米 关闭电池盒盖。 注 • 如果您注意到以下情形请更换所有的电池:遥控器的操作范 围减小,指示器不闪烁或者灯变暗。 • 新旧电池请勿混用。 • 请勿将不同型号的电池一起使用 (例如碱性电池和锰电 池) 。 请仔细阅读包装,因为这些不同类型的电池可能具 注 有相同的外形和颜色。 • 请勿将水或其它液体洒在遥控器上。 •... -
Page 211: 使用遥控器
开始 使用遥控器 打开电源 本节说明使用附带的遥控器如何操作本机。 根据操作 模式选择开关的位置不同,遥控器的功能也许不同。 设置操作模式选择开关到 YSP,以切换本机的操作模 式。 只有当您选择 YSP 时,遥控器上编号为 1 到 4 的按钮才能操作。 另外,根据操作模式选择开关的位 置不同,编号为 5 到 9 的按钮的功能也不同。 这些 按钮所对应的功能,请参阅第 9 页。 通过设置适当的遥控器代码,您能控制其它装置 ( 请参阅第 81 页 )。 一旦对每个输入源 (DVD,VCR,STB,TV 或 AUX) 设置了遥控器代码,更多的信息请参见第 82 页上的 “控制 INPUT VOLUME STANDBY/ON... -
Page 212: 使用 Set Menu
使用 SET MENU 使用 SET MENU 显示 OSD 本章简单介绍在您的电视机屏幕上如何显示本机的 OSD (在屏显示)以及对您的听音室如何设置参数。 完成 了以上操作,您就可以在您自己的房间里一边舒适地看着电视一边享受真正的环绕声音响。 注 OSD 不通过本机的 COMPONENT VIDEO OUT 插孔输出。 将本机的 VIDEO OUT 插孔连接到电视机的视频输入插孔,显示 OSD。 按下遥控器上的 TV,电视机屏幕将显示本机的 STANDBY/ON POWER POWER OSD。 本机的 OSD 出现在电视机屏幕上也许需要几秒钟 时间。 如果没有出现 OSD,使用电视机的遥控器切换视 频输入直到 OSD 出现为止。 INPUT1 INPUT2 MACRO... -
Page 213: 流程图 Set Menu
使用 SET MENU 流程图 SET MENU 设置步骤的全部流程如下图所示。 启动 LANGUAGE SETUP。 请参阅第 28 页上的 “改变 OSD 语言”. 启动 AUTO SETUP(IntelliBeam)。 请参阅第 29 页上的 “AUTO SETUP (IntelliBeam)”. 如果出现错误 寻找补救措施。 关于错误信息的全部表格和有效措施,请参见第 35 页上的 “错误讯息 AUTO SETUP” 。 播放音频信号或对声束模式和 CINEMA DSP 设置进行调节。 请参阅第 39 页上的 “播放”. 如果您希望增加设置并调节... -
Page 214: 改变 Osd 语言
改变 OSD 语言 改变 OSD 语言 该功能允许您选择出现在本机的 SET MENU 上的各种选择所使用的语言。 设置操作模式选择开关到 YSP,以切换本机的操 按下 ,选择语言 , 然后按下 ENTER。 作模式。 TV/AV ENTER ENTER 按遥控器上的 MENU。 电视机上出现 SET MENU 屏幕。 选择: ENGLISH ( 英语 ), DEUTSCH ( 德语 ), SET ENU Français ( 法语 ), ESPAÑOL ( 西班牙语 ) MENU E ORY AUTO SETUP... -
Page 215: Auto Setup (Intellibeam)
AUTO SETUP (INTELLIBEAM) AUTO SETUP (IntelliBeam) 本机在您的听音室里以声束通过墙壁反射而创造一个声场,它使得所有声道间的凝聚力变得更加宽广。 正像 在其他音频系统中您要排列扬声器的位置一样,你需要设置声束角度来享受本机带来的最佳的音响。 本机使用声束最优化功能和声音最优化功能,它借助于附带的最优化麦克风,所以您可以避免麻烦的边收听边 调节的设置,就能达到最适合您的收听环境的高精度声束调节。 这两种功能被总称为 “IntelliBeam” 。 声束最优化功能在您的听音室里不用手动设置参数就可以创造最佳环绕声声场。 声音最优化技术完成下列检查并自动进行适当的声音调节。 DISTANCE: 检查从本机到每个声束的距离,然后调节每个声道的延迟,以便每个声束的声音均能以相同的时间到达听音位 置。 EQUALIZING: 调节各个声道的参数均衡器的频率和音量 , 以减低声道之间的染色 , 产生凝聚的音场。 声音最优化功能综合 调节参数均衡器上的 7 个波段的各个波段的三个参数 (频率、音量和 Q 因子) ,从而可对频率特性进行高精度 的自动调节。 LEVEL: 检查并调节每个声道的声音输出水平。 流程图 AUTO SETUP 本机将实行一系列的检查,包括最优化声束角度,延迟,音量和音质。 您可以选择最优化全部或部分参数。 注... -
Page 216: 安装优化器麦克风
AUTO SETUP (IntelliBeam) 安装优化器麦克风 随机提供的优化器麦克风获取和分析本机在您实际的收听环境中产生的声音。 请按照下列步骤将优化器麦克 风连接到本机,请务必将优化器麦克风放置在适当的地方,即在您的听音室的墙和优化器麦克风之间确保没有 大的障碍物。 注 • 在您已经完成 AUTO SETUP 步骤之后,请确保拔掉优化器麦克风。 • 优化器麦克风对热很敏感。 - 请将其远离直射阳光。 - 请勿将其放置在本机上部。 • 不要将优化器麦克风连接到延长缆线,这样做也许会导致错误的最优化声音。 • 如果没有将优化器麦克风放置在您的听音室的适当位置,在 AUTO SETUP 过程中,也许会出现错误。 为了避免出现错误: - 不要将优化器麦克风放置在距离本机的中央位置太左或太右。 - 不要将优化器麦克风放置在本机前部 1.8 米以内。 - 不要将优化器麦克风放置在距离本机中央高度 1 米以上。 • 请确保您的听音室的墙和优化器麦克风之间没有障碍物,因为障碍物会妨碍声束通道。 还有,靠墙的物体将被当成墙壁的 突出部分。... -
Page 217: 使用 Auto Setup(Intellibeam)
AUTO SETUP (IntelliBeam) 使用 AUTO SETUP(IntelliBeam) 现在优化器麦克风已经被放置到您的听音室的适当位 置并稳固地连接到本机,下面要做的是开始 AUTO SETUP 步骤。 只要简单按住遥控器上的 AUTO SETUP 2 秒钟以上, 您也可以进入 AUTO SETUP 过程。 在此情形下,本机 既进行声束最优化也进行声音最优化。 中心线 优化器麦克风 装配附带的纸板麦克风支架 INPUT VOLUME STANDBY/ON 您将发现纸板麦克风支架的三个单独的部件 (一个圆 形部件和两个长形部件) ,它们最初摆放在一起。 STANDBY/ON POWER POWER INPUT1 INPUT2 MACRO AUTO VOL MODE SETUP INPUTMODE SLEEP 5BEAM... - Page 218 AUTO SETUP (IntelliBeam) 注 按遥控器上的 MENU。 电视机上出现 SET MENU 屏幕。 • 当本机在进行 AUTO SETUP 步骤时,请务必保持听音室的安 静。 • 要得到最佳效果,您应该离开您的听音室,直到 AUTO SET ENU SETUP 步骤完成,这样就不会干扰声束的路径。 E ORY MENU • 请注意,在 AUTO SETUP 步骤中输出很响的测试音是正常 AUTO SETUP ANUAL SETUP LANGUAGE SETUP 的。 [ ]/[ ]:Up/Down •...
- Page 219 AUTO SETUP (IntelliBeam) 按下 ,选择 BEAM+SOUND OPTIMZ, BEAM 在开始 AUTO SETUP 步骤之前,请再一次检查以下 OPTIMZ only 或 SOUND OPTIMZ only,然后按下 要点。 ENTER。 优化器麦克风是否被牢固地连接到本机? • 优化器麦克风是否被放置在适当的位置? 电视机上出现以下屏幕。 • 在您的听音室的墙壁和优化器麦克风之间,是 • 否有大的障碍物? ENTER ENTER 按下 ENTER,开始 AUTO SETUP 步骤。 电视机上出现以下屏幕,AUTO SETUP 过程在 10 秒钟后开始。 在...
- Page 220 AUTO SETUP (IntelliBeam) 检查电视机上显示以下屏幕。 从前面板上的 OPTIMIZER MIC 插孔拔下优化器麦 电视机上显示 AUTO SETUP 步骤的结果。 克风。 例 1 从侧面看 SHOW RESULT EASURE ENT CO PLETE :5 BEA SUBWOOFER :NOT APPLICABLE [ENTER]:Save set-up. [RETURN]:Do not save set-up. 例 2 SHOW RESULT 优化器麦克风 EASURE ENT CO PLETE ENVIRON ENT CHECK[FAILED] :5 BEA SUBWOOFER :YES...
- Page 221 1.8m/6ft. ERROR E-6 优化器麦克风不能收集本机产生的声 将优化器麦克风牢固地连接到本机并 音因为声音输出水平太低。 放置到适当的位置。 如果仍然有问 Volume level is lower than expected. Please check MIC 题,请联系最近的 YAMAHA 服务援助 中心。 position/connection and re-try. ERROR E-7 内部系统发生错误。 重复 AUTO SETUP 步骤。 Unexpected error happened. Please re-try.
-
Page 222: 使用系统存储器
使用系统存储器 使用系统存储器 系统记忆的方便利用 按下 ,选择 MEMORY, 然后按下 ENTER。 电视机上出现以下屏幕。 在本机的系统存储器里,您可以保存在 SET MENU 调 节的当前设置。 根据不同的收听环境保存某些设置很 方便。 例如,如果声束通道有窗帘,则声束的效果将 会根据窗帘的打开或关闭而改变。 ENTER ENTER 当窗帘打开时 当窗帘关闭时 MEMORY )LOAD 2)SAVE [ ]/[ ]:Up/Down [ENTER]:Enter 保存设置 设置操作模式选择开关到 YSP,以切换本机的操 按下 ,选择 SAVE, 然后按下 ENTER。 作模式。 电视机上出现以下屏幕。 TV/AV ENTER ENTER 按遥控器上的... -
Page 223: 装载设置
使用系统存储器 装载设置 按下 ,选择 MEMORY1, MEMORY2 或 MEMORY3,然后按下 ENTER。 根据各种环境条件,您可以呼出在第 36 页上的 “保 电视机上出现以下屏幕。 存设置”保存的设置。 设置操作模式选择开关到 YSP,以切换本机的操 作模式。 ENTER ENTER TV/AV 按遥控器上的 MENU。 2) E ORY SAVE 电视机上出现 SET MENU 屏幕。 E ORY1 Save Now ? SET ENU MENU E ORY Push [ENTER] to Save AUTO SETUP ANUAL SETUP... - Page 224 使用系统存储器 按下 ,选择 LOAD,然后按下 ENTER。 再次按 ENTER。 电视机上出现以下屏幕。 新的参数被当做 MEMORY1,MEMORY2 或 MEMORY3 保存。 一旦参数被保存,显示返回到 SET MENU 屏幕。 ENTER ENTER 1)MEMORY LOAD MEMORY1 Loading ENTER E ORY LOAD E ORY1 E ORY2 E ORY3 SET ENU [ ]/[ ]:Select [ENTER]:Enter E ORY AUTO SETUP ANUAL SETUP LANGUAGE SETUP...
-
Page 225: 选择输入源
播放 播放 前部面板操作 选择输入源 反复按下前部面板上的 INPUT 按钮,在 TV,DVD,VCR 您只需要简单的反复按下前部面板上的 INPUT 按钮, 和 AUX 之间切换。 或按下遥控器上的输入选择器按钮 (TV,STB, VCR, 相应的输入源名称和当前的输入模式的类型会显示在 DVD 或 AUX)之一,您就可以在连接到本机的装置上 前部面板的显示器上。 播放音响。 选择的输入源的名称和相应的输入模式的 遥控器操作 类型会显示在前部面板的显示器上。 设置操作模式选择开关到 YSP,以切换本机的操作模 式,然后按下遥控器的 TV,播放电视节目。 TV/AV INPUT VOLUME STANDBY/ON 选择的输入源名称 选择的输入模式的类型 设置操作模式选择开关到 YSP,以切换本机的操作模 式,然后按下遥控器的 STB,播放卫星广播。 INPUT1 INPUT2 MACRO... -
Page 226: 播放音源
播放 设置操作模式选择开关到 YSP,以切换本机的操作模 播放音源 式,然后按下遥控器的 VCR,播放录像带。 一旦选择了输入源 (请参阅第 39 页) ,您就可以播 TV/AV 放选择的输入源。 注 本章使用以 DVD 播放机为播放源的事例来介绍。 关于您使用的电视机和 DVD 播放机的详细情况,请参见电视 机和 DVD 播放机附带的说明书。 设置操作模式选择开关到 YSP,以切换本机的操作模 式,然后按下遥控器的 AUX,播放连接在本机后面板 使用 DVD 播放机附带的遥控器, 打开 DVD 播放机的 的 AUX 插孔上的装置。 电源。 使用电视机附带的遥控器,切换电视机的视频输 TV/AV 入,DVD 菜单屏幕被显示。 如果需要,调低电视机的音量直到听不到声音为... -
Page 227: 调节音量
播放 调节音量 静音 VOLUME TV VOL MUTE TV INPUT TV MUTE CODE SET 按下遥控器上的 MUTE,选择静音。 AUDIO MUTE ON 出现在前部面板显示器上,音量 水平指示灯闪烁。 INPUT VOLUME STANDBY/ON MUTE VOLUME TV VOL MUTE TV INPUT TV MUTE CODE SET 按下前部面板上或遥控器上的 VOLUME +/- 按钮,增 闪烁 加或减少音量水平。 音量水平的数值出现在前部面板显示器上。... -
Page 228: 享受环绕声音响
享受环绕声音响 享受环绕声音响 使用遥控器的声束模式按钮改变声束模式,您可以享受多声道环绕声音响。 对于多声道播放,选择 3 声束模 式,5 声束模式以及立体声加 3 声束。 注 当在 MANUAL SETUP (请参阅第 62 页)中设置 ANGLE TO WALL OR CORNER 时,不能选择 5 声束和 3 声束。 5 声束 AUTO VOL MODE SETUP INPUTMODE SLEEP 从前方左和右,中央,以及环绕声左和右声道输出声 5BEAM ST+3BEAM 3BEAM 束。 在观看多声道格式录制的 DVD 时或在多声道格式 播放... -
Page 229: 立体声加 3 声束
享受环绕声音响 立体声加 3 声束 3 声束 从前方左和右声道输出正常声音,从中央,以及环绕 从前方左和右以及中央声道输出声束。 该模式最适合 声左和右声道输出声束。 对于观看 DVD 录制的实况转 全家人一起享受电影的乐趣。 因为收听位置范围很 播,该模式最理想。 在靠近收听位置的中央,可以听 宽,您可以在大范围内享受到最佳质量的环绕声。 此 到人声和伴奏声,而经过墙壁反射的声音在您的右边 外,当听音位置比较靠近后面的墙壁以及环绕声左右 和左边可以听到,给您的感觉是您坐在舞台的正前 声束不能反射时,您可以使用此模式。 方。 按下遥控器上的 3BEAM,选择 3 声束。 按下遥控器上的 ST+3BEAM ,选择立体声加 3 声束。 ST+3BEAM 3BEAM 如果您在 BEAM MENU 调节 IMAGE LOCATION 的设置,您就可 以收听到更加逼真的环绕声效果... - Page 230 享受环绕声音响 解码器指示器 环绕声模式和推荐的音源 根据输入源和选择的环绕声模式,前部面板显示器上 环绕声模式 推荐的音源 的指示灯在以下情况下点亮: Dolby Pro Logic Ð 所有音源 状态 指示器 Movie 电影 Dolby Pro Logic Music 音乐 Game 游戏 当输入 PCM 信号时 Cinema 电影 DTS Neo:6 Music 音乐 当输入 DTS 数码信号或选择 DTS Neo:6 时 注 • 当声束模式被设置到立体声播放或专用声束为声束模式以 当输入...
-
Page 231: 以环绕声方式享受 2 声道音源
享受环绕声音响 以环绕声方式享受 2 声道音源 反复按下遥控器上的 SURROUND(或按下 SURROUND 然后按下 ) ,在环绕声模式之间切换。 本机可以将 2 声道播放解码成 5.1 声道音源,所以只 要切换环绕声模式,您就可以享受到各种各样的环绕 声效果。 SURROUND 只有当 CINEMA DSP 程序被关闭 (请参阅第 54 页)或电影程 或 序被当作 CINEMA DSP 程序选择 (请参阅第 52 页)时,环绕 声模式有效。 另外,声束模式必须设置到 5 声束,立体声加 3 声束或 3 声束 (请参阅第 42 页) 。 SURROUND ENTER 5BEAM... -
Page 232: 调节环绕声模式参数
享受环绕声音响 当 Dolby Pro Logic II Music 被选择时 调节环绕声模式参数 PANORAMA 您可以对 Dolby Pro Logic II Music 和 DTS Neo:6 给前方左 / 右声道以环绕声效果,分布于所有环 Music 设置参数,以微调环绕声效果。 绕声声场,造成开阔的感觉。 选择: ON/OFF 5BEAM ST+3BEAM 3BEAM 默认设定: OFF STEREO MY BEAM SURROUND DIMENSION 调节前方和环绕声声道的音量差,直到您所期望 MUSIC MOVIE SPORTS 的平衡音量。... -
Page 233: 享受立体声音响
享受立体声音响 享受立体声音响 立体声播放 注 • 当您播放多声道音源时,除了前方左和右声道以外的所有 使用遥控器的声束模式控制按钮改变声束模式到立体 信号都被向下混合,从前方左和右声道输出。 从中央和后 声播放,您可以享受 2 声道立体声播放。 在 2 声道立 方扬声器则无音频输出。 体声模式,从前方和左声道输出正常声音。 这样最适 • 当选择立体声播放作为声束模式时,环绕声模式无效。 合播放高保真音源,例如 CD,也可以用于替代电视机 • 当您以立体声播放 Dolby Digital 音频信号时, 动态范围被 扬声器。 压缩。 如果音量水平极度减小,请使用专用声束以外的其 他声束模式。 AUTO • 如果立体声播放被当作声束模式选择,环绕声模式 (请参 VOL MODE SETUP INPUTMODE SLEEP 阅第... -
Page 234: 清晰播放声音 ( 专用声束 )
清晰播放声音 ( 专用声束 ) 清晰播放声音 ( 专用声束 ) 改变声束模式到专用声束,输出的声束聚集到一个声道,投射到听音位置,从而改善嘈杂环境的听音质量。 此外,如果您不期望声束反射到您的听音室的墙上或者如果当您在夜晚欣赏音乐或电影时不想打扰其他人的睡 眠时,专用声束最理想。 专用声束麦克风 STANDBY/ON POWER POWER 5BEAM ST+3BEAM 3BEAM STEREO MY BEAM SURROUND MUSIC MOVIE SPORTS CH LEVEL MENU TV/AV ENTER RETURN TEST 注 如果专用声束被当作声束模式选择,环绕声模式 (请参阅第 44 页) ,CINEMA DSP 程序 (请参阅第 50 页)和 TruBass (请参阅第... -
Page 235: 使用手动调节功能
清晰播放声音 ( 专用声束 ) 使用手动调节功能 在播放输入源时,您可以手动调节声束角度。 当听音 位置偏离自动调节功能操作的保证区域时,该功能也 很理想。 设置操作模式选择开关到 YSP,以切换本机的操 作模式。 TV/AV 按遥控器上的 MY BEAM。 MY BEAM 被显示在前部面板显示器上。 MY BEAM 当 MY BEAM 被显示时,按下 调节角度。 控制范围: L90 度 到 R90 度 反复按下 ,增加左边的水平线角度。 • 反复按下 ,增加右边的水平线角度。 • ENTER... -
Page 236: 使用声场程序
使用声场程序 使用声场程序 本机配备有一系列的精确数码解码器,使您能欣赏来自立体声或多声道的多声道播放。 本机也配备有 YAMAHA CINEMA DSP( 数码声场处理)芯片,芯片中包含几个声场程序,使您能用来增强您的播放感受。 大多数这些声 场程序是著名的交响乐厅、音乐场所和电影院中的实际声音环境的精确数码再现。 YAMAHA CINEMA DSP 模式兼容所有 Dolby Digital, DTS 和 Dolby Surround 声源。 注 请根据您的收听喜好来选择一个声场程序,而不是完全依靠声场程序的名称选择。 什么是声场 ? 真正创建乐器生动,丰富而完整音调的是来自房间的墙面的多次反射。 除了使声音生动,这些反射也使我们 能够辨别播放机所处的位置以及我们坐着的房间的尺寸和形状。 声场的要素 在任何环境中,除了来自播放机设备直接入我们耳朵的声音外,还有两类有明显特性的声音反射组成了声场。 早期反射 反射的声音在仅经过一次表面反射后 (例如从天花板或墙面)就极快地进入我们的耳朵 (直接声音后 50 毫秒 到 80 毫秒) 。 早期反射实际上增加了直接声音的清晰度。... -
Page 237: 声场程序种类
使用声场程序 声场程序种类 当您播放音乐,电影或体育节目时您可以根据自己的喜好从以下的声场程序进行选择。 如何在可利用的声场 程序之间切换,详情请参阅第 52 页。 注 可使用的体育声场程序仅有一种。 声场程序 音源 性能 此程序产生一种充满活力的氛围,让您感觉您似乎身处实际的爵 Music Video 士或摇滚音乐会中。 此程序通过大量的临场感,厚重音响的延伸,创建了大型圆形交 Concert Hall 音乐 响乐厅生动的环绕声效果,让您感觉您似乎正坐在靠近舞台的中 央。 此程序再现 “底线” ,纽约的著名爵士乐俱乐部,的声音环境, Jazz Club 让您感觉您似乎坐在舞台的正前方。 此程序清晰再现最新科幻电影的对话和特殊的声音效果,让您感 Sci-Fi 觉寂静中的广阔宏大的电影空间。 此程序再现宽广和盛大的环境,通过强烈的视觉效果让您对壮观 Spectacle 电影 的场景印象深刻。 此程序再现最新动作片中令人颤栗的场景,让您感觉情节紧凑动 Adventure 人的场景的动态和刺激。 此程序再现体育节目实况转播的的充满活力的场景,将评论员的 SPORTS 体育节目... -
Page 238: 开启 Cinema Dsp 程序
使用声场程序 开启 CINEMA DSP 程序 检查 MUSIC 是否显示在前面板显示器上,然后反 复按下遥控器上的 MUSIC 按钮 (或按下遥控器上 根据您期望欣赏的音源的类型,您可以从三种不同的 的 ) ,在音乐声场程序之间切换。 声场程序中选择 (MUSIC,MOVIE 和 SPORTS) 。 注 • 如果立体声播放(请参阅第 47 页)或专用声束(请参阅第 48 页)被当作声场模式选择,CINEMA DSP 程序无效。 • 如果 CINEMA DSP 程序无效,当您按下遥控器上的声场程序 按钮之一, “Prohibit”出现在前部面板显示器上。 MUSIC 或 ENTER 5BEAM ST+3BEAM 3BEAM... - Page 239 使用声场程序 检查 MOVIE 是否显示在前面板显示器上,然后反 复按下遥控器上的 MOVIE 按钮 (或按下遥控器上 的 ) ,在音乐声场程序之间切换。 MOVIE 或 ENTER Sci-Fi Spectacle Adventure 对于每个声场程序的详细介绍,请参阅第 51 页上的 “声场 程序种类” 。 体育节目 当您播放体育节目音源时,选择该声场程序。 当来自 观众或您的听音室周围的环境声音变得太大时,该程 序在中央位置非常密集地集中了讲解员的声音。 设置操作模式选择开关到 YSP,以切换本机的操 作模式。 TV/AV 按下遥控器上的 SPORTS,选择体育节目声场程 序。 SPORTS • 可使用的体育声场程序仅有一种。 • 对于每个声场程序的详细介绍,请参阅第 51 页上的 “声 场程序种类”...
-
Page 240: 关闭 Cinema Dsp 程序
使用声场程序 关闭 CINEMA DSP 程序 调节 CINEMA DSP 效果水平 如果您期望欣赏原声而非声场程序效果,请关闭 使用工厂预设的参数,您能欣赏高质量的声音。 而 CINEMA DSP 程序。 且,您也可以相对于直接声音水平调节 CINEMA DSP 程序的效果水平,因此,每个声场程序可以更加准确 地反映您的收听环境和您的喜好。 设置操作模式选择开关到 YSP,以切换本机的操 作模式。 设置操作模式选择开关到 YSP,以切换本机的操 作模式。 TV/AV TV/AV 按下遥控器上的 OFF,关闭声场程序。 CINEMA DSP OFF 被显示在前部面板显示器上。 按下遥控器上的 MUSIC, MOVIE 或 SPORTS,选择 期望的声场程序。 MUSIC MOVIE SPORTS... -
Page 241: 使用音量模式 ( 深夜收听模式 / 电视音量均等模式 )
使用音量模式 ( 深夜收听模式 / 电视音量均等模式 ) 使用音量模式 ( 深夜收听模式 / 电视音量均等模式 ) 夜间收听模式用于提高在低音量或夜间的可听度。 另外,您可以限制电视机的音量水平,这样音量水平就不 会因为突然地大程度的改变播音内容 (也就是由于广告等)而改变。 INPUT1 INPUT2 MACRO 反复按下前部面板上的 VOL MODE,选择 AUTO VOL MODE SETUP INPUTMODE SLEEP NIGHT:CINEMA, NIGHT:MUSIC, TV EQUAL VOL 或 5BEAM ST+3BEAM 3BEAM OFF。 STEREO MY BEAM SURROUND VOL MODE MUSIC... - Page 242 使用音量模式 ( 深夜收听模式 / 电视音量均等模式 ) 按下遥控器上的 ,当显示 NIGHT:CINEMA, NIGHT:MUSIC 或 TV EQUAL VOL 时,调节压缩得 效果水平。 ENTER Effect.Lvl:MIN Effect.Lvl:MID Effect.Lvl:MAX 最小压缩选择 Effect.Lvl:MIN。 • 标准压缩选择 Effect.Lvl:MID。 • 最大压缩选择 Effect.Lvl:MAX。 • 注 如果按下前部面板上或遥控器上的 STANDBY/ON 或者您 没有将电源缆线连接到 AC 墙壁插孔,音量模式设置将 被取消。...
-
Page 243: 使用低音增强器 (Trubass)
使用低音增强器 (TRUBASS) 使用低音增强器 (TruBass) 借助于 SRS TruBass 技术,本机可以改善低频性能的感知,即使没有超低音扬声器来改善低音也照样可以提供 如超低音扬声器存在似的深度的丰富的低音。 注 当专用声束被当作声束模式来选择时,TruBass 无效 (请参阅第 48 页) 。 5BEAM ST+3BEAM 3BEAM 反复按下前部面板上的 ,选择 TruBass MID 或 TruBass DEEP。 STEREO MY BEAM SURROUND 根据您播放的材料的类型,您可以选择 TruBass MUSIC MOVIE SPORTS MID 或 TruBass DEEP。 CH LEVEL MENU TV/AV ENTER... -
Page 244: 使用睡眠定时器
使用睡眠定时器 使用睡眠定时器 使用此特性以自动设置本机在指定的一定时间之后转为待机模式。 当本机正在播放音源时如果您想在一确定 的时间后睡觉,睡眠定时器将很有用。 每次您按下遥控器上的 SLEEP,前部面板显示器 使用睡眠定时器 如下改变。 SLEEP AUTO VOL MODE SETUP INPUTMODE SLEEP 5BEAM ST+3BEAM 3BEAM STEREO MY BEAM SURROUND MUSIC MOVIE SPORTS SLEEP 120min SLEEP 90min CH LEVEL MENU SLEEP 60min TV/AV ENTER TEST RETURN SLEEP 30min SLEEP 设置操作模式选择开关到... -
Page 245: 取消睡眠定时器
使用睡眠定时器 取消睡眠定时器 设置操作模式选择开关到 YSP,切换本机的操作 模式。 TV/AV 反复按下遥控器上的 SLEEP,SLEEP OFF 出现在前 部面板显示器上。 SLEEP SLEEP 等待几秒钟而不操作本机,以确认睡眠定时器的 设置。 前部面板显示器上的 SLEEP 指示器消失,指示睡 眠定时器无效。 SLEEP 消失 注 在睡眠定时器无效之前的前一个设置被存储在系统存储器 中,并在您进行下一个新的设置时自动恢复。 如果您按下前面板或遥控器上的 STANDBY/ON,设置本机到 待机模式,或拔下 AC 电源插座上的电源缆线,也可使得睡 眠定时器无效。... -
Page 246: Manual Setup
MANUAL SETUP MANUAL SETUP 要得到最高质量的环绕声,您可以使用 MANUAL SETUP 微调收听环境参数,以及对于声音信号,声束,数码输 入和 OSD 进行高级设置。 改变初始设置 (在每个参数下以粗体指示)以反映您的收听环境的需要。 • 您可以保存 AUTO SETUP 步骤得到的最优化设置 (请参阅第 36 页) 。 根据您的收听环境的特定条件的最优化设置, 可以根据 您的各种收听环境条件在后来被呼出使用 (请参阅第 37 页) 。 • 当您进行 AUTO SETUP 时, SOUND MENU 和 BEAM MENU 里的大多数参数将自动设置 (请参阅第 29 页) 。 使用 SOUND MENU 和 BEAM MENU,进行附加的调节。... -
Page 247: 使用 Manual Setup
MANUAL SETUP 使用 MANUAL SETUP 按下 ,选择 MANUAL SETUP, 然后按下 ENTER。 使用遥控器来访问和调节每个参数。 电视机上出现以下屏幕。 5BEAM ST+3BEAM 3BEAM STEREO MY BEAM SURROUND ENTER MUSIC MOVIE SPORTS ENTER CH LEVEL MENU TV/AV ENTER MANUAL SETUP RETURN TEST )SOUND MENU 2)BEAM MENU 3)INPUT MENU 4)DISPLAY MENU [ ]/[ ]:Up/Down [ENTER]:Enter... -
Page 248: Beam Menu
MANUAL SETUP 如果本机安装在您的听音室与墙平行的地方,选择 • BEAM MENU FLAT TO WALL。 调节您的听音室的宽度和长度, 以及从本机到收听位置的距离和从左边墙壁到本机 用于手动调节各种涉及声束输出的参数。 的中央的距离。 SET MENU → MANUAL SETUP → BEAM MENU 2)BE M MENU 从左边墙壁到收听位置 )SETTING P R METERS B)BE M DJUSTMENT C)IM GE LOC TION [ ]/[ ]:Up/Down 从本机到收听位置 [ENTER]:Enter 房间长度... -
Page 249: Beam Adjustment
MANUAL SETUP 如果本机安装在您的听音室的墙角, 选择ANGLE TO INSTALLED HEIGHT (安装本机的高度) • WALL OR CORNER。 调节您的听音室的长和宽,以 用于调节本机的安装高度。 及从收听位置到本机的距离。 控制范围: 0.0 米 到 3.0 米 初始设置: 1.0 米 从本机到收听位置 房间宽度 房间长度 选择房间的宽度和长度 : 2.0 到 12.0 米 地板 米 米 到 3.0 选择从本机到收听位置的距离: 1.8 到 9.0 米 BEAM ADJUSTMENT (声束调节)... - Page 250 MANUAL SETUP HORIZONTAL ANGLE (水平角度) BEAM TRAVEL LENGTH (声束传播长度) 用于调节每个声道声束的水平角度。 调节声束的水平 对每个声道的声音都要施加一定的延迟,以便每个声 角度,可以优化声束通道。 测试音调被自动输出。 束的声音均能以相同的时间到达听音位置。 该菜单设 置声束传播的距离,该距离是指每个声道的声束被输 出并反射到墙壁直到到达听音位置的距离。 下图的线指示的距离。 选择: L90 度 到 R90 度 朝 L (左)调节,向左移动输出方向;朝 R (右)调 节,向右移动输出方向。 选择:0.3 米 到 24.0 米 a)HORIZONTAL ANGLE Front L 调节前方左声道声束传播距离。 •...
- Page 251 MANUAL SETUP FOCAL LENGTH (焦点长度) TREBLE GAIN ( 高音增益 ) 用于设置每个声道从本机的前方到输出的焦点的距 用于调节每个声道的高频输出水平。 离,以及调节各声道的开阔感。 除中央声道以外焦点应该设置在靠近墙壁的反射点附 如果前方左右或环绕声左右声束的反射点是窗帘或其他会吸 近。 距离越近,越开阔。 收声音的表面,您可以使用增加这些声束的高音水平的方法 来获得更好的环绕声效果。 焦点长度 焦点 甜点 选择: -12.0 dB 到 +12.0 dB 初始设置: 0 dB FL 调节前方左声道的高频输出水平。 • 前左声道 中央声道 FR 调节前方右声道的高频输出水平。 • C 调节中央声道的高频输出水平。 •...
-
Page 252: Sound Menu
MANUAL SETUP IMAGE LOCATION (声象位置) SOUND MENU 用于调节方向,从该方向可以听见从前方左右声道的 声音,所以它们可以从靠近中央声道的地方听到。 用于手动调节各种涉及声音输出的参数。 如果来自前方左右声道的声音听起来不自然,例如您 SET MENU → MANUAL SETUP → SOUND MENU 的收听位置不在听音室的中央时,请使用该特性改变 音频信号的方向。 1)SOUND MENU 当 3 声束或 5 声束被当作声束模式选择时 (请参阅第 42 页) ,您只能调节此参数。 )TONE CONTROL B)SUBWOOFER C)MUTE LEVEL 选择: ON, OFF D) UDIO DEL Y E)ROOM... - Page 253 MANUAL SETUP SUBWOOFER SET ( 超低音扬声器设置 ) MUTE LEVEL (静音水平) 用于手动调节各种超低音扬声器设置。 用以调节静音功能要减弱音量水平的程度。 选择: MUTE, -20 dB 选择 MUTE,完全停止所有声音输出。 • B)SUBWOOFER SET 选择 -20 dB,降低当前音量 20dB。 • BASS OUT;;;;;FRONT CROSS OVER;;;100Hz LFE LEVEL;;;;;;0dB DISTANCE;;;;;;3.0m UTE LEVEL [ ]/[ ]:Up/Down [ ]/[ ]:Sel [ENTER]:Return -20dB [ ]/[ ]:Select...
-
Page 254: Input Menu
MANUAL SETUP DD/DTS Dynamic Range INPUT MENU (Dolby Digital 和 DTS 信号的动态范围) 用于选择动态范围压缩量。 此设置仅在本机解码 用于手动调节各种涉及音频和视频输出的参数。 Dolby Digital 和 DTS 信号时有效。 动态范围是在装 SET MENU → MANUAL SETUP → INPUT MENU 置的噪音之上可以听到的最小音响和不产生失真时可 听到的最大音响之间的差。 3 INPUT MENU 选择: MIN (最小), STD (标准), MAX ( 最大 ) )INPUT SSIGNMENT B)INPUT... - Page 255 MANUAL SETUP 选择 COMPONENT (1),分配装置到本机的 STB INPUT TRIM( 输入微调 ) • COMPONENT VIDEO IN 插孔。 用于调节输入源的输入水平。 选择: TV, VCR 选择 COMPONENT (2),分配装置到本机的 DVD/AUX • C)INPU RIM COMPONENT VIDEO IN 插孔。 ANALOG -3.0dB 选择: DVD, AUX OP ICAL -3.0dB ANALOG -3.0dB COAXIAL -3.0dB COAXIAL -3.0dB [ ]/[ ]:Up/Down [ ]/[ ]:Sel...
-
Page 256: Display Menu
MANUAL SETUP INPUT RENAME ( 输入重新命名 ) DISPLAY MENU 用于在 OSD 和前部面板显示器改变输入源的名称。 按 下输入选择器按钮 (TV, STB, DVD, VCR, 或 AUX), 用于手动调节各种涉及显示的参数。 选择您期望改变其名称的装置,然后完成下列步骤。 SET MENU → MANUAL SETUP → DISPLAY MENU D)INPUT RENAME 4 DISPL Y MENU DVD -> )DIMMER SET B)OSD C)UNIT [ ]/[ ]:Position... - Page 257 MANUAL SETUP OSD SET (OSD 设置) 用于调节显示位置和 OSD 的背景色。 B) SD SHIFT BACK C L R BLUE [ ]/[ ]:Up/Down [ ]/[ ]:Sel [ENTER]:Return OSD SHIFT (OSD 平移) 用于调节 OSD 的垂直位置。 朝 - (负)方向调节,上 升 OSD 的位置;朝 + (正)方向调节,降低 OSD 的 位置。...
-
Page 258: 调节音频平衡
调节音频平衡 调节音频平衡 使用测试音调或每个声束模式播放的音频输出,您可以调节每个声道的声束输出水平,以达到更加逼真的环绕 声效果。 使用测试音凋 按下 ,选择您期望调节的声道。 前部面板显示器显示改变如下。 您可以使用测试音凋功能,从每个声道输出测试音 凋,手动平衡声道水平。 TEST FRONT L 使用测试音调设置声道水平,所以从您的收听位置听 到的每个声道的音量水平是相同的。 TEST CENTER ENTER TEST FRONT R CH LEVEL MENU TEST SUR.R TV/AV ENTER TEST SUR.L RETURN TEST TEST SWFR 设置操作模式选择开关到 YSP,以切换本机的操 作模式。 注 只有当超低音扬声器被连接到本机以及在 SOUND MENU 的 BASS OUT,SWFR 被选择时,TEST SWFR 有效... -
Page 259: 使用正在播放的音频输出
调节音频平衡 使用正在播放的音频输出 当您完成了所有的调节后,按下 TEST。 当播放输入源例如 DVD 时,您也可以手动调节声道水 TEST 平。 注 CH LEVEL MENU • 当立体声播放或专用声束被当作声束模式选择时 (请参阅 第 47 页和 48) ,所有的声道水平都不能调节。 TV/AV ENTER • 当立体声加 3 声束被当作声束模式选择时 (请参阅第 43 RETURN TEST 页) ,FRONT L/R 不能调节。 • 当立体声加 3 声束或立体声播放被当作声束模式选择时 (请参阅第 43 页和 47) ,FRONT L/R 被自动根据其他声道 的设置调节。... - Page 260 调节音频平衡 注 只有当超低音扬声器被连接到本机以及在 SOUND MENU 的 BASS OUT,SWFR 被选择时,SWFR 有效 ( 请参阅第 66 页 )。 按下 ,调节声道音量。 ENTER 控制范围: -10 dB 到 +10 dB 当您完成调节后,等待几秒钟不要操作本机。 注 • 当立体声播放被当作声束模式选择时,所有声道的水平都 不能调节 (请参阅第 47 页) 。 • 当立体声加 3 声束被当作声束模式选择时 (参阅第 41 页) , FRONT L/R 不能调节。...
-
Page 261: 选择输入模式
选择输入模式 选择输入模式 根据您的喜好或输入源的条件,您可以选择被选择输入源的音频输入信号的类型。 在多数情况下,我们推荐将输入模式设置到 AUTO。 注 • VCR 的输入模式被固定到 ANALOG。 但是,如果本机的 TV STANDBY/ON POWER POWER OPTICAL IN 插孔被分配到 VCR, AUTO, DTS 和 ANALOG 被当 作 VCR 的输入模式变得有效 (请参阅第 68 页) 。Ð • ANALOG 不能当作 DVD 和 AUX 的有效输入模式。 AUTO • INPUT1 INPUT2 MACRO... -
Page 262: 调节系统参数
调节系统参数 调节系统参数 本机具有附加菜单可显示在前面板显示器上。 这些菜单提供附加的操作来调节和定做本机的操作方式。 使用系统参数 释放前部面板上的 INPUT。 遵照下列步骤键入系统参数。 INPUT 设置 MEMORY PROTECT 您可以保护您保存在本机系统记忆中的设置,以防意 外消去或不经意的变动。 INPUT VOLUME STANDBY/ON 重复 “使用系统参数”的步骤 1 到 3。 设置操作模式选择开关到 YSP,以切换本机的操 作模式。 CH LEVEL MENU TV/AV ENTER TV/AV RETURN TEST 确认 MEMORY PROTECT 被显示在前面板显示器上, 按下前面板的 STANDBY/ON,关闭本机的电源。 然后按下 ENTER。 STANDBY/ON MEMORY PROTECT 按住前部面板上的... -
Page 263: 设置 Max Volume
调节系统参数 按下 , 在PROTECT: ON和PROTECT: OFF之间 按下遥控器上的 ,MAX VOLUME SET 出现 切换。 在前部面板显示器上。 ENTER ENTER PROTECT: ON MAX VOLUME SET 按下 ENTER。 PROTECT: OFF 要激活保护功能,选择 PROTECT: ON。 • ENTER 取消保护功能,选择 PROTECT: OFF。 • 按下前面板的 STANDBY/ON,设置本机到待机模 式。 按下 ,调节最大音量水平。 STANDBY/ON 新设置将在下一次打开本机电源后被激活。 ENTER 设置... -
Page 264: 设置 Turn On Volume
调节系统参数 设置 TURN ON VOLUME 按下前面板的 STANDBY/ON,设置本机到待机模 式。 当本机电源打开时,您可以设置初始音量水平。 STANDBY/ON 重复第 76 页上的 “使用系统参数” 的步骤 1 到 3。 当您再次打开本机的电源时,对于最大音量水平 设置操作模式选择开关到 YSP,以切换本机的操 的新的设置将被激活。 作模式。 设置 DEMO MODE TV/AV 您可以从本机输出测试声束以体验声束。 按下遥控器上的 ,TURN ON VOLUME 出现 仅在前面板显示器按下 INPUT,您也可以完成此功能。 当您 按住 INPUT 2 秒以上时,本机输出声束。 声束在左右之间交 在前部面板显示器上。... -
Page 265: 设置 Factory Preset
调节系统参数 设置 FACTORY PRESET 按下 , 在 DEMO: ON 和 DEMO: OFF 之间切换。 您可以重新设置本机的所有参数,使它们返回到工厂 预设。 该步骤完全重新设置 SET MENU 里的所有参 数。 ENTER 注 在完成以下步骤以后,您必须重新设置 AUTO SETUP,以匹配 您的环绕声环境。 重复第 76 页上的 “使用系统参数” 的步骤 1 到 3。 设置操作模式选择开关到 YSP,以切换本机的操 DEMO: ON 作模式。 TV/AV DEMO: OFF 按下遥控器上的... - Page 266 调节系统参数 按下 , 在 PRESET: RESET 和 PRESET: CANCEL 之间切换。 ENTER PRESET: RESET PRESET: CANCEL 要重新设置所有的当前设置,请选择 PRESET: • RESET。 要取消重新设置步骤,请选择 PRESET: • CANCEL。 按下前面板的 STANDBY/ON,设置本机到待机模 式。 STANDBY/ON 新设置将在下一次打开本机电源后被激活。...
-
Page 267: 遥控器特性
遥控器特性 遥控器特性 除了控制本机之外,此遥控器还能操作 YAMAHA 和其它厂商制造的其它 A/V 装置。 要控制其它装置,您必须用 适当的遥控器代码设置遥控器,并设置操作模式选择开关到 TV/AV,改变控制区域。 注 根据您正在使用的外部 A/V 装置的类型,即使已经设置遥控器代码,您也许不能使用遥控器操作该装置。 在这种情况下,请 使用该装置附带的遥控器来操作。 设置遥控器代码 按住 CODE SET 的同时,按下数字按钮键入遥控器 代码。 通过设置适当的遥控器代码,您能控制其它装置。 能对 设置例: YAMAHA DVD 输入范围 每个输入区域设置代码 (TV, STB, DVD, VCR 和 AUX)。 有关可用的遥控器代码的完全列表,请参阅本说明书 SURROUND 末尾的 “遥控器代码列表” 。... -
Page 268: 控制其它装置
遥控器特性 控制其它装置 操作您的电视机 操作 DVD 播放机 设置操作模式选择开关到 TV/AV,然后按下 TV,选择 设置操作模式选择开关到 TV/AV,然后按下 DVD,选择 TV 作为输入源。 DVD 作为输入源。 遥控器控制区域切换到 TV 操作模式。 遥控器控制区域切换到 DVD 操作模式。 TV/AV TV/AV STANDBY/ON POWER POWER STANDBY/ON POWER POWER INPUT1 INPUT2 MACRO INPUT1 INPUT2 MACRO AUTO AUTO VOL MODE SETUP INPUTMODE SLEEP VOL MODE... - Page 269 遥控器特性 操作您的录像机 操作您的 STB (CATV/ 卫星调谐器 ) 设置操作模式选择开关到 TV/AV,然后按下 VCR,选 设置操作模式选择开关到 TV/AV,然后按下 STB,选 择 VCR 作为输入源。 择 STB 作为输入源。 遥控器控制区域切换到 VCR 操作模式。 遥控器控制区域切换到 STB 操作模式。 TV/AV TV/AV STANDBY/ON POWER POWER STANDBY/ON POWER POWER INPUT1 INPUT2 MACRO INPUT1 INPUT2 MACRO AUTO AUTO VOL MODE SETUP INPUTMODE...
-
Page 270: 使用电视机宏
遥控器特性 对有调谐性能的电视机设置宏 使用电视机宏 按住遥控器上的 CODE SET,然后按下输入选择器 电视机宏功能可通过只按一个按钮就执行一系列的操 按钮之一,选择您期望对其设置宏的输入源。 作。 例如,当您想要播放 DVD 时,通常您要打开该装 按住 CODE SET,进行步骤 2。 置,选择 DVD 为输入源,按下播放按钮以开始播放。 电视机宏功能让您能简单地通过按下 DVD 的宏指令按 钮,就能执行所有这些操作。 TV MUTE 按住的同时,按 注 下 CODE SET • 在进行宏设置之前一定要为您的电视机设置遥控器代码。 • 如果您的电视机没有调谐性能,用不同的方法设置宏。 • 如果在设置宏时,您按下遥控器上的不用于设置宏的操作 按钮,设置步骤将被自动取消。 按住 CODE SET 并按下遥控器上的 MACRO。 •... - Page 271 遥控器特性 对没有调谐性能的电视机设置宏 操作宏 按住遥控器上的 CODE SET,然后按下输入选择器 设置操作模式选择开关到 YSP,以切换本机的操 按钮之一,选择您期望对其设置宏的输入源。 作模式。 按住 CODE SET,进行步骤 2。 TV/AV TV MUTE 按住的同时,按下 CODE SET 按住输入选择器按钮大约 2 秒钟,选择对其进行 宏操作的输入源。 在输入模式改变的同时电视机输入改变。 按住 CODE SET 并按下遥控器上的 MACRO。 TV MUTE MACRO 按住的同时,按下 CODE SET 取消宏 按遥控器上的 INPUT1。 按住遥控器上的 CODE SET,然后按下输入选择器 INPUT1 按钮之一,选择您期望对其取消宏的输入源。...
-
Page 272: 故障排除
故障排除 故障排除 当本机工作不正常时,请参阅下面的表。 如果您遇到的问题没有列在下面,或如果下面给出的指导不起作用, 请将本机设为待机模式,断开电源导线的连接,并联络距离您最近的 YAMAHA 经销商或服务中心。 一般 问题 原因 措施 参考页 当按下 STANDBY/ON 时,本机不能打 电源线没有牢固地连接到墙壁上的电 将电源线牢固地连接到墙壁上的电源 开,或在打开电源后很快进入待机模 源插座或本机后面板上的电源插孔。 插座或本机后面板上的电源插孔。 式。 本机册曾被暴露在强烈的外部电击 将本机设为待机模式,断开电源导 — (例如闪电和强烈的静电) 。 线,过 30 秒钟后再次插回,然后正 常使用。 本机突然进入待机模式。 内部温度变得过高,过热保护电路被 请等待大约 1 小时,直到本机冷却, — 启用。 然后重新打开它。 睡眠定时器将本机关闭了。 打开电源,并再次播放信号源。... - Page 273 故障排除 问题 原因 措施 参考页 低音扭曲或音量太小。 SUBWOOFER SET 的 CROSS OVER 设定不 正确设定 CROSS OVER。 正确。 现在,夜间收听模式之一被选择。 关闭夜间收听模式。 低音太多。 现在,TruBass 被打开。 关闭 TruBass。 超低音扬声器的音量水平太高。 降低超低音扬声器的音量水平。 — 环绕声效果微弱。 听音室的形状不规则。 在正方形或长方形形状的房间里安装 — 本机。 声束通道里没有墙壁。 在声束通道里尝试放置一个扁平物 — 体,例如木板。 — Dolby Digital 或 DTS 信号源不能被 连接的装置不设为输出...
- Page 274 故障排除 遥控器 问题 原因 措施 参考页 遥控器不能工作和 / 或不能正常起作 距离或角度错误。 遥控器在最大为 6 米的范围内起作 用。 用,且不能偏离前部面板轴心超过 30 度。 直射阳光或光照 (来自逆变器型荧光 重新放置本机。 — 灯)影响了本机的遥控器传感器。 电池微弱。 更换所有电池。 使用本机的遥控器您不能操作外部装 您期望操作的外部装置没有被当作输 按下前部面板上的 INPUT 或遥控器上 置。 入源选择。 的输入选择器按钮,选择您期望操作 的外部装置。 没有正确设置遥控代码。 正确设置遥控代码或使用本说明书最 后的 “遥控器代码列表”尝试对相同 的厂商使用不同的代码。 即使遥控代码是正确的,有些型号也 请使用外部设备自带的遥控器。 —...
-
Page 275: 音频格式
术语 术语 DTS (数码影院系统)数码环绕声 音频格式 DTS 数码环绕声使用 6 声道数码声轨来替换电影的模 拟声轨,现在正迅速在全球影院中受到欢迎。 Dolby Digital Digital Theater Systems Inc. 开发了一个家庭影院 系统,使您能在自己家中就欣赏到 DTS 数码环绕声的 Dolby Digital 是一种数码环绕声系统,能给您完全 声音厚度和自然空间再现。 此系统产生了几乎无失真 独立的多声道音频。 Dolby Digital 有 3 个前声道 的 6 声道声音 (从技术上说,左声道,右声道和中央 (左、中、右)和 2 个环绕声立体声声道,能提供 5 声道,2 个环绕声声道,加上一个超低音扬声器的 个完全范围的音频声道。... - Page 276 索引 索引 测试音 ........72 声场程序 ........50 声束模式 ......42, 47, 48 睡眠定时器 ........58 电源线 ........23 电视机宏指令 ........ 84 动态范围 ........68 遥控器 ....... 9, 24, 25 遥控器代码 ........81 音量模式 ........55 优化器麦克风 ........ 30 环绕声模式 ........44 在屏显示...
- Page 277 规格 规格 AMP 部分 一般 最大输出功率 (EIAJ) 电源 • • ..... 2 W (1 kHz, 10% THD, 4 Ω) x 40 [ 美国和加拿大型号 ] ....AC 120 V, 60 Hz 20 W (100 Hz, 10% THD, 3 Ω) x 2 [ 澳大利亚型号...
-
Page 278: List Of Remote Control Codes
VIDECH 297, 242 351, 353, 363 SIGNATURE 2000 FRABA WARDS 297, 239, 232, 216 GOODMANS 334, 337 395, 397 FUJITSU YAMAHA 299, 292, 242, GRUNDIG 332, 338 SONY 368, 379, 372, FUNAI 277, 278 285, 287, 253 HITACHI 325, 333, 349,... - Page 279 JEROLD 722, 728, 729, 732, 733, 734, 735, 736, 737 MAGNAVOX MOTOROLA 739, 742, 743 PANASONIC 744, 745, 746, 747, 783, 784 PHILLIPS 763, 764, 765, 766, 767, 768 PIONEER 748, 785 RADIO SHACK749 SCIENTIFIC ATLANTA 752, 753, 754 SONY 756, 757 TOCOM UNIVERSAL...
- Page 280 YAMAHA ELECTRONICS (UK) LTD. YAMAHA HOUSE, 200 RICKMANSWORTH ROAD WATFORD, HERTS WD18 7GQ, ENGLAND YAMAHA SCANDINAVIA A.B. J A WETTERGRENS GATA 1, BOX 30053, 400 43 VÄSTRA FRÖLUNDA, SWEDEN YAMAHA MUSIC AUSTRALIA PTY, LTD. 17-33 MARKET ST., SOUTH MELBOURNE, 3205 VIC., AUSTRALIA...
-
Page 281: Quick Reference Guide
Connect your TV or DVD player to this unit using appropriate cables as shown below. Connecting a subwoofer enhances bass sound for listening enjoyment. YSP-1100 For further information on connecting other components, see pages 15 to 22 in the Owner’s Manual. - Page 282 This unit employs the YAMAHA IntelliBeam technology with the aid of the supplied optimizer microphone, allowing you to achieve highly accurate sound adjustments that best match your listening environment. Be advised that it is normal for loud test tones to be output during the AUTO SETUP procedure. Make sure that there are no children around in the listening room while the AUTO SETUP procedure is in progress.
- Page 283 Conecte su TV o reproductor DVD a la unidad utilizando los cables adecuados, tal como se muestra en el siguiente gráfico. Conectando un subwoofer se mejora el sonido de los YSP-1100 bajos, para disfrutar más de la escucha. Para obtener más información sobre cómo conectar otros componentes, consulte las páginas 15 a 22 en el Manual de Instrucciones.
- Page 284 Esta unidad emplea la tecnología IntelliBeam de YAMAHA que, con ayuda del micrófono optimizador incluido, le permite seleccionar con gran precisión los ajustes de sonido que mejor correspondan a su entorno de escucha. Téngase en cuenta que es normal que se emitan tonalidades bastante fuertes de prueba, durante el procedimiento de AUTO SETUP.