Table of Contents
Advertisement
Quick Links
Advertisement
Table of Contents

Related Manuals for FEIYUTECH Vimble 2A


Summary of Contents for FEIYUTECH Vimble 2A
- Page 1 3-Axis Stabilized Handheld Gimbal for Action Camera Instructions EN V1.1...
-
Page 2: Table Of Contents
Catalogue 1. Overview ………………………………………………………… 2 2. Start to Use ……………………………………………………… 4 2.1 Charging……………………………………………………………………… 4 2.2 Unlock / Lock ……………………………………………………………… 4 2.3 Mount Action Camera ……………………………………………………… 5 2.4 Power ON/OFF ……………………………………………………………… 5 2.5 Extend and Reset the Handle ……………………………………………… 6 3. Function Operation …………………………………………… 6 3.1 Function / Modes Introduction ……………………………………………... - Page 3 3-Axis stabilized handheld gimbal for action camera with small size and portable, extendable feature. It supports portrait mode and landscape mode, well control the recording/photo/timelapes of action camera. Suggestion Vimble 2A includes below information, please read the information before using the gimbal 1. Quick start guide 2. Online instruction 3.
-
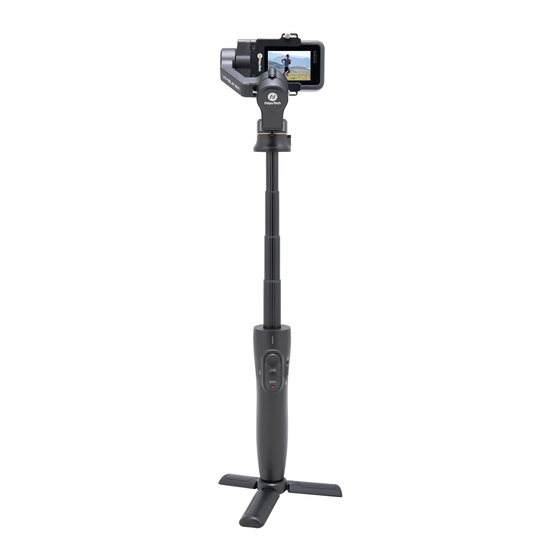
Page 4: Overview
1. Overview * The gimbal is NOT included action camera. www.feiyu-tech.com... - Page 5 www.feiyu-tech.com...
-
Page 6: Start To Use
2. Start to Use TIPS (1) Please fully charge gimbal before power on for the first time. (2) If the power is too low, the indicator will flash red for three times every five seconds. It is recommended to charge it immediately. (3) When not in use, please turn off the gimbal. -
Page 7: Mount Action Camera
Pan axis position lock unlock for example. 2.3 Mount Action Camera 1) Turn camera clip upward, loosen it. 2) Turn lens mounting frame down. 3) Mount the camera, fix the lens with lens mounting frame, lock the camera clip. 2.4 Power ON/OFF TIPS: (1) Unlock pan axis position lock &... -
Page 8: Extend And Reset The Handle
2.5 Extend and Reset the Handle 1) Hold the handle with one hand, hold upper grip with other hand. 2) Extending: Pull the extendable bar out to suitable length (range from 0mm to 183mm) Reset: Push upper grip to make the extendable bar down to handle part. 3. -
Page 9: Joystick Operation
Mode Function The roll and tilt direction are fixed, and the camera Pan Mode moves according to the left-right movements of the (Default mode) user's hand. The roll direction is fixed, and the smartphone moves Follow Mode according to the left-right movements, up-down movements of the user's hand. -
Page 10: Function Button Operation
3.3 Function Button Operation Identify the current working mode through status indicator. Function Button Function Indicator Status Operation Pan Mode Switch Between Pan Mode/ Single Tap Lock Mode Lock Mode Follow Mode Double Tap (Pan and Tilt Axis Will Follow) All Follow Mode Triple Tap (pan, tilt and roll axis will follow) -
Page 11: Shutter Button Operation
Slide Button Function Operation Push-Up Roll axis rotate counterclockwise. Push-Down Roll axis rotate clockwise. 3.5 Shutter Button Operation Shutter Button Function Status Indicator Operation In Photo Take Photo Mode Single Tap In Video Start/stop Recording Mode Long press 3 seconds to switch Long Press between Photo/Video/Timelapse mode... -
Page 12: Gimbal Initialization
3.7 Gimbal Initialization You can initialize your gimbal when: a. When camera is not balance. b. If not use for a long period of time. c. In case of extreme temperature variations. Steps: (1) Five tap function button, the motors will stop working after the tone. Status indicator turns solid blue. -
Page 13: Manual Lock
3.8 Manual Lock Manually rotate the camera to a certain pan angle and tilt angle, and wait for half second to make the camera stay at that position. 3.9 Portrait Mode Default (Rotate the handle ±70° with the roll motor as the center to enter portrait mode automatically) 3.10 Light Indicator Indicator Status... -
Page 14: Feiyu On App
Indicator Status Description Instruction Initialization Failure / Blue light keeps flashing Malfunction Photo / Video Green light flashes once Power On Green light change to blue Power off Red light turn off Low power Red light flashes three times Gimbal powering off Red light keeps flashing because of low power Green light flash twice for... -
Page 15: Connect Feiyu On App
4.2 Connect Feiyu ON App Steps: (1) Turn on the gimbal. (2) turn the camera's Wifi (usually in camera's "setting- network-Wifi" to control), when the screen shows the name and the password of the Wifi, stay at interface (3) Log in Feiyu ON App (Register for the first time). (4) The App will search equipment nearby, and it will show "connection succeed"... -
Page 16: Firmware Upgrade
4.3 Firmware Upgrade Upgrade the firmware through the Feiyu ON App. (1) Click the icon on the top left (2) Select upgrade type. (3) Follow the prompts to upgrade the firmware. Tips: the gimbal has upgrade protection, restart the gimbal after the upgrade is failed, then the gimbal can reset to the last firmware version, and users can connect to the APP to upgrade again. -
Page 17: Specifications
5. Specifications 272mm×106mm×46mm (Storage status) Product Dimensions 279mm×94mm×69mm (Working status) Net gimbal Weight 277.6g (Including the batteries) Max. Payload 135g Max. Tilt Range 330° Max. Roll Range 195° Max. Pan Range 330° Standby Time 10 Hours Cameras GoPro HERO5/6/7 www.feiyu-tech.com... -
Page 18: Disclaimer
3. DO NOT disassemble the gimbal except marked detachable. It need send to FeiyuTech after-sales or authorized service center to fix it if you accidently disassemble it and cause abnormal work. The relevant costs are borne by user. - Page 19 www.feiyu-tech.com...