Table of Contents
Advertisement
Advertisement
Table of Contents

Related Manuals for Pandigital PANSCN09


Summary of Contents for Pandigital PANSCN09
- Page 1 ORTABLE CANNER WITH EEDER User Guide PANSCN09...
-
Page 2: What's In The Box
DCIM 100PHOTO (for storing scanned photo .jpg files) 200DOC (for storing scanned document .pdf files) Pandigital Documentation (Scanner Quick Start Guide) (Scanner User Guide) ... -
Page 3: Table Of Contents
T a b l e o f C o n t e n t s What’s in the Box ..........................2 Included microSD Card Folder Structure ..................2 Read This First ............................. 5 Read This First ............................. 5 Important Safety Precautions ......................5 Introduction ............................ - Page 4 Connect with Windows XP ......................23 Connect with Macintosh Computer ....................24 Safely Disconnect the Scanner (Macintosh) ................24 Presto! PageManager ........................24 Features ............................24 System Requirements ........................25 Install the Software ......................... 25 Launch the Software ........................25 Using the Annotation function ......................
-
Page 5: Read This First
R e ad T h is F ir s t Please read the following important safety instructions carefully before using the scanner. Failure to observe these instructions may result in personal injuries or damages to the scanner. Important Safety Precautions Always follow these basic safety precautions when using your scanner. -
Page 6: Introduction
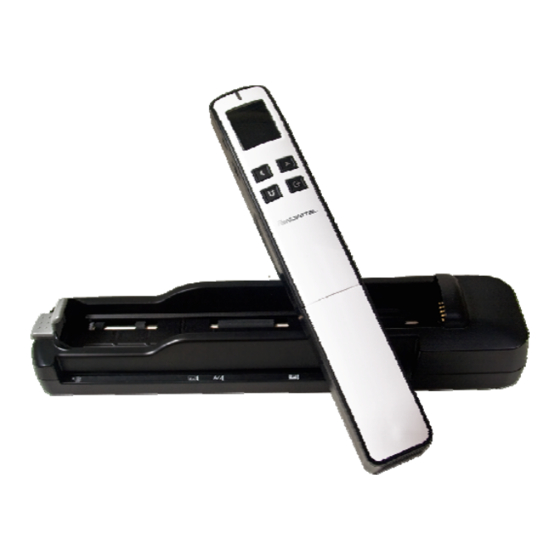
This portable wand scanner quickly and easily makes digital copies of documents, receipts, books, photos, recipes and more…anytime, anywhere! Featuring a built-in color LCD preview screen to confirm you’ve captured what you intended, as well as Pandigital’s ScanRite roller tracking technology to guide your hand-held scans perfectly to produce straight high-resolution digital copies. -
Page 7: Scanner Overview
Scanner bottom Name Function/ Description Hand-held Wand scans: the rollers are part of Pandigital’s ScanRite roller tracking technology for guiding your scans. Feed Sensor Rollers Sheet-fed with Feeder Dock: the rollers work with the feeder dock feed sensor rollers to feed originals through the feed slot. - Page 8 Feeder Dock Name Function/ Description Secures the scanner in the feeder dock. Press down on latch to insert Scanner latch and release scanner. Feeds originals through device while scanning. The rollers are sensors ...
-
Page 9: Power And Scan Indicator Light
P owe r and S c an In di cat o r L igh t The indicator light patterns and the functions they indicate are as follows: Off = scanner is off or scanner is on and ready for use ... -
Page 10: Turning The Scanner Off
Turning the Scanner Off To turn the scanner off, press and hold for three seconds. Now you can safely remove the SD card from the scanner. The scanner has a power-saving feature which automatically turns the scanner off when it’s left idle for a specified number of seconds (if not connected to a computer). To set the Power Saving time, see the “Set the Power Saving Time”... -
Page 11: Suitable And Unsuitable Original Types
With the SD card inserted in the scanner, connect the scanner to your computer via the USB cable. Your computer recognizes the scanner as a Removable Disk. If you have the PD_SCAN Pandigital SD card inserted, the volume title is . Use a Windows Explorer or Mac Finder window to locate your scanned image files. -
Page 12: Sheet-Fed Scanning With Feeder Dock
PDI_9999.JPG PDI_9999.PDF If the file name reaches in the initial folder, a new folder 101PHOTO 201DOC titled is automatically created to store subsequent new files, and so You can view or edit the .JPG files on the SD card by using the included Presto! PageManager software, or by using your own graphic editing software. -
Page 13: Wand Scanning (Hand-Held)
Gently insert the original into the feed slot; release it as soon as it begins to feed. After the feed begins, the scanner pauses briefly and then completes the scan. This is by design and is not a malfunction. ... -
Page 14: Preview Scanned Images On Lcd Screen
Insert a SD card. Press to turn scanner ON. Press again to initiate the scan mode. With your original on a clean flat surface, slowly slide the scanner across your original. Moving the wand scanner over the original too fast causes an error and the scanner may stop scanning. -
Page 15: Set Preview Mode
Set Preview Mode By default, the Preview mode is On, allowing you to preview the JPG scanned image for 2 seconds immediately after scanning. Two options appear on the screen with the image Save Delete allowing you to press (default) or the image immediately (delete confirmation displays during deletion). -
Page 16: Menu - Settings
Menu - Settings Resolution The scan resolution is measured in dpi (dots per inch). The higher the dpi, the more details on the original are captured by the scanner and produce a higher quality scanned image. However, a higher dpi also results in a larger image size and occupies more space on the memory card. -
Page 17: Lcd Off
LCD Off To prevent screen burn-in, the LCD screen automatically shuts off when left idle for a specified time (45 seconds [default], 90 seconds or 2 minutes). After the LCD shuts off (and scanner is still on), simply press any button to turn the LCD back on. -
Page 18: Anti-Mirror (Wand Scans Only)
In Portrait mode, the images are automatically rotated 90 right before being saved, ensuring the vertically scanned image is saved in the correct viewing orientation, thus eliminating the need to manually rotate the saved images later. Changing the orientation to Portrait mode is best used for PDF vertical right-to-left scans. ... -
Page 19: Auto-Crop (Sheet-Fed Scans Only)
Card Format Press to scroll to , and then press to select it. Press to select To confirm, press After a successful format, the Settings screen is displayed. Press to exit. Auto-crop (sheet-fed scans only) When using the feeder dock, the scanner has a built-in cropping function that detects and crops dark edges of an original and dark background around an original during the scan process (see following example). -
Page 20: Language
If the original is fed slightly crooked, the original is only cropped a maximum amount per following illustration: Original Cropped image 0.5mm 1.5mm When scanning darker originals, over-cropping may occur (see example of photo of the night sky). Please insert the original in a different direction (orientation) and try again. To change auto-crop setting: With the screen displayed, press... -
Page 21: Calibration (As Needed Only)
U s e o f P ro t e c t i ve Sl e eve s (o pt io n al) 5”x7” protective sleeves (not included with the scanner) can be purchased on our website: www.pandigital.net. We recommend using a 5”x7” protective sleeve for your older, fragile photos and when scanning... -
Page 22: Connect Scanner To A Computer
The protective sleeves also help to eliminate the possibility of de-focusing due to the uneven surface of curled photos. Fuzzy areas that result from the uneven surface of the curled photo Curled photo Remove photos from the sleeve after scanning to prevent the sleeve from sticking to the photos over time. -
Page 23: Connect With Windows Xp
Do not select “Take no Action” or “Set AutoPlay to defaults in Control Panel”. DCIM\100PHOTO In the Windows Explorer window, find the scanned images in the DCIM\200DOC folders. Connect with Windows XP When the computer recognizes the scanner with an inserted memory card, a “PD_SCAN” window appears. -
Page 24: Connect With Macintosh Computer
When the ‘Safe to Remove Hardware’ message appears, you can safely remove the scanner’s USB cable. Connect with Macintosh Computer When the computer recognizes the scanner, with an inserted memory card, the memory card volume icon appears on the desktop. To view the contents of the memory card, double-click the icon to open a Finders’... -
Page 25: System Requirements
Outlook, Outlook Express, Netscape Mail, Microsoft Mail, cc:Mail, or other electronic mail software Install the Software You can install the software from the Pandigital microSD card when it is inserted into the scanner or your own card reader attached to your computer. -
Page 26: Using The Annotation Function
Tree View 3. The window opens: 4. In the left pane, locate the scanner drive. If you are using the Pandigital microSD card, PD_SCAN (drive letter) Removable Disk (drive letter) look for . Otherwise look for or the personal title of your own memory card. -
Page 27: Using Presto! Wrapper
Image Annotation toolbar 1 appears on the right Click top icon side of the screen. If it is not visible, click in the top to display right corner. Toolbars 1 & 2 Click the top icon to display toolbar 2, and vice versa. -
Page 28: Using The Optical Character Recognition (Ocr) Function
Import from Presto! Wrapper Tree View a. In the window, select or create a folder for the imported files. File> Import from> Presto! Wrapper b. Click Open [wrapper file].exe Open c. In the dialog box, select a file, and then click d. -
Page 29: Back Up/Restore Files
– Choose the desired default language for OCR. Document – Choose to view documents with PageManager or with other associated application. Back up/Restore Files You can back up or restore important files, which are compressed as PMF files. Tree View In the window, select the folder you want to back up. -
Page 30: Calibrate The Scanner (Wand Scan Mode)
Use a suitable dust blower to blow off dust from the scanner and feeder dock. Use a slightly dampened cloth to wipe off any smear on the surface of the scanner and LCD screen. Gently wipe the feed rollers on the scanner and feeder dock, and the CIS cover with the cleaning cloth (included). -
Page 31: Error Messages
Error Messag es Error Message Root cause/ Code Purpose How to restore 1) No memory card inserted. 1) Insert a memory card. Insert Memory Card 2) Card not recognized. 2) Try a different card. Card is full; can’t save scanned Card Full Use a different card. - Page 32 Is it safe to feed old and fragile photos into the feeder dock? We recommend using a 5”x7” protective sleeve (not included) for all old and fragile photos. These sleeves can be purchased on our website: www.pandigital.net. Why doesn’t my computer recognize my scanner when it’s connected via USB cable? Make sure the cable connection is secure.
- Page 33 Presto PageManager How do I sort the thumbnails? Follow these steps to sort by Name, Type, Size, Date, Author or Keyword: View Sort Click and then select Select the preferred sort type. How can I improve unsatisfactory results after converting a document? Unsatisfactory results may be caused by the following: ...
-
Page 34: Technical Specifications
Why is my printer dialog box gray and does not allow me to change settings? Before you attempt to print a document, you must do a one-time printer setup. Follow these steps: File> Fax/Print Setup> your output printer] Click Tree View In the window, click and drag the file that you want to print to the printer icon File>... -
Page 35: Storing The Scanner
LABOR: For a period of one (1) year from the date of purchase, if this product is found to be defective, Pandigital will repair or replace the product, at its option, at no charge. After this one (1) year, labor... - Page 36 PARTS: For a period of one (1) year from the date of purchase, if this product is found to be defective, Pandigital will supply at no cost, new or rebuilt replacement parts, at its option, at no charge. After this one (1) year period, parts will be charged for on a case by case basis.
-
Page 37: Newsoft's End User License Agreement
Avoid scanning and re-distributing copyrighted originals and images or those of unknown sources. Doing so may violate your local copyright laws and related regulations. Pandigital cannot be made liable for the losses that may result from breaching the laws described above. - Page 38 Upgrades If the Software is labeled as an upgrade, End User must be properly licensed to use the Software identified by NewSoft as being eligible for the upgrade in order to use the Software. Software labeled as an upgrade replaces and/or supplements the product that forms the basis for the End User's eligibility for the upgrade.
- Page 39 Applicable laws This EULA is governed by the laws of the State of California, USA if End User acquired or uses this Software in the United States. If this Software was acquired and is used exclusively outside of the United States, then local law may also apply.