Table of Contents
Advertisement
Advertisement
Table of Contents

Related Manuals for Pandigital S8X1100


Summary of Contents for Pandigital S8X1100
- Page 1 Personal Photo Scanner S8X1100 User Guide v1.3...
-
Page 2: Table Of Contents
Tab le o f Co n t en ts Introduction ................................... 3 What’s in the Box ................................3 Important Safety Precautions ............................3 Software CD ................................... 4 Scanner Overview ................................. 4 Save Format ................................5 Color Mode ................................5 Scan Resolution ............................... 5 Scanner Status Indicators ............................ -
Page 3: Introduction
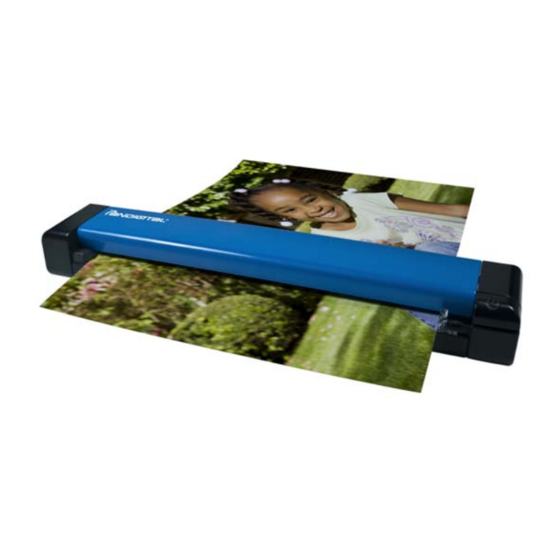
In tr o d u c t io n Scan printed photos, cards, documents, and other items quickly and easily using your Pandigital Personal Scanner! No computer is necessary to scan – just choose your resolution and then feed your item into the scanner to create a JPG image file. You can store scans on the scanner’s built-in disk (automatic if no memory card is inserted), or you can insert a memory card for expanded storage capacity. -
Page 4: Software Cd
So ftw ar e CD The software CD included with your scanner contains electronic versions of the Pandigital Quick Start Guide and User Guide, plus the Presto! PageManager software for both PC and Macintosh computers, and bonus graphics editing software. The CD folder structure is shown below:... -
Page 5: Save Format
Save Format All scans are saved to JPEG format. Use the included Presto! PageManager software to convert the JPG files to other file formats, including PDFs, if desired. Color Mode All scans are in color mode. Scan Resolution The scan resolution is measured in DPI (dots per inch). The higher the DPI, the more details on the original are captured by the scanner, producing a higher quality scanned image;... -
Page 6: Storage Capacity
Storage Capacity Built-in Disk The scanner’s built-in disk has approximately 128MB of memory that can be used to store images. If a memory card is not inserted, scanned files will automatically be stored on the built-in disk until it is recognized as full (i.e., less than 2MB remaining for the 300 DPI setting, less than 5MB remaining for the 600 DPI setting, and less than 15MB remaining for the 1200 DPI setting). -
Page 7: Considerations For All Scanning
Co n s id er at io n s f o r a l l S c an n in g Inserting a memory card before scanning is recommended for large scanning projects so that you don’t have to stop at frequent intervals to move the scanned files from the built-in disk to a memory card or to a folder on your computer. -
Page 8: Getting Started
Gett in g Star ted Using a Protective Sleeve (Optional) We recommend using a 5”x7” protective sleeve for your older, fragile photos and when scanning originals smaller than 2”x2”. The protective sleeves also help to eliminate the possibility of de-focusing due to the uneven surface of curled photos. For information on obtaining protective sleeves, contact Customer Support at www.sunglow.net. -
Page 9: Auto-Crop Feature
With the side to be scanned facing up, place the left edge of the original straight against the left edge of the feed slot, and then slide the guide lever against the right side of the original. Gently push the original into the feed slot; release it as soon as it begins to feed. After the feed begins, the scanner pauses briefly and then continues the feed. -
Page 10: Connecting The Scanner To A Computer
Co n n ec t in g th e Sc a n n er to a Co m p u t er Connect the scanner to your computer to access the scanned images from the scanner’s built-in disk or from the inserted memory card without using an independent card reader. While connected, you can view your scanned image files, copy and paste files from one storage area to the other, or delete files you don’t wish to keep. -
Page 11: Connecting With Macintosh Computer
Connecting with Macintosh Computer When the computer recognizes the scanner built-in disk or inserted memory card, the volume icon appears on the desktop. To view the contents of the built-in disk or memory card, double-click the icon to open a Finders window. -
Page 12: Pr E Sto! P A Gem A N A Ger
Pr e sto! P a geM a n a ger Fast, fun, and efficient, Presto! PageManager makes it easy to share and organize your photos and documents by helping you to convert piles of papers into organized, digitized files, and also to view, edit, send, and back up files in many formats. -
Page 13: System Requirements For Installing Presto! Pagemanager
Turn the scanner on. Insert the CD containing the PageManager software into the CD/DVD drive on your computer. WINDOWS: In a Windows Explorer window, click on the volume titled Pandigital/Software. MAC: Double-click the Software icon on the desktop Single Installation Method Setup_PC.exe* WINDOWS: Double-click Setup_Mac.app*... -
Page 14: Using Presto! Pagemanager On Windows Operating System
To install each software individually, follow the instruction below. In some PowerPC Mac the single launcher may not work on OS 10.5.8 (as we recommended and tested on Intel Mac). To install PageManager XE software individually Presto_PMxxx_PC Setup.exe WINDOWS: Double-click Presto_PMxxx_MAC \PMxxx_Setup.mpkg MAC: Click Presto_PM9.08_PC and... - Page 15 Menu Bar Provides commands used to perform program functions. Command Includes most commonly used commands; click a command to Toolbar execute. Drag frequently used folders to the Quick Links area. Folders dragged Quick Links here are shortcuts only and not actual folders. Right-click shortcuts to open, rename, or remove them without affecting the real folders.
- Page 16 Image Annotation Toolbar Display Area 1. In the window, double-click an Click top icon Page image thumbnail to open it in view. to display the Touch up Touch up and toolbar appears on the right side of the Annotation toolbars screen.
- Page 17 d. The individual files are extracted from the .exe file and imported into the Display Area window. 4. Extract Individual Images from a Presto! Wrapper File Presto! Wrapper’s .exe a. In a Windows Explorer window, double-click the file. b. Click the thumbnail of the image you want to extract. Save As c.
-
Page 18: Using Presto! Pagemanager On Macintosh (Mac) Operating System
Browse. 5. To choose the Destination, click Set Password 6. (Optional) Click and enter a password for protecting your backup file. Memo 7. For future reference and searching, enter other useful information in the field. 8. Click Restoring Files File Restore →... - Page 19 Select desired file formats: JPEG, PNG, BMP, GIF, TIFF, PDF, Filters RTF, HTML, XML, TEXT, and OTHERS. Double-click on the Filters bar to show or hide files in the folders. Shows files in the selected viewing mode. Open the Shortcut menu ...
- Page 20 → For complete instructions on using the PDF Annotation toolbars, click Help Help. Using the Optical Character Recognition (OCR) Function You can convert text in a scanned image to editable text using the OCR function. This function is only available for documents that are stored on your computer. You cannot convert documents that are stored on your memory card.
-
Page 21: Installing The Bonus Software
CD/DVD drive < > to open it. In a Windows Explorer window, click on the volume titled PD_SCAN\Pandigital\Software\Bonus Start.exe Double-click on To install a software program, click on the desired install button: Follow the on-screen instructions to complete the installation. -
Page 22: Scanner Maintenance
Scan n er M ain ten a n c e Clearing Paper Jams To clear a jam from the feeder, press and hold the Power button for 3 seconds to power off, then press quickly to power on again to continue the sheet feed. If the item is still jammed, open the cover and gently pull out the item. -
Page 23: Frequently Asked Questions
Fr eq u en tl y A sked Qu e st io n s Before contacting Customer Support, you may find answers to your questions below. This FAQ contains Q&A for both the scanner and the Presto! PageManager software. Scanner Q: Why doesn’t my scanner power on? A: Ensure the microUSB cable is securely connected to the scanner and to either the USB slot in your computer or a USB power adapter connected to an electrical outlet. - Page 24 Q: What can I do if my images are getting over-cropped, or not getting cropped the way I expected or prefer? A: When you feed your original, always be sure you are positioning the original straight and against the left edge of the feeder slot. Q: What is the relationship between the orientation of my scan and the final stored image? A: The orientation of your scanned image should be the same as the original as it was inserted into the scanner.
-
Page 25: Technical Specifications
How do I use the basic Backup function? A: You can back up or restore important files, which are compressed as PMF files. Follow the instructions in the “Backing Up Files” section on page 17. Q: How can I back up files containing annotations when moving them to a different computer? Backup File... -
Page 26: Limited Warranty
Li m i ted War r an t y The Limited Warranty set forth below is provided to you by Sunglow North America, Inc. (“Sunglow”) with respect to the Pandigital™ scanner products S8X1100 (the “Device”) purchased and used in the United States of America. Sunglow warrants this product as follows: LABOR: For a period of one (1) year from the date of purchase, if this Device is found to be defective, Sunglow will repair or replace the Device, at its sole option, at no charge. -
Page 27: Newsoft End User License Agreement
New So ft En d U ser Li cen se A gr eem en t IMPORTANT - PLEASE READ CAREFULLY BEFORE INSTALLING THE SOFTWARE This NewSoft End User License Agreement (EULA) is a legal agreement between you (End User) and NewSoft Technology Corporation (NewSoft) for the accompanying computer software (Software), which may include software from third party suppliers made available by NewSoft, and the related documentation. - Page 28 and workmanship, assuming normal use. This Limited Warranty is void if failure of the Software has resulted from accident, abuse, or misapplication. Any replacement Software will be warranted for the remainder of the original warranty period. Refer to the NewSoft website (www.newsoftinc.com) for information on product warranties. NewSoft and its suppliers do not and cannot warrant the performance or results the End User may obtain by using the Software or documentation, nor does NewSoft warrant the Software will be uninterrupted or error-free.