Table of Contents
Advertisement
Advertisement
Table of Contents

Related Manuals for Pandigital PhotoLink PANSCN02


Summary of Contents for Pandigital PhotoLink PANSCN02
-
Page 1: User Guide
User Guide PANSCN02 ... -
Page 2: Table Of Contents
Table of Contents Read This First ................4 Important Safety Precautions ..........4 Disclaimer ................5 Copyright ................. 6 Notes about copyrighted materials .......... 6 Disposal of this product ............6 What’s in the Box ..............6 ... - Page 3 Scanner Maintenance .............. 25 Cleaning the PhotoLink Scanner ......25 Cleaning the Roller ..............25 Cleaning the Image Sensor ........... 27 Calibrate the PhotoLink Scanner ......27 Storing the PhotoLink Scanner ......... 28 Technical Specifications ............29 ...
-
Page 4: Read This First
Read This First Please read the following important safety instructions carefully before using this scanner. Failure to observe these instructions may result in personal injuries or damages to this scanner. Important Safety Precautions Always follow these basic safety precautions when using your Scanner. This will reduce the risk of fire, PhotoLink electric shock, and injury. -
Page 5: Disclaimer
Disclaimer Pandigital reserves the right to revise this publication and to make changes from time to time in the contents thereof without obligation to notify any person of such revision or... -
Page 6: Copyright
Copyright Copyright Pandigital. All rights reserved. No part of this publication may be reproduced, transmitted, transcribed, stored in a retrieval system or translated into any language or computer language, in any form or by any means, electronic, mechanical, magnetic, optical, chemical, manual or otherwise, without the prior written permission of Pandigital. -
Page 7: Introduction
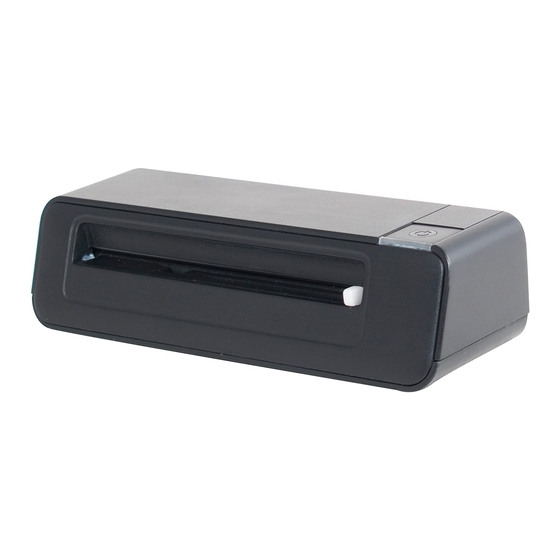
Introduction Welcome to the Pandigital Multimedia Scanner. PhotoLink Now you can scan your printed photos and store them on your memory card, no computer is necessary. Simply insert a memory card into the Scanner, and power it on. When the... - Page 8 Name Function/ Description Paper Guide Slide the guide to adjust for smaller than 4x6” originals Slide to ensure the proper alignment. Feeding Slot Insert an original photo into this slot to begin scanning. Orientation Indicates the correct position and orientation of the guide original for proper scanning.
-
Page 9: Scanner Indicator Lights
Scanner Indicator Lights Listed below are the indicator light patterns and the functions they represent: Status Power /Card The scanner is ready for use. Scanning current original. Please wait until the process is complete before scanning another original. The scanner is powered off. Initializing system and memory card. -
Page 10: Suitable And Unsuitable Original Types
Suitable and Unsuitable Original Types Scanner is designed to obtain the best PhotoLink scanning results with the following types of originals: 3.5”x5” and 4”x6” photos Business cards (max 1.0mm) Do not use the following types of originals for scanning, otherwise the scanner may malfunction or cause the original to jam in the slot. Originals thicker than 1.0mm Originals with either side shorter than 55mm Originals with lots of black or dark colors... - Page 11 Fuzzy areas that result from the uneven surface of the curled photo Curled photo 1. Insert the photo into the plastic sheath as shown below. 2. Insert the plastic sheath into the feeding slot of the scanner flat and level as shown below. Notes: Keeping the original flat and level when feeding prevents possible jamming.
-
Page 12: Orientation Of The Original And Scanned Image
Orientation of the Original and Scanned Image Refer to the illustrations below for the relationship between the orientation of the original when scanning and that of the scanned image when displayed on the computer screen. Operating the Scanner PhotoLink Preparation and Initial Setup 1. Peel off the tape that secures the guide lever (first time only procedure). -
Page 13: Power On The Photolink Scanner
3. Plug the power adapter into a power outlet. Note: The type of power plug and socket illustrated may differ from that of your region. 4. Insert an unlocked (writable) memory card into the memory card slot. Notes: Always insert a memory card before scanning. The scanner only accepts memory cards in FAT16 or FAT32 format. -
Page 14: Scan An Original
Scan an Original 1. Insert your photo into the plastic sheath (included with scanner). 2. With the side to be scanned facing upward and in correct orientation as indicated by the orientation guide, place one edge of the photo on the scanner and adjust the guide lever so that the photo aligns against the left side of the feeding slot. -
Page 15: Automatic Image Cropping
Notes: Do not remove the memory card or disconnect the power supply while the indicators are blinking. This scanner only supports output images in JPEG (.jpg) format, and the date/ time attribute will not be added. For more information on how this scanner stores the scanned image files on the memory card, refer to “Orientation”... -
Page 16: Connect Photolink Scanner To A Pc
Use the plastic sheath when scanning originals that are sized or shaped other than the standard 3.5”x5” or 4”x6”. Depending on the shape, you may want to perform additional manual cropping on the scanned image, using your own photo editing software, to achieve your desired final image. - Page 17 2. Plug the power adapter into an electrical outlet. Note: The type of power plug and socket illustrated may differ from that of your region. 3. Insert the Pandigital SD memory card (provided with the scanner) or an unlocked (writable) memory card into the memory card slot.
-
Page 18: For Windows Vista Users
For Windows Vista Users When the PC recognizes the Scanner, with PhotoLink an inserted SD Card, a pop-up “AutoPlay” window will appear. To view photos on the PC while scanning, change Windows Explorer’s setting as follows: 1. Check the checkbox. Always do this for pictures 2. Select option. -
Page 19: After Successful Connection
After Successful Connection When the scanner connects with the PC, an additional drive will be listed in the Explorer window. If you are using the Pandigital SD memory card, the drive will be titled PDSCAN [drive letter] If you are using your own memory card, the drive will be titled or the personalized title you Removable Disk [drive letter]... - Page 20 The scanned images will be saved in the folder. PHOTO1 Each scanned image is given a file name with the prefix followed by a 4- digit sequential number in the order the images are stored. For example, PD_0001.jpg PD_0002.jpg If the file name reaches in the folder, a PD_9999.jpg...
-
Page 21: Safely Disconnect The Scanner From Pc
Scanner to your PC (see PhotoLink instructions beginning on page 16), using the Pandigital (included with scanner). SD card 2. When the Windows Explorer window opens, click the ‘+’ next to the Pandigital folder (listed under the PDSCAN drive), and then select the folder. Utility... - Page 22 3. In the right window pane, double-click the “Scan2PC_Setup_Vxxxx.exe” file to begin the Scan2PC installation (see example above). 4. Follow the on-screen instructions to complete the installation. Notes: Once installed, the runs automatically Scan2PC Manager upon PC startup, and the icon stays on the system tray. If you want to close the temporarily, Scan2PC Manager...
-
Page 23: Using The Scan2Pc Manager
Using the Scan2PC Manager 1. When the Scanner is connected via PhotoLink USB cable to the PC, the Status/Card light will be blinking. The following window will Scan2PC Manager appear: 2. You can specify the location where you want the scanned images to be saved, either on the memory card or in a specific folder on the PC. -
Page 24: Uninstalling The Scan2Pc Manager
If the file name reaches in the folder, a PD_9999.jpg Photo1 new folder titled will automatically be created to store Photo2 subsequent new files, and so on. There can be up to 9 folders ( Photo1..9 PD_0001... PD_9999 on a memory card. If exceeded, the Status/Card indicator light blinks. -
Page 25: Supported Memory Cards
Supported Memory Cards MS (MemoryStick) MS Pro MS Pro Duo (adapter required) MS Duo (adapter required) MMC (MultiMediaCard) RS-MMC (adapter required) xD (extreme Digital, H-type and M-type) SD (SecureDigital) Mini SD (adapter required) micro SD/T-Flash (adapter required) Scanner Maintenance Cleaning the Scanner PhotoLink In order to maintain the scanned image quality and prevent dust accumulation, it is recommended that you clean the scanner (outer casing, image sensor and roller inside the... - Page 26 2. Connect the power supply to the scanner. 3. With scanner power off, press and hold the power button for 5 seconds. The scanner will enter cleaning mode. The power and Status/Card indicators will be on. 4. Insert the supplied roller cleaning sheet as shown.
-
Page 27: Cleaning The Image Sensor
Cleaning the Image Sensor 1. Clean the scanner’s outer casing first, using only the recommended and supplied tools. 2. With the scanner powered off and disconnected from the power supply, insert the sensor cleaning swab into one end of the output slot. Note: Make sure that there is no visible dust on the swab before inserting it into the output slot. -
Page 28: Storing The Photolink Scanner
1. Follow the instructions beginning on page 25 to clean the roller and the image sensor, and then follow the instruction in “Initial Setup” on page 12 to prepare the scanner for scanning. 2. Insert the calibration card as shown. The scanner will scan the pattern on the calibration card and perform calibration to the sensor inside automatically. -
Page 29: Technical Specifications
Technical Specifications “One Touch” PhotoLink Specification Scanner Document Size (Max) Up to A6 / 4” x 6” Output image formats JPEG with compression (4:2:2) Up to 1800 x 1200 @ 4x6 photo Image scanned Resolution Optical 300 x 300 dpi (dot per inch) Memory Cards SD, MMC, MS, MS Pro, xD Interfaces... -
Page 30: Frequently Asked Questions/ Troubleshooting
Frequently Asked Questions/ Troubleshooting Q: There are strange lines on the scanned image, or the image is not clear. A: Check the following: Are there scratches on the original, or is the original clean? Remove any stains or dust from the original before scanning. -
Page 31: Limited Warranty
PARTS: For a period of one (1) year from the date of purchase, if this product is found to be defective, Pandigital will supply at no cost, new or rebuilt replacement parts, at its option, at no charge. After this one (1) year period, parts will be charged for on a case by case basis. - Page 32 Pandigital or its suppliers and is protected by United States and international copyright laws or other intellectual property laws and treaties. Said content shall not be reproduced or used without express written permission from Pandigital and its suppliers respectively.